近期需要完成一个Android项目,那先从与数据库交互最简单的登陆注册开始吧,现记录过程如下:
此篇文章的小demo主要涉及数据库的连接,以及相应信息的查找与插入。
我已将源码上传至GitHub:
https://github.com/changyan-maker/LoginApp
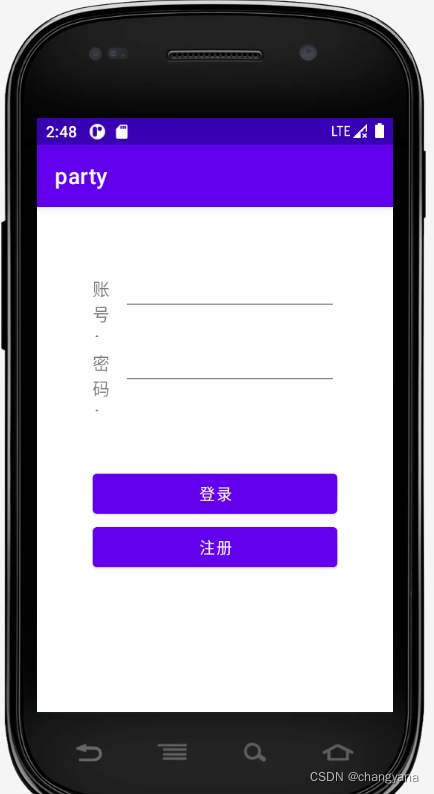
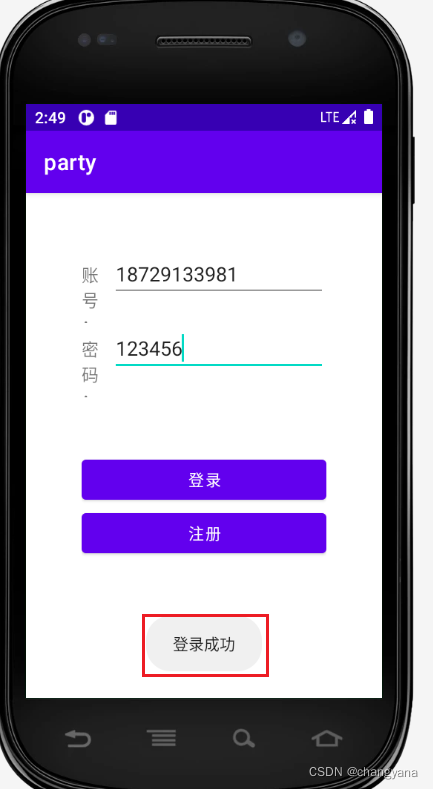
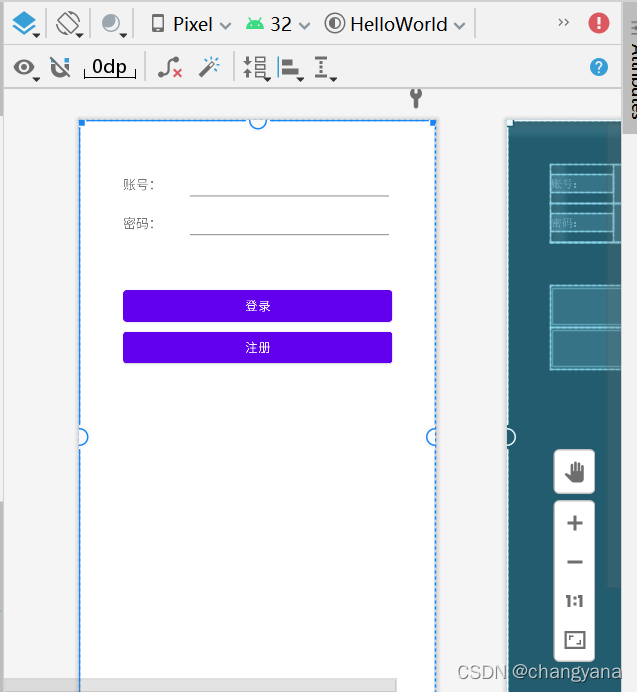
首先展示一下完成效果。
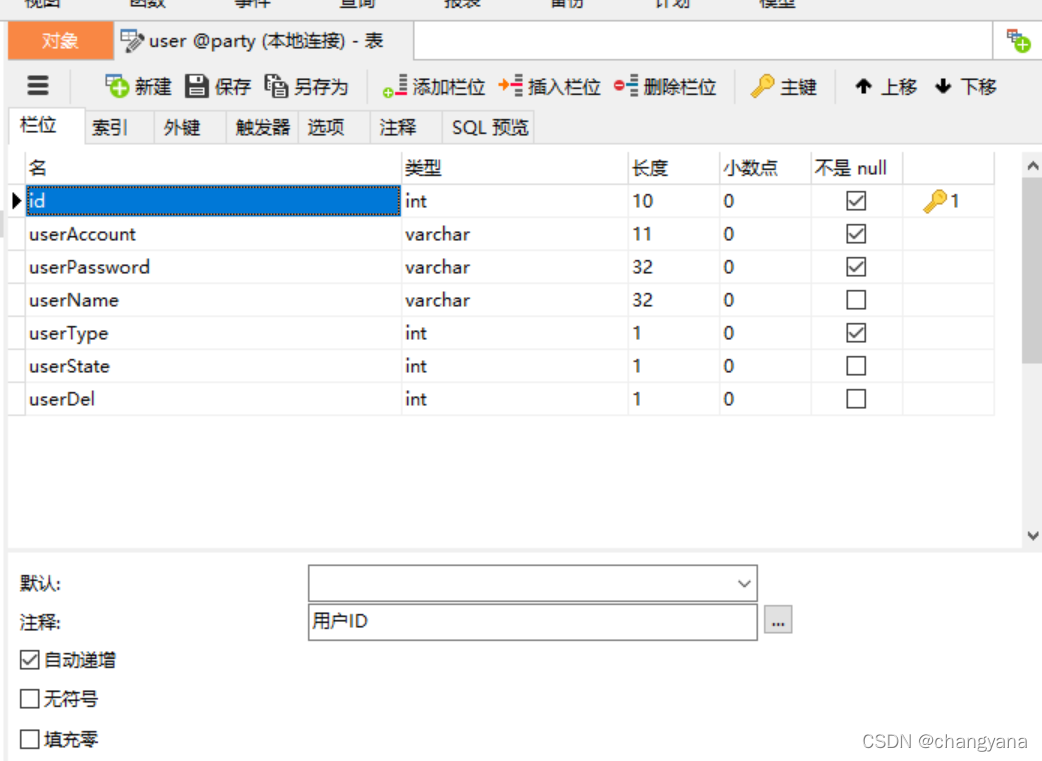
数据库设计:
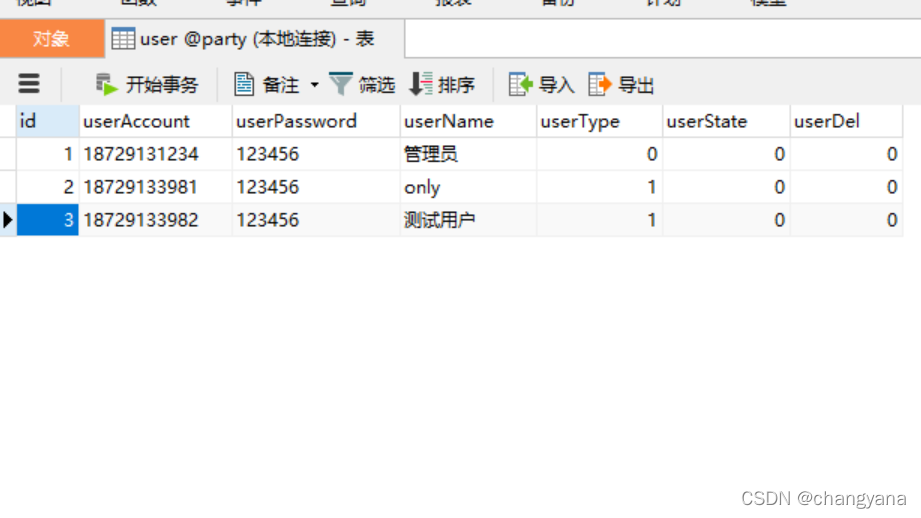
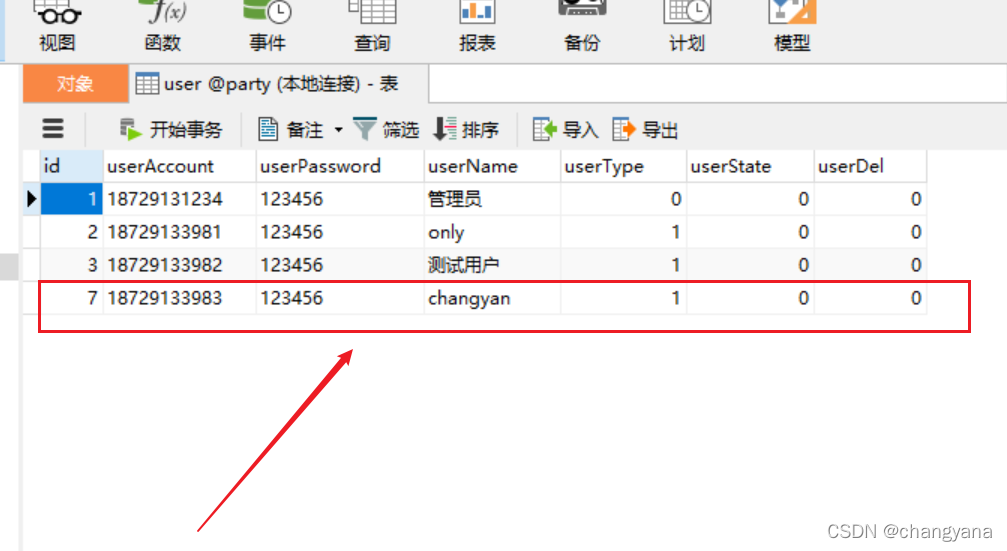
数据库内容:
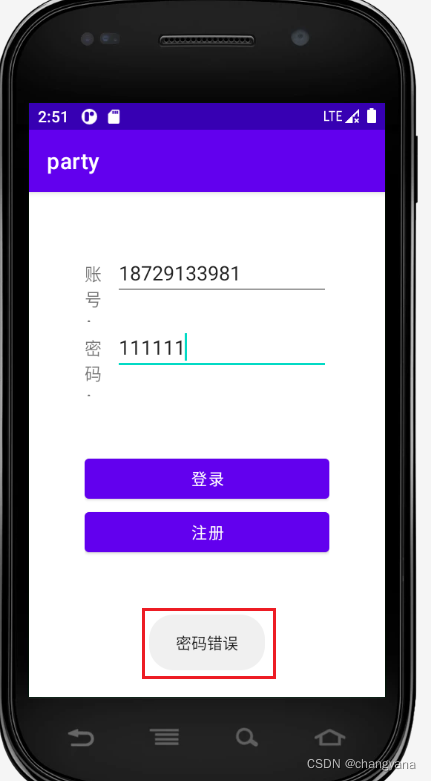
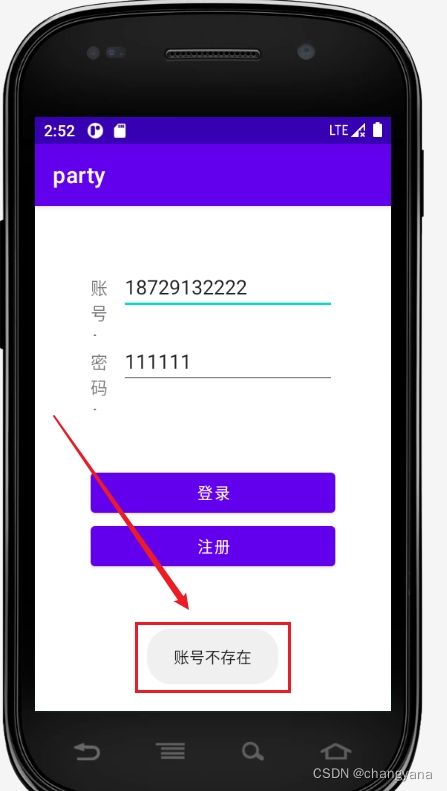
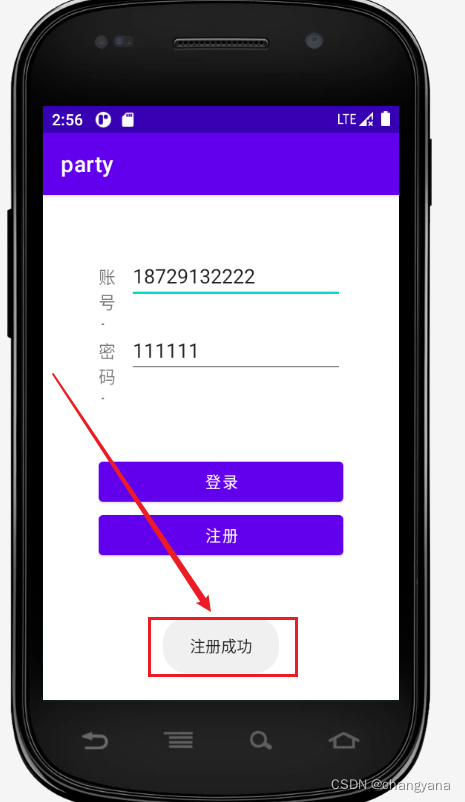
登录结果展示:
此处默认您已经安装好Android studio 与MySQL软件。
首先需要创建一个空项目,关于空的项目如何创建,请参考我本篇文章:
https://blog.csdn.net/changyana/article/details/122948513
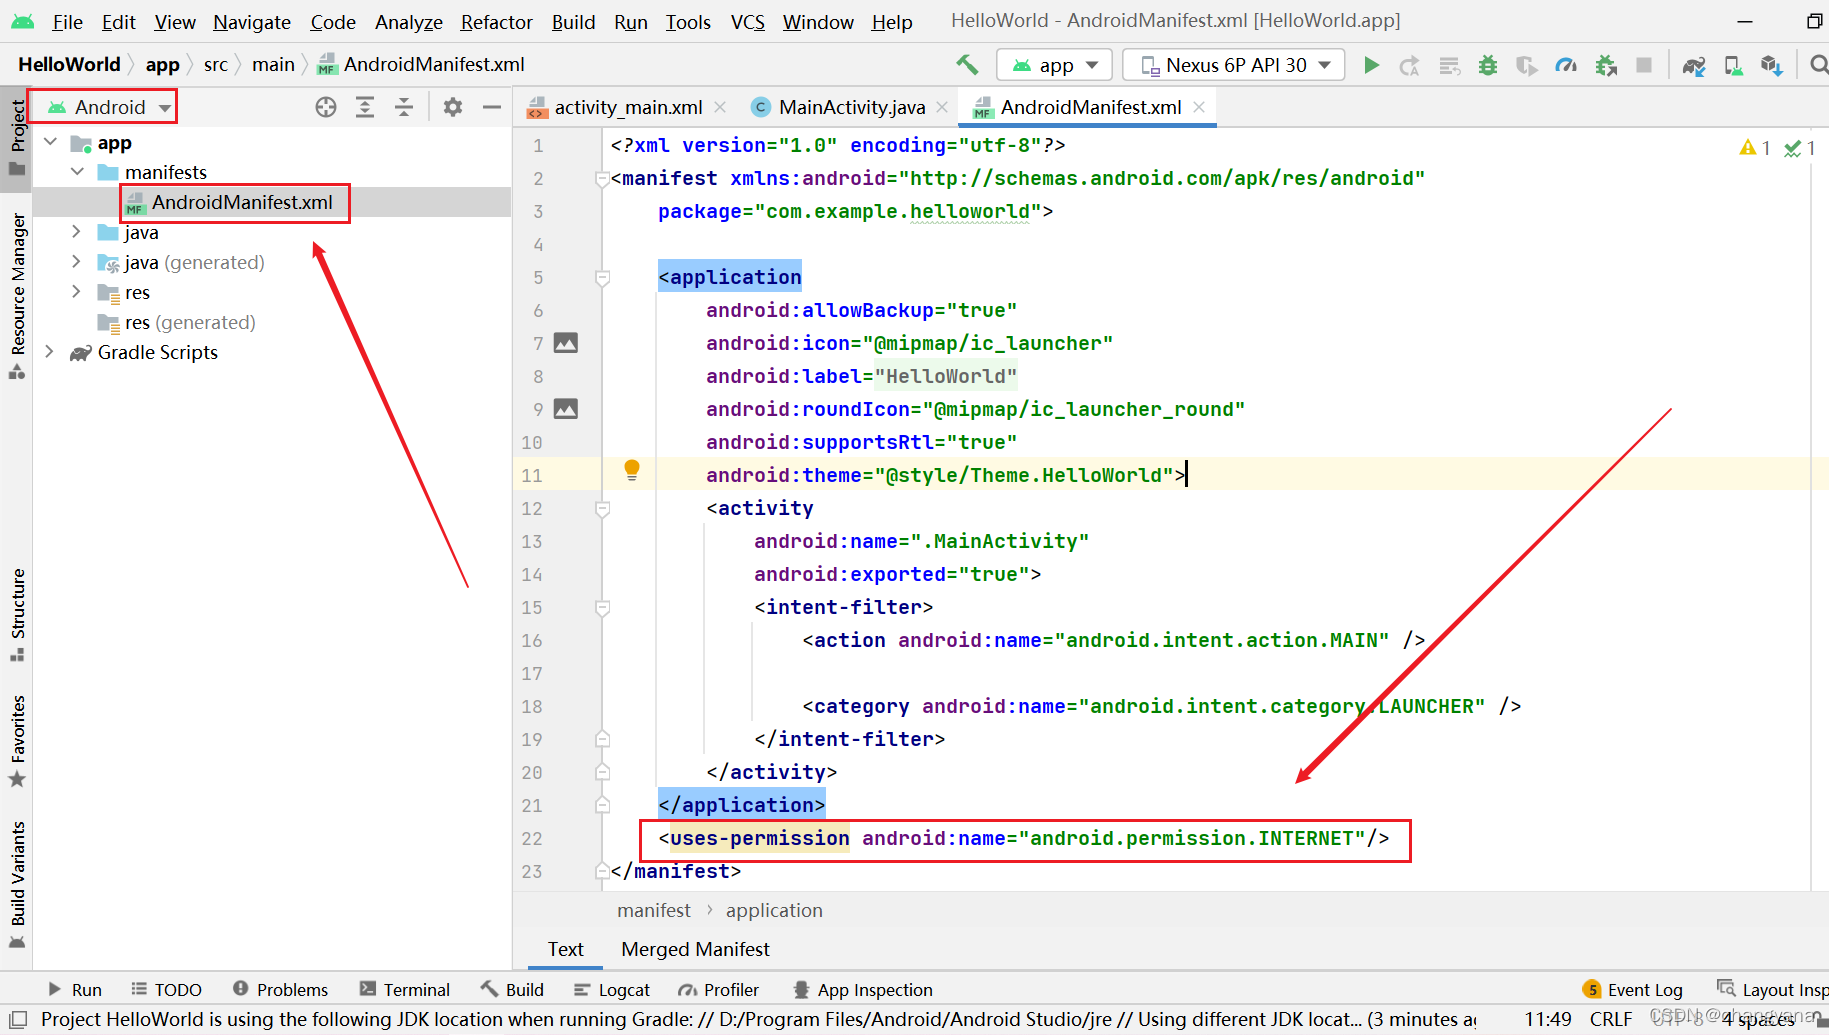
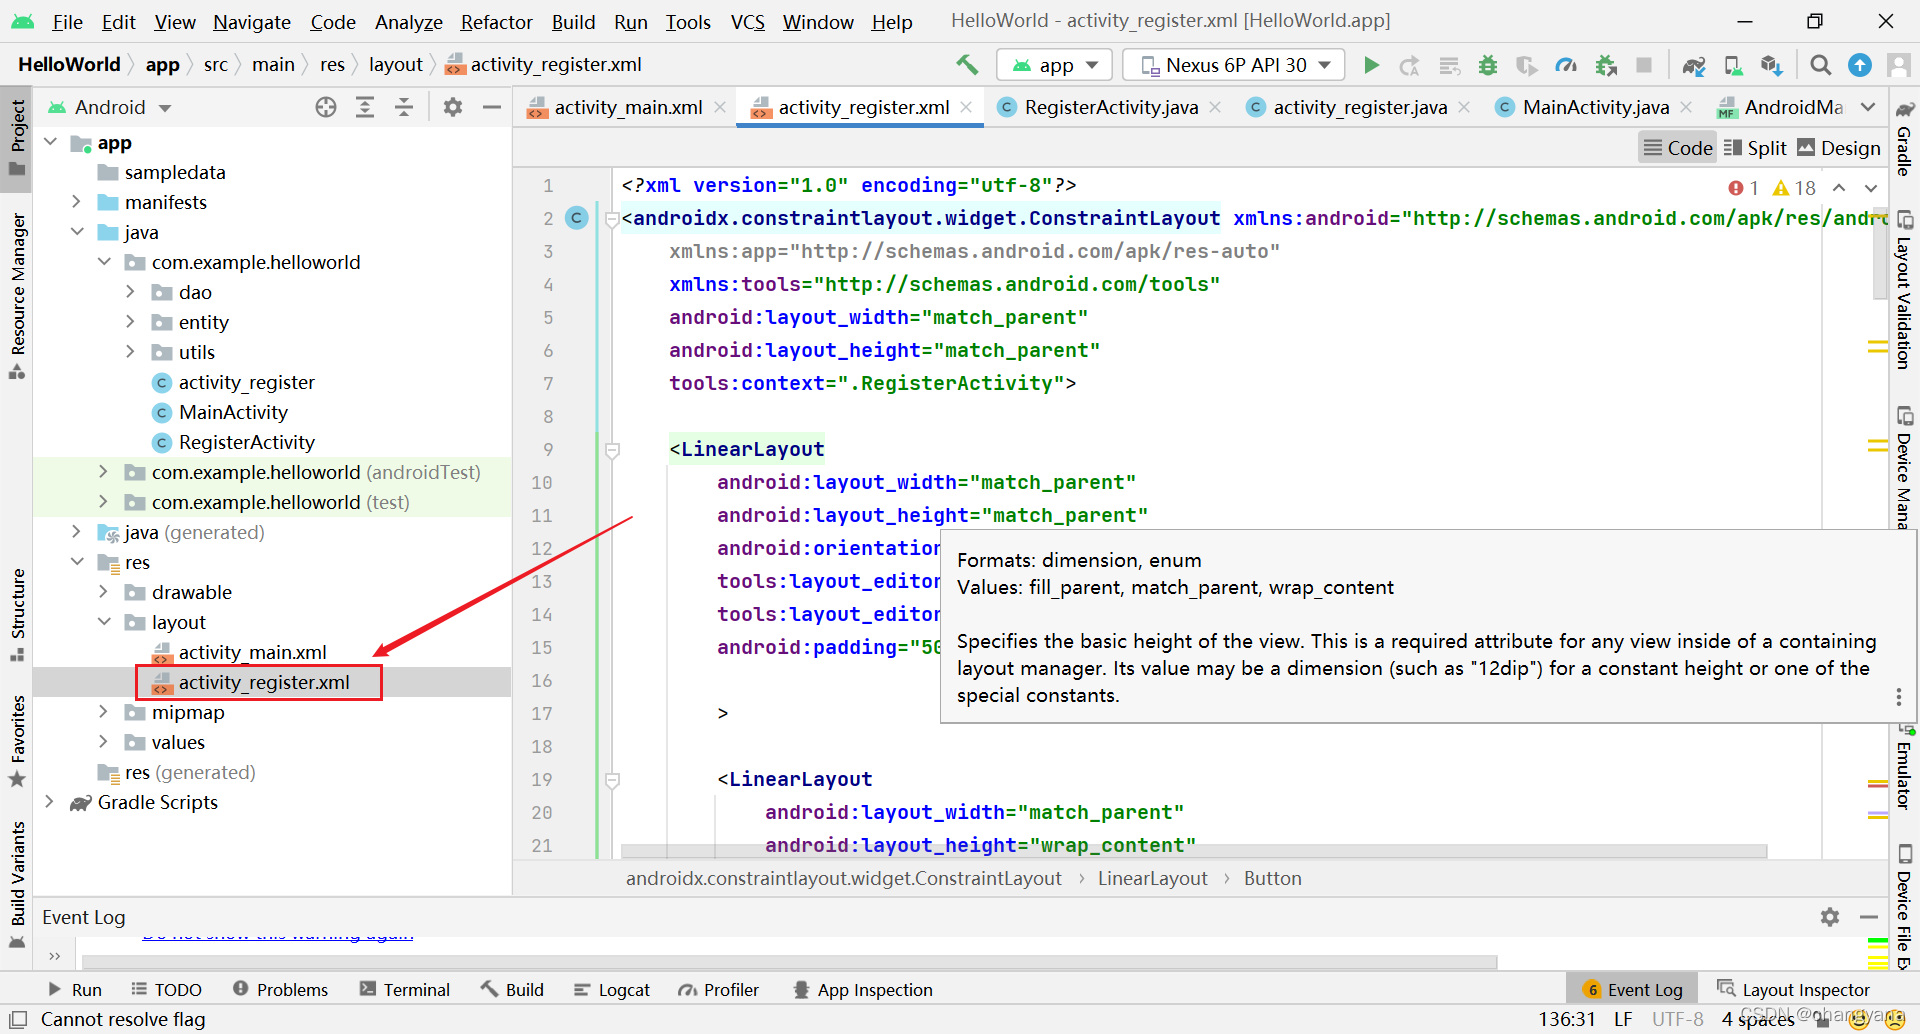
接下来需要连接MySQL,首先需要开启网络权限。需要添加一句话,具体位置如图:(将项目切换成Android模式比较好找)
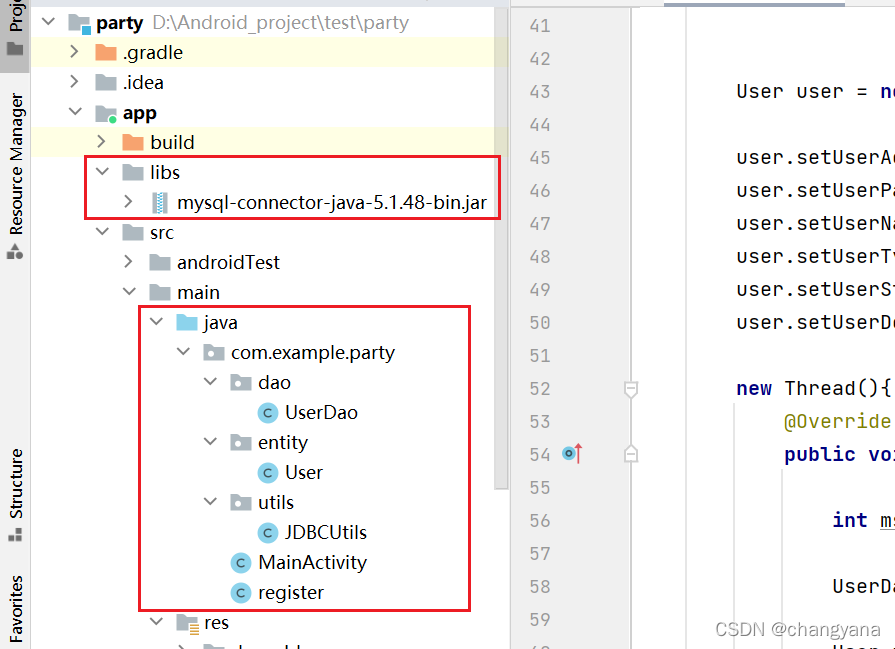
之后是导入Mysql-connection的jar包
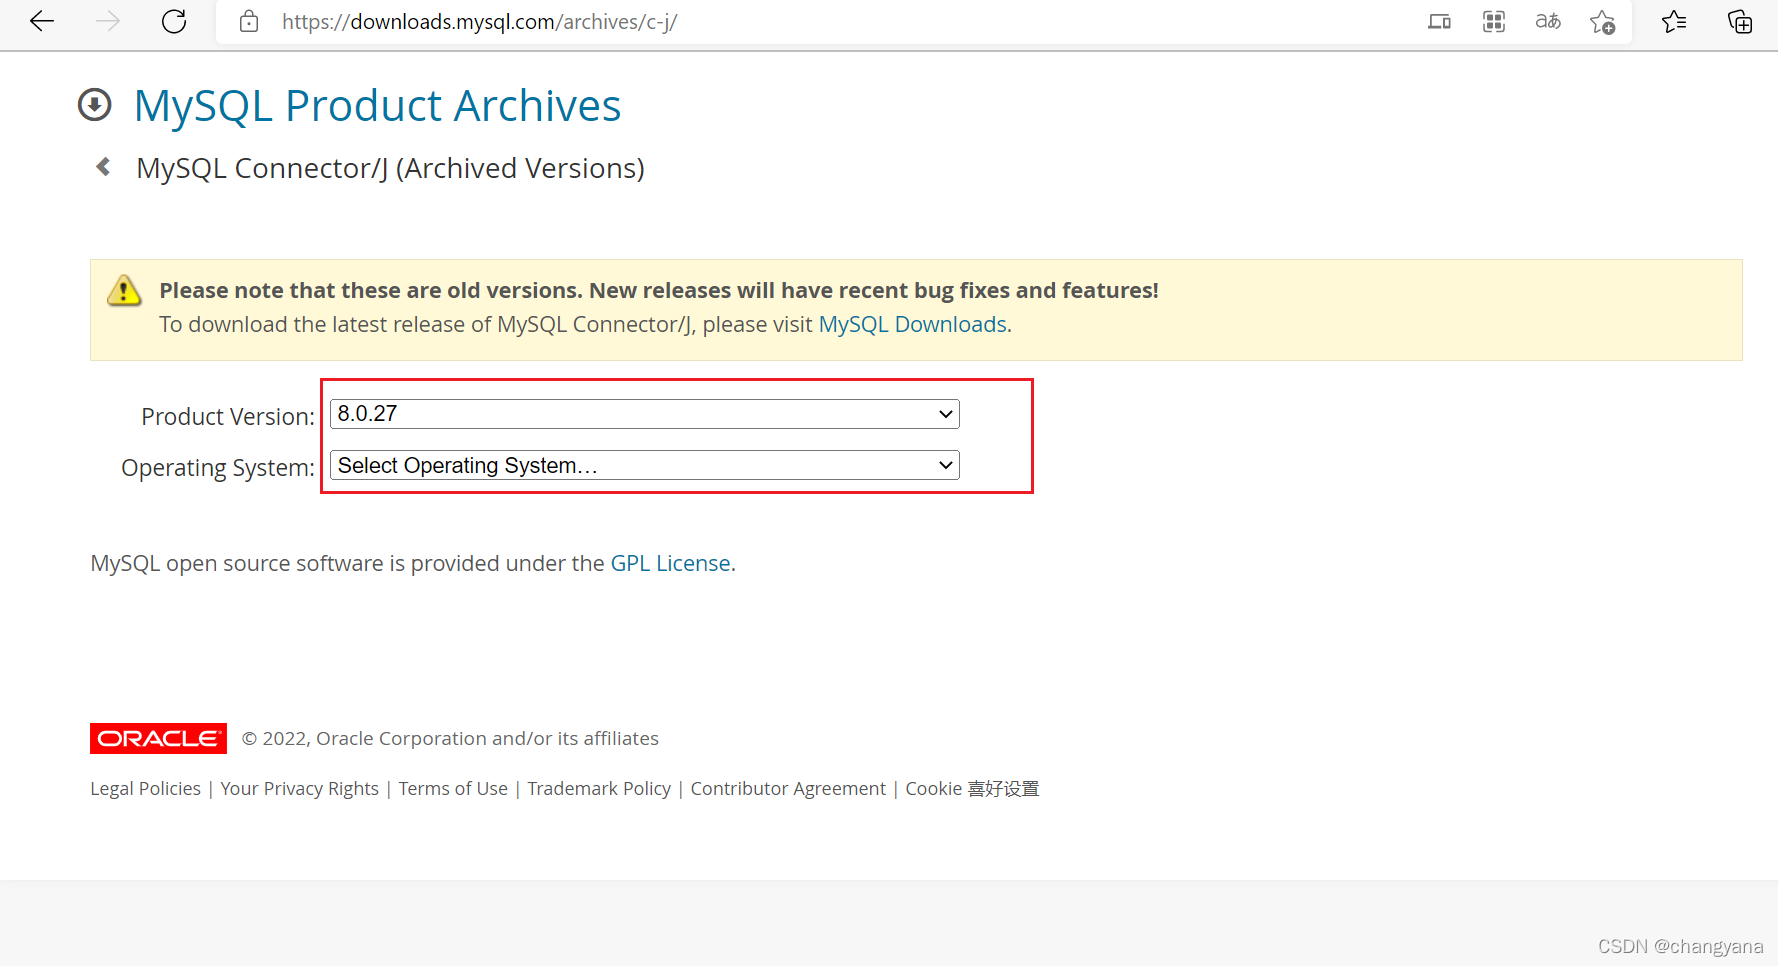
关于这个jar包需要我们去官网下载:https://downloads.mysql.com/archives/c-j/
关于版本的选择个人建议选择老一点的,比较稳定。选择ZIP格式进行下载。
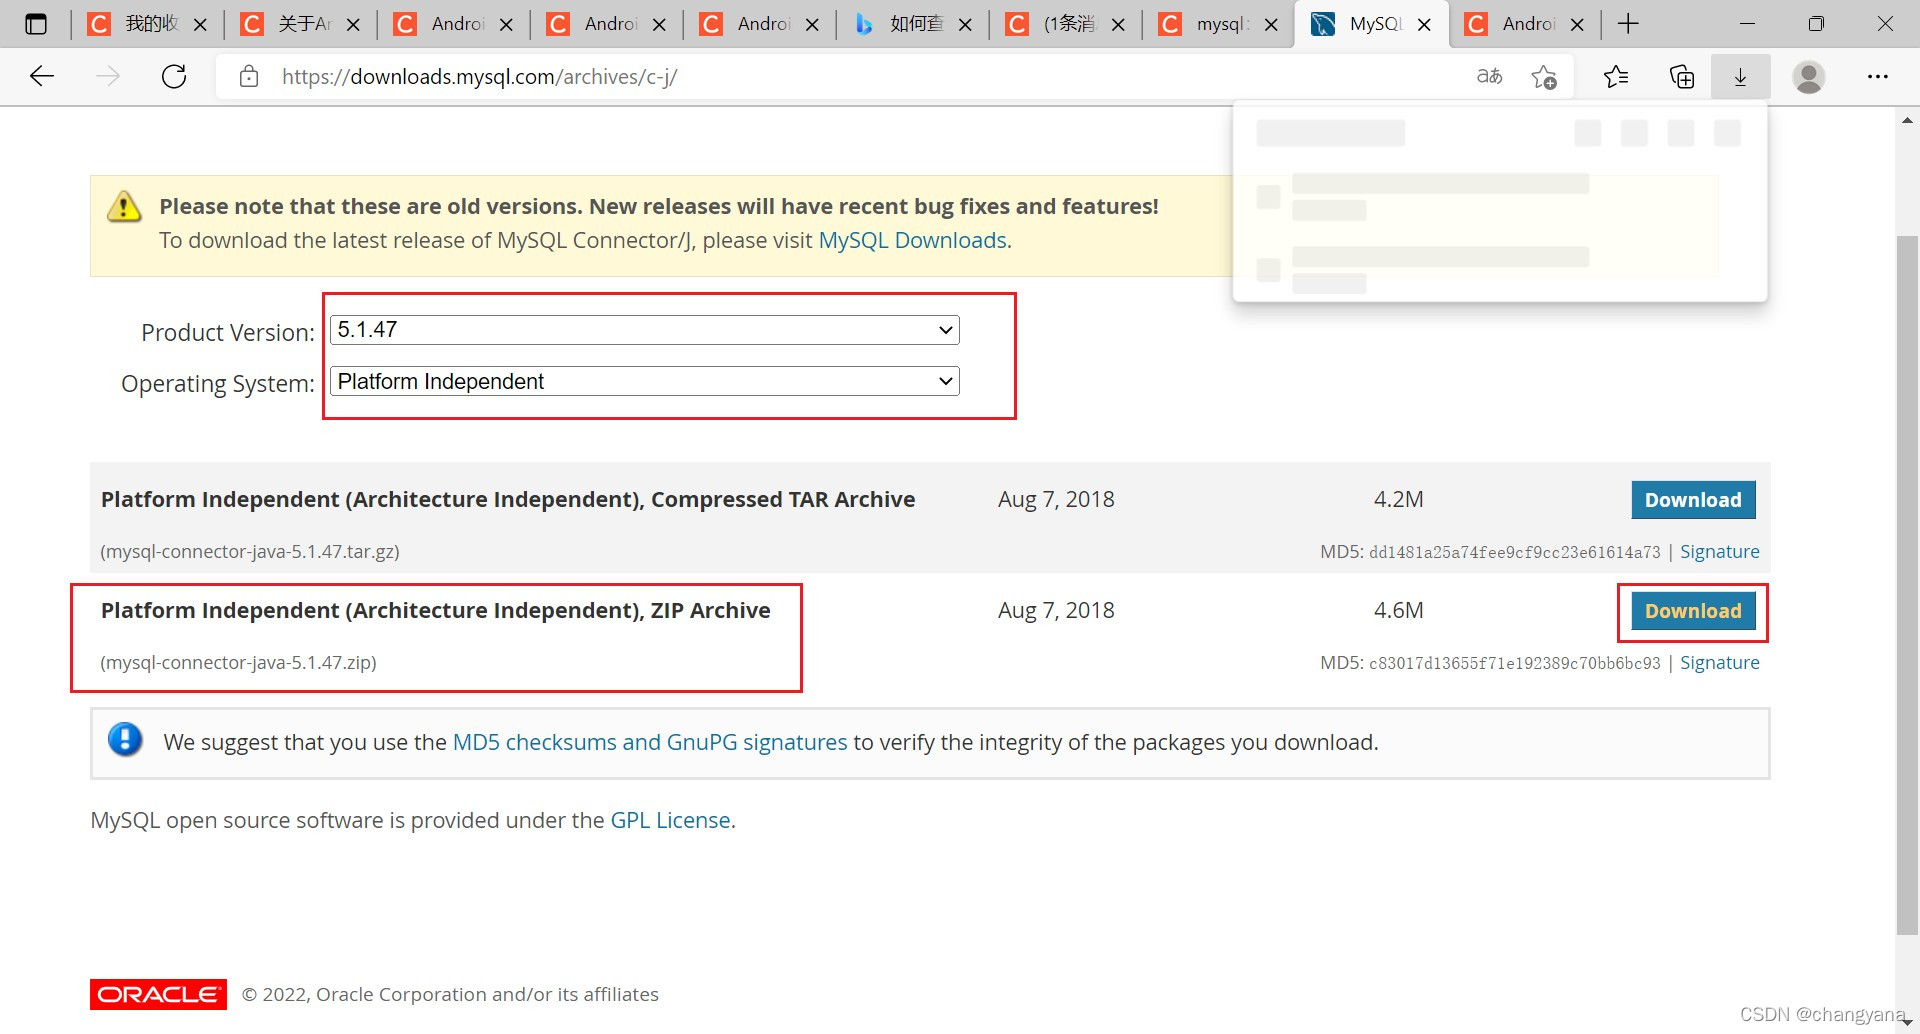
下载完成后在里边找到mysql-connector-java-5.1.47-bin.jar并复制到粘贴板。

然后将Android studio的项目页面切换到Project模式,找到如下文件的位置进行粘贴。
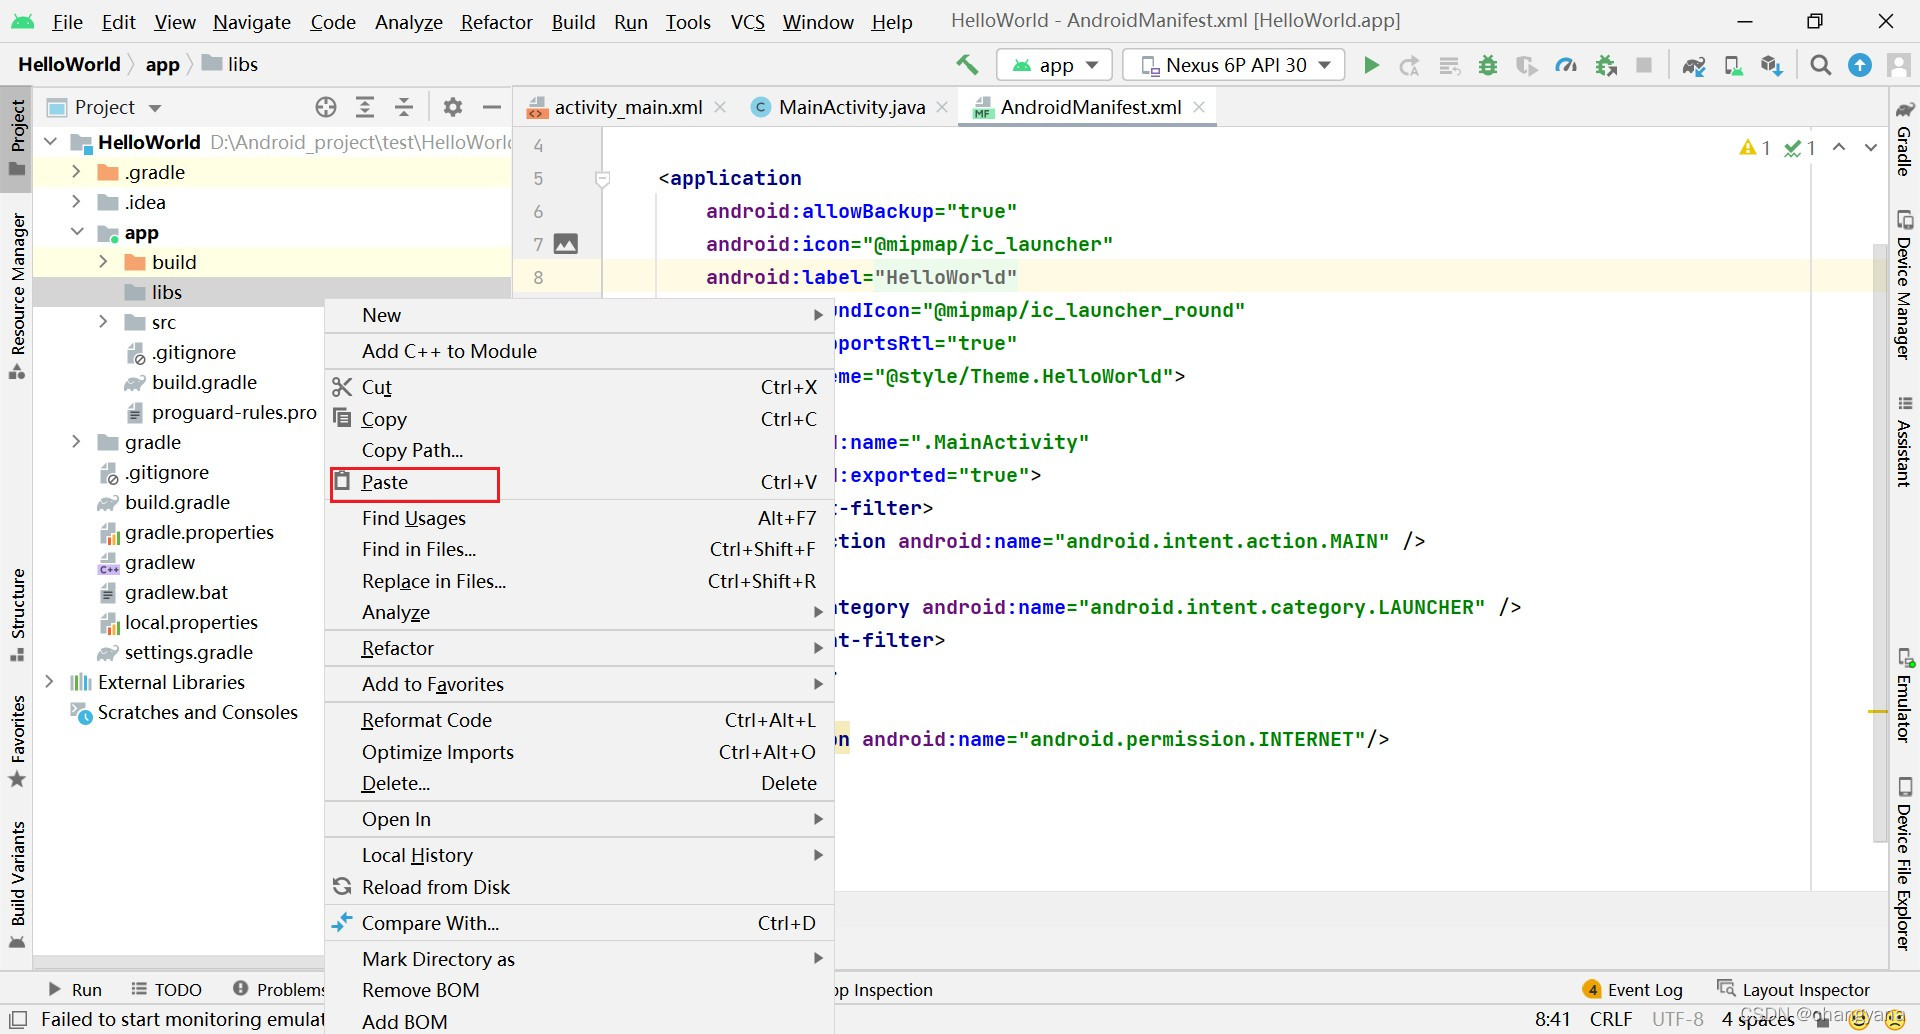
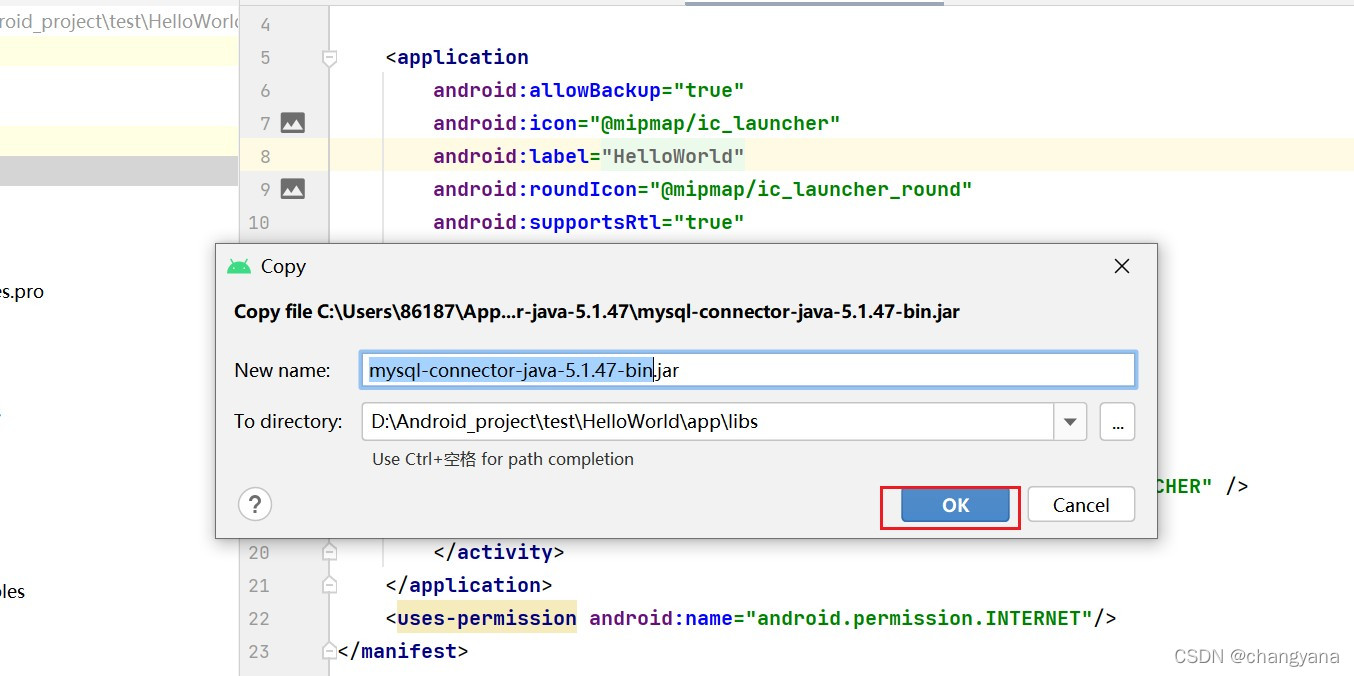
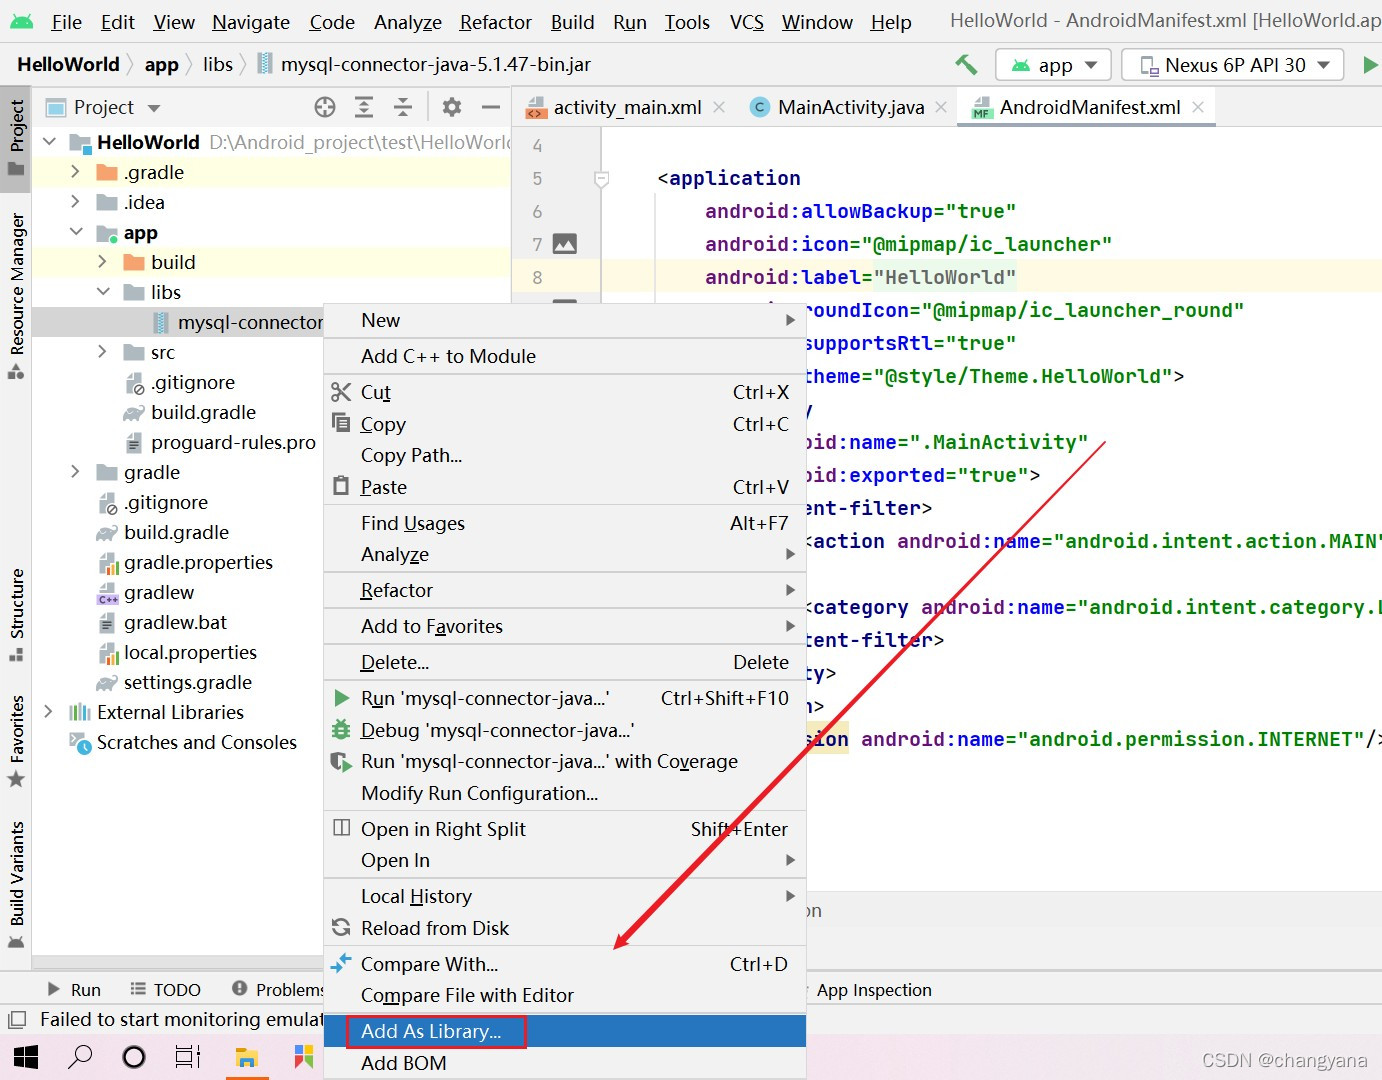
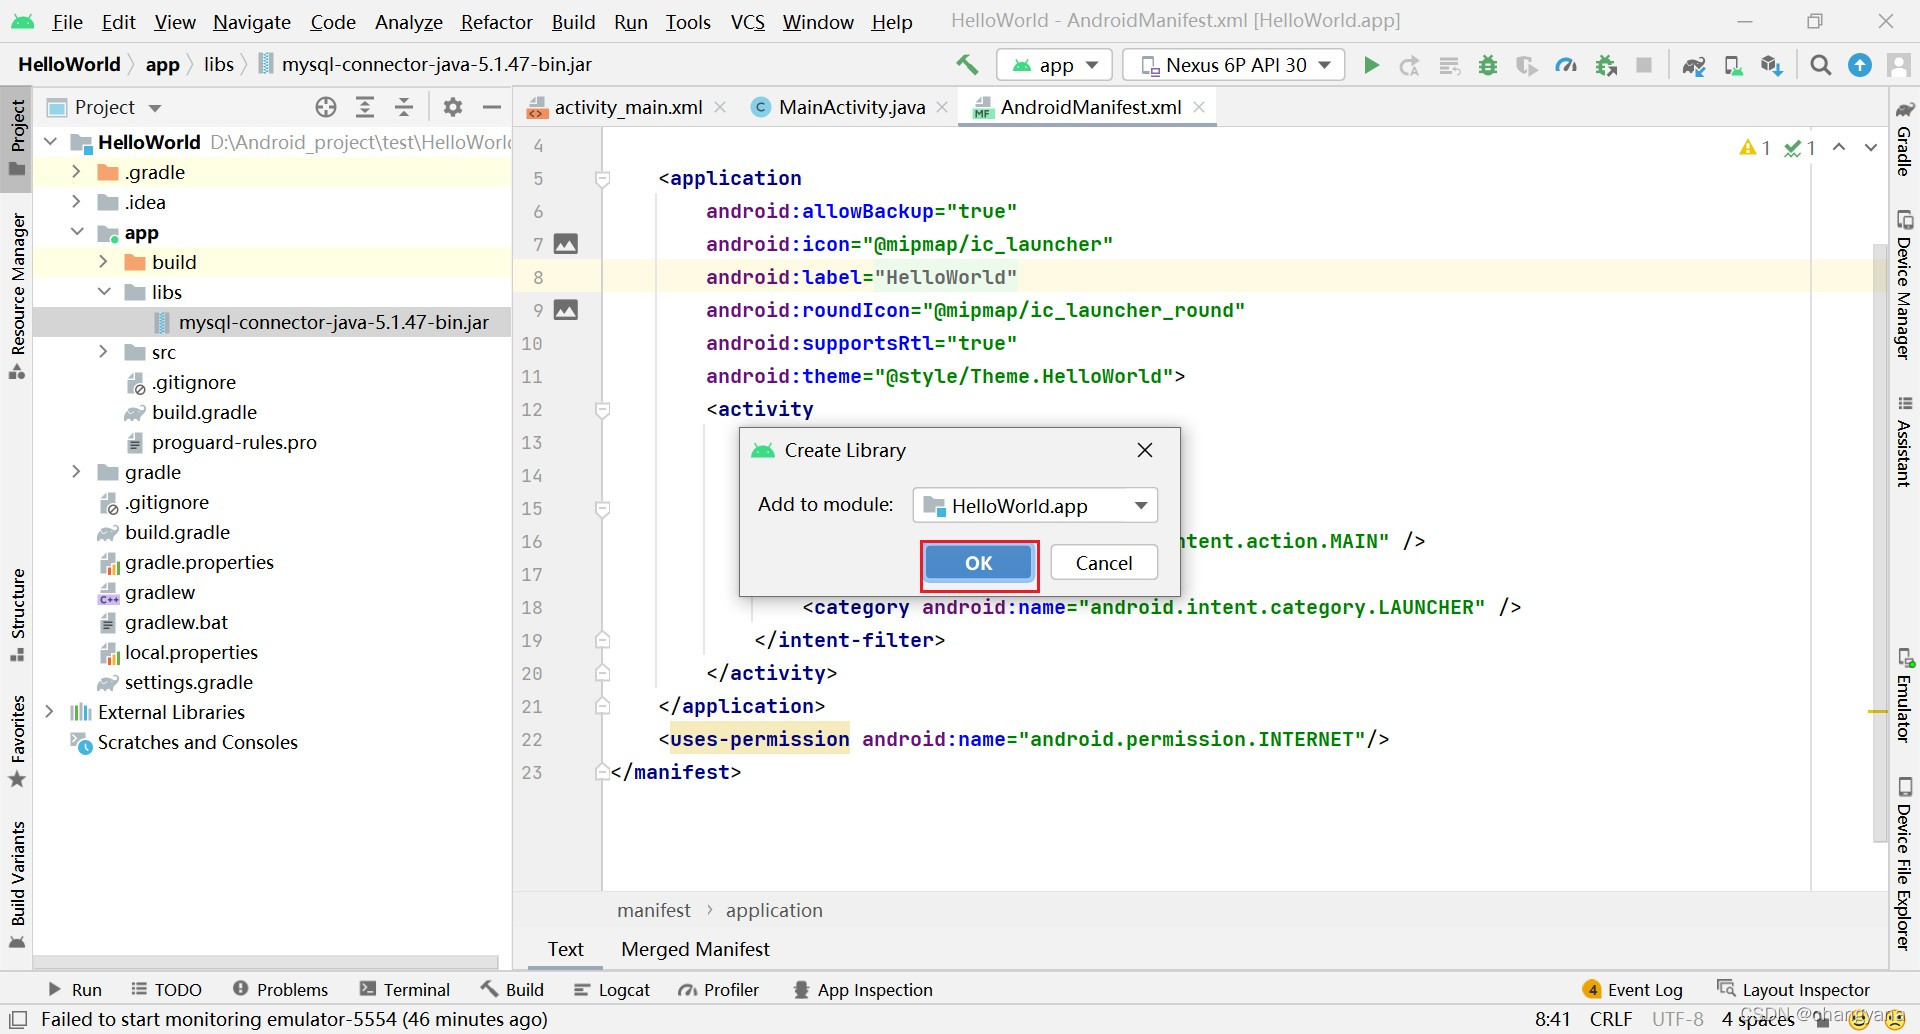
粘贴完成后需要把刚才导入的jar包右击Add as Library
然后切换回Android视图,操作如下,新建一个package
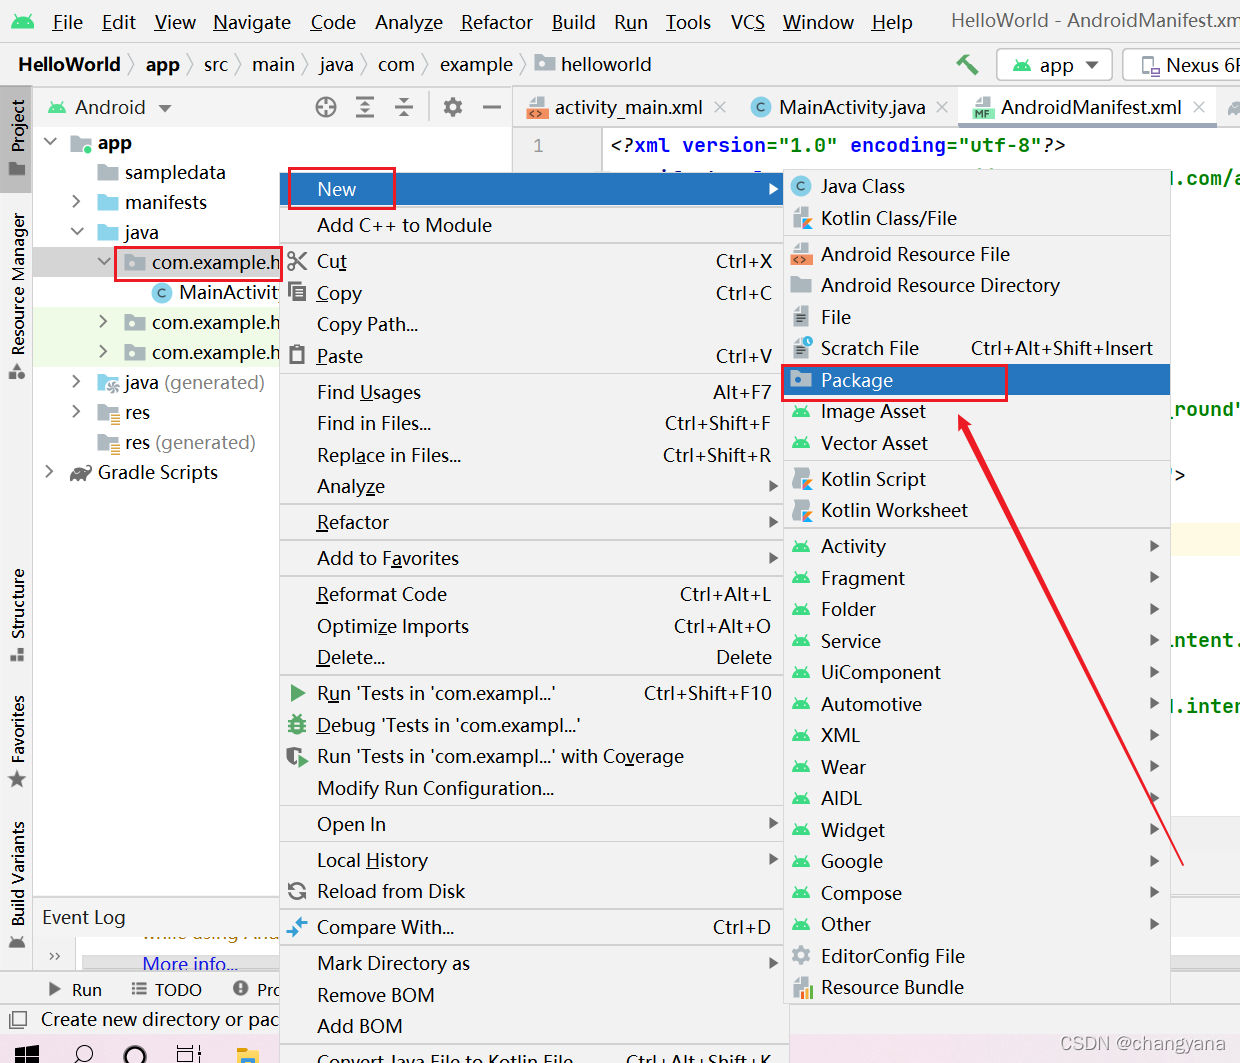
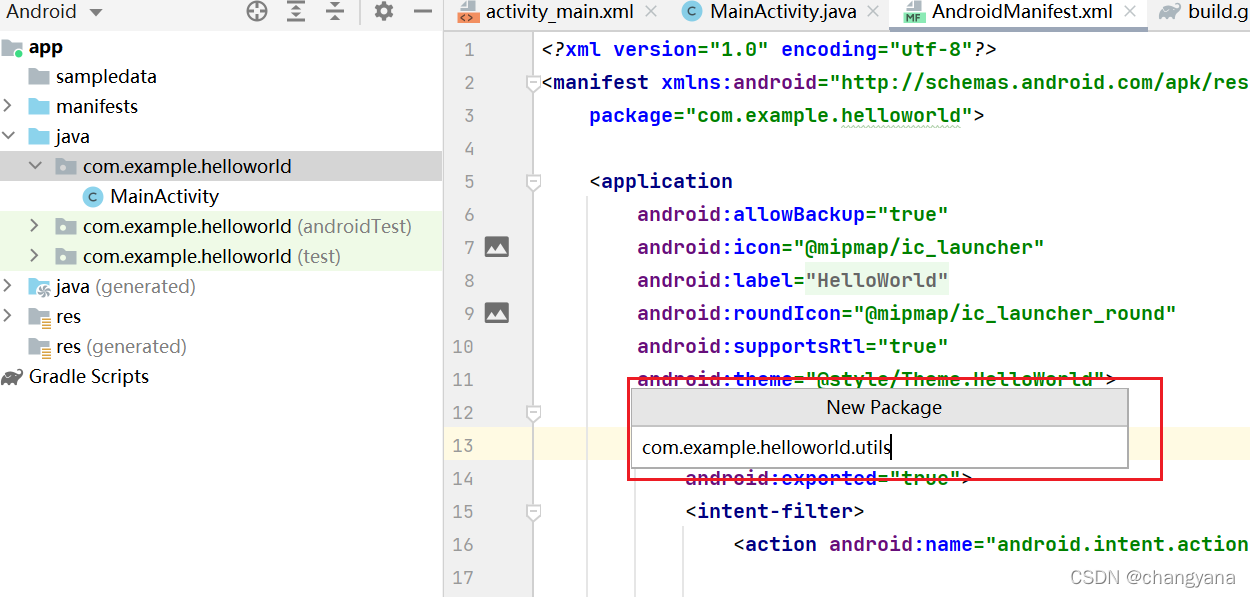
然后粘贴代码如下:
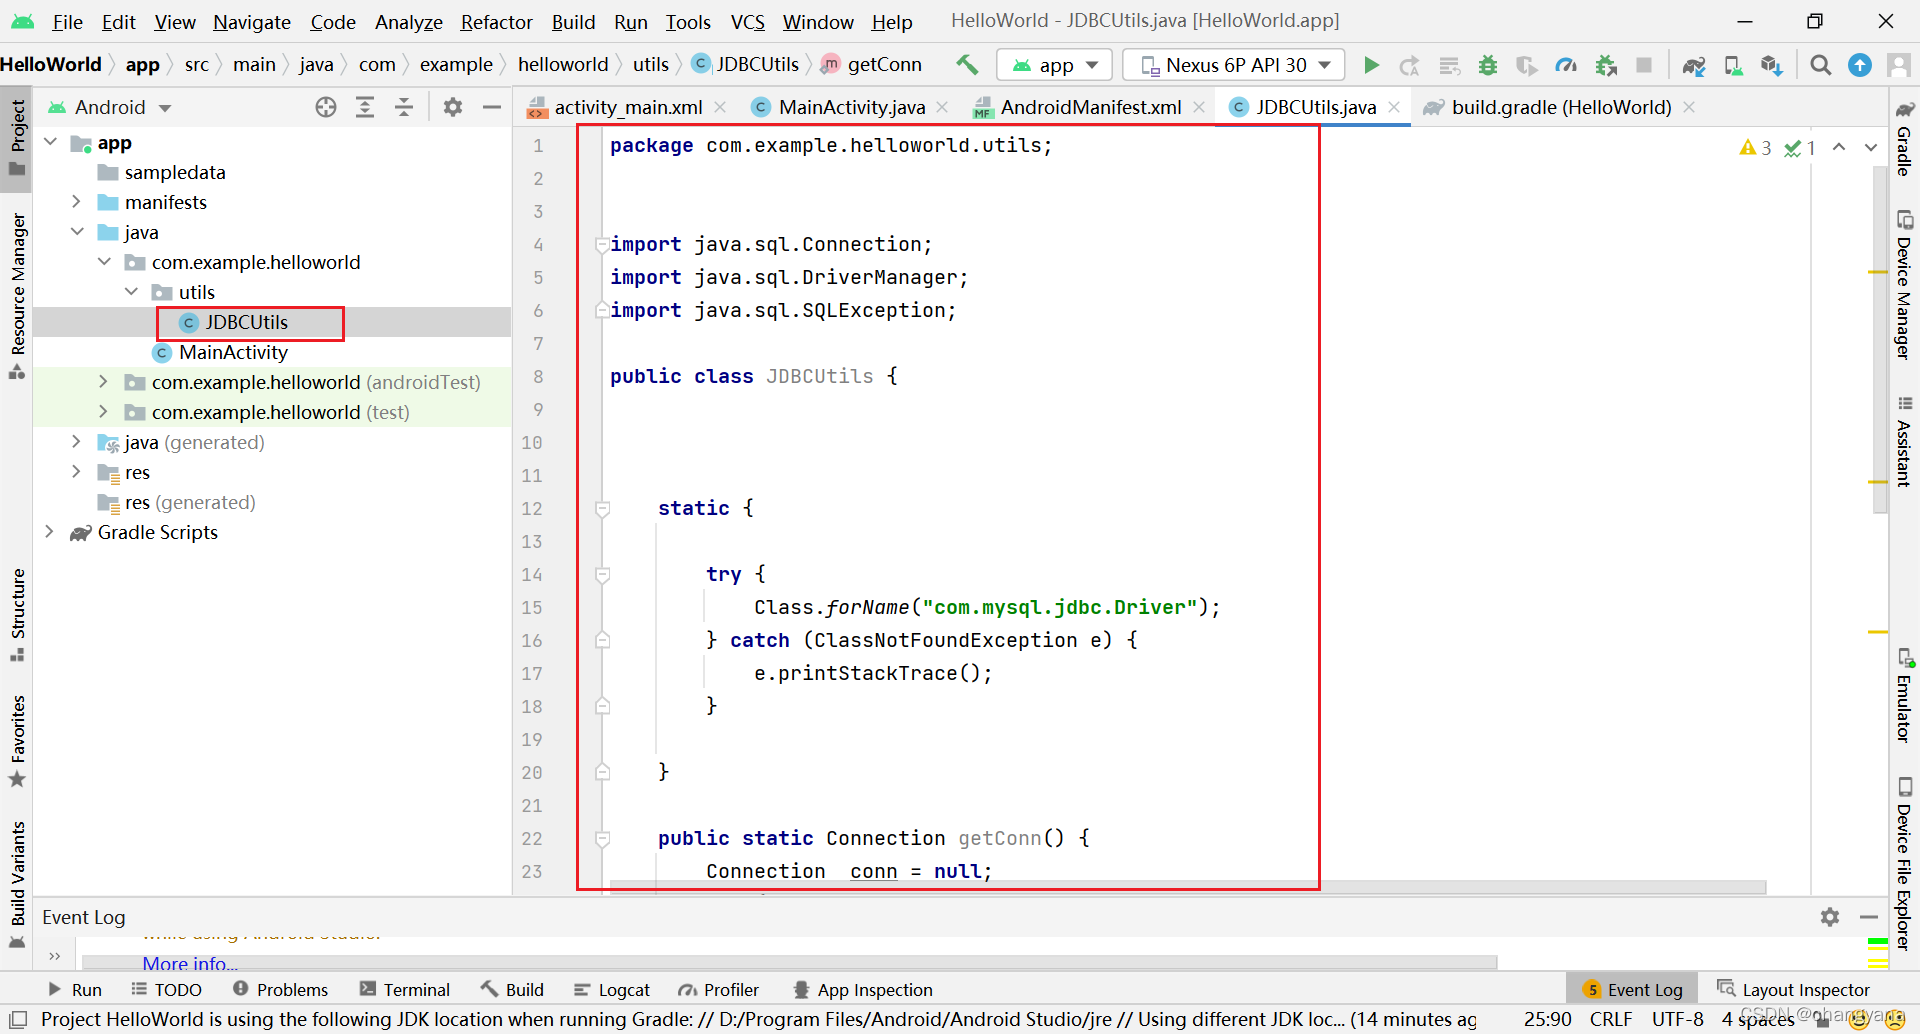
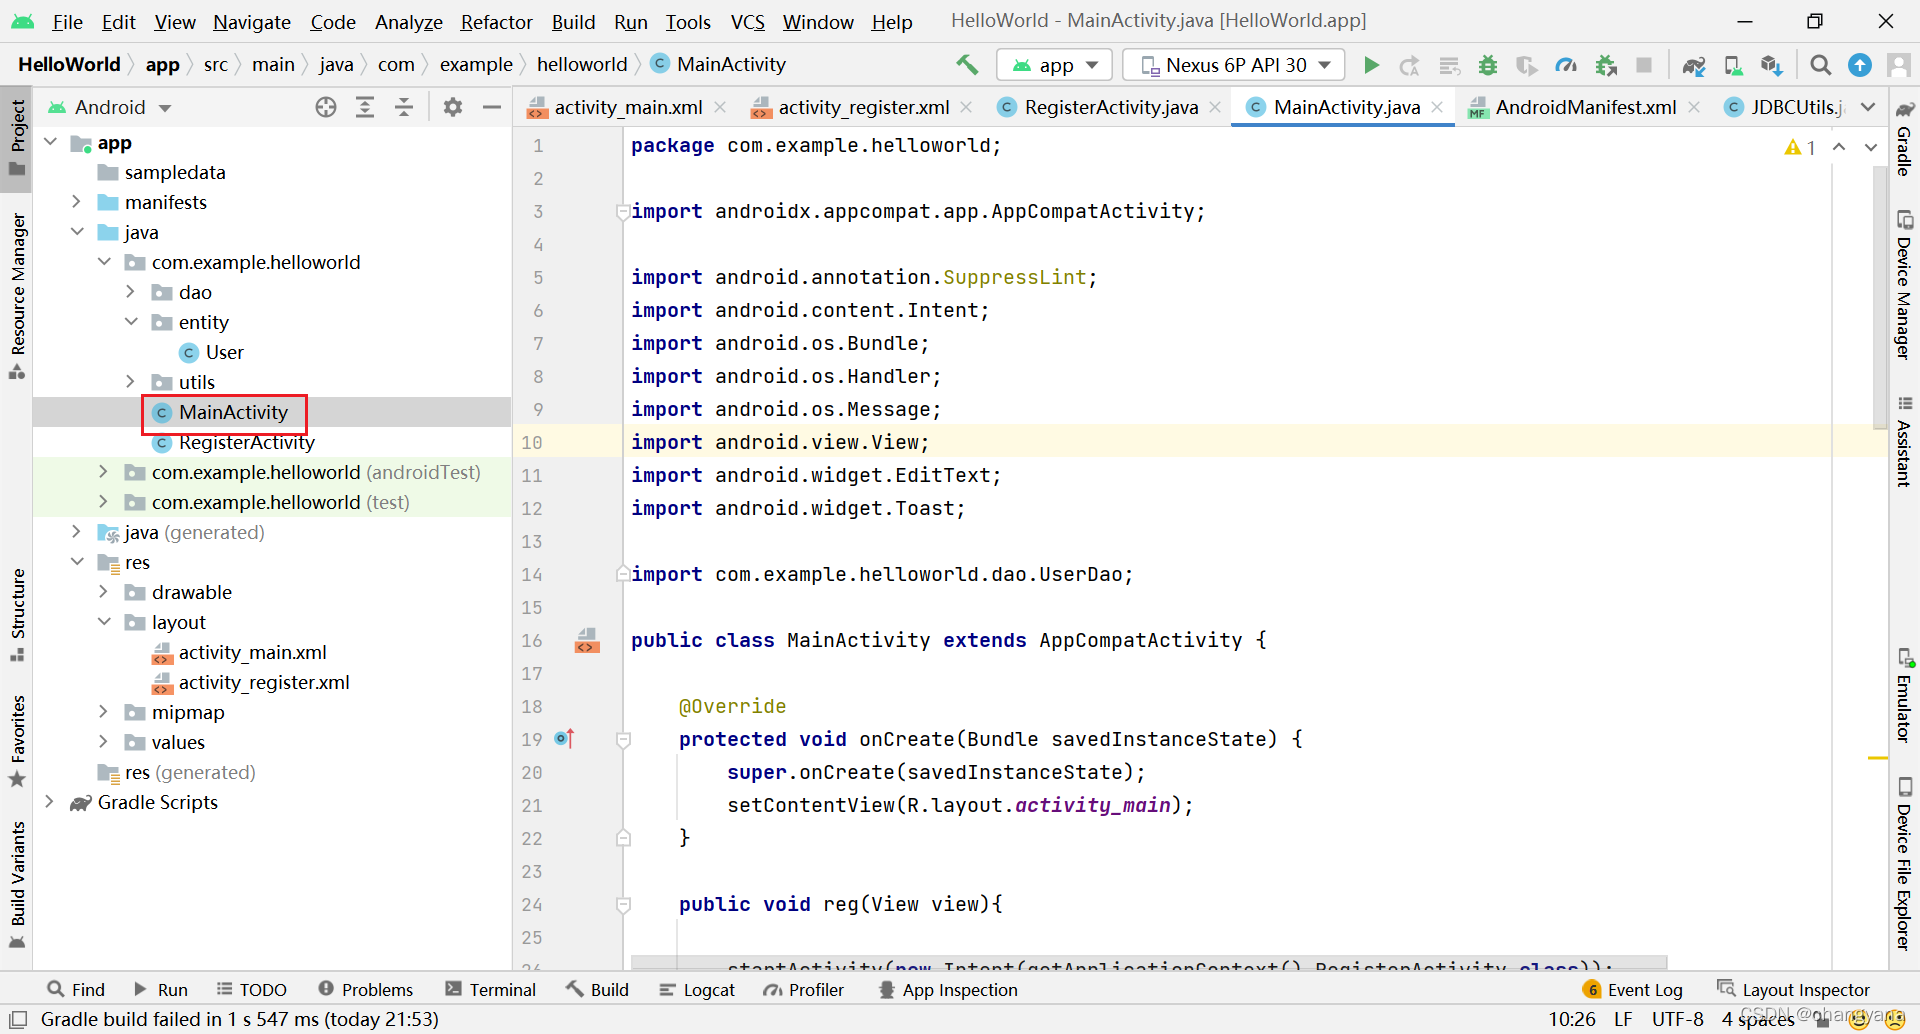
本篇文章从图片可以看到我的项目名称为HelloWorld,这个项目只是我用来做测试的。但是代码是我完善后放在另一个项目为party中的,所有的位置都是一样的,只是项目名称不一样,这个不用担心。你只需要把我的代码里的包名改成你项目的名称就好了。
注意数据库的连接:要连接的数据库,还有用户名和密码都要和自己的Mysql对应。
package com.example.party.utils;

import java.sql.Connection;
import java.sql.DriverManager;

/**
 * function: 数据库工具类,连接数据库用
 */
public class JDBCUtils {


    private static final String TAG = "mysql-party-JDBCUtils";

    private static String driver = "com.mysql.jdbc.Driver";// MySql驱动

    private static String dbName = "party";// 数据库名称

    private static String user = "root";// 用户名

    private static String password = "";// 密码

    public static Connection getConn(){


        Connection connection = null;
        try{


            Class.forName(driver);// 动态加载类
            String ip = "10.0.2.2";// 写成本机地址,不能写成localhost,同时手机和电脑连接的网络必须是同一个

            // 尝试建立到给定数据库URL的连接
            connection = DriverManager.getConnection("jdbc:mysql://" + ip + ":3306/" + dbName,
                    user, password);

        }catch (Exception e){


            e.printStackTrace();
        }
        return connection;
    }
}
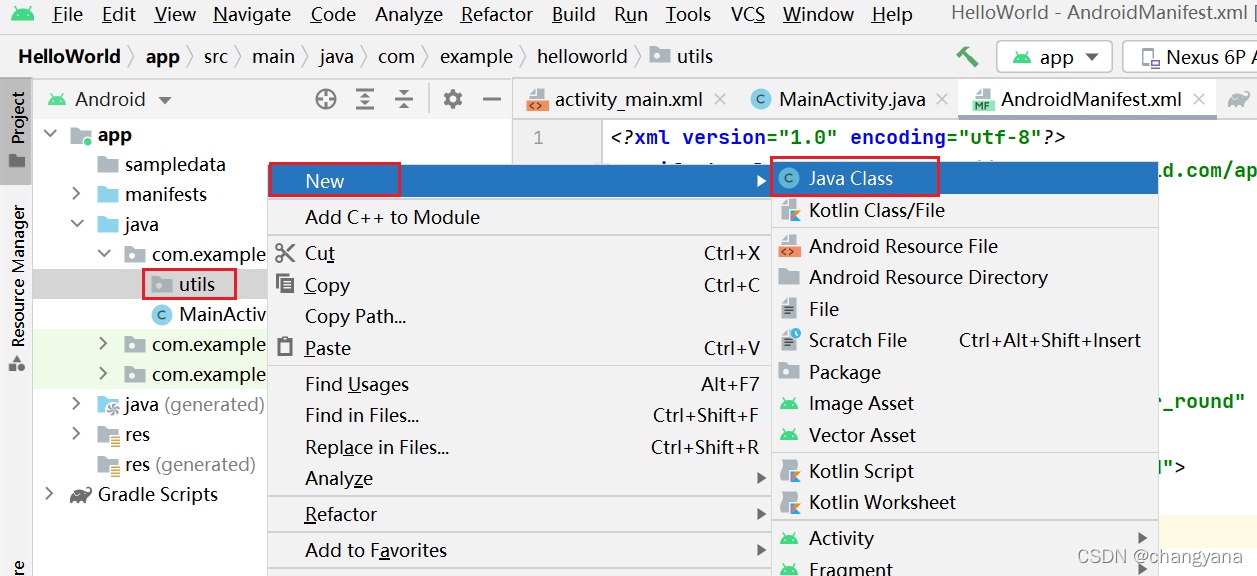
接着创建entity和User
位置如图,创建方法与上述创建JDBCUtils一样
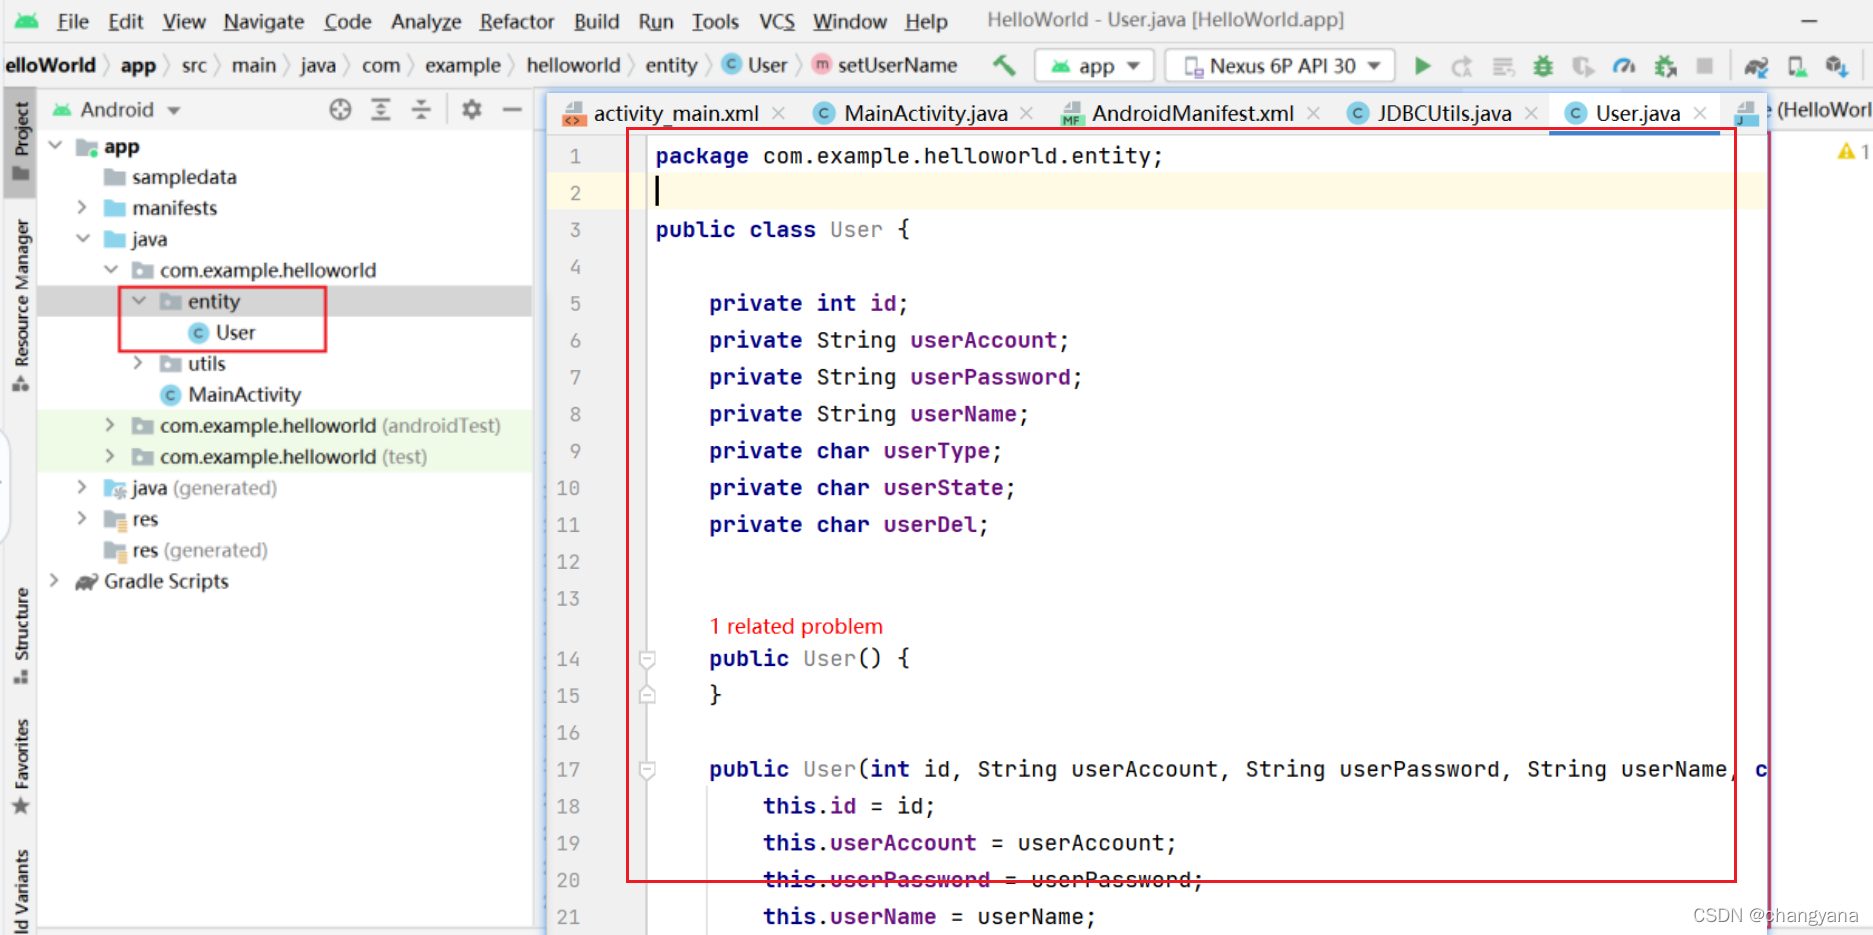
代码如下:
package com.example.party.entity;

public class User {


    private int id;
    private String userAccount;
    private String userPassword;
    private String userName;
    private int userType;
    private int userState;
    private int userDel;


    public User() {


    }

    public User(int id, String userAccount, String userPassword, String userName, int userType, int userState, int userDel) {


        this.id = id;
        this.userAccount = userAccount;
        this.userPassword = userPassword;
        this.userName = userName;
        this.userType = userType;
        this.userState = userState;
        this.userDel = userDel;
    }

    public int getId() {


        return id;
    }

    public void setId(int id) {


        this.id = id;
    }

    public String getUserAccount() {


        return userAccount;
    }

    public void setUserAccount(String userAccount) {


        this.userAccount = userAccount;
    }

    public String getUserPassword() {


        return userPassword;
    }

    public void setUserPassword(String userPassword) {


        this.userPassword = userPassword;
    }

    public String getUserName() {


        return userName;
    }

    public void setUserName(String userName) {


        this.userName = userName;
    }

    public int getUserType() {


        return userType;
    }

    public void setUserType(int userType) {


        this.userType = userType;
    }

    public int getUserState() {


        return userState;
    }

    public void setUserState(int userState) {


        this.userState = userState;
    }

    public int getUserDel() {


        return userDel;
    }

    public void setUserDel(int userDel) {


        this.userDel = userDel;
    }
}
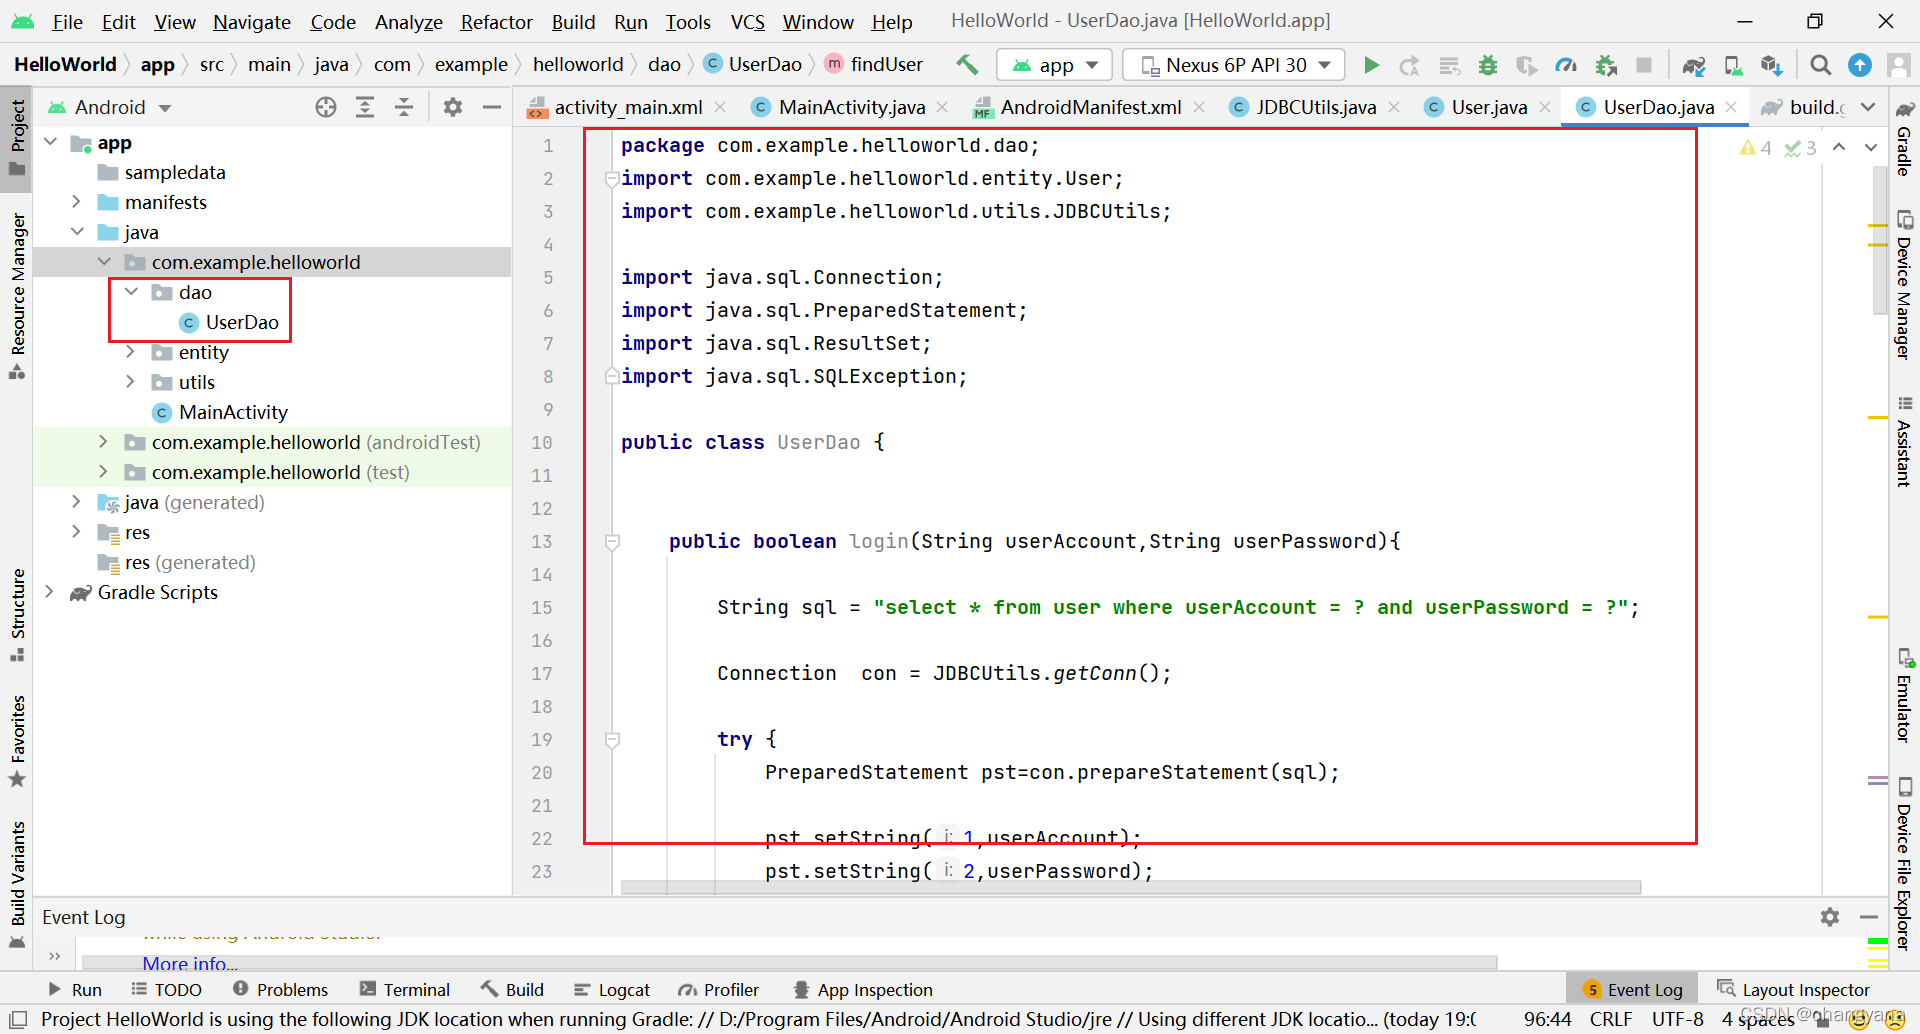
之后创建dao和UserDao
package com.example.party.dao;

import com.example.party.entity.User;
import com.example.party.utils.JDBCUtils;
import android.util.Log;

import java.sql.Connection;
import java.sql.PreparedStatement;
import java.sql.ResultSet;
import java.util.HashMap;

/**
 * author: yan
 * date: 2022.02.17
 * **/
public class UserDao {


    private static final String TAG = "mysql-party-UserDao";

    /**
     * function: 登录
     * */
    public int login(String userAccount, String userPassword){


        HashMap<String, Object> map = new HashMap<>();
        // 根据数据库名称,建立连接
        Connection connection = JDBCUtils.getConn();
        int msg = 0;
        try {


            // mysql简单的查询语句。这里是根据user表的userAccount字段来查询某条记录
            String sql = "select * from user where userAccount = ?";
            if (connection != null){

    // connection不为null表示与数据库建立了连接
                PreparedStatement ps = connection.prepareStatement(sql);
                if (ps != null){


                    Log.e(TAG,"账号:" + userAccount);
                    //根据账号进行查询
                    ps.setString(1, userAccount);
                    // 执行sql查询语句并返回结果集
                    ResultSet rs = ps.executeQuery();
                        int count = rs.getMetaData().getColumnCount();
                        //将查到的内容储存在map里
                        while (rs.next()){


                            // 注意:下标是从1开始的
                            for (int i = 1;i <= count;i++){


                                String field = rs.getMetaData().getColumnName(i);
                                map.put(field, rs.getString(field));
                            }
                        }
                        connection.close();
                        ps.close();

                    if (map.size()!=0){


                        StringBuilder s = new StringBuilder();
                        //寻找密码是否匹配
                        for (String key : map.keySet()){


                            if(key.equals("userPassword")){


                                if(userPassword.equals(map.get(key))){


                                    msg = 1;            //密码正确
                                }
                                else
                                    msg = 2;            //密码错误
                                break;
                            }
                        }
                    }else {


                        Log.e(TAG, "查询结果为空");
                        msg = 3;
                    }
                }else {


                    msg = 0;
                }
            }else {


                msg = 0;
            }
        }catch (Exception e){


            e.printStackTrace();
            Log.d(TAG, "异常login:" + e.getMessage());
            msg = 0;
        }
        return msg;
    }


    /**
     * function: 注册
     * */
    public boolean register(User user){


        HashMap<String, Object> map = new HashMap<>();
        // 根据数据库名称,建立连接
        Connection connection = JDBCUtils.getConn();

        try {


            String sql = "insert into user(userAccount,userPassword,userName,userType,userState,userDel) values (?,?,?,?,?,?)";
            if (connection != null){

    // connection不为null表示与数据库建立了连接
                PreparedStatement ps = connection.prepareStatement(sql);
                if (ps != null){


                    //将数据插入数据库
                    ps.setString(1,user.getUserAccount());
                    ps.setString(2,user.getUserPassword());
                    ps.setString(3,user.getUserName());
                    ps.setInt(4,user.getUserType());
                    ps.setInt(5, user.getUserState());
                    ps.setInt(6,user.getUserDel());

                    // 执行sql查询语句并返回结果集
                    int rs = ps.executeUpdate();
                    if(rs>0)
                        return true;
                    else
                        return false;
                }else {


                    return  false;
                }
            }else {


                return  false;
            }
        }catch (Exception e){


            e.printStackTrace();
            Log.e(TAG, "异常register:" + e.getMessage());
            return false;
        }

    }

    /**
     * function: 根据账号进行查找该用户是否存在
     * */
    public User findUser(String userAccount) {


        // 根据数据库名称,建立连接
        Connection connection = JDBCUtils.getConn();
        User user = null;
        try {


            String sql = "select * from user where userAccount = ?";
            if (connection != null){

    // connection不为null表示与数据库建立了连接
                PreparedStatement ps = connection.prepareStatement(sql);
                if (ps != null) {


                    ps.setString(1, userAccount);
                    ResultSet rs = ps.executeQuery();

                    while (rs.next()) {


                        //注意:下标是从1开始
                        int id = rs.getInt(1);
                        String userAccount1 = rs.getString(2);
                        String userPassword = rs.getString(3);
                        String userName = rs.getString(4);
                        int userType = rs.getInt(5);
                        int userState = rs.getInt(6);
                        int userDel = rs.getInt(7);
                        user = new User(id, userAccount1, userPassword, userName, userType, userState, userDel);
                    }
                }
            }
        }catch (Exception e){


            e.printStackTrace();
            Log.d(TAG, "异常findUser:" + e.getMessage());
            return null;
        }
        return user;
    }

}
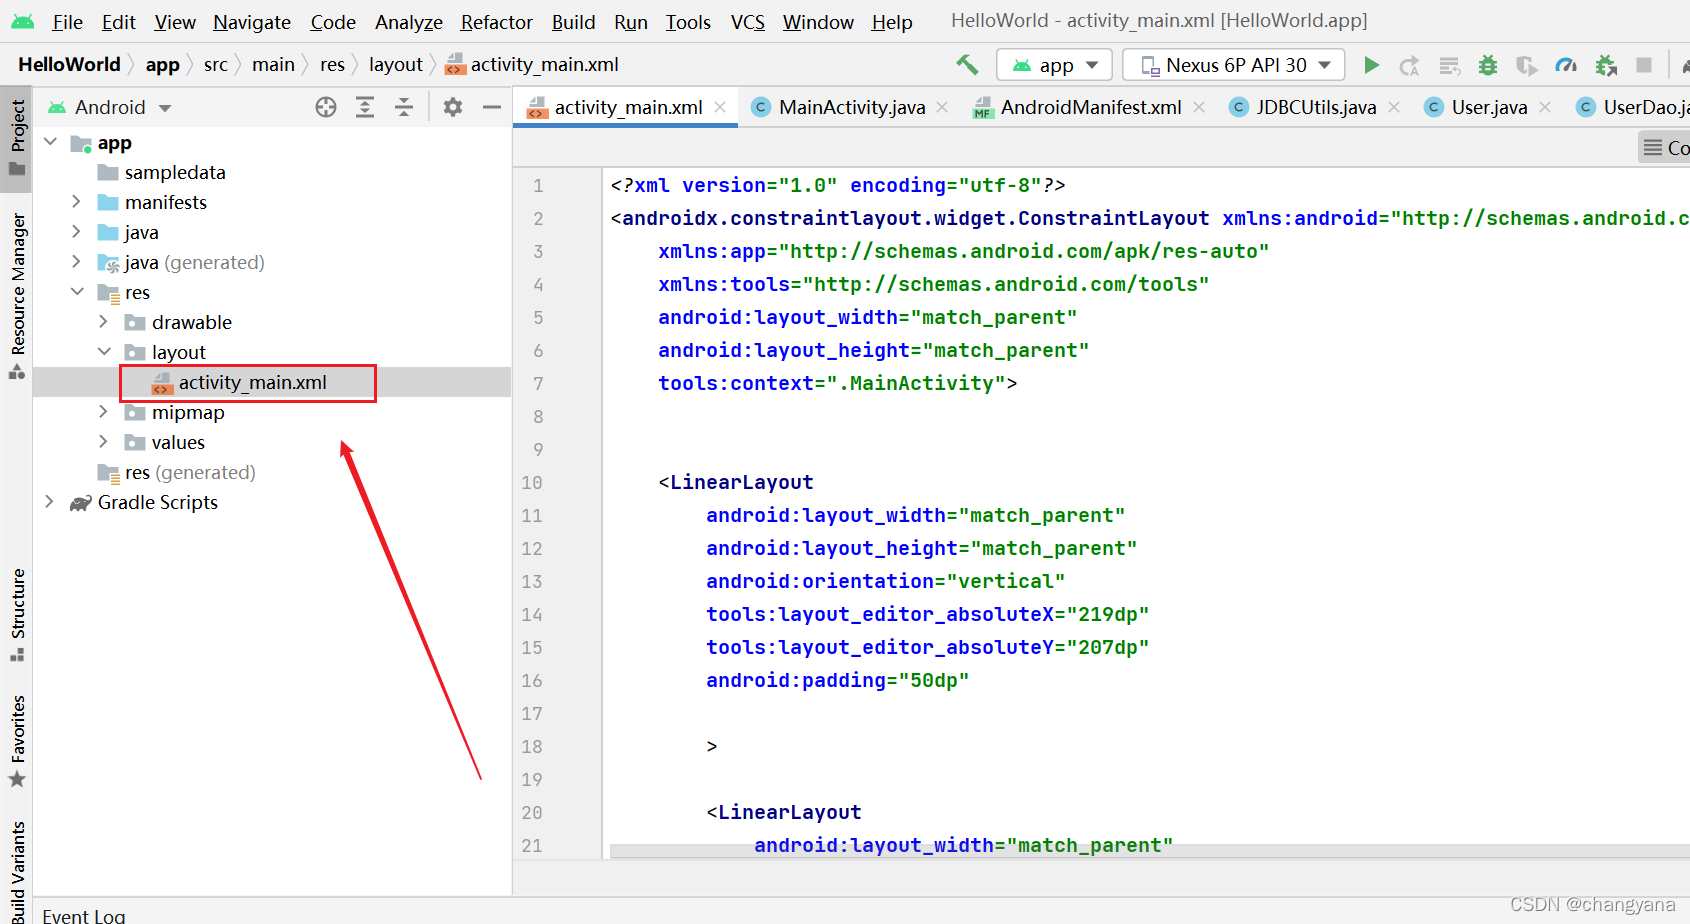
编写登录页面
<?xml version="1.0" encoding="utf-8"?>
<androidx.constraintlayout.widget.ConstraintLayout xmlns:android="http://schemas.android.com/apk/res/android"
    xmlns:app="http://schemas.android.com/apk/res-auto"
    xmlns:tools="http://schemas.android.com/tools"
    android:layout_width="match_parent"
    android:layout_height="match_parent"
    tools:context=".MainActivity">


    <LinearLayout
        android:layout_width="match_parent"
        android:layout_height="match_parent"
        android:orientation="vertical"
        tools:layout_editor_absoluteX="219dp"
        tools:layout_editor_absoluteY="207dp"
        android:padding="50dp"

        >

        <LinearLayout
            android:layout_width="match_parent"
            android:layout_height="wrap_content"
            android:orientation="horizontal">


            <TextView
                android:id="@+id/textView"
                android:layout_width="wrap_content"
                android:layout_height="wrap_content"
                android:layout_weight="1"
                android:textSize="15sp"
                android:text="账号:" />

            <EditText
                android:id="@+id/uesrAccount"
                android:layout_width="wrap_content"
                android:layout_height="wrap_content"
                android:layout_weight="1"
                android:ems="10"
                android:inputType="phone"
                android:text="" />
        </LinearLayout>
        <LinearLayout
            android:layout_width="match_parent"
            android:layout_height="wrap_content"
            android:orientation="horizontal">


            <TextView
                android:id="@+id/textView2"
                android:layout_width="wrap_content"
                android:layout_height="wrap_content"
                android:layout_weight="1"
                android:textSize="15sp"
                android:text="密码:"

                />

            <EditText
                android:id="@+id/userPassword"
                android:layout_width="wrap_content"
                android:layout_height="wrap_content"
                android:layout_weight="1"
                android:ems="10"
                android:inputType="textPersonName"
                />
        </LinearLayout>
        <LinearLayout
            android:layout_width="match_parent"
            android:layout_height="wrap_content"
            android:orientation="horizontal">


        </LinearLayout>

        <Button
            android:layout_marginTop="50dp"
            android:id="@+id/button2"
            android:layout_width="match_parent"
            android:layout_height="wrap_content"
            android:text="登录"
            android:onClick="login"
            />

        <Button
            android:id="@+id/button3"
            android:layout_width="match_parent"
            android:layout_height="wrap_content"
            android:onClick="reg"
            android:text="注册" />
    </LinearLayout>
</androidx.constraintlayout.widget.ConstraintLayout>
效果如图:
完善MainActivity
package com.example.party;

import androidx.appcompat.app.AppCompatActivity;
import android.annotation.SuppressLint;
import android.content.Intent;
import android.os.Bundle;
import android.os.Handler;
import android.os.Message;
import android.util.Log;
import android.view.View;
import android.widget.EditText;
import android.widget.Toast;
import com.example.party.dao.UserDao;
/**
 * function:连接页面加载首页
 */
public class MainActivity extends AppCompatActivity {


    private static final String TAG = "mysql-party-MainActivity";

    @Override
    protected void onCreate(Bundle savedInstanceState) {


        super.onCreate(savedInstanceState);
        setContentView(R.layout.activity_main);
    }

    public void reg(View view){


        startActivity(new Intent(getApplicationContext(),register.class));
    }


    /**
     * function: 登录
     * */
    public void login(View view){


        EditText EditTextAccount = findViewById(R.id.uesrAccount);
        EditText EditTextPassword = findViewById(R.id.userPassword);

        new Thread(){


            @Override
            public void run() {


                UserDao userDao = new UserDao();
                int msg = userDao.login(EditTextAccount.getText().toString(),EditTextPassword.getText().toString());
                hand1.sendEmptyMessage(msg);
            }
        }.start();

    }

    @SuppressLint("HandlerLeak")
    final Handler hand1 = new Handler() {


        @Override
        public void handleMessage(Message msg) {


            if (msg.what == 0){


                Toast.makeText(getApplicationContext(), "登录失败", Toast.LENGTH_LONG).show();
            } else if (msg.what == 1) {


                Toast.makeText(getApplicationContext(), "登录成功", Toast.LENGTH_LONG).show();
            } else if (msg.what == 2){


                Toast.makeText(getApplicationContext(), "密码错误", Toast.LENGTH_LONG).show();
            } else if (msg.what == 3){


                Toast.makeText(getApplicationContext(), "账号不存在", Toast.LENGTH_LONG).show();
            }
        }
    };
}
编写注册页面
<?xml version="1.0" encoding="utf-8"?>
<androidx.constraintlayout.widget.ConstraintLayout xmlns:android="http://schemas.android.com/apk/res/android"
    xmlns:app="http://schemas.android.com/apk/res-auto"
    xmlns:tools="http://schemas.android.com/tools"
    android:layout_width="match_parent"
    android:layout_height="match_parent"
    tools:context=".register">

    <LinearLayout
        android:layout_width="match_parent"
        android:layout_height="match_parent"
        android:orientation="vertical"
        tools:layout_editor_absoluteX="219dp"
        tools:layout_editor_absoluteY="207dp"
        android:padding="50dp"

        >

        <LinearLayout
            android:layout_width="match_parent"
            android:layout_height="wrap_content"
            android:orientation="horizontal">


            <TextView
                android:id="@+id/textView"
                android:layout_width="wrap_content"
                android:layout_height="wrap_content"
                android:layout_weight="1"
                android:textSize="15sp"
                android:text="账号:" />

            <EditText
                android:id="@+id/userAccount"
                android:layout_width="wrap_content"
                android:layout_height="wrap_content"
                android:layout_weight="1"
                android:ems="10"
                android:inputType="phone"
                />
        </LinearLayout>
        <LinearLayout
            android:layout_width="match_parent"
            android:layout_height="wrap_content"
            android:orientation="horizontal">


            <TextView
                android:layout_width="wrap_content"
                android:layout_height="wrap_content"
                android:layout_weight="1"
                android:textSize="15sp"
                android:text="昵称:" />

            <EditText
                android:id="@+id/userName"
                android:layout_width="wrap_content"
                android:layout_height="wrap_content"
                android:layout_weight="1"
                android:ems="10"
                android:inputType="textPersonName"
                />
        </LinearLayout>
        <LinearLayout
            android:layout_width="match_parent"
            android:layout_height="wrap_content"
            android:orientation="horizontal">


            <TextView
                android:id="@+id/textView2"
                android:layout_width="wrap_content"
                android:layout_height="wrap_content"
                android:layout_weight="1"

                android:textSize="15sp"
                android:text="密码:"

                />

            <EditText
                android:id="@+id/userPassword"
                android:layout_width="wrap_content"
                android:layout_height="wrap_content"
                android:layout_weight="1"
                android:ems="10"
                android:inputType="textPassword"
                />
        </LinearLayout>
        <LinearLayout
            android:layout_width="match_parent"
            android:layout_height="wrap_content"
            android:orientation="horizontal">

        </LinearLayout>

        <Button
            android:layout_marginTop="50dp"
            android:id="@+id/button2"
            android:layout_width="match_parent"
            android:layout_height="wrap_content"
            android:text="注册"
            android:onClick="register"
            />
    </LinearLayout>
</androidx.constraintlayout.widget.ConstraintLayout>
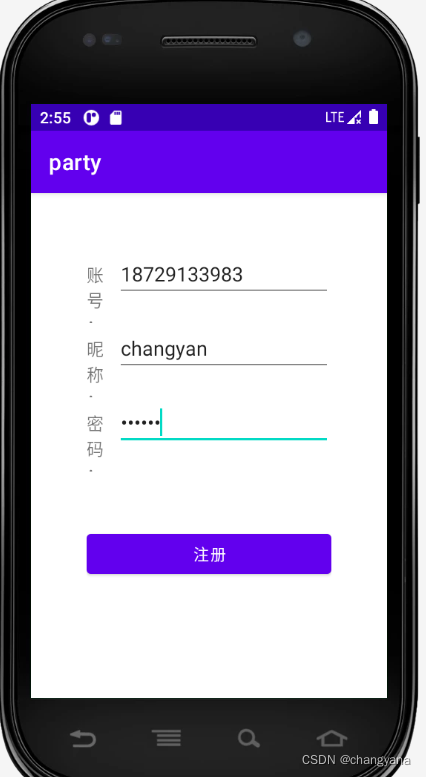
页面如图

完善register
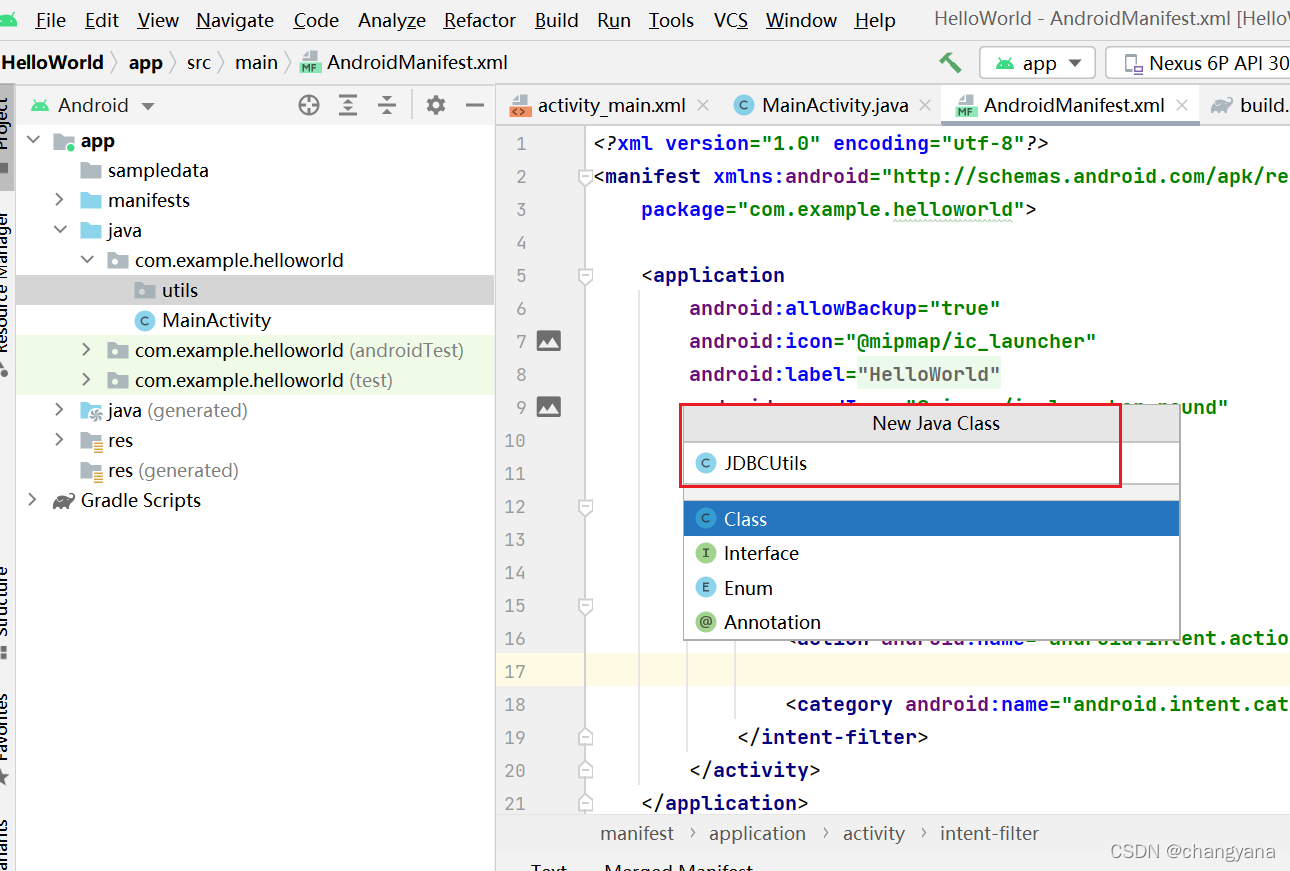
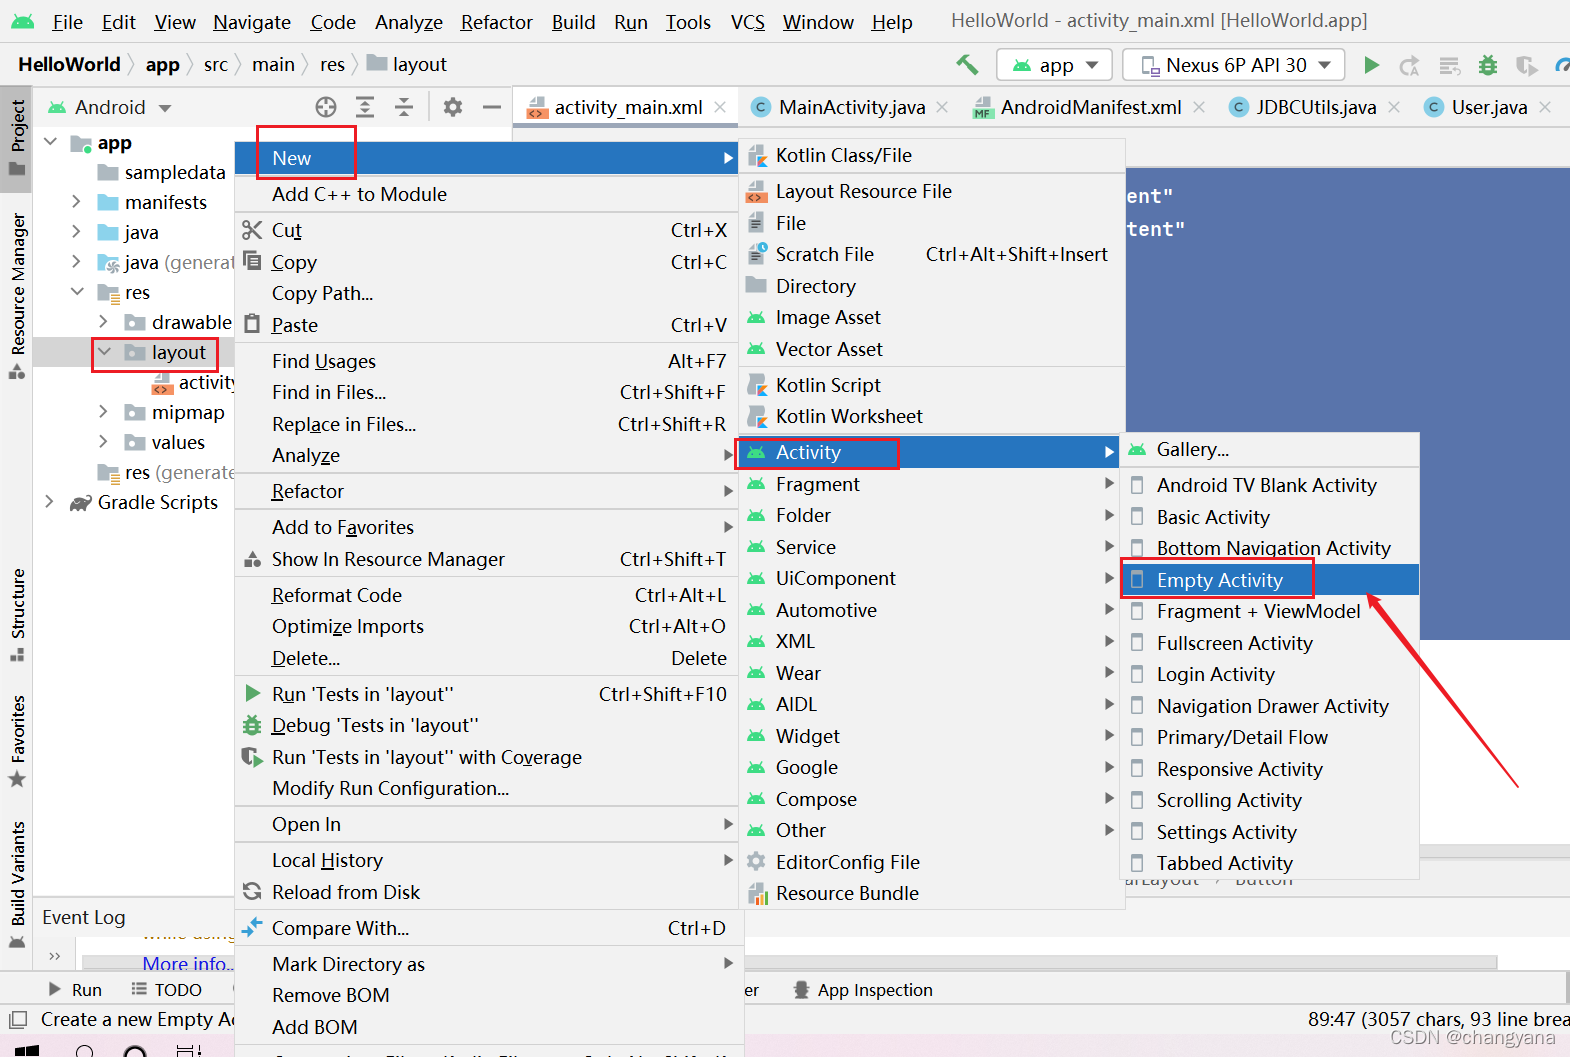
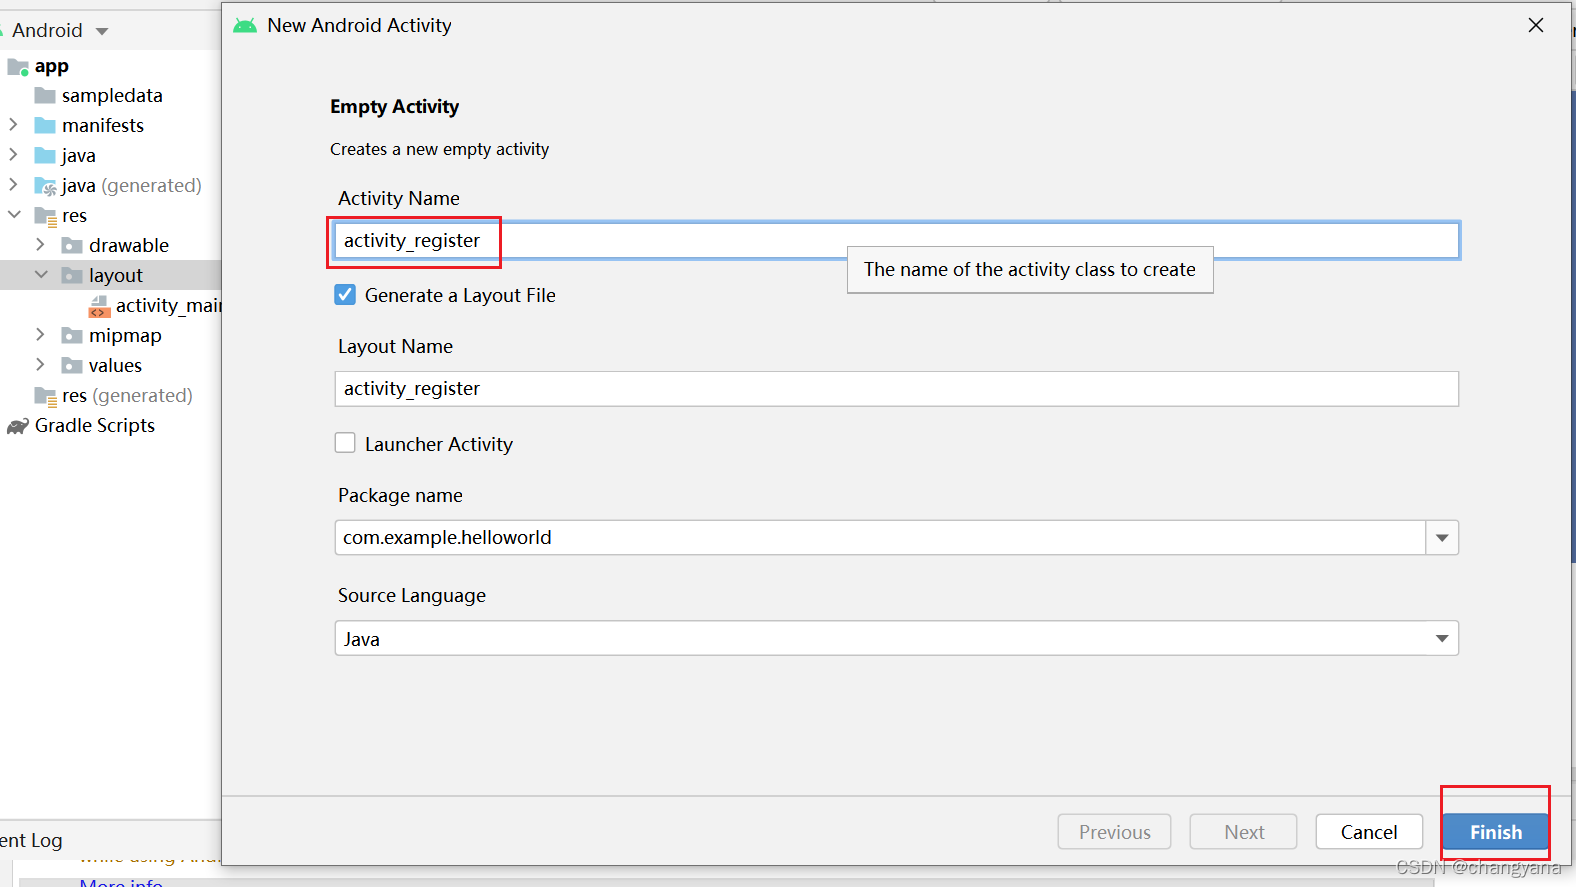
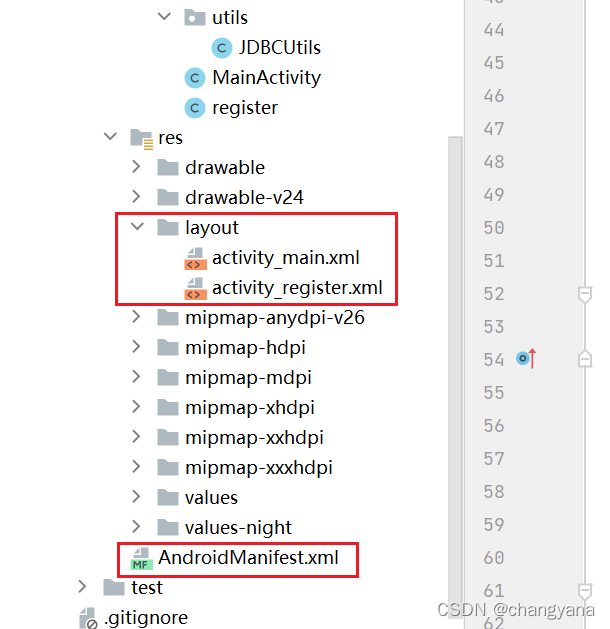
上一步创建activity_register.xml的时候会自动生成一个Class,位置如图,如果没有的话自己右键创建一个Class就可以。

package com.example.party;

import androidx.appcompat.app.AppCompatActivity;
import android.annotation.SuppressLint;
import android.content.Intent;
import android.os.Bundle;
import android.os.Handler;
import android.os.Message;
import android.util.Log;
import android.view.View;
import android.widget.EditText;
import android.widget.Toast;

import com.example.party.dao.UserDao;
import com.example.party.entity.User;

/**
 * function:连接注册页面
 */
public class register extends AppCompatActivity {


    private static final String TAG = "mysql-party-register";
    EditText userAccount = null;
    EditText userPassword = null;
    EditText userName = null;

    @Override
    protected void onCreate(Bundle savedInstanceState) {


        super.onCreate(savedInstanceState);
        setContentView(R.layout.activity_register);

        userAccount = findViewById(R.id.userAccount);
        userPassword = findViewById(R.id.userPassword);
        userName = findViewById(R.id.userName);
    }


    public void register(View view){


        String userAccount1 = userAccount.getText().toString();
        String userPassword1 = userPassword.getText().toString();
        String userName1 = userName.getText().toString();


        User user = new User();

        user.setUserAccount(userAccount1);
        user.setUserPassword(userPassword1);
        user.setUserName(userName1);
        user.setUserType(1);
        user.setUserState(0);
        user.setUserDel(0);

        new Thread(){


            @Override
            public void run() {


                int msg = 0;

                UserDao userDao = new UserDao();

                User uu = userDao.findUser(user.getUserAccount());
                if(uu != null){


                    msg = 1;
                }
                else{


                    boolean flag = userDao.register(user);
                    if(flag){


                        msg = 2;
                    }
                }
                hand.sendEmptyMessage(msg);

            }
        }.start();


    }
    @SuppressLint("HandlerLeak")
    final Handler hand = new Handler()
    {


        public void handleMessage(Message msg) {


            if(msg.what == 0) {


                Toast.makeText(getApplicationContext(),"注册失败",Toast.LENGTH_LONG).show();
            } else if(msg.what == 1) {


                Toast.makeText(getApplicationContext(),"该账号已经存在,请换一个账号",Toast.LENGTH_LONG).show();
            } else if(msg.what == 2) {


                Toast.makeText(getApplicationContext(), "注册成功", Toast.LENGTH_LONG).show();
                Intent intent = new Intent();
                //将想要传递的数据用putExtra封装在intent中
                intent.putExtra("a","注册");
                setResult(RESULT_CANCELED,intent);
                finish();
            }
        }
    };
}
下面汇总一下都需要改变的文件!
然后运行就可以啦!
心得建议
我的大部分时间感觉都是花费在了连接数据库上。刚开始数据库一直连接无法连接,原因是连接的请求要放在一个新的线程里,不能直接在当前线程请求连接数据库。之后解决了连接问题后得到数据进行匹配都是比较简单的事情。
个人建议:如果出问题可以先建一个临时的项目然后按照【连接数据库】–> 【请求数据并在控制台输出】 --> 【建立前端页面交互】这样的过程一步一步进行调试。
祝成功!