查找
getElementById()
返回带有id的元素
<!document html>
<html>
<head>
	<meta charset="utf-8"/>
    <title>js演示</title>

</head>

<body>

	<div class="box" id="box">
    	元素
   </div>
	<script>
		var box = document.getElementById("box");
		console.log(box);
	</script>

</body>
</html>
结果:

getElementsByTagName(“tag”)
返回一个对所有tag标签引用的集合
<!document html>
<html>
<head>
	<meta charset="utf-8"/>
    <title>js演示</title>

</head>

<body>

	<div class="box" id="box">
    	<ul>
        	<li>好好学习</li>
            <li>天天向上</li>
            <li>留给我的时间不多了</li>
        </ul>
   </div>
	<script>
		var r = document.getElementsByTagName("li");
		console.log(r);
	</script>
</body>
</html>
结果:

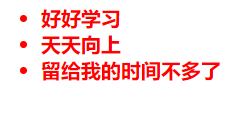
设置元素样式
<!document html>
<html>
<head>
	<meta charset="utf-8"/>
    <title>js演示</title>

</head>

<body>

	<div class="box" id="box">
    	<ul>
        	<li>好好学习</li>
            <li>天天向上</li>
            <li>留给我的时间不多了</li>
        </ul>
   </div>
	<script>
		var r = document.getElementById("box");
		/* 设置字体颜色,用js的方式 */
		r.style.color='#f00';
		r.style.fontWeight = "bold";
	</script>

</body>
</html>
结果:
注意:
设置的属性是减号连接的符合形式时,必需转换成驼峰形式
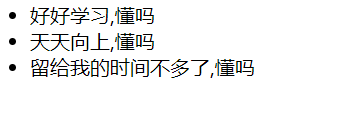
得到HTML内容
innerHTML:获取和设置标签之间的文本内容和html
<!document html>
<html>
<head>
	<meta charset="utf-8"/>
    <title>js演示</title>

</head>

<body>

	<div class="box" id="box">
    	<ul class="one">
        	<li>好好学习</li>
            <li>天天向上</li>
            <li>留给我的时间不多了</li>
        </ul>
   </div>
	<script>
		var result = document.getElementById("box").getElementsByTagName("li");
		for(var i = 0;i < result.length;i++){


			console.log(result[i].innerHTML);
			result[i].innerHTML+=",懂吗";
		}

	</script>

</body>
</html>
结果:

获取class值及修改class值
className:修改class值,读取class值
<!document html>
<html>
<head>
	<meta charset="utf-8"/>
    <title>js演示</title>
    <style>
		.one{


			color:red;
		}
		.two{


			font-weight:bolder;
		}
	</style>

</head>

<body>

	<div class="box" id="box">
    	<ul class="one" id="one">
        	<li>好好学习</li>
            <li>天天向上</li>
            <li>留给我的时间不多了</li>
        </ul>
   </div>
	<script>
		document.getElementById("one").className="two";
		console.log(document.getElementById("one").className);

	</script>

</body>
</html>
结果:


是将原来的class取代掉,而不是叠加
获取属性及修改
<!document html>
<html>
<head>
	<meta charset="utf-8"/>
    <title>js演示</title>
    <style>
		.one{


			color:red;
		}

	</style>

</head>

<body>

	<p id="one" class="one" myType="title">文本</p>
	<script>
		var p = document.getElementById("one");
		console.log(p.id);// 非自定义可用这种方法,获取class除外
		console.log(p.getAttribute("myType"));// 因为myType是自定义属性,用getAttribute()得到值

	</script>

</body>
</html>
结果:

设置属性:
ele.setAttribute(“attribute”,value)
<!document html>
<html>
<head>
	<meta charset="utf-8"/>
    <title>js演示</title>
    <style>
		.one{


			color:red;
		}
		#two{


			color:blue;
		}

	</style>

</head>

<body>

	<p id="one" class="one" myType="title">文本</p>
	<script>
		var p = document.getElementById("one");
		p.setAttribute("id","two");
	</script>

</body>
</html>
结果:

删除属性:removeAttribute(“attribute”)
<!document html>
<html>
<head>
	<meta charset="utf-8"/>
    <title>js演示</title>
    <style>
		.one{


			color:red;
		}
	</style>
</head>
<body>

	<p id="one" class="one" myType="title">文本</p>
	<script>
		var p = document.getElementById("one");
		console.log(p.getAttribute("myType"));//title
		p.removeAttribute("myType");
		console.log(p.getAttribute("myType"));//null   属性已被删除,为null
	</script>

</body>
</html>
html事件
语法:<tag 事件=“执行脚本” >
功能:在HTML元素上绑定事件
说明:执行脚本可以是一个函数的调用

<!document html>
<html>
<head>
	<meta charset="utf-8"/>
    <title>js演示</title>
    <style>
	</style>

</head>

<body>

	<input type="button" value="show" onclick="alert('look!')">
</body>
</html>

例二:
<!document html>
<html>
<head>
<meta charset="utf-8"/>
<title>js演示</title>
<style>
.btn{
background:blue;
text-align:center;
border-radius:5px;
width:70px;
height:90px;
margin:auto;
}
</style>
</head>
<body>
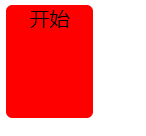
<div class="btn" onmouseover="ff(this)" onmouseout="ff2(this)">开始
<script>
/* 鼠标划过时,蓝色背景变成红色 */
function ff(btn){
btn.style.background = "red";
}
/* 鼠标移开时,红色变蓝色 */
function ff2(btn){
btn.style.background = "blue";
}
</script>
</body>
</html>
结果:
鼠标移到位置:
鼠标离开:

DOM0级事件
1、通过DOM获取HTML元素
2、(获取HTML元素).事件=执行脚本

<!document html>
<html>
<head>
	<meta charset="utf-8"/>
    <title>js演示</title>
    <style>
		.btn{


			background:blue;
			text-align:center;
			border-radius:5px;
			width:70px;
			height:90px;
			margin:auto;
		}
	</style>

</head>

<body>

	<div class="btn" id="btn">开始</div>
    <script>
		b = document.getElementById("btn");
		b.onmouseover=function(){


			this.style.background="red";
		}
		b.onmouseout=function(){


			this.style.background="blue";
		}
	</script>
</body>
</html>
效果同上一个案例
第二种方式
<!document html>
<html>
<head>
	<meta charset="utf-8"/>
    <title>js演示</title>
    <style>
		.btn{


			background:blue;
			text-align:center;
			border-radius:5px;
			width:70px;
			height:90px;
			margin:auto;
		}
	</style>

</head>

<body>

	<div class="btn" id="btn">开始</div>
    <script>
		b = document.getElementById("btn");
		function ff(){


			this.style.background="red";
		}
		function ff2(){


			this.style.background="blue";
		}
		b.onmouseover=ff;//注意不要加括号
		b.onmouseout=ff2;
	</script>
</body>
</html>
效果同上
事件类型
onload
页面加载时触发
<!document html>
<html>
<head>
	<meta charset="utf-8"/>
    <title>js演示</title>
    <style>
		.btn{


			background:blue;
			text-align:center;
			border-radius:5px;
			width:70px;
			height:90px;
			margin:auto;
		}
	</style>
    <script>
		window.onload=function(){


			b = document.getElementById("btn");
			function ff(){


				this.style.background="red";
			}
			function ff2(){


				this.style.background="blue";
			}
			b.onmouseover=ff;//注意不要加括号
			b.onmouseout=ff2;
		}

	</script>

</head>

<body>

	<div class="btn" id="btn">开始</div>

</body>
</html>
此时<script>在head当中,使用window.onload,当页面将body内容加载完成后开始调用方法
onfoucs:获得焦点时触发(点进文本框里面)
onblur:失去焦点时触发(离开文本框)
<!document html>
<html>
<head>
	<meta charset="utf-8"/>
    <title>js演示</title>
    <style>

	</style>
    <script>
		/* 页面加载时执行 */
		window.onload=function(){


			i = document.getElementById("photo");
			var f = function(){


				this.placeholder="";
			}
			var f2 = function(){


				this.placeholder="请输入手机号码";
			}
			i.onfocus=f;
			i.onblur=f2;
		}

	</script>

</head>

<body>
	<div>
    	<input type="text" id="photo" placeholder="请输入手机号码"/>
    </div>
</body>
</html>
结果:
离开文本框
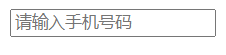
点进文本框(有光标显示,但由于截图原因,显示不上)
注意

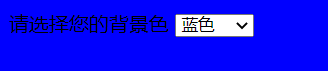
onchange:域的内容改变时发生
<!document html>
<html>
<head>
	<meta charset="utf-8"/>
    <title>js演示</title>
    <style>

	</style>
    <script>
		window.onload=init;

		function init(){


			/* 获取下拉菜单 */
			var menu = document.getElementById("menu");
			/* 给菜单绑定change事件,一般用于select,checkbox,radio */
			menu.onchange=function(){


				/* 获取选中的值 */
				console.log(this.value);
				console.log(menu.options[menu.selectedIndex].value);
				bgcolor = menu.options[menu.selectedIndex].value
				//bgcolor = this.value;
				if(bgcolor==null) return;
				document.body.style.background=bgcolor;
			}
		}

	</script>

</head>

<body>
	<div class="box">
    	请选择您的背景色
        <select id="menu">
        	<option value="">请选择</option>
            <option value="red">红色</option>
            <option value="blue">蓝色</option>
			<option value="yellow">黄色</option>
        </select>

    </div>
</body>
</html>
结果:

<!document html>
<html>
<head>
	<meta charset="utf-8"/>
    <title>js演示</title>
    <style>
		.box{


			background:#3F6;
			width:400px;
			height:400px;
		}
	</style>
    <script>
		window.onload=function(){


		}

	</script>

</head>

<body>
	<div class="box" id="box">拖动</div>
    <script>
		var box = document.getElementById("box");
		box.onmousedown = function(){


			console.log("我被按下");
		}
		box.onmousemove = function(){


			console.log("我被移动了");
		}

	</script>


    </div>
</body>
</html>
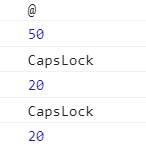
键盘事件


<!document html>
<html>
<head>
	<meta charset="utf-8"/>
    <title>js演示</title>
    <style>


	</style>

</head>

<body>

    <script>
		document.onkeydown=function(event){


			console.log(event.key);
			console.log(event.keyCode);
		}

	</script>


    </div>
</body>
</html>
展示: