实验环境配置
1、DCS-3926S 交换机1 台
2、PC 机2 台
3、Console 线1 根
4、直通网线 2 根
| 设备 | IP地址 |
|---|---|
| 交换机 | 192.168.1.11 |
| PC1 | 192.168.1.101 |
| PC2 | 192.168.1.102 |
实验步骤
-
新建拓扑图
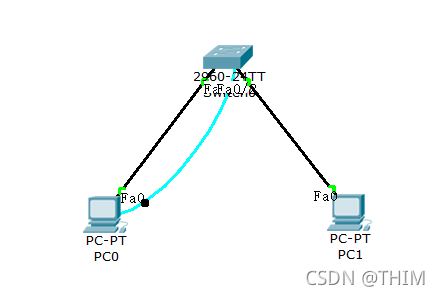
提醒:使用一台交换机和两台PC 机,还将其中PC1 作为控制台终端,使用Console 口配置方式;使用两根网线分别将PC1 和PC2 连接到交换机的接口上。
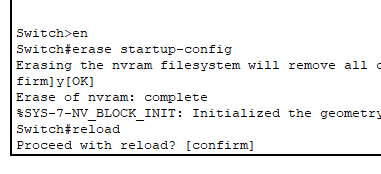
2.首先将交换机恢复出厂设置
//擦除启动配置文件
switch#erase startup-config
//擦除确认
[confirm]Y
//重启
switch#reload
//重启确认
Proceed with reload? [confirm]Y
结果演示:
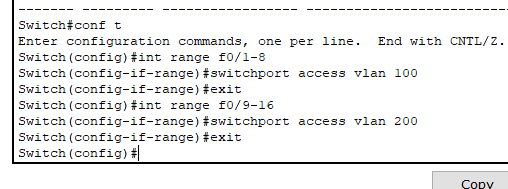
3.创建vlan100 和vlan200,给vlan100添加端口1-8 ,给vlan200 添加端口9-16。
//进入全局配置模式
switch#conf t
//创建vlan 100
switch(config)#vlan 100
//退回到全局配置模式
switch(config-vlan)#exit
//创建vlan 200
switch(config)#vlan 200
//退回到全局配置模式
switch(config-vlan)#exit
//给vlan分配端口
switch(config)#int range f0/1-8
switch(config-if-range)#switchport access vlan 100
switch(config-if-range)#exit
//vlan200 分配方式同上
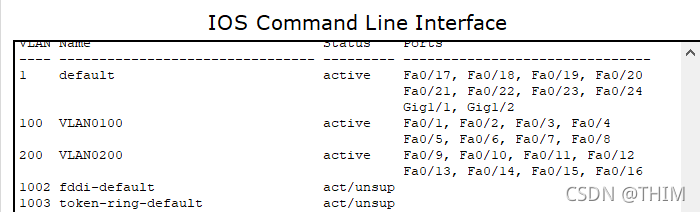
结果演示:
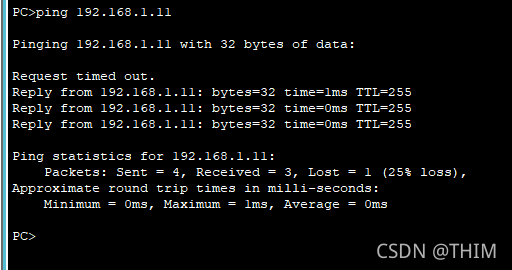
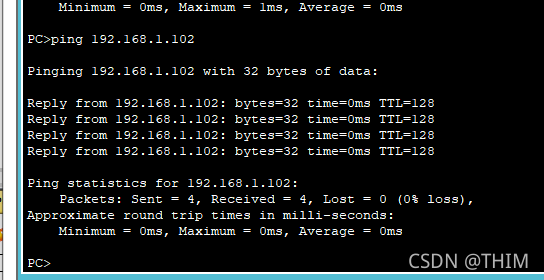
验证
| PC1端口位置 | PC2端口位置 | 操作 | 预期结果 |
|---|---|---|---|
| 1-8 | PC1 ping 192.168.1.11 | 不通 | |
| 9-16 | PC1 ping 192.168.1.11 | 不通 | |
| 17-24 | PC1 ping 192.168.1.11 | 通 | |
| 1-8 | PC1 ping PC2 | 通 | |
| 9-16 | PC1 ping PC2 | 不通 | |
| 17-24 | PC1 ping PC2 | 不通 |
提醒:仅展示3,4两行结果