文章目录
前言
1.Form表单的定义
表单在网页中主要负责数据采集功能。一个表单有三个基本组成部分:
-
表单标签:这里面包含了处理表单数据所用CGI程序的URL以及数据提交到服务器的方法。
-
表单域:包含了文本框、密码框、隐藏域、多行文本框、复选框、单选框、下拉选择框和文件上传框等。
-
表单按钮:包括提交按钮、复位按钮和一般按钮;用于将数据传送到服务器上的CGI脚本或者取消输入,还可以用表单按钮来控制其他定义了处理脚本的处理工作。
2.Form表单的属性
| 属性 | 类型 | 默认值 | 必填 | 说明 | 最低版本 |
|---|---|---|---|---|---|
| report-submit | boolean | false | 否 | 是否返回 formId 用于发送模板消息 | 1.0.0 |
| report-submit-timeout | number | 0 | 否 | 等待一段时间(毫秒数)以确认 formId 是否生效。如果未指定这个参数,formId 有很小的概率是无效的(如遇到网络失败的情况)。指定这个参数将可以检测 formId 是否有效,以这个参数的时间作为这项检测的超时时间。如果失败,将返回 requestFormId:fail 开头的 formId | 2.6.2 |
| bindsubmit | eventhandle | 否 | 携带 form 中的数据触发 submit 事件,event.detail = {value : {‘name’: ‘value’} , formId: ‘’} | 1.0.0 | |
| bindreset | eventhandle | 否 | 表单重置时会触发 reset 事件 | 1.0.0 |
一、Form表单
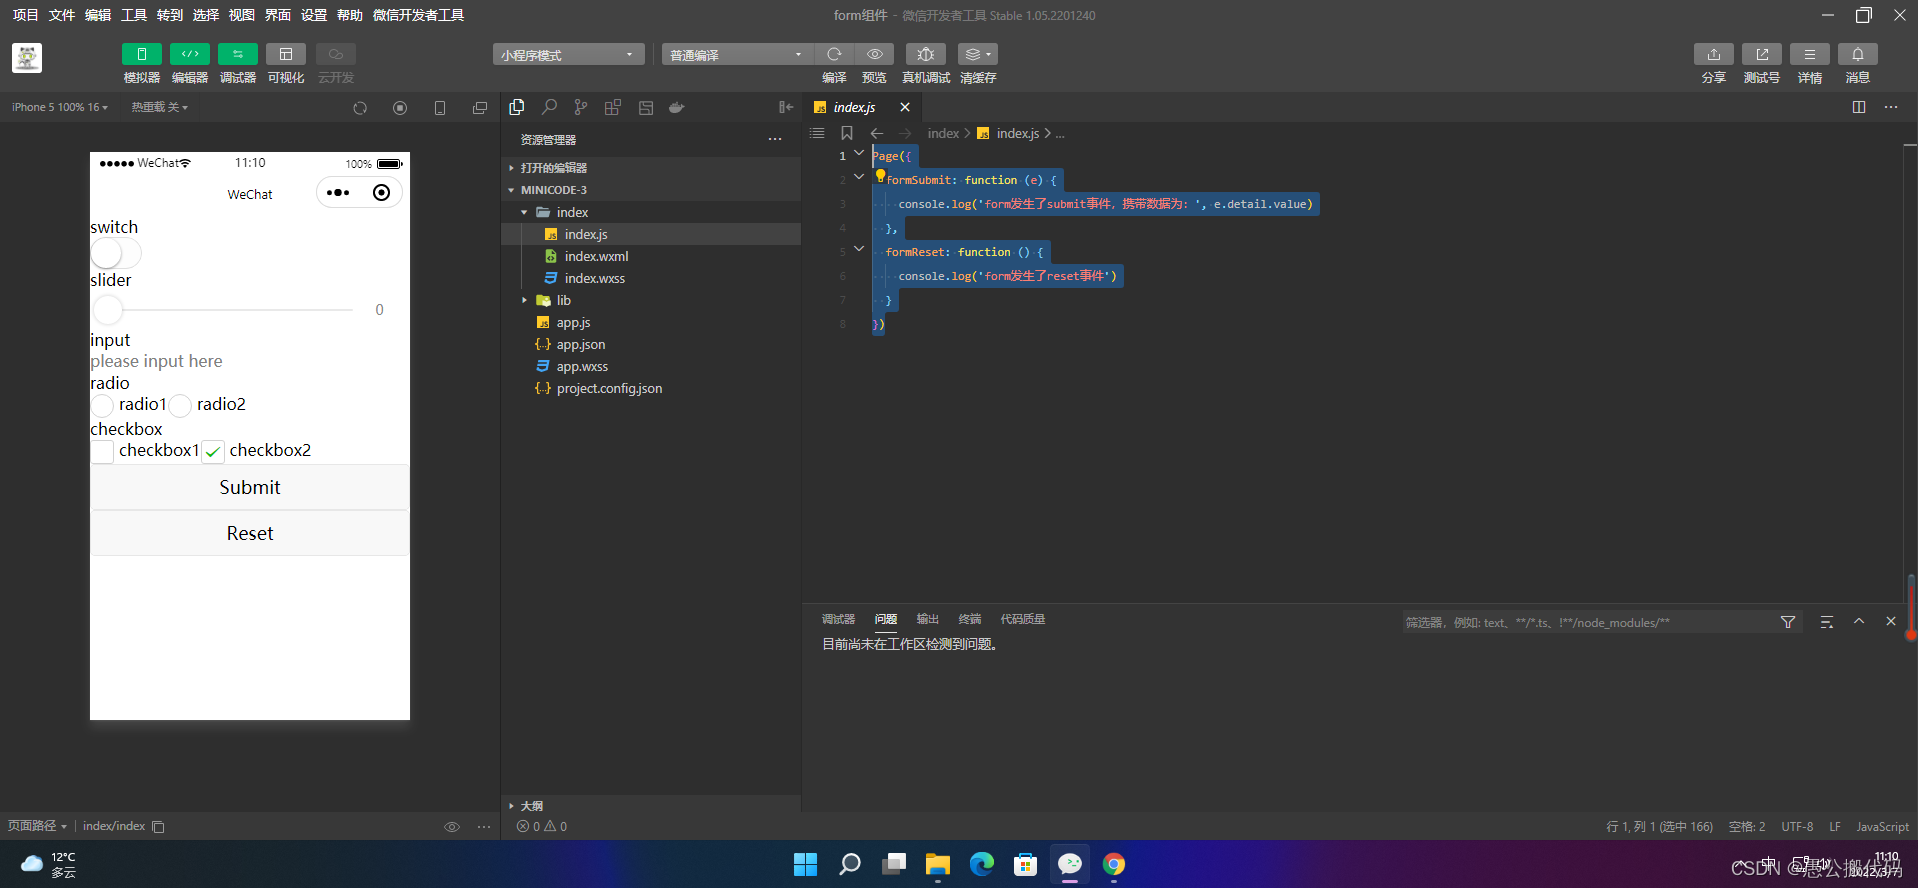
1.Form表单基础使用
<form bindsubmit="formSubmit" bindreset="formReset">
  <view class="section section_gap">
    <view class="section__title">switch</view>
    <switch name="switch"/>
  </view>
  <view class="section section_gap">
    <view class="section__title">slider</view>
    <slider name="slider" show-value ></slider>
  </view>

  <view class="section">
    <view class="section__title">input</view>
    <input name="input" placeholder="please input here" />
  </view>
  <view class="section section_gap">
    <view class="section__title">radio</view>
    <radio-group name="radio-group">
      <label><radio value="radio1"/>radio1</label>
      <label><radio value="radio2"/>radio2</label>
    </radio-group>
  </view>
  <view class="section section_gap">
    <view class="section__title">checkbox</view>
    <checkbox-group name="checkbox">
      <label><checkbox value="checkbox1"/>checkbox1</label>
      <label><checkbox value="checkbox2"/>checkbox2</label>
    </checkbox-group>
  </view>
  <view class="btn-area">
    <button formType="submit">Submit</button>
    <button formType="reset">Reset</button>
  </view>
</form>
Page({


  formSubmit: function (e) {


    console.log('form发生了submit事件,携带数据为:', e.detail.value)
  },
  formReset: function () {


    console.log('form发生了reset事件')
  }
})
2.使用内置behaviors
对于 form 组件,目前可以自动识别下列内置 behaviors:
- wx://form-field
- wx://form-field-group
- wx://form-field-button
2.1 wx://form-field
| 属性名 | 类型 | 描述 | 最低版本 |
|---|---|---|---|
| name | String | 在表单中的字段名 | 1.6.7 |
| value | 任意 | 在表单中的字段值 | 1.6.7 |
1、组件定义
Component({


  behaviors: ['wx://form-field'],
  data: {


    value: ''
  },
  methods: {


    onChange: function (e) {


      this.setData({


        value: e.detail.value,
      })
    }
  }
})
<input placeholder="请输入名字" value="{

    {value}}" bindinput="onChange" ></input>
input {


  margin: 60rpx 30rpx;
  border-bottom: 1px solid grey;
  padding-bottom: 2px;
}
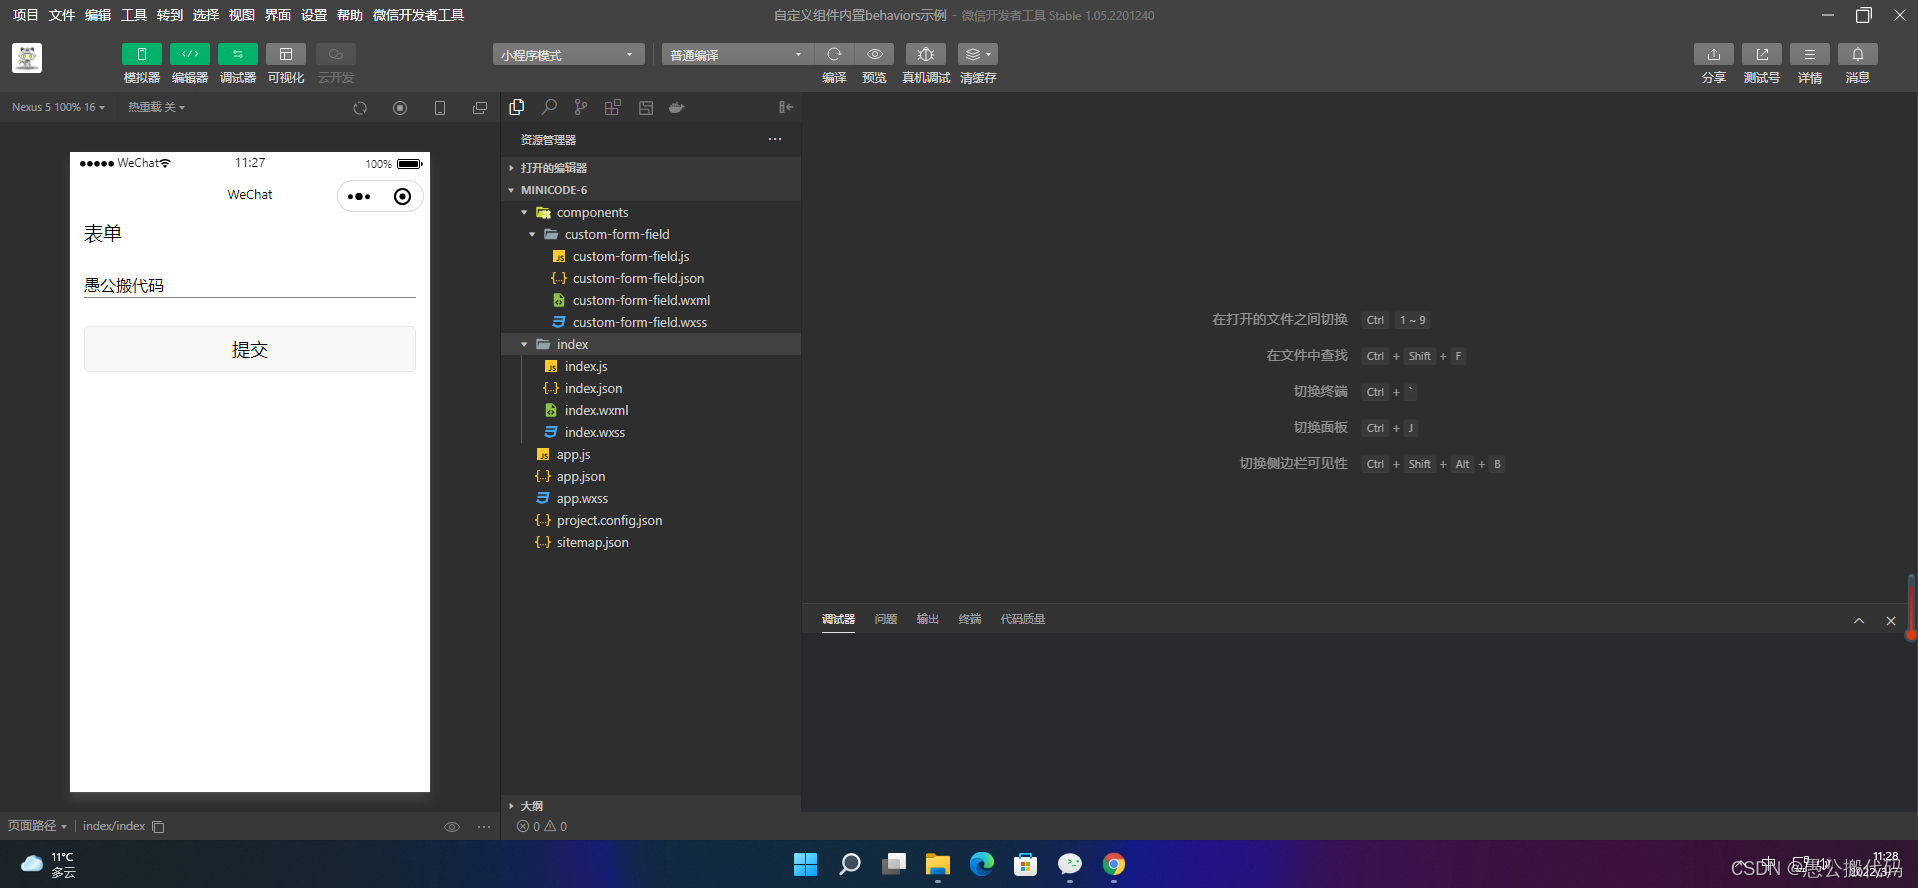
2、表单使用
{


  "usingComponents": {


    "custom-form-field": "../components/custom-form-field/custom-form-field"
  }
}
<form bindsubmit="formSubmit">
  <text>表单</text>
  <custom-form-field name="custom-name"></custom-form-field>
  <button form-type="submit">提交</button>
</form>
text {


  font-size: 40rpx;
  margin: 30rpx;
}
button {


  margin: 30rpx;
}
const app = getApp()

Page({


  formSubmit: function(e) {


    console.info('表单提交携带数据', e.detail.value)
  },
})
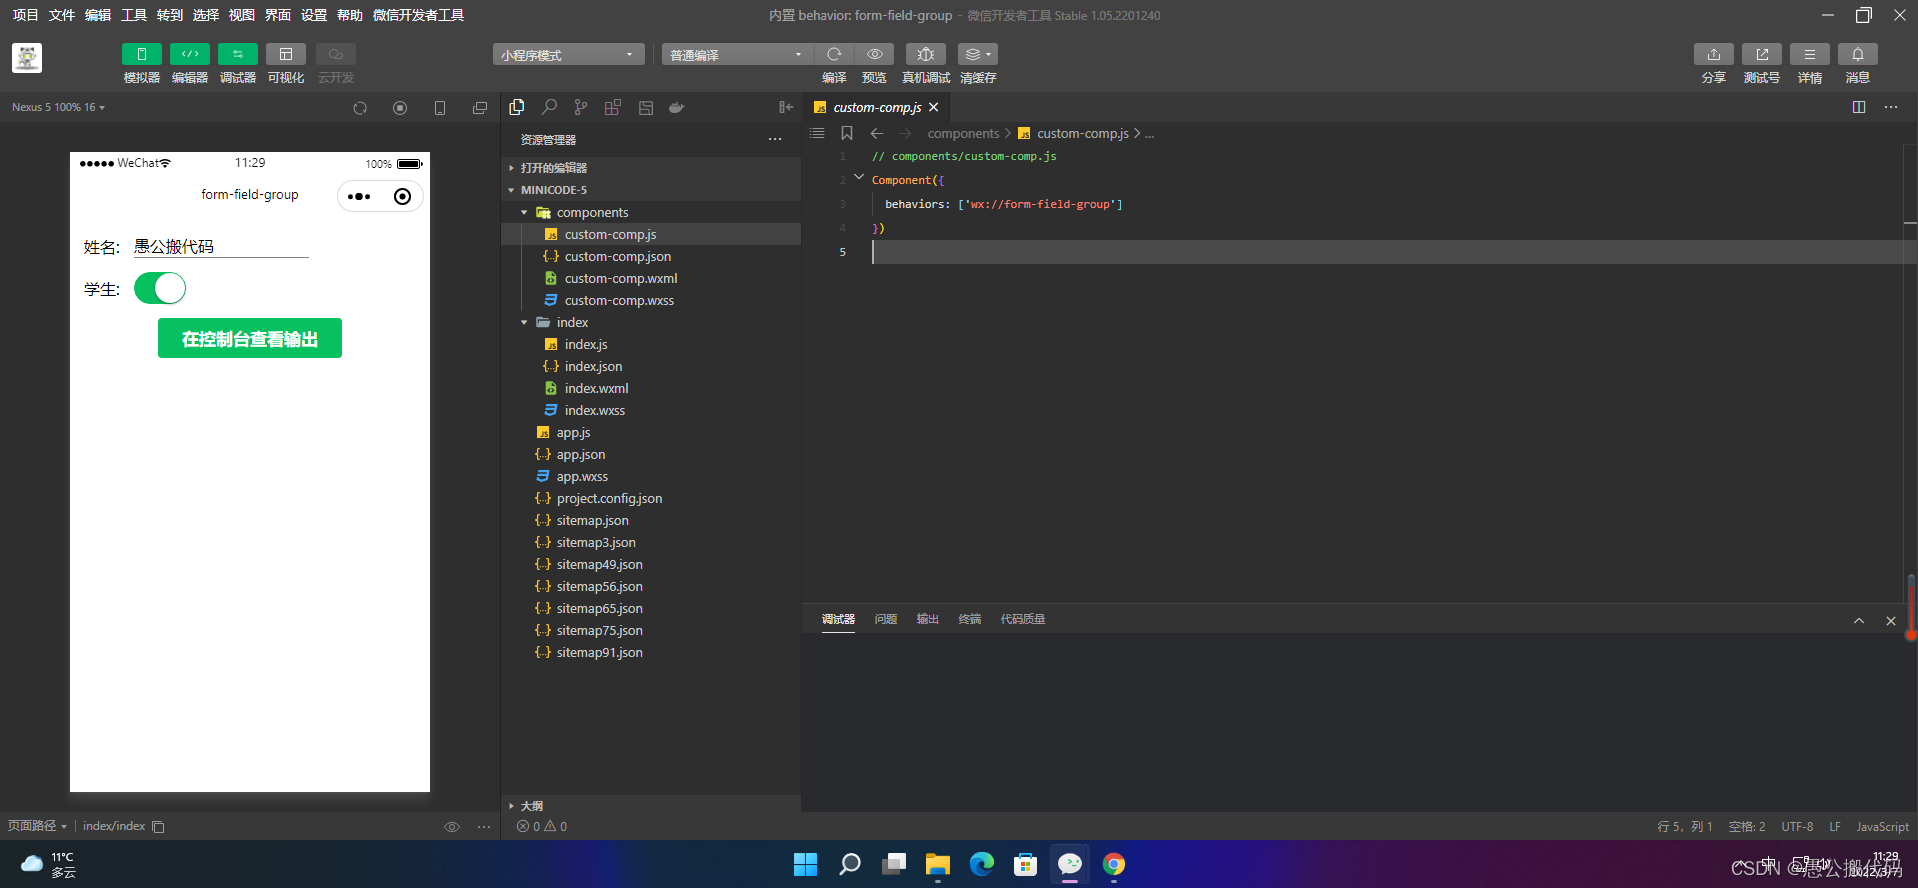
2.2 wx://form-field-group
1、组件定义
// components/custom-comp.js
Component({


  behaviors: ['wx://form-field-group']
})
<view>
  <text>姓名: </text>
  <input name="name" />
</view>
<view>
  <text>学生:</text>
  <switch name="student" />
</view>
view {


  display: flex;
  flex-direction: row;
  align-items: center;
  margin: 30rpx;
}
text {


  margin-right: 30rpx;
}
input {


  padding-bottom: 1px;
  border-bottom: 1px solid gray;
}
2、表单使用
{


  "usingComponents": {


    "custom-comp": "../components/custom-comp"
  }
}
<form bindsubmit="formSubmit">
  <custom-comp></custom-comp>
  <button type="primary" form-type="submit">在控制台查看输出</button>
</form>
.intro {


  margin: 30px;
  text-align: center;
}
const app = getApp()

Page({


  data: {


  },
  formSubmit: function(e) {


    console.info('表单提交携带数据', e.detail.value)
  },
  onLoad: function () {


  },
})
2.3 wx://form-field-button
1、组件定义
Component({


  behaviors: ['wx://form-field-button']
})
<button type="primary" form-type="submit">在控制台查看输出</button>
2、表单使用
{


  "usingComponents": {


    "custom-comp": "../components/custom-comp"
  }
}
 <form bindsubmit="submit">
  <input name="name" placeholder="请输入名字"></input>
  <custom-comp></custom-comp>
 </form>
input {


  margin: 30rpx;
  padding-bottom: 1px;
  border-bottom: 1px solid gray;
}
const app = getApp()

Page({


  data: {


  },
  submit: function (e) {


    console.log("表单携带的数据:", e.detail.value)
  },
  onLoad: function () {


  },
})
