在本博客之前,我们介绍了如何使用warp用Rust创建一个CRUD网络服务,以及如何使用Yew用Rust构建一个前端网络应用。
在本教程中,我们将把这一切结合起来,建立一个简单的全栈网络应用,其特点是有数据库支持的REST后端和前端的基于Wasm的单页应用,它调用这个后端。
最重要的是,我们将创建一个共享的Rust模块,它将被前端和后端使用,以演示如何在这样的设置中共享代码。
我们将建立一个非常简单的宠物主人应用程序,使用户能够添加主人和他们的宠物。我们的应用程序将为主人和他们的宠物列表提供一个详细的视图,使他们能够根据需要删除和添加宠物。
下面是我们要介绍的内容。
- 设置一个全栈式的Rust应用程序
- 常用功能
- 构建REST后端
- 前端实现
- 测试我们的Rust全栈应用
你不需要读过上述的帖子就能跟上,但由于这篇文章包括了这两个概念,我们不会对基础知识进行同样程度的深入研究。如果你想深入了解,请随意浏览它们。
不多说了,让我们开始吧!
设置一个全栈的Rust应用程序
要想继续学习,你所需要的是一个合理的最新Rust安装。Docker或者其他一些运行Postgres数据库的方式也会很有用。
在这种情况下,由于我们要用Rust编写后端和前端,而且我们要在它们之间共享一些代码,所以我们要用Cargo创建一个多成员的工作区项目。
首先,创建一个新的Rust项目。
cargo new rust-fullstack-example
cd rust-fullstack-example

复制代码然后,删除src 文件夹,编辑Cargo.toml 文件,如下所示。
[workspace]

members = [
    "backend",
    "frontend",

    #Internal
    "common"
]

复制代码
现在我们可以创建我们的三个独立的Rust项目了。
cargo new --lib common
cargo new backend
cargo new --lib frontend

复制代码导航到common 目录,编辑Cargo.toml 文件,添加以下依赖关系。
[dependencies]
serde = {version = "=1.0.126", features = ["derive"] }

复制代码接下来,编辑frontend 中的Cargo.toml 文件,并添加这些依赖项。
[dependencies]
yew = "0.18"
wasm-bindgen = "0.2.67"
serde_json = "1"
serde = {version = "=1.0.126", features = ["derive"] }
anyhow = "1"
yew-router = "0.15.0"
common = { version = "0.1.0", path = "../common" }

复制代码我们使用Yew来构建基于Wasm的前端。我们再添加一些用于路由、错误和JSON处理的实用库,以及对我们的common 库的内部依赖,该库将保存前端和后端之间共享的代码。
最后,编辑backend 中的Cargo.toml 文件,添加这些依赖关系。
[dependencies]
tokio = { version = "=1.6.1", features = ["macros", "rt-multi-thread"] }
warp = "=0.3.1"
mobc = "=0.7.2"
mobc-postgres = { version = "=0.7.0", features = ["with-chrono-0_4", "with-serde_json-1"] }
serde = {version = "=1.0.126", features = ["derive"] }
serde_json = "=1.0.64"
thiserror = "=1.0.24"
common = { version = "0.1.0", path = "../common" }

复制代码我们正在使用warpweb框架来构建后端。因为我们使用Postgres数据库来存储数据,所以我们也要添加Postgres的mobc连接池。
除此之外,由于Warp为Tokio进行了优化,我们需要将其作为我们的同步运行时加入。我们将添加一些用于错误和JSON处理的实用库,以及对我们的common 项目的内部依赖。
设置就这样了。让我们开始在我们的common 项目中为frontend 和backend 编写共享代码。
共同功能
我们将从充实common 模块开始,在这里我们将添加frontend 和backend 之间的共享数据模型。在实际应用中,可以共享更多的功能--包括验证、助手、实用程序等--但在这种情况下,我们将坚持使用数据结构。
在lib.rs 中,我们将为我们的Owner 和Pet 模型添加数据模型。
use serde::{Deserialize, Serialize};

#[derive(Deserialize, Clone, PartialEq, Debug)]
pub struct Owner {
    pub id: i32,
    pub name: String,
}

#[derive(Serialize, Deserialize, Clone, PartialEq, Debug)]
pub struct OwnerRequest {
    pub name: String,
}

#[derive(Serialize, Deserialize, Clone, PartialEq, Debug)]
pub struct OwnerResponse {
    pub id: i32,
    pub name: String,
}

impl OwnerResponse {
    pub fn of(owner: Owner) -> OwnerResponse {
        OwnerResponse {
            id: owner.id,
            name: owner.name,
        }
    }
}

#[derive(Deserialize, Clone, PartialEq, Debug)]
pub struct Pet {
    pub id: i32,
    pub name: String,
    pub owner_id: i32,
    pub animal_type: String,
    pub color: Option<String>,
}

#[derive(Serialize, Deserialize, Clone, PartialEq, Debug)]
pub struct PetRequest {
    pub name: String,
    pub animal_type: String,
    pub color: Option<String>,
}

#[derive(Serialize, Deserialize, Clone, PartialEq, Debug)]
pub struct PetResponse {
    pub id: i32,
    pub name: String,
    pub animal_type: String,
    pub color: Option<String>,
}

impl PetResponse {
    pub fn of(pet: Pet) -> PetResponse {
        PetResponse {
            id: pet.id,
            name: pet.name,
            animal_type: pet.animal_type,
            color: pet.color,
        }
    }
}

复制代码我们定义数据库域结构Owner 和Pet ,以及请求和响应数据对象,我们将使用这些对象在前端和后端之间进行通信。
分享这段代码是很好的,因为在API的某个地方增加或删除一个字段,如果我们不对这个变化进行调整,就会在前端出现编译错误。这可能会节省我们在更新API时追寻错误的时间。
Owner 是非常简单的,只有一个name 和数据库的ID。Pet 类型有一个name ,一个animal_type ,和一个可选的color 。
我们还定义了一些助手,以便从数据库域对象中为API创建我们的数据对象。
这就是我们要放在common 项目中的全部内容。
让我们继续我们的应用程序的后端部分。
构建REST后端
我们从数据模型的数据库定义开始。
CREATE TABLE IF NOT EXISTS owner
(
    id SERIAL PRIMARY KEY NOT NULL,
    name VARCHAR(255) NOT NULL
);

CREATE TABLE IF NOT EXISTS pet
(
    id SERIAL PRIMARY KEY NOT NULL,
    owner_id INT NOT NULL,
    name VARCHAR(255) NOT NULL,
    animal_type VARCHAR(255) NOT NULL,
    color VARCHAR(255),

    CONSTRAINT fk_pet_owner_id FOREIGN KEY (owner_id) REFERENCES pet(id)
);

复制代码
这定义了我们的两个数据表和它们各自的字段。
我们将自下而上构建后端,从数据库层开始,一直到Web服务器和路由定义。
首先,我们将创建一个db 模块。在这里,我们将从mod.rs 中的一些数据库和连接池初始化代码开始。
type Result<T> = std::result::Result<T, error::Error>;

const DB_POOL_MAX_OPEN: u64 = 32;
const DB_POOL_MAX_IDLE: u64 = 8;
const DB_POOL_TIMEOUT_SECONDS: u64 = 15;
const INIT_SQL: &str = "./db.sql";

pub async fn init_db(db_pool: &DBPool) -> Result<()> {
    let init_file = fs::read_to_string(INIT_SQL)?;
    let con = get_db_con(db_pool).await?;
    con.batch_execute(init_file.as_str())
        .await
        .map_err(DBInitError)?;
    Ok(())
}

pub async fn get_db_con(db_pool: &DBPool) -> Result<DBCon> {
    db_pool.get().await.map_err(DBPoolError)
}

pub fn create_pool() -> std::result::Result<DBPool, mobc::Error<Error>> {
    let config = Config::from_str("postgres://[email protected]:7878/postgres")?;

    let manager = PgConnectionManager::new(config, NoTls);
    Ok(Pool::builder()
        .max_open(DB_POOL_MAX_OPEN)
        .max_idle(DB_POOL_MAX_IDLE)
        .get_timeout(Some(Duration::from_secs(DB_POOL_TIMEOUT_SECONDS)))
        .build(manager))
}

复制代码在init_db 中,我们读取上述的db.sql 文件并执行它来初始化我们的表。
create_pool 和get_db_con 帮助程序是用来初始化数据库池和从池中获取新的连接。
有了这些设置细节,让我们看看我们的第一个域访问对象owner.rs 。
pub const TABLE: &str = "owner";
const SELECT_FIELDS: &str = "id, name";

pub async fn fetch(db_pool: &DBPool) -> Result<Vec<Owner>> {
    let con = get_db_con(db_pool).await?;
    let query = format!("SELECT {} FROM {}", SELECT_FIELDS, TABLE);
    let rows = con.query(query.as_str(), &[]).await.map_err(DBQueryError)?;

    Ok(rows.iter().map(|r| row_to_owner(&r)).collect())
}

pub async fn fetch_one(db_pool: &DBPool, id: i32) -> Result<Owner> {
    let con = get_db_con(db_pool).await?;
    let query = format!("SELECT {} FROM {} WHERE id = $1", SELECT_FIELDS, TABLE);

    let row = con
        .query_one(query.as_str(), &[&id])
        .await
        .map_err(DBQueryError)?;
    Ok(row_to_owner(&row))
}

pub async fn create(db_pool: &DBPool, body: OwnerRequest) -> Result<Owner> {
    let con = get_db_con(db_pool).await?;
    let query = format!("INSERT INTO {} (name) VALUES ($1) RETURNING *", TABLE);
    let row = con
        .query_one(query.as_str(), &[&body.name])
        .await
        .map_err(DBQueryError)?;
    Ok(row_to_owner(&row))
}

fn row_to_owner(row: &Row) -> Owner {
    let id: i32 = row.get(0);
    let name: String = row.get(1);
    Owner { id, name }
}

复制代码
有三个针对所有者的数据库操作。
fetch读取所有的所有者fetch_one检索具有给定ID的所有者create创建一个新的所有者
这些方法的实现是相当直接的。首先,我们从池中获得一个连接,然后我们定义要执行的Postgres查询,并用给定的值执行它,传播任何错误。
最后,我们使用row_to_owner 帮助器将返回的数据库行数据转换为一个实际的Owner 结构。
pet.rs 数据访问对象也很类似。
pub const TABLE: &str = "pet";
const SELECT_FIELDS: &str = "id, owner_id, name, animal_type, color";

pub async fn fetch(db_pool: &DBPool, owner_id: i32) -> Result<Vec<Pet>> {
    let con = get_db_con(db_pool).await?;
    let query = format!(
        "SELECT {} FROM {} WHERE owner_id = $1",
        SELECT_FIELDS, TABLE
    );
    let rows = con
        .query(query.as_str(), &[&owner_id])
        .await
        .map_err(DBQueryError)?;

    Ok(rows.iter().map(|r| row_to_pet(&r)).collect())
}

pub async fn create(db_pool: &DBPool, owner_id: i32, body: PetRequest) -> Result<Pet> {
    let con = get_db_con(db_pool).await?;
    let query = format!(
        "INSERT INTO {} (name, owner_id, animal_type, color) VALUES ($1, $2, $3, $4) RETURNING *",
        TABLE
    );
    let row = con
        .query_one(
            query.as_str(),
            &[&body.name, &owner_id, &body.animal_type, &body.color],
        )
        .await
        .map_err(DBQueryError)?;
    Ok(row_to_pet(&row))
}

pub async fn delete(db_pool: &DBPool, owner_id: i32, id: i32) -> Result<u64> {
    let con = get_db_con(db_pool).await?;
    let query = format!("DELETE FROM {} WHERE id = $1 AND owner_id = $2", TABLE);
    con.execute(query.as_str(), &[&id, &owner_id])
        .await
        .map_err(DBQueryError)
}

fn row_to_pet(row: &Row) -> Pet {
    let id: i32 = row.get(0);
    let owner_id: i32 = row.get(1);
    let name: String = row.get(2);
    let animal_type: String = row.get(3);
    let color: Option<String> = row.get(4);
    Pet {
        id,
        name,
        owner_id,
        animal_type,
        color,
    }
}

复制代码
这里我们有以下三个方法。
fetch获取属于一个给定的宠物的所有宠物。owner_idcreate为给定的宠物创建一个新的宠物owner_iddelete删除给定的宠物id和owner_id
在实现方面,它遵循与上述owner.rs 完全相同的概念。
数据库层就这样结束了。让我们再往上走一步,在src 中实现handler.rs 。
pub async fn list_pets_handler(owner_id: i32, db_pool: DBPool) -> Result<impl Reply> {
    let pets = db::pet::fetch(&db_pool, owner_id)
        .await
        .map_err(reject::custom)?;
    Ok(json::<Vec<_>>(
        &pets.into_iter().map(PetResponse::of).collect(),
    ))
}

pub async fn create_pet_handler(
    owner_id: i32,
    body: PetRequest,
    db_pool: DBPool,
) -> Result<impl Reply> {
    Ok(json(&PetResponse::of(
        db::pet::create(&db_pool, owner_id, body)
            .await
            .map_err(reject::custom)?,
    )))
}

pub async fn delete_pet_handler(owner_id: i32, id: i32, db_pool: DBPool) -> Result<impl Reply> {
    db::pet::delete(&db_pool, owner_id, id)
        .await
        .map_err(reject::custom)?;
    Ok(StatusCode::OK)
}

pub async fn list_owners_handler(db_pool: DBPool) -> Result<impl Reply> {
    let owners = db::owner::fetch(&db_pool).await.map_err(reject::custom)?;
    Ok(json::<Vec<_>>(
        &owners.into_iter().map(OwnerResponse::of).collect(),
    ))
}

pub async fn fetch_owner_handler(id: i32, db_pool: DBPool) -> Result<impl Reply> {
    let owner = db::owner::fetch_one(&db_pool, id)
        .await
        .map_err(reject::custom)?;
    Ok(json(&OwnerResponse::of(owner)))
}

pub async fn create_owner_handler(body: OwnerRequest, db_pool: DBPool) -> Result<impl Reply> {
    Ok(json(&OwnerResponse::of(
        db::owner::create(&db_pool, body)
            .await
            .map_err(reject::custom)?,
    )))
}

复制代码
该API-表面由六个操作组成。
- 列出所有者
- 为一个给定的ID获取所有者
- 创建主人
- 创建宠物
- 删除宠物
- 为一个给定的主人列出宠物
在每一种情况下,我们只是在数据库层中调用相应的操作,并将返回的Owner ,或Pet ,分别转换为OwnerResponse 或PetResponse ,并将任何错误直接返回给调用者。
最后,再往上走一步,我们在main.rs 中实现指向这些处理程序的实际Web服务器。
mod db;
mod error;
mod handler;

type Result<T> = std::result::Result<T, Rejection>;
type DBCon = Connection<PgConnectionManager<NoTls>>;
type DBPool = Pool<PgConnectionManager<NoTls>>;

#[tokio::main]
async fn main() {
    let db_pool = db::create_pool().expect("database pool can be created");

    db::init_db(&db_pool)
        .await
        .expect("database can be initialized");

    let pet = warp::path!("owner" / i32 / "pet");
    let pet_param = warp::path!("owner" / i32 / "pet" / i32);
    let owner = warp::path("owner");

    let pet_routes = pet
        .and(warp::get())
        .and(with_db(db_pool.clone()))
        .and_then(handler::list_pets_handler)
        .or(pet
            .and(warp::post())
            .and(warp::body::json())
            .and(with_db(db_pool.clone()))
            .and_then(handler::create_pet_handler))
        .or(pet_param
            .and(warp::delete())
            .and(with_db(db_pool.clone()))
            .and_then(handler::delete_pet_handler));

    let owner_routes = owner
        .and(warp::get())
        .and(warp::path::param())
        .and(with_db(db_pool.clone()))
        .and_then(handler::fetch_owner_handler)
        .or(owner
            .and(warp::get())
            .and(with_db(db_pool.clone()))
            .and_then(handler::list_owners_handler))
        .or(owner
            .and(warp::post())
            .and(warp::body::json())
            .and(with_db(db_pool.clone()))
            .and_then(handler::create_owner_handler));

    let routes = pet_routes
        .or(owner_routes)
        .recover(error::handle_rejection)
        .with(
            warp::cors()
                .allow_credentials(true)
                .allow_methods(&[
                    Method::OPTIONS,
                    Method::GET,
                    Method::POST,
                    Method::DELETE,
                    Method::PUT,
                ])
                .allow_headers(vec![header::CONTENT_TYPE, header::ACCEPT])
                .expose_headers(vec![header::LINK])
                .max_age(300)
                .allow_any_origin(),
        );

    warp::serve(routes).run(([127, 0, 0, 1], 8000)).await;
}

fn with_db(db_pool: DBPool) -> impl Filter<Extract = (DBPool,), Error = Infallible> + Clone {
    warp::any().map(move || db_pool.clone())
}

复制代码
要解开的东西很多,所以让我们来看看。
首先,我们定义模块和一些类型,以节省打字的时间。然后,在main 函数中(或tokio::main ,我们应用程序的异步入口点),我们首先初始化数据库池和数据库。
在底部,有一个with_db 过滤器,这是warp中传递数据给处理程序的首选方式--在这里是连接池。
然后,我们定义几个路由基数:pet ,它的形式是/owner/$ownerId/pet ;pet_param ,它在末尾添加了一个/$petId ;owner ,它只是包含/owner 。
有了这些基础,我们可以定义我们的路由,通向不同的处理程序。
GET /owner列出所有的所有者GET /owner/$ownerId返回具有给定ID的所有者POST /owner创建一个主人GET /owner/$ownerid/pet列出给定主人的所有宠物POST /owner/$ownerId/pet为给定的主人创建一个宠物DELETE /owner/$ownerId/pet/$petId删除具有给定ID和主人ID的宠物。
然后我们用一个CORS配置把所有的东西连接起来,并在端口8000 上运行服务器。
至此,backend 。你可以通过简单地运行cargo run ,只要你有一个在端口7878 (例如,使用Docker)运行的Postgres数据库,你将有REST API在http://localhost:8000。
你可以通过运行类似这样的命令,用cURL来测试它。
curl -X POST http://localhost:8000/owner -d '{"name": "mario"}' -H 'content-type: application/json'

curl -v -X POST http://localhost:8000/owner/1/pet -d '{"name": "minka", "animal_type": "cat", "color": "black-brown-white"}' -H 'content-type: application/json'

复制代码
前台的实现
现在我们有了一个功能齐全的后端,我们需要一种与之互动的方式。
在frontend ,我们将从lib.rs 的顶部开始,然后通过组件往下走,因为一步一步地走过组件树会更自然。
我们将使用yew_router 进行路由。否则,我们将使用与Yew官方文档中建议的相同设置,使用 [trunk](https://github.com/thedodd/trunk)来构建和提供网络应用。
在我们的应用程序中,有两个模块,pet 和owner 。然而,在我们开始编写任何Rust代码之前,我们需要在我们的frontend 项目根中创建我们的index.html 文件,包括我们将使用的样式。
<html>
  <head>
    <title>Rust Fullstack Example</title>
    <style>
        body {
            font-size: 14px;
            font-family: sans-serif;
        }
        a {
            text-decoration: none;
            color: #339;
        }
        a:hover {
            text-decoration: none;
            color: #33f;
        }
        .app {
            background-color: #efefef;
            margin: 100px 25% 25% 25%;
            width: 50%;
            padding: 10px;
        }
        .app .nav {
            text-align: center;
            font-size: 16px;
            font-weight: bold;
        }
        .app .refresh {
            text-align: center;
            margin: 10px 0 10px 0;
        }
        .list-item {
            margin: 2px;
            padding: 5px;
            background-color: #cfc;
        }
        .pet {
            margin-top: 10px;
        }
        .completed {
            text-decoration: line-through;
            background-color: #dedede;
        }
        .detail {
            font-size: 16px;
        }
        .detail h1 {
            font-size: 24px;
        }
        .detail .id {
            color: #999;
        }
        .detail .completed {
            color: #3f3;
        }
        .detail .not-completed {
            color: #f33;
        }
    </style>
  </head>
</html>

复制代码这个HTML文件将被作为一个起点,trunk ,当我们构建应用程序时,将在dist 文件夹中添加相应的片段,使我们的应用程序与之配合。
从根部开始
让我们从顶部开始,lib.rs 。
我们首先定义一些模块和一个包含我们根组件的结构,以及一些路由。
mod owner;
mod pet;

pub type Anchor = RouterAnchor<AppRoute>;

struct FullStackApp {}

pub enum Msg {}

#[derive(Switch, Clone, Debug)]
pub enum AppRoute {
    #[to = "/app/create-owner"]
    CreateOwner,
    #[to = "/app/create-pet/{id}"]
    CreatePet(i32),
    #[to = "/app/{id}"]
    Detail(i32),
    #[to = "/"]
    Home,
}

复制代码我们的应用程序有路由用于Home (例如,列出主人),用于查看主人的详细页面,以及用于创建主人和宠物。
然后,我们为我们的FullStackApp 实现了Component 特质,这样我们就可以把它作为一个入口点。
impl Component for FullStackApp {
    type Message = Msg;
    type Properties = ();
    fn create(_: Self::Properties, _link: ComponentLink<Self>) -> Self {
        Self {}
    }

    fn update(&mut self, _msg: Self::Message) -> ShouldRender {
        true
    }

    fn change(&mut self, _props: Self::Properties) -> ShouldRender {
        true
    }

    fn view(&self) -> Html {
        html! {
            <div class=classes!("app")>
                <div class=classes!("nav")>
                    <Anchor route=AppRoute::Home>{"Home"}</Anchor>
                </div>
                <div class=classes!("content")>
                    <Router<AppRoute, ()>
                        render = Router::render(move |switch: AppRoute| {
                            match switch {
                                AppRoute::CreateOwner => {
                                    html! {
                                        <div>
                                            <owner::create::CreateForm />
                                        </div>}
                                }
                                AppRoute::CreatePet(owner_id) => {
                                    html! {
                                        <div>
                                            <pet::create::CreateForm owner_id=owner_id/>
                                        </div>}
                                }
                                AppRoute::Detail(owner_id) => {
                                    html! {
                                        <div>
                                            <owner::detail::Detail owner_id=owner_id/>
                                        </div>}
                                }
                                AppRoute::Home => {
                                    html! {
                                        <div>
                                            <owner::list::List />
                                            <br />
                                            <Anchor route=AppRoute::CreateOwner>
                                                { "Create New Owner" }
                                            </Anchor>
                                        </div>
                                    }
                                }
                            }
                        })
                    />
                </div>
            </div>
        }
    }
}

复制代码我们的根组件其实并没有做什么;它只是包含了一个简单的菜单,有一个Home 的链接,它总是可见的,然后包括了路由器,对于我们的每一条路线,它配置了哪些组件应该被显示,哪些只是额外的标记。
例如,对于AppRoute::Home ,我们默认的Home 路由,我们显示一个所有者列表和一个指向Create New Owner 表格的链接。
最后,我们需要下面的片段来使Wasm-magic工作,这样我们就可以从trunk ,得到一个实际的网络应用。
#[wasm_bindgen(start)]
pub fn run_app() {
    App::<FullStackApp>::new().mount_to_body();
}

复制代码
业主名单
让我们从Home 上显示的所有者列表开始,因为它是最简单的组件。
在owner 模块中,我们创建了一个mod.rs 文件,一个create.rs ,一个detail.rs 和一个list.rs 文件。
在mod.rs ,我们简单地导出这些模块。
pub mod create;
pub mod detail;
pub mod list;

复制代码然后,我们开始实现list.rs 。
我们的目标是从后台获取所有者列表,并显示每个所有者链接到其详细页面。
我们首先定义List 结构,它是我们组件的基础。
pub struct List {
    fetch_task: Option<FetchTask>,
    owners: Option<Vec<OwnerResponse>>,
    link: ComponentLink<Self>,
}

复制代码
ComponentLink 是Yew在组件内部发送消息的方法,例如,触发网络请求等副作用。
因为我们使用Yew的FetchService ,所以我们还需要保存我们要用来从后端获取所有者的fetch_task 。
owners 列表一开始是None ,一旦向后端请求(希望)返回一个所有者的列表,就会被填充。
然后,我们定义我们的Msg 枚举,定义由组件处理的消息。
pub enum Msg {
    MakeReq,
    Resp(Result<Vec<OwnerResponse>, anyhow::Error>),
}

复制代码
我们简单地创建一个动作来发出请求,一个动作来接收来自后端的结果。
有了这些,我们就可以实现Component ,如下所示。
impl Component for List {
    type Properties = ();
    type Message = Msg;

    fn create(_props: Self::Properties, link: ComponentLink<Self>) -> Self {
        link.send_message(Msg::MakeReq);
        Self {
            fetch_task: None,
            link,
            owners: None,
        }
    }

    fn view(&self) -> Html {
        html! {
            <div>
                { self.render_list() }
            </div>
        }
    }

    fn update(&mut self, msg: Self::Message) -> ShouldRender {
        match msg {
            Msg::MakeReq => {
                self.owners = None;
                let req = Request::get("http://localhost:8000/owner")
                    .body(Nothing)
                    .expect("can make req to backend");

                let cb = self.link.callback(
                    |response: Response<Json<Result<Vec<OwnerResponse>, anyhow::Error>>>| {
                        let Json(data) = response.into_body();
                        Msg::Resp(data)
                    },
                );

                let task = FetchService::fetch(req, cb).expect("can create task");
                self.fetch_task = Some(task);
                ()
            }
            Msg::Resp(resp) => {
                if let Ok(data) = resp {
                    self.owners = Some(data);
                }
            }
        }
        true
    }

    fn change(&mut self, _props: Self::Properties) -> ShouldRender {
        true
    }
}

复制代码当组件被创建时,我们使用组件链接来触发MakeReq ,向后端发送一个对所有者的请求。然后我们初始化该组件。
在update ,我们处理请求和响应信息,使用FetchService ,将请求发送到 [http://localhost:8000/owner](http://localhost:8000/owner),在那里我们的后端为我们提供所有者的列表。
然后我们在回调中解析响应,并调用Msg::Resp(data) ,如果没有发生错误,将把数据设置到我们的组件中。
在render 函数中,我们简单地调用render_list ,我们在List 本身实现,如下所示。
impl List {
    fn render_list(&self) -> Html {
        if let Some(t) = &self.owners {
            html! {
                <div class=classes!("list")>
                    { t.iter().map(|name| self.view_owner(name)).collect::<Html>() }
                </div>
            }
        } else {
            html! {
                <div class=classes!("loading")>{"loading..."}</div>
            }
        }
    }

    fn view_owner(&self, owner: &OwnerResponse) -> Html {
        html! {
            <div class=classes!("list-item")>
                <Anchor route=AppRoute::Detail(owner.id as i32)>
                    { &owner.name }
                </Anchor>
            </div>
        }
    }
}

复制代码基本上,如果我们设置了self.owners ,我们就在列表中进行迭代,并为每个人呈现view_owner 。这将创建一个带有所有者ID的AppRoute::Detail ,这是一个指向详细页面的链接。
如果我们没有数据,我们会显示一个loading… 的信息。
这就是清单所有者的情况。让我们继续在detail.rs 的详细页面。
为业主创建一个详细的页面
业主的详细页面有点棘手。在这里,我们需要做两个请求:一个是获取具有给定主人ID的主人(所以我们也可以刷新页面并直接使用该路径),以及主人的宠物列表。此外,我们还必须在这里实现删除宠物的功能。
一般的想法是一样的。
#[derive(Properties, Clone, PartialEq)]
pub struct Props {
    pub owner_id: i32,
}

pub struct Detail {
    props: Props,
    link: ComponentLink<Self>,
    pets: Option<Vec<PetResponse>>,
    owner: Option<OwnerResponse>,
    fetch_pets_task: Option<FetchTask>,
    fetch_owner_task: Option<FetchTask>,
    delete_pet_task: Option<FetchTask>,
}

pub enum Msg {
    MakePetsReq(i32),
    MakeOwnerReq(i32),
    MakeDeletePetReq(i32, i32),
    RespPets(Result<Vec<PetResponse>, anyhow::Error>),
    RespOwner(Result<OwnerResponse, anyhow::Error>),
    RespDeletePet(Response<Json<Result<(), anyhow::Error>>>, i32),
}

复制代码我们为被调用的组件定义道具--在这种情况下,就是路由路径中的owner id 。
然后,我们定义Detail 结构,它持有我们组件的数据,包括我们要获取的pets 和owner ,以及组件的链接和用于获取宠物、获取主人和删除宠物的props和FetchTasks 。
让我们看一下组件的实现。
impl Component for Detail {
    type Properties = Props;
    type Message = Msg;

    fn create(props: Self::Properties, link: ComponentLink<Self>) -> Self {
        link.send_message(Msg::MakePetsReq(props.owner_id));
        link.send_message(Msg::MakeOwnerReq(props.owner_id));
        Self {
            props,
            link,
            owner: None,
            pets: None,
            fetch_pets_task: None,
            fetch_owner_task: None,
            delete_pet_task: None,
        }
    }

    fn view(&self) -> Html {
        html! {
            <div>
                { self.render_detail(&self.owner, &self.pets)}
            </div>
        }
    }

    fn update(&mut self, msg: Self::Message) -> ShouldRender {
        match msg {
            Msg::MakePetsReq(id) => {
                let req = Request::get(&format!("http://localhost:8000/owner/{}/pet", id))
                    .body(Nothing)
                    .expect("can make req to backend");

                let cb = self.link.callback(
                    |response: Response<Json<Result<Vec<PetResponse>, anyhow::Error>>>| {
                        let Json(data) = response.into_body();
                        Msg::RespPets(data)
                    },
                );

                let task = FetchService::fetch(req, cb).expect("can create task");
                self.fetch_pets_task = Some(task);
                ()
            }
            Msg::MakeOwnerReq(id) => {
                let req = Request::get(&format!("http://localhost:8000/owner/{}", id))
                    .body(Nothing)
                    .expect("can make req to backend");

                let cb = self.link.callback(
                    |response: Response<Json<Result<OwnerResponse, anyhow::Error>>>| {
                        let Json(data) = response.into_body();
                        Msg::RespOwner(data)
                    },
                );

                let task = FetchService::fetch(req, cb).expect("can create task");
                self.fetch_owner_task = Some(task);
                ()
            }
            Msg::MakeDeletePetReq(owner_id, pet_id) => {
                let req = Request::delete(&format!(
                    "http://localhost:8000/owner/{}/pet/{}",
                    owner_id, pet_id
                ))
                .body(Nothing)
                .expect("can make req to backend");

                let cb = self.link.callback(
                    move |response: Response<Json<Result<(), anyhow::Error>>>| {
                        Msg::RespDeletePet(response, pet_id)
                    },
                );

                let task = FetchService::fetch(req, cb).expect("can create task");
                self.delete_pet_task = Some(task);
                ()
            }
            Msg::RespPets(resp) => {
                if let Ok(data) = resp {
                    self.pets = Some(data);
                }
            }
            Msg::RespOwner(resp) => {
                if let Ok(data) = resp {
                    self.owner = Some(data);
                }
            }
            Msg::RespDeletePet(resp, id) => {
                if resp.status().is_success() {
                    self.pets = self
                        .pets
                        .as_ref()
                        .map(|pets| pets.into_iter().filter(|p| p.id != id).cloned().collect());
                }
            }
        }
        true
    }

    fn change(&mut self, props: Self::Properties) -> ShouldRender {
        self.props = props;
        true
    }
}

复制代码基本原理是一样的,我们的view 调用一个render_detail 函数,我们稍后会看一下,在create ,我们也初始化我们的组件,并通过发送相应的消息和给定的owner_id 来触发对宠物和主人的获取。
在update ,我们需要实现获取宠物和主人的请求和响应处理程序。这些几乎与List 组件中的完全相同,只是有不同的URL和不同的返回类型。
在MakeDeletePetReq 的处理程序中,我们使用给定的owner_id 和pet_id 发送DELETE 请求。如果成功,我们就触发Msg::RespDeletePet 消息。
在那里,如果请求成功,我们简单地从我们的宠物列表中删除具有给定ID的宠物。这很好,因为它意味着我们不需要重新获取整个宠物列表。
让我们来看看主人详细信息的渲染代码。
impl Detail {
    fn render_detail(
        &self,
        owner: &Option<OwnerResponse>,
        pets: &Option<Vec<PetResponse>>,
    ) -> Html {
        match owner {
            Some(o) => {
                html! {
                    <div class=classes!("detail")>
                        <h1>{&o.name}{" ("}<span class=classes!("id")>{o.id}</span>{")"}</h1>
                        {
                            self.view_pet_list(pets)
                        }

                    <br />
                    <Anchor route=AppRoute::CreatePet(o.id as i32)>
                        { "Create New Pet" }
                    </Anchor>
                    </div>
                }
            }
            None => {
                html! {
                    <div class=classes!("loading")>{"loading..."}</div>
                }
            }
        }
    }

    fn view_pet_list(&self, pets: &Option<Vec<PetResponse>>) -> Html {
        match pets {
            Some(p) => {
                html! {
                    p.iter().map(|pet| self.view_pet(pet)).collect::<Html>()
                }
            }
            None => {
                html! {
                    <div class=classes!("loading")>{"loading..."}</div>
                }
            }
        }
    }

    fn view_pet(&self, pet: &PetResponse) -> Html {
        let id = pet.id;
        let owner_id = self.props.owner_id;
        html! {
            <div class=classes!("list-item", "pet")>
                <div><b>{ &pet.name }</b> { " (" } <button onclick=self.link.callback(move |_| Msg::MakeDeletePetReq(owner_id, id))>{"Delete"}</button> {")"}</div>
                <div>{ &pet.animal_type }</div>
                <div>{ &pet.color.as_ref().unwrap_or(&String::new()) }</div>
            </div>
        }
    }
}

复制代码同样,如果我们有数据,我们就渲染它。否则,我们会显示一个loading… 。一旦我们有了owner ,我们就渲染它的名字和旁边的ID。
下面,我们渲染宠物列表,在view_pet ,实际渲染宠物。我们还创建了删除宠物的按钮,它有一个onclick 处理程序,触发MsgMakeDeletePetReq 消息。
在宠物列表的下面,我们显示一个指向创建宠物路线的链接。
我们几乎已经完成了。现在我们只需要看一下创建主人和宠物的组件。让我们从create.rs 中的主人开始。
pub struct CreateForm {
    link: ComponentLink<Self>,
    fetch_task: Option<FetchTask>,
    state_name: String,
}

pub enum Msg {
    MakeReq,
    Resp(Result<OwnerResponse, anyhow::Error>),
    EditName(String),
}

复制代码同样,我们从Component 结构和Msg 枚举开始。
在这种情况下,我们需要数据基础设施来提出创建主人的请求,但我们也需要一种方法来创建和编辑一个表单。
为此,我们在组件上创建了state_name 字段,在Msg 中创建了EditName(String) 。
接下来让我们看一下Component 的实现。
impl Component for CreateForm {
    type Properties = ();
    type Message = Msg;

    fn create(_props: Self::Properties, link: ComponentLink<Self>) -> Self {
        Self {
            link,
            state_name: String::new(),
            fetch_task: None,
        }
    }

    fn view(&self) -> Html {
        html! {
            <div>
                { self.render_form() }
            </div>
        }
    }

    fn update(&mut self, msg: Self::Message) -> ShouldRender {
        match msg {
            Msg::MakeReq => {
                let body = OwnerRequest {
                    name: self.state_name.clone(),
                };
                let req = Request::post("http://localhost:8000/owner")
                    .header("Content-Type", "application/json")
                    .body(Json(&body))
                    .expect("can make req to backend");

                let cb = self.link.callback(
                    |response: Response<Json<Result<OwnerResponse, anyhow::Error>>>| {
                        let Json(data) = response.into_body();
                        Msg::Resp(data)
                    },
                );

                let task = FetchService::fetch(req, cb).expect("can create task");
                self.fetch_task = Some(task);
                ()
            }
            Msg::Resp(resp) => {
                ConsoleService::info(&format!("owner created: {:?}", resp));
                if let Ok(_) = resp {
                    RouteAgent::dispatcher().send(RouteRequest::ChangeRoute(Route {
                        route: "/".to_string(),
                        state: (),
                    }));
                }
            }
            Msg::EditName(input) => {
                self.state_name = input;
            }
        }
        true
    }

    fn change(&mut self, _props: Self::Properties) -> ShouldRender {
        true
    }
}

impl CreateForm {
    fn render_form(&self) -> Html {
        let edit_name = self
            .link
            .callback(move |e: InputData| Msg::EditName(e.value));

        html! {
            <div class=classes!("pet-form")>
                <div>
                    <input type="text" value={self.state_name.clone()} oninput={edit_name} />
                </div>
                <div>
                    <button onclick=self.link.callback(move |_| Msg::MakeReq)>{"Submit"}</button>
                </div>
            </div>
        }
    }
}

复制代码正如你所看到的,在render_form 内的CreateForm 实现中,我们创建了一个简单的表单输入字段,它把self.state_name 作为一个值。这意味着它直接与我们的状态相连。
我们使用oninput 事件处理程序,在每次有人向输入字段写入文本时,用输入字段的值调用Msg::EditName 消息。
当你看一下Component 实现中的update 函数时,Msg::EditName 的处理程序只是将self.state_name 设置为输入中的给定值。这确保了我们的组件中总是有表单字段中的值。
一旦我们点击Submit 按钮,触发Msg::MakeReq ,这就很重要。在那里,我们创建一个JSON有效载荷,使用self.state_name 作为name 的值来创建一个所有者。
然后,我们把这个有效载荷发送到后端端点,用于创建一个所有者,如果一切成功,使用yew_router'sRouteAgent 和调度器,手动把路由改回"/" ,我们的主页路由。
宠物的详细页面
这就是Yew的表单处理是多么的简单啊!让我们看看谜题的最后部分,创建一个pet 模块,里面有一个mod.rs 和create.rs 。
在mod.rs 中,我们同样只是导出create 。
pub mod create;

复制代码在create.rs ,我们实现添加新宠物的组件,这将与我们刚刚实现的主人的CreateForm 非常相似。
#[derive(Properties, Clone, PartialEq)]
pub struct Props {
    pub owner_id: i32,
}

pub struct CreateForm {
    props: Props,
    link: ComponentLink<Self>,
    fetch_task: Option<FetchTask>,
    state_pet_name: String,
    state_animal_type: String,
    state_color: Option<String>,
}

pub enum Msg {
    MakeReq(i32),
    Resp(Result<PetResponse, anyhow::Error>),
    EditName(String),
    EditAnimalType(String),
    EditColor(String),
}

复制代码
CreatePet 表单把我们想为其创建宠物的主人的owner_id 作为一个道具。
然后,我们定义state_pet_name 、state_animal_type 、state_color ,以保持我们的三个表单字段的状态,与我们对主人所做的一样。
对于Msg ,情况也是一样的:我们需要为每个表单字段提供处理程序,同时也需要为create pet 请求和处理其响应。
让我们来看看Component 的实现和渲染逻辑。
impl Component for CreateForm {
    type Properties = Props;
    type Message = Msg;

    fn create(props: Self::Properties, link: ComponentLink<Self>) -> Self {
        Self {
            props,
            link,
            state_pet_name: String::new(),
            state_animal_type: String::from("cat"),
            state_color: Some(String::from("black")),
            fetch_task: None,
        }
    }

    fn view(&self) -> Html {
        html! {
            <div>
                { self.render_form(self.props.owner_id) }
            </div>
        }
    }

    fn update(&mut self, msg: Self::Message) -> ShouldRender {
        match msg {
            Msg::MakeReq(id) => {
                let body = PetRequest {
                    name: self.state_pet_name.clone(),
                    animal_type: self.state_animal_type.clone(),
                    color: self.state_color.clone(),
                };
                let req = Request::post(&format!("http://localhost:8000/owner/{}/pet", id))
                    .header("Content-Type", "application/json")
                    .body(Json(&body))
                    .expect("can make req to backend");

                let cb = self.link.callback(
                    |response: Response<Json<Result<PetResponse, anyhow::Error>>>| {
                        let Json(data) = response.into_body();
                        Msg::Resp(data)
                    },
                );

                let task = FetchService::fetch(req, cb).expect("can create task");
                self.fetch_task = Some(task);
                ()
            }
            Msg::Resp(resp) => {
                ConsoleService::info(&format!("pet created: {:?}", resp));
                if let Ok(_) = resp {
                    RouteAgent::dispatcher().send(RouteRequest::ChangeRoute(Route {
                        route: format!("/app/{}", self.props.owner_id),
                        state: (),
                    }));
                }
            }
            Msg::EditName(input) => {
                self.state_pet_name = input;
            }
            Msg::EditAnimalType(input) => {
                ConsoleService::info(&format!("input: {:?}", input));
                self.state_animal_type = input;
            }
            Msg::EditColor(input) => {
                self.state_color = Some(input);
            }
        }
        true
    }

    fn change(&mut self, props: Self::Properties) -> ShouldRender {
        self.props = props;
        true
    }
}

impl CreateForm {
    fn render_form(&self, owner_id: i32) -> Html {
        let edit_name = self
            .link
            .callback(move |e: InputData| Msg::EditName(e.value));
        let edit_animal_type = self.link.callback(move |e: ChangeData| match e {
            ChangeData::Select(elem) => Msg::EditAnimalType(elem.value()),
            _ => unreachable!("only used on select field"),
        });
        let edit_color = self
            .link
            .callback(move |e: InputData| Msg::EditColor(e.value));

        html! {
            <div class=classes!("pet-form")>
                <div>
                    <input type="text" value={self.state_pet_name.clone()} oninput={edit_name} />
                </div>
                <div>
                    <select onchange={edit_animal_type}>
                        <option value="cat" selected=true>{ "Cat" }</option>
                        <option value="dog">{ "Dog" }</option>
                    </select>
                </div>
                <div>
                    <input type="text" value={self.state_color.clone()} oninput={edit_color} />
                </div>
                <div>
                    <button onclick=self.link.callback(move |_| Msg::MakeReq(owner_id))>{"Submit"}</button>
                </div>
            </div>
        }
    }
}

复制代码让我们从CreateForm 中的render_form 函数开始。在这里,我们再次为宠物的所有字段创建输入字段。然而,这一次有一个转折:我们为动物类型使用了一个select 字段,因为我们想把它限制在猫和狗身上。
这意味着,对于edit_animal_type 的回调处理程序,我们得到一个ChangeData ,而不是一个InputData 。在它里面,我们需要对变化的类型进行匹配。我们只想对ChangeData::Select(elem) ,并获取该元素的值,将其发送到我们的组件状态中进行设置。
对于其他两个字段,其过程与我们的Create Owner 组件中相同。
就Component 的实现而言,这里也没有什么新东西。我们实现了在后端调用create pet 端点的处理程序,以及将表单输入字段的值传递给我们的状态的处理程序,所以我们可以为这个端点创建有效载荷。
随着这最后一个组件的完成,我们的Rust全栈网络应用的实现就完成了剩下的事情就是测试它是否真的能运行。
测试我们的Rust全栈应用
我们可以用运行在7878端口的Postgres数据库来运行frontend 和backend (导航到http://localhost:8080)。
在那里,迎接我们的是一个空的Home 屏幕。我们可以点击 "创建新的所有者",这就向我们展示了这个表格。

提交将创建所有者,我们将在列表中看到Home 。

接下来,让我们点击新主人,看看主人的详细页面。

现在我们可以使用Create New Pet 开始添加一些宠物。

一旦我们完成了,我们就会被重定向到业主详情页,它显示了我们新添加的宠物列表。
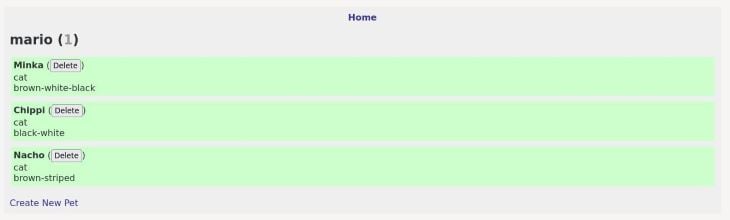
最后,我们可以尝试通过点击旁边的删除按钮来删除一个宠物。
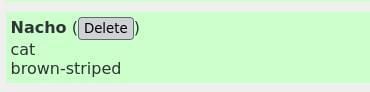
太棒了,它成功了!所有这些都是用Rust编写的。
你可以在GitHub上找到这个例子的完整代码。
总结
在本教程中,我们演示了如何完全用Rust构建一个简单的全栈网络应用。我们介绍了如何使用Cargo创建一个多模块工作空间,以及如何在应用程序的前端和后端部分之间共享代码。
因此,Rust的网络生态系统仍在不断成熟,所以你已经可以用太多的模糊来构建现代的全栈网络应用,这令人印象深刻。
我很高兴看到Wasm的旅程如何继续,我非常期待看到Rust异步网络生态系统进一步发展,稳定性、兼容性和库的丰富性得到改善。
无论如何,Rust中的网络开发的未来看起来很有希望!
The postFull-Stack Rust:全栈Rust:带例子的完整教程》首次出现在LogRocket博客上。