1. Seata 简介
Seata(Simple Extensible Autonomous Transaction Architecture) 是一款开源的分布式事务解决方案,致力于提供高性能和简单易用的分布式事务服务。Seata 将为用户提供了 AT、TCC、SAGA 和 XA 事务模式,为用户打造一站式的分布式解决方案。
简要发展史
我们简单了解一下相关的发展史。阿里巴巴作为国内领先的互联网公司,在微服务的实践,分布式事务问题的处理都是比较早的,已经具备了很强沉淀积累。
-
2014 - 阿里中间件团队发布txc(taobao transaction constructor)在阿里内部提供分布式事务服务;
-
2016 - txc经过改造和升级,变成了gts(global transaction service)在阿里云作为服务对外开放,也成为当时唯一一款对外的服务;
-
2019 - 阿里经过txc和gts的技术积累,决定开源(Apache开源协议)。并且,在github上发起了一个项目叫做fescar(fast easy commit and rollback)开始拥有了社区群体;
-
2019 - fescar被重命名为了seata(simple extensiable autonomous transaction architecture),项目迁移到了新的github地址。
Seata 设计初衷
-
高性能:减少分布式事务解决方案所带来的性能消耗。
-
对业务无侵入:即减少技术架构上的微服务化所带来的分布式事务问题对业务的侵入。
2. 使用 Docker 快速搭建 Seata 1.4
-
在 linux 服务器上选择并建立目录;
mkdir seata-docker
-
进入 seata-docker 目录,建立一个名为 registry.conf 的配置文件,内容如下:
config {
  type = "nacos"

  nacos {
    serverAddr = "(安装Nacos机器的IP):8848"
    group = "SEATA_GROUP"
    namespace = ""
    username = "nacos"
    password = "nacos"
  }
}

registry {
  type = "nacos"

  nacos {
    application = "seata-server"
    serverAddr = "(安装Nacos机器的IP):8848"
    group = "SEATA_GROUP"
    namespace = ""
    cluster = "default"
    username = ""
    password = ""
  }
}
注意:这里先别急着操作下一步,我要向大家解释一下这个配置文件。
-
registry.type = "nacos":表示 Seata 服务的注册中心选择 Nacos;Seata 提供了多种注册中心供我们使用,如 eureka、redis、zk、consul、etcd3、sofa、apollo,选择不同的 type,对应修改不同的配置信息。
-
config.type = "nacos":表示 Seata 服务的配置存储于 Nacos;Seata 提供了多种配置方式供我们使用,如 file、redis、zk、consul、etcd3、apollo,选择不同的 type,对应修改不同的配置信息。
不管采用那种配置存储方式,总需要有个配置文件吧,我先贴一下配置文件 config.txt:
transport.type=TCP
transport.server=NIO
transport.heartbeat=true
transport.enableClientBatchSendRequest=false
transport.threadFactory.bossThreadPrefix=NettyBoss
transport.threadFactory.workerThreadPrefix=NettyServerNIOWorker
transport.threadFactory.serverExecutorThreadPrefix=NettyServerBizHandler
transport.threadFactory.shareBossWorker=false
transport.threadFactory.clientSelectorThreadPrefix=NettyClientSelector
transport.threadFactory.clientSelectorThreadSize=1
transport.threadFactory.clientWorkerThreadPrefix=NettyClientWorkerThread
transport.threadFactory.bossThreadSize=1
transport.threadFactory.workerThreadSize=default
transport.shutdown.wait=3
service.vgroupMapping.my_test_tx_group=default
service.default.grouplist=127.0.0.1:8091
service.enableDegrade=false
service.disableGlobalTransaction=false
client.rm.asyncCommitBufferLimit=10000
client.rm.lock.retryInterval=10
client.rm.lock.retryTimes=30
client.rm.lock.retryPolicyBranchRollbackOnConflict=true
client.rm.reportRetryCount=5
client.rm.tableMetaCheckEnable=false
client.rm.tableMetaCheckerInterval=60000
client.rm.sqlParserType=druid
client.rm.reportSuccessEnable=false
client.rm.sagaBranchRegisterEnable=false
client.tm.commitRetryCount=5
client.tm.rollbackRetryCount=5
client.tm.defaultGlobalTransactionTimeout=60000
client.tm.degradeCheck=false
client.tm.degradeCheckAllowTimes=10
client.tm.degradeCheckPeriod=2000
store.mode=file
store.publicKey=
store.file.dir=file_store/data
store.file.maxBranchSessionSize=16384
store.file.maxGlobalSessionSize=512
store.file.fileWriteBufferCacheSize=16384
store.file.flushDiskMode=async
store.file.sessionReloadReadSize=100
store.db.datasource=druid
store.db.dbType=mysql
store.db.driverClassName=com.mysql.jdbc.Driver
store.db.url=jdbc:mysql://127.0.0.1:3306/seata?useUnicode=true&rewriteBatchedStatements=true
store.db.user=username
store.db.password=password
store.db.minConn=5
store.db.maxConn=30
store.db.globalTable=global_table
store.db.branchTable=branch_table
store.db.queryLimit=100
store.db.lockTable=lock_table
store.db.maxWait=5000
store.redis.mode=single
store.redis.single.host=127.0.0.1
store.redis.single.port=6379
store.redis.maxConn=10
store.redis.minConn=1
store.redis.maxTotal=100
store.redis.database=0
store.redis.password=
store.redis.queryLimit=100
server.recovery.committingRetryPeriod=1000
server.recovery.asynCommittingRetryPeriod=1000
server.recovery.rollbackingRetryPeriod=1000
server.recovery.timeoutRetryPeriod=1000
server.maxCommitRetryTimeout=-1
server.maxRollbackRetryTimeout=-1
server.rollbackRetryTimeoutUnlockEnable=false
client.undo.dataValidation=true
client.undo.logSerialization=jackson
client.undo.onlyCareUpdateColumns=true
server.undo.logSaveDays=7
server.undo.logDeletePeriod=86400000
client.undo.logTable=undo_log
client.undo.compress.enable=true
client.undo.compress.type=zip
client.undo.compress.threshold=64k
log.exceptionRate=100
transport.serialization=seata
transport.compressor=none
metrics.enabled=false
metrics.registryType=compact
metrics.exporterList=prometheus
metrics.exporterPrometheusPort=9898
配置参数非常的多啊,具体不在这里一一解释,可以参考 Seata 官网配置参数。
这里和大家说几个需要关注的配置点。上边提到了两个 type,registry.type 和 config.type,这里还需要一个 mode 就是 store.mode;字面意思一看就知道是持久化的意思,Seata 要实现分布式事务的控制需要一个持久化的存储,提供了多种方式如 file、redis、mysql。
为了简单部署而且是单机模式,这里我们选择:
store.mode=file
选择 redis 和 mysql 的朋友可以自己搭建然后配置 IP 地址和端口改下就行(如果搭建 Seata 集群不能用 file 模式,因为磁盘文件内容无法集群同步)。
-
修改 config.txt 中的参数中的一行(具体原因后边会解释):
service.vgroupMapping.my_test_tx_group=default
vgroupMapping(seata的资源逻辑) 修改为:
service.vgroupMapping.herring_group=default
service.default.grouplist 和 service.disableGlobalTransaction 这两个参数可以不改。
-
事务分组是什么?
事务分组是seata的资源逻辑,类似于服务实例。在file.conf中的my_test_tx_group就是一个事务分组。
-
通过事务分组如何找到后端集群?
首先程序中配置了事务分组(GlobalTransactionScanner 构造方法的txServiceGroup参数),程序会通过用户配置的配置中心去寻找service.vgroupMapping.事务分组配置项,取得配置项的值就是TC集群的名称。拿到集群名称程序通过一定的前后缀+集群名称去构造服务名,各配置中心的服务名实现不同。拿到服务名去相应的注册中心去拉取相应服务名的服务列表,获得后端真实的TC服务列表。
-
为什么这么设计,不直接取服务名?
这里多了一层获取事务分组到映射集群的配置。这样设计后,事务分组可以作为资源的逻辑隔离单位,当发生故障时可以快速failover。
-
什么时候会用到file.conf中的default.grouplist?
当registry.type=file时会用到,其他时候不读。
-
上传 config.txt 中的配置参数到 Nacos,实现动态配置:
如果你嫌麻烦的话, 选择 config.type = "file" 替换 Nacos 的配置, 那就在刚才的 seata-docker 目录下,建立一个名为 file.conf 的配置文件,把 config.txt 的内容复制进去,然后在后边的 docker-compose 脚本中,配置对应的目录映射即可。
config {
  type = "file"

  file {
    name = "file:/root/seata-config/file.conf"
  }
}
我们选择 config.type = "nacos",表示 Seata 服务的配置存储于 Nacos,所以需要将 config.txt 中的配置参数上传到 Nacos。
建立一个脚本文件 nacos-config.sh:
#!/usr/bin/env bash
# Copyright 1999-2019 Seata.io Group.
#
# Licensed under the Apache License, Version 2.0 (the "License");
# you may not use this file except in compliance with the License.
# You may obtain a copy of the License at、
#
#      http://www.apache.org/licenses/LICENSE-2.0
#
# Unless required by applicable law or agreed to in writing, software
# distributed under the License is distributed on an "AS IS" BASIS,
# WITHOUT WARRANTIES OR CONDITIONS OF ANY KIND, either express or implied.
# See the License for the specific language governing permissions and
# limitations under the License.

while getopts ":h:p:g:t:u:w:" opt
do
  case $opt in
  h)
    host=$OPTARG
    ;;
  p)
    port=$OPTARG
    ;;
  g)
    group=$OPTARG
    ;;
  t)
    tenant=$OPTARG
    ;;
  u)
    username=$OPTARG
    ;;
  w)
    password=$OPTARG
    ;;
  ?)
    echo " USAGE OPTION: $0 [-h host] [-p port] [-g group] [-t tenant] [-u username] [-w password] "
    exit 1
    ;;
  esac
done

urlencode() {
  for ((i=0; i < ${#1}; i++))
  do
    char="${1:$i:1}"
    case $char in
    [a-zA-Z0-9.~_-]) printf $char ;;
    *) printf '%%%02X' "'$char" ;;
    esac
  done
}

if [[ -z ${host} ]]; then
    host=localhost
fi
if [[ -z ${port} ]]; then
    port=8848
fi
if [[ -z ${group} ]]; then
    group="SEATA_GROUP"
fi
if [[ -z ${tenant} ]]; then
    tenant=""
fi
if [[ -z ${username} ]]; then
    username=""
fi
if [[ -z ${password} ]]; then
    password=""
fi

nacosAddr=$host:$port
contentType="content-type:application/json;charset=UTF-8"

echo "set nacosAddr=$nacosAddr"
echo "set group=$group"

failCount=0
tempLog=$(mktemp -u)
function addConfig() {
  curl -X POST -H "${contentType}" "http://$nacosAddr/nacos/v1/cs/configs?dataId=$(urlencode $1)&group=$group&content=$(urlencode $2)&tenant=$tenant&username=$username&password=$password" >"${tempLog}" 2>/dev/null
  if [[ -z $(cat "${tempLog}") ]]; then
    echo " Please check the cluster status. "
    exit 1
  fi
  if [[ $(cat "${tempLog}") =~ "true" ]]; then
    echo "Set $1=$2 successfully "
  else
    echo "Set $1=$2 failure "
    (( failCount++ ))
  fi
}

count=0
for line in $(cat $(dirname "$PWD")/config.txt | sed s/[[:space:]]//g); do
  (( count++ ))
  key=${line%%=*}
    value=${line#*=}
  addConfig "${key}" "${value}"
done

echo "========================================================================="
echo " Complete initialization parameters,  total-count:$count ,  failure-count:$failCount "
echo "========================================================================="

if [[ ${failCount} -eq 0 ]]; then
  echo " Init nacos config finished, please start seata-server. "
else
  echo " init nacos config fail. "
fi
然后随便找个地方,建立起这样的目录结构:
| 一级 | 二级 | 三级 |
|---|---|---|
| seata | conf | nacos-config.sh |
| config.txt |

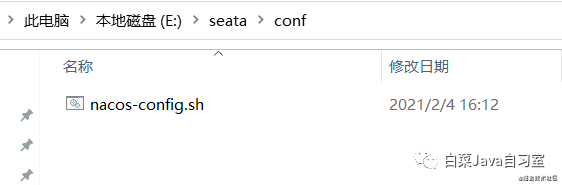
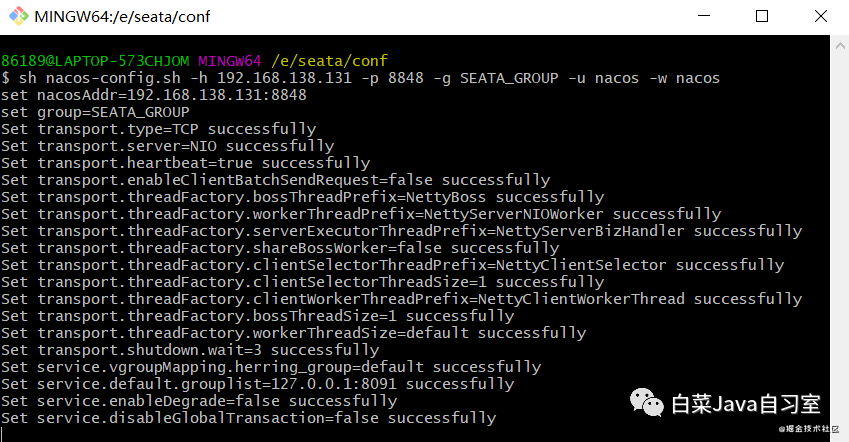
右键选择 git bash here,执行脚本上传:
sh nacos-config.sh -h (安装Nacos机器的IP) -p 8848 -g SEATA_GROUP -t (命名空间ID不传就默认) -u nacos -w nacos
-
上传完配置参数,我们回到 seata-docker 目录,建立名为 seata.yaml 的脚本文件:
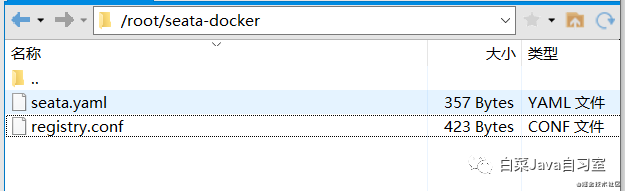
version: "3"
services:
  seata-server:
    image: seataio/seata-server
    hostname: seata-server
    ports:
      - "8091:8091"
    environment:
      - SEATA_IP=(安装Seata机器的IP)
      - SEATA_PORT=8091
      - STORE_MODE=file
      - SEATA_CONFIG_NAME=file:/root/seata-config/registry
    volumes:
      - /root/seata-docker:/root/seata-config
-
执行 seata.yaml 脚本启动容器:
docker-compose -f seata.yaml up
3. 在 Spring 项目中使用 Seata 客户端
-
我们先别急着上 Seata,先来配置 Mybatis 相关,然后单微服务数据更新测试成功;
-
会员服务:herring-member-service,微服务之一,接收到请求后会到认证中心验证。
-
订单服务:herring-orders-service,微服务之二,接收到请求后会到认证中心验证。
-
商品服务:herring-product-service,微服务之三,接收到请求后会到认证中心验证。
前几篇文章中我们建立过这些微服务,还是拿来用,然后对每个微服务都做下边的配置:
POM 文件引入 Mybatis 需要的依赖:
        <dependency>
            <groupId>org.mybatis.spring.boot</groupId>
            <artifactId>mybatis-spring-boot-starter</artifactId>
            <version>2.1.3</version>
        </dependency>
        <dependency>
            <groupId>mysql</groupId>
            <artifactId>mysql-connector-java</artifactId>
            <version>5.1.38</version>
        </dependency>
在 application.yml 中添加相关配置:
spring:
  application:
    name: (服务名字)-service

  datasource:
    driver-class-name: com.mysql.cj.jdbc.Driver
    url: jdbc:mysql://(安装Mysql的机器IP):3306/herring_data?characterEncoding=UTF-8&useSSL=false
    username: root
    password: (你的root密码)

mybatis:
  mapper-locations: classpath:/mapper/*.xml
在数据库 herring_data 中建立 m_member表、o_orders表、p_product表,并添加简单得数据:
-- ----------------------------
-- Table structure for m_member
-- ----------------------------
DROP TABLE IF EXISTS `m_member`;
CREATE TABLE `m_member`  (
  `id` int(11) NOT NULL,
  `num` decimal(16, 2) NOT NULL,
  PRIMARY KEY (`id`) USING BTREE
) ENGINE = InnoDB CHARACTER SET = utf8mb4 COLLATE = utf8mb4_bin ROW_FORMAT = Compact;

-- ----------------------------
-- Records of m_member
-- ----------------------------
INSERT INTO `m_member` VALUES (1, 100.00);

-- ----------------------------
-- Table structure for o_orders
-- ----------------------------
DROP TABLE IF EXISTS `o_orders`;
CREATE TABLE `o_orders`  (
  `id` int(11) NOT NULL,
  `num` decimal(16, 2) NOT NULL,
  PRIMARY KEY (`id`) USING BTREE
) ENGINE = InnoDB CHARACTER SET = utf8mb4 COLLATE = utf8mb4_bin ROW_FORMAT = Compact;

-- ----------------------------
-- Records of o_orders
-- ----------------------------
INSERT INTO `o_orders` VALUES (1, 100.00);

-- ----------------------------
-- Table structure for p_product
-- ----------------------------
DROP TABLE IF EXISTS `p_product`;
CREATE TABLE `p_product`  (
  `id` int(11) NOT NULL,
  `num` decimal(16, 2) NOT NULL,
  PRIMARY KEY (`id`) USING BTREE
) ENGINE = InnoDB CHARACTER SET = utf8mb4 COLLATE = utf8mb4_bin ROW_FORMAT = Compact;

-- ----------------------------
-- Records of p_product
-- ----------------------------
INSERT INTO `p_product` VALUES (1, 100.00);
在 Spring 项目中,用最简单得方式实现下:
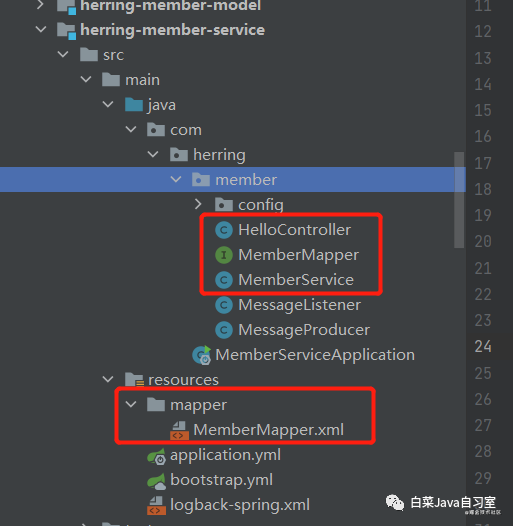
MemberMapper.xml
<?xml version="1.0" encoding="UTF-8" ?>
<!DOCTYPE mapper PUBLIC "-//mybatis.org//DTD Mapper 3.0//EN" "http://mybatis.org/dtd/mybatis-3-mapper.dtd">
<mapper namespace="com.herring.member.MemberMapper">

    <update id="update">
        UPDATE m_member SET num=num+1 WHERE id=1
    </update>

</mapper>
MemberMapper.java
@Mapper
public interface MemberMapper {

    int update();

}
MemberService.java
@Service
public class MemberService {

    @Resource
    private MemberMapper memberMapper;

    public int doUpdate() {
        return memberMapper.update();
    }

}
HelloController.java
@RestController
@RequestMapping
public class HelloController {

    @Resource
    private MemberService memberService;

    @RequestMapping("/update")
    public void update() {
        memberService.doUpdate();
    }

}
member-service,orders-service,product-service 三个项目都按照这个配置,名字复制下改改,然后单机更新测试成功通过。
-
引入 Seata 分布式事务客户端,添加 pom 文件依赖:
        <dependency>
            <groupId>com.alibaba.cloud</groupId>
            <artifactId>spring-cloud-starter-alibaba-seata</artifactId>
        </dependency>
        <dependency>
            <groupId>io.seata</groupId>
            <artifactId>seata-spring-boot-starter</artifactId>
            <version>1.4.0</version>
        </dependency>
-
在配置文件 application.yml 中添加关于 Seata 的配置:
seata:
  tx-service-group: herring_group

  registry:
    type: nacos
    nacos:
      application: seata-server
      server-addr: (安装Nacos机器的IP):8848
      group: SEATA_GROUP
      username: nacos
      password: nacos

  config:
    type: nacos
    nacos:
      server-addr: (安装Nacos机器的IP):8848
      group: SEATA_GROUP
      username: nacos
      password: nacos
注意:这里的 tx-service-group: herring_group,和我们刚才部署服务端的 conf.txt 里的 service.vgroupMapping.herring_group=default 名字必须一致。
-
本身我们项目的限流熔断走的 sentinel,这里为了减少 hystrix 带来不必要的影响和麻烦,建议在 application.yml 中另外添加以下配置:
feign:
  sentinel:
    enabled: true
  hystrix:
    enabled: false
  client:
    config:
      default:
        readTimeout: 60000
        connectTimeout: 60000
-
数据源代理配置。这个是要特别注意的地方,Seata 对数据源做了代理和接管,在每个参与分布式事务的服务中,都要做如下配置:
@Configuration
public class DataSourceConfiguration {

    @Bean
    @ConfigurationProperties(prefix = "spring.datasource")
    public DataSource druidDataSource() {
        DruidDataSource druidDataSource = new DruidDataSource();
        return druidDataSource;
    }

    @Primary
    @Bean("dataSource")
    public DataSourceProxy dataSource(DataSource druidDataSource) {
        return new DataSourceProxy(druidDataSource);
    }

    @Bean
    public SqlSessionFactory sqlSessionFactory(DataSourceProxy dataSourceProxy) throws Exception {
        SqlSessionFactoryBean sqlSessionFactoryBean = new SqlSessionFactoryBean();
        sqlSessionFactoryBean.setDataSource(dataSourceProxy);
        sqlSessionFactoryBean.setMapperLocations(new PathMatchingResourcePatternResolver()
                .getResources("classpath*:/mapper/*.xml"));
        sqlSessionFactoryBean.setTransactionFactory(new SpringManagedTransactionFactory());
        return sqlSessionFactoryBean.getObject();
    }

}
注意还要在项目在剔除 Spring Boot 默认的 DataSourceAutoConfiguration 配置:
@EnableFeignClients
@EnableDiscoveryClient
@SpringBootApplication(exclude = DataSourceAutoConfiguration.class)
public class OrdersServiceApplication {

    public static void main(String[] args) {
        SpringApplication.run(OrdersServiceApplication.class, args);
    }

}
-
我们现在改造下 member-service, 添加对 orders-service,product-service 远程访问的客户端:
@FeignClient(name = "orders-service", path = "/api/orders")
public interface OrdersClient {

    @RequestMapping("/update")
    String update();

}
@FeignClient(name = "product-service", path = "/api/product")
public interface ProductClient {

    @RequestMapping("/update")
    String update();

}
使用注解 @GlobalTransactional, 不止修改本地 m_member 表,还要进行远程调用:
@Service
public class MemberService {

    @Resource
    private MemberMapper memberMapper;
    @Resource
    private ProductClient productClient;
    @Resource
    private OrdersClient ordersClient;

    @GlobalTransactional(rollbackFor = Exception.class)
    public int doUpdate() {
        int result = memberMapper.update();
        ordersClient.update();
        productClient.update();
        return result;
    }

}
-
我们先来测试下正常情况下的结果(下边是三个表的初始数据):
m_member 表:![]()
o_orders 表:![]()
p_product 表:![]()
请求一下 /api/member/update 触发下事务:
GET http://localhost:10801/api/member/update
Accept: */*
Cache-Control: no-cache
查看请求结果:
m_member 表:
o_orders 表:
p_product 表:
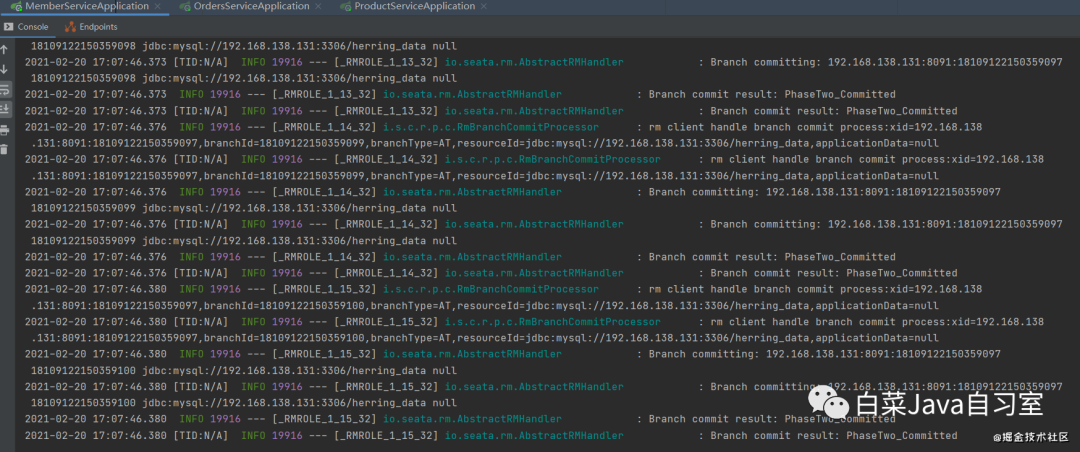
查看输出的日志情况(PhaseTwo_Comitted 二阶段提交成功):
-
我们来修改一下其中一个远程调用微服务,OrdersService 抛出一个异常:
@Service
public class OrdersService {

    @Resource
    private OrdersMapper ordersMapper;

    public int doUpdate() {
        throw new RuntimeException("server error! ");
        // return ordersMapper.update();
    }

}
重启项目后,再次请求一下 /api/member/update 触发下事务:
GET http://localhost:10801/api/member/update
Accept: */*
Cache-Control: no-cache
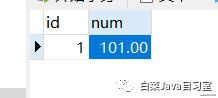
查看请求结果,发现事务回滚了,UPDATE m_member SET num=num+1 WHERE id=1 刚的更新结果 101.00,现在还是 101.00:
m_member 表:
o_orders 表:
p_product 表:
这时 undo_log 表出现记录:

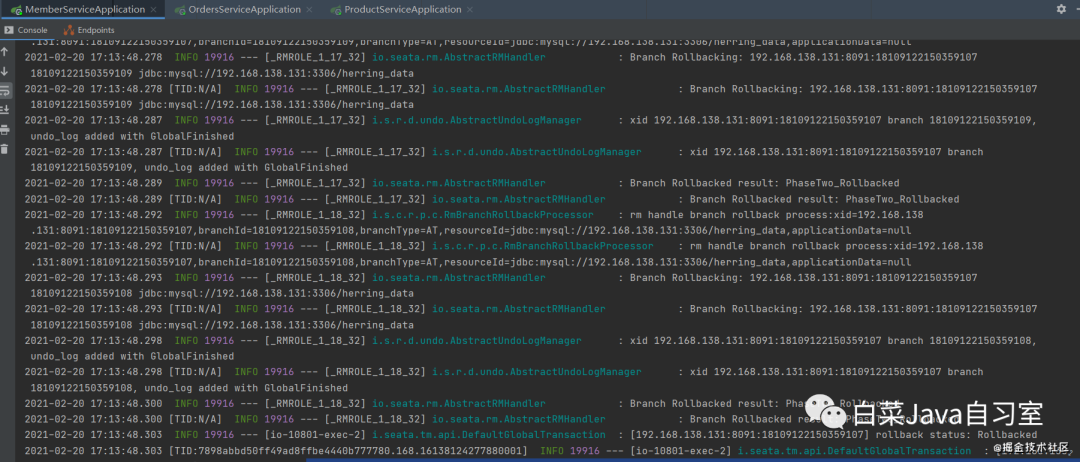
查看输出的日志情况(PhaseTwo_Rollbacked 二阶段提交回滚):
Seata 实现分布式事务有 AT 模式、TCC 模式、Saga 模式、XA 模式,默认状态是 AT 模式。这里做下简单的介绍,具体原理分析将另外开篇。
(AT、TCC、Saga、XA)模式对比:
AT 模式:是无侵入的分布式事务解决方案,适用于不希望对业务进行改造的场景,几乎0学习成本。
TCC 模式:是高性能分布式事务解决方案,适用于核心系统等对性能有很高要求的场景。
Saga 模式:是长事务解决方案,适用于业务流程长且需要保证事务最终一致性的业务系统,Saga 模式一阶段就会提交本地事务,无锁,长流程情况下可以保证性能,多用于渠道层、集成层业务系统。事务参与者可能是其它公司的服务或者是遗留系统的服务,无法进行改造和提供 TCC 要求的接口,也可以使用 Saga 模式。
XA 模式:是分布式强一致性的解决方案,但性能低而使用较少。