一、上电:
上电串口终端输出(波特率115200):
[MAIXPY]Pll0:freq:832000000
[MAIXPY]Pll1:freq:398666666
[MAIXPY]Pll2:freq:45066666
[MAIXPY]cpu:freq:416000000
[MAIXPY]kpu:freq:398666666
[MAIXPY]Flash:0xc8:0x17
open second core...
gc heap=0x802f8c40-0x80378c40(524288)
[MaixPy] init end

 __  __              _____  __   __  _____   __     __
|  \/  |     /\     |_   _| \ \ / / |  __ \  \ \   / /
| \  / |    /  \      | |    \ V /  | |__) |  \ \_/ /
| |\/| |   / /\ \     | |     > <   |  ___/    \   /
| |  | |  / ____ \   _| |_   / . \  | |         | |
|_|  |_| /_/    \_\ |_____| /_/ \_\ |_|         |_|

Official Site : https://www.sipeed.com
Wiki          : https://maixpy.sipeed.com

MicroPython v0.5.0-124-g92d9c04 on 2020-08-26; Sipeed_M1 with kendryte-k210
Type "help()" for more information.
>>>
二、粘贴执行代码:
目的:执行以下代码
import os
f = os.listdir()
print(f)
串口终端执行代码:
### 执行单行代码 ###
>>> print("hello world")
hello world

### 执行多行代码 ###
# 先按 Ctrl+E
# 粘贴多行代码
# 再按 Ctrl+D
>>>
>
paste mode; Ctrl-C to cancel, Ctrl-D to finish
=== import os
=== f = os.listdir()
=== print(f)
===
['freq.conf', 'main.py', 'config.json']
>>>
三、测试摄像头和屏幕:
先按 Ctrl+E ,复制粘贴以下代码,再按 Ctrl+D 运行代码, Ctrl+C 结束运行。
import sensor, lcd

sensor.reset()
sensor.set_pixformat(sensor.RGB565)
sensor.set_framesize(sensor.QVGA)
sensor.run(1)
sensor.skip_frames()

lcd.init(freq=15000000)

while(True):
    lcd.display(sensor.snapshot())
QVGA:320*240HVGA: 480*320VGA:640*480WVGA:800*480
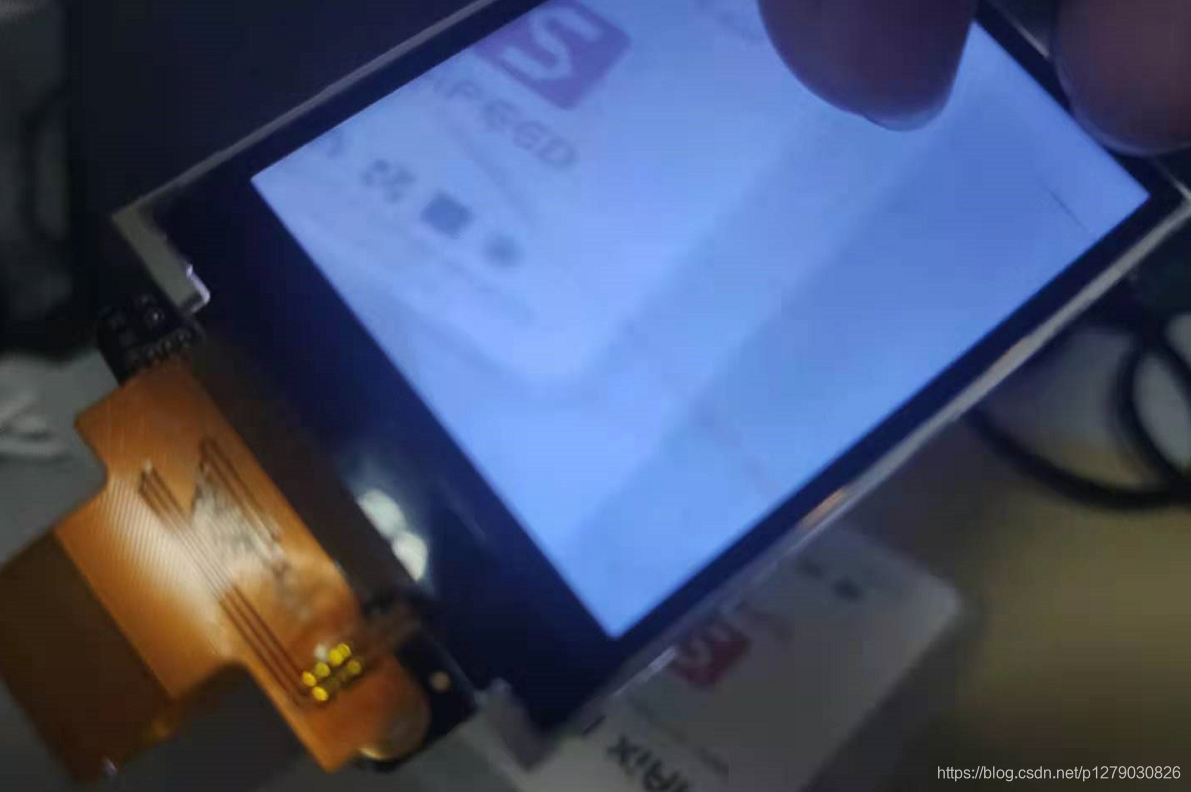
屏幕就会显示摄像头拍到的画面:
四、测试点亮LED:
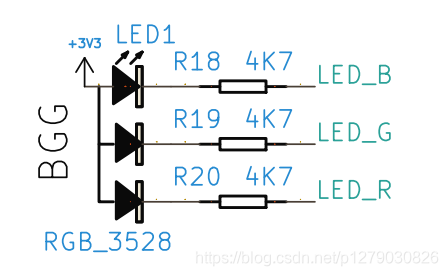
点亮红色 LED:
from fpioa_manager import fm
from Maix import GPIO

led_r_io = 14
fm.register(led_r_io, fm.fpioa.GPIO0)
led_r = GPIO(GPIO.GPIO0, GPIO.OUT)
led_r.value(0)
RGB 流水灯控制:
from fpioa_manager import fm
from Maix import GPIO
import time

led_b_io = 12
led_g_io = 13
led_r_io = 14

fm.register(led_r_io, fm.fpioa.GPIO0)
fm.register(led_g_io, fm.fpioa.GPIO1)
fm.register(led_b_io, fm.fpioa.GPIO2)

led_r = GPIO(GPIO.GPIO0, GPIO.OUT)
led_g = GPIO(GPIO.GPIO1, GPIO.OUT)
led_b = GPIO(GPIO.GPIO2, GPIO.OUT)

while 1:
    led_r.value(0)
    led_g.value(1)
    led_b.value(1)
    time.sleep_ms(500)
    led_r.value(1)
    led_g.value(0)
    led_b.value(1)
    time.sleep_ms(500)
    led_r.value(1)
    led_g.value(1)
    led_b.value(0)
    time.sleep_ms(500)