1 工具 :阿里云服务器,WordPress,
2 部署好阿里云服务器创建好实例以后,用本地的XShell 连接远程服务器,一般的话我喜欢用CentOS系统。连上以后
1 安装一个扩展源
yum install epel-release

2 下载nginx
yum install nginx -y
安装完成以后查看nginx版本
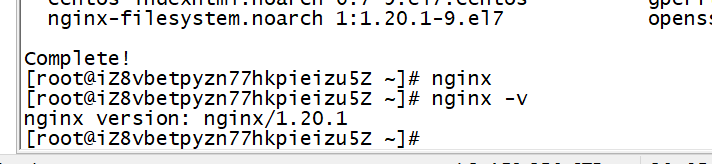
3 启动nginx
systemctl start nginx

4设置开机自启动
systemctl enable nginx
(2)下载PHP
进入这个网站下载你需要下载的版本
https://www.php.net/downloads.php
然后复制对应的tar.gz 链接到XShell里边
(3)
wget 链接地址

4 解压
tar xf php-7.3.32.tar.gz

5 安装PHP所需的依赖
yum install gcc gcc-c++ libxm12-devel openssl-dev libcurl-devel freetype-devel libjpeg-devel libpng-devel libxslt-devel systemd-devel libicu-devel libedit-devel


6 创建user

7 编译配置参数
./configure \
 --prefix=/usr/local/php\
 --enable-fpm\
 --with-fpm-user=www\
 --with-fpm-group=www\
 --with-config-file-path=/usr/local/php/conf\
 --disable-rpath\
 --enable-soap\
 --with-libxml-dir\
 --with-xmlrpc\
 --with-openssl\
 --with-mhash\
 --with-pcre-regex\
 --with-zlib\
 --enable-bcmath\
 --with-bz2\
 --enable-calendar\
 --with-curl\
 --enable-exif\
 --with-pcre-dir\
 --enable-ftp\
 --with-gd\
 --with-openssl-dir\
 --with-jpeg-dir\
 --with-png-dir\
 --with-zlib-dir\
 --with-freetype-dir\
 --enable-gd-jis-conv\
 --with-gettext\
 --with-gmp\
 --with-mhash\
 --enable-mbstring\
 --with-onig\
 --with-mysqli=mysqlnd\
 --with-pdo-mysql=mysqlnd\
 --with-zlib-dir\
 --with-readline\
 --enable-shmop\
 --enable-sockets\
 --enable-sysvmsg\
 --enable-sysvsem \
 --enable-sysvshm \
 --enable-wddx\
 --with-libxml-dir\
 --with-xsl\
 --enable-zip\
 --with-pear

报找不到libzip的错误
报这个错误 Cannot find OpenSSL’s evp.h
解决方法
报这个错误 error:Please reinstall the BZip2 distribution
解决方案
每次执行完命令以后都要重新运行上边那一大堆代码进行检查
然后由于中间还有部分报错,这里就没有摘录了,最后安装成功是这样的。
中间安装那块可以看PHP安装的这一节
https://www.bilibili.com/video/BV1JJ411W72p?p=4&spm_id_from=pageDriver

配置成功以后输入 make 进行编译
过程比较长,请耐心等待
启动后还有错误,还是一步一步跟着视频做比较好
php部署成功后登录可以看到PHP的界面

安装mysql
我的centos版本是7 所以需要到这个页面里下载 Linux7版本的mysql
https://dev.mysql.com/downloads/file/?id=508902
mysql版本是5.7的
安装成功

到这个页面下载WordPress
https://wordpress.org/download/
下载以后解压,并移动到这个目录

给用户 赋予 www权限
布置完上面的操作之后,输入你的ip到浏览器就可以看到如下页面

最后附上上述操作的全部代码
ps -ef|grep nginx 查看nginx的进程
systemctl enable nginx 设置为开机自启动
wget https://www.php.net/distributions/php-7.3.13.tar.gz 下载php
tar xf php-7.3.13.tar.gz 解压
在php 目录下安装 依赖的环境
yum install gcc gcc-c++ libxm12-devel openssl-dev libcurl-devel freetype-devel libjpeg-devel libpng-devel libxslt-devel systemd-devel libicu-devel libedit-devel
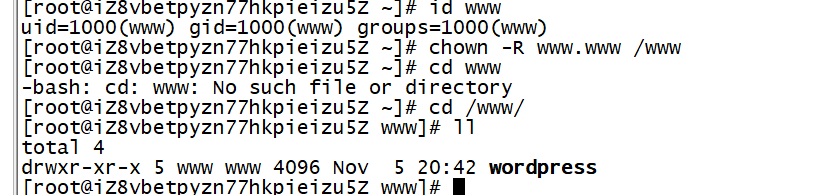
在php下创建用户
useradd -M -s /sbin/nologin www
id www
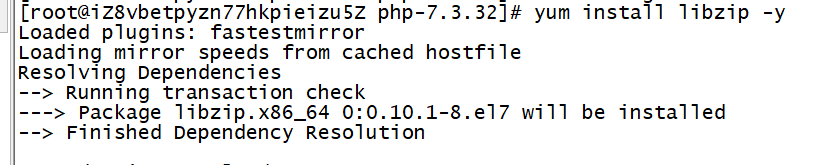
安装 一些需要用到的库
yum install libzip -y
yum install libzip-devel -y
yum install openssl openssl-devel
yum install bzip2 bzip2-devel
yum install gmp-devel -y
yum -y install readline-devel
编译的配置参数:
./configure \
--prefix=/usr/local/php\
--enable-fpm\
--with-fpm-user=www\
--with-fpm-group=www\
--with-config-file-path=/usr/local/php/conf\
--disable-rpath\
--enable-soap\
--with-libxml-dir\
--with-xmlrpc\
--with-openssl\
--with-mhash\
--with-pcre-regex\
--with-zlib\
--enable-bcmath\
--with-bz2\
--enable-calendar\
--with-curl\
--enable-exif\
--with-pcre-dir\
--enable-ftp\
--with-gd\
--with-openssl-dir\
--with-jpeg-dir\
--with-png-dir\
--with-zlib-dir\
--with-freetype-dir\
--enable-gd-jis-conv\
--with-gettext\
--with-gmp\
--with-mhash\
--enable-mbstring\
--with-onig\
--with-mysqli=mysqlnd\
--with-pdo-mysql=mysqlnd\
--with-zlib-dir\
--with-readline\
--enable-shmop\
--enable-sockets\
--enable-sysvmsg\
--enable-sysvsem \
--enable-sysvshm \
--enable-wddx\
--with-libxml-dir\
--with-xsl\
--enable-zip\
--with-pear
如果报错
checking for libzip... configure: error: system libzip must be upgraded to version >= 0.11
那么卸载重新安装libzip
yum remove libzip libzip-devel -y
wget https://libzip.org/download/libzip-1.8.0.tar.gz
下载好以后解压 tar xf libzip-1.8.0.tar.gz
进入目录 创建
mkdir build
cd build
yum install cmake3 -y
cmake3 ..
cp /usr/bin/cmake3 /usr/bin/cmake
然后再执行make 命令 (在build目录下)
然后 make install
然后输入 echo $? 如果返回0 说明正常
再 到php目录执行很长的一段配置
报错check your library configuration
进入 vim /etc/ld.so.conf
添加
/usr/lib
/usr/lib64
/usr/local/lib
/usr/local/lib64
然后输入 ldconfig
再次进行编译 ,直到这个界面出现
creating main/internal_functions_cli.c
+--------------------------------------------------------------------+
| License: |
| This software is subject to the PHP License, available in this |
| distribution in the file LICENSE. By continuing this installation |
| process, you are bound by the terms of this license agreement. |
| If you do not agree with the terms of this license, you must abort |
| the installation process at this point. |
+--------------------------------------------------------------------+
Thank you for using PHP.
然后 make 命令编译
然后 make install
完成以后到php 文件夹下 执行
[root@iz8vbetpyzn77hkpieizu5z php-7.3.13]# cp php.ini-development /usr/local/php/etc/php.ini
[root@iz8vbetpyzn77hkpieizu5z php-7.3.13]# cd /usr/local/php/etc/
[root@iz8vbetpyzn77hkpieizu5z etc]# cp php-fpm.conf.default php-fpm.conf
[root@iz8vbetpyzn77hkpieizu5z etc]# cd
[root@iz8vbetpyzn77hkpieizu5z ~]# cd php-7.3.13
[root@iz8vbetpyzn77hkpieizu5z php-7.3.13]# cd sapi/fpm
[root@iz8vbetpyzn77hkpieizu5z fpm]# cp php-fpm.service /usr/lib/systemd/system/
[root@iz8vbetpyzn77hkpieizu5z fpm]# systemctl start php-fpm
查看启动状态
[root@iz8vbetpyzn77hkpieizu5z fpm]# systemctl status php-fpm
没有启动成功
[root@iz8vbetpyzn77hkpieizu5z fpm]# cd /usr/local/php/etc/php-fpm.d/
[root@iz8vbetpyzn77hkpieizu5z php-fpm.d]# ls
www.conf.default
[root@iz8vbetpyzn77hkpieizu5z php-fpm.d]# cp www.conf.default www.conf
[root@iz8vbetpyzn77hkpieizu5z php-fpm.d]# ls
www.conf www.conf.default
[root@iz8vbetpyzn77hkpieizu5z php-fpm.d]#
再次启动 就启动成功了
[root@iz8vbetpyzn77hkpieizu5z php-fpm.d]# systemctl start php-fpm
[root@iz8vbetpyzn77hkpieizu5z php-fpm.d]# systemctl status php-fpm
● php-fpm.service - The PHP FastCGI Process Manager
Loaded: loaded (/usr/lib/systemd/system/php-fpm.service; disabled; vendor preset: disabled)
Active: active (running) since Fri 2021-12-10 12:10:17 CST; 3s ago
Main PID: 15989 (php-fpm)
CGroup: /system.slice/php-fpm.service
├─15989 php-fpm: master process (/usr/local/php/etc/php-fpm.conf)
├─15990 php-fpm: pool www
└─15991 php-fpm: pool www
Dec 10 12:10:17 iz8vbetpyzn77hkpieizu5z systemd[1]: Started The PHP FastCGI Process Manager.
回到nginx 配置
[root@iz8vbetpyzn77hkpieizu5z php-fpm.d]# cd /etc/nginx
[root@iz8vbetpyzn77hkpieizu5z nginx]# mv nginx.conf nginx.conf.bak
[root@iz8vbetpyzn77hkpieizu5z nginx]# cp nginx.conf.default nginx.conf
vim nginx.conf
下面是nginx.conf配置的内容
#user nobody;
worker_processes 1;
#error_log logs/error.log;
#error_log logs/error.log notice;
#error_log logs/error.log info;
#pid logs/nginx.pid;
events {
worker_connections 1024;
}
http {
include mime.types;
default_type application/octet-stream;
#log_format main '$remote_addr - $remote_user [$time_local] "$request" '
# '$status $body_bytes_sent "$http_referer" '
# '"$http_user_agent" "$http_x_forwarded_for"';
#access_log logs/access.log main;
sendfile on;
#tcp_nopush on;
#keepalive_timeout 0;
keepalive_timeout 65;
#gzip on;
server {
listen 80;
server_name localhost;
#charset koi8-r;
#access_log logs/host.access.log main;
root /www/wordpress;
location / {
index index.php index.html index.htm;
}
#error_page 404 /404.html;
# redirect server error pages to the static page /50x.html
#
error_page 500 502 503 504 /50x.html;
location = /50x.html {
root html;
}
# proxy the PHP scripts to Apache listening on 127.0.0.1:80
#
#location ~ \.php$ {
# proxy_pass http://127.0.0.1;
#}
# pass the PHP scripts to FastCGI server listening on 127.0.0.1:9000
#
location ~ \.php$ {
fastcgi_pass 127.0.0.1:9000;
fastcgi_index index.php;
fastcgi_param SCRIPT_FILENAME /scripts$fastcgi_script_name;
include fastcgi.conf;
}
# deny access to .htaccess files, if Apache's document root
# concurs with nginx's one
#
#location ~ /\.ht {
# deny all;
#}
}
# another virtual host using mix of IP-, name-, and port-based configuration
#
#server {
# listen 8000;
# listen somename:8080;
# server_name somename alias another.alias;
# location / {
# root html;
# index index.html index.htm;
# }
#}
# HTTPS server
#
#server {
# listen 443 ssl;
# server_name localhost;
# ssl_certificate cert.pem;
# ssl_certificate_key cert.key;
# ssl_session_cache shared:SSL:1m;
# ssl_session_timeout 5m;
# ssl_ciphers HIGH:!aNULL:!MD5;
# ssl_prefer_server_ciphers on;
# location / {
# root html;
# index index.html index.htm;
# }
#}
}
[root@iz8vbetpyzn77hkpieizu5z wordpress]# echo "<?php phpinfo();?>" >index.php
[root@iz8vbetpyzn77hkpieizu5z wordpress]# vim index.php
[root@iz8vbetpyzn77hkpieizu5z wordpress]# nginx -s reload
然后看页面能否查看到index.php
能查看到就说明配置成功
安装mysql
[root@iz8vbetpyzn77hkpieizu5z ~]# wget https://dev.mysql.com/get/mysql80-community-release-el7-4.noarch.rpm
[root@iz8vbetpyzn77hkpieizu5z ~]# yum install mysql80-community-release-el7-4.noarch.rpm
[root@iz8vbetpyzn77hkpieizu5z ~]# yum list all|grep mysql
[root@iz8vbetpyzn77hkpieizu5z ~]# yum install yum-utils -y
[root@iz8vbetpyzn77hkpieizu5z ~]# yum-config-manager --disable mysql80-community
[root@iz8vbetpyzn77hkpieizu5z ~]# yum-config-manager --enable mysql57-community
[root@iz8vbetpyzn77hkpieizu5z ~]# yum install mysql-community-server -y
[root@iz8vbetpyzn77hkpieizu5z ~]# systemctl start mysqld
[root@iz8vbetpyzn77hkpieizu5z ~]# systemctl status mysqld
● mysqld.service - MySQL Server
Loaded: loaded (/usr/lib/systemd/system/mysqld.service; enabled; vendor preset: disabled)
Active: active (running) since Fri 2021-12-10 12:52:47 CST; 17s ago
Docs: man:mysqld(8)
http://dev.mysql.com/doc/refman/en/using-systemd.html
Process: 29601 ExecStart=/usr/sbin/mysqld --daemonize --pid-file=/var/run/mysqld/mysqld.pid $MYSQLD_OPTS (code=exited, status=0/SUCCESS)
Process: 29552 ExecStartPre=/usr/bin/mysqld_pre_systemd (code=exited, status=0/SUCCESS)
Main PID: 29605 (mysqld)
CGroup: /system.slice/mysqld.service
└─29605 /usr/sbin/mysqld --daemonize --pid-file=/var/run/mysqld/mysqld.pid
Dec 10 12:52:41 iz8vbetpyzn77hkpieizu5z systemd[1]: Starting MySQL Server...
Dec 10 12:52:47 iz8vbetpyzn77hkpieizu5z systemd[1]: Started MySQL Server.
[root@iz8vbetpyzn77hkpieizu5z ~]# cat /var/log/mysqld.log
找到这一句,后边有临时密码就是登录数据库的密码
[Note] A temporary password is generated for root@localhost: P=Jr,OC+t7B/
2021-12-10T04:52:47.209086Z 0 [Warning] TIMESTAMP with implicit DEFAULT value is deprecated. Please use --explicit_def
登录以后修改数据库密码
mysql> alter user 'root'@'localhost' identified by '你的数据库密码';
创建用户
create user 'user'@'%' identified by '000000';
授权
mysql> grant all privileges on wordpress.* to 'user'@'%';
下载wordpress程序
[root@iz8vbetpyzn77hkpieizu5z ~]# wget https://wordpress.org/latest.tar.gz
使用tar xf 解压
[root@iz8vbetpyzn77hkpieizu5z ~]# mv wordpress/* /www/wordpress/
[root@iz8vbetpyzn77hkpieizu5z ~]# chown -R www.www /www
此时访问浏览器就可以访问到你的wordpress了