一、修改默认的防火墙firewal为iptables
我在搭建ftp服务器的过程中,总是不成功,然后把防火墙换了以后,就莫名其妙的可以了,所以这里需要把防火墙换一下。
1、关闭原来的防火墙
systemctl stop firewalld.service #停止firewall

systemctl disable firewalld.service #禁止firewall开机启动
2、安装iptables
yum -y install iptables-services
3、将iptables设置为开机启动
systemctl enable iptables.service #设置防火墙开机启动
4、我们既然要使用iptables,我们就需要配置防火墙可以通行的端口,一下是放行端口的方法:
首先打开配置文件:vim /etc/sysconfig/iptables
然后添加通行端口,例如:
-A INPUT -m state --state NEW -m tcp -p tcp --dport 8080 -j ACCEPT
最后重新启动防火墙,使配置生效
systemctl restart iptables.service #重启防火墙使配置生效
二、安装vsftpd和修改相关的配置文件
1、通过yum安装vsftpd
yum install -y vsftpd
2、修改vsftpd的配置文件
vim /etc/vsftpd/vsftpd.conf
关于如何配置,这里只是关于我的配置,应该按照自己的要求自行修改:
# Example config file /etc/vsftpd/vsftpd.conf
#
# The default compiled in settings are fairly paranoid. This sample file
# loosens things up a bit, to make the ftp daemon more usable.
# Please see vsftpd.conf.5 for all compiled in defaults.
#
# READ THIS: This example file is NOT an exhaustive list of vsftpd options.
# Please read the vsftpd.conf.5 manual page to get a full idea of vsftpd's
# capabilities.
#
# Allow anonymous FTP? (Beware - allowed by default if you comment this out).
anonymous_enable=NO
#
# Uncomment this to allow local users to log in.
# When SELinux is enforcing check for SE bool ftp_home_dir
local_enable=YES
#
# Uncomment this to enable any form of FTP write command.
write_enable=YES
#
# Default umask for local users is 077. You may wish to change this to 022,
# if your users expect that (022 is used by most other ftpd's)
local_umask=022
#
# Uncomment this to allow the anonymous FTP user to upload files. This only
# has an effect if the above global write enable is activated. Also, you will
# obviously need to create a directory writable by the FTP user.
# When SELinux is enforcing check for SE bool allow_ftpd_anon_write, allow_ftpd_full_access
#anon_upload_enable=YES
#
# Uncomment this if you want the anonymous FTP user to be able to create
# new directories.
#anon_mkdir_write_enable=YES
#
# Activate directory messages - messages given to remote users when they
# go into a certain directory.
dirmessage_enable=YES
#
# Activate logging of uploads/downloads.
xferlog_enable=YES
#
# Make sure PORT transfer connections originate from port 20 (ftp-data).
connect_from_port_20=YES
#
# If you want, you can arrange for uploaded anonymous files to be owned by
# a different user. Note! Using "root" for uploaded files is not
# recommended!
#chown_uploads=YES
#chown_username=whoever
#
# You may override where the log file goes if you like. The default is shown
# below.
#xferlog_file=/var/log/xferlog
#
# If you want, you can have your log file in standard ftpd xferlog format.
# Note that the default log file location is /var/log/xferlog in this case.
xferlog_std_format=YES
#
# You may change the default value for timing out an idle session.
#idle_session_timeout=600
#
# You may change the default value for timing out a data connection.
#data_connection_timeout=120
#
# It is recommended that you define on your system a unique user which the
# ftp server can use as a totally isolated and unprivileged user.
#nopriv_user=ftpsecure
#
# Enable this and the server will recognise asynchronous ABOR requests. Not
# recommended for security (the code is non-trivial). Not enabling it,
# however, may confuse older FTP clients.
#async_abor_enable=YES
#
# By default the server will pretend to allow ASCII mode but in fact ignore
# the request. Turn on the below options to have the server actually do ASCII
# recommended for security (the code is non-trivial). Not enabling it,
# however, may confuse older FTP clients.
#async_abor_enable=YES
#
# By default the server will pretend to allow ASCII mode but in fact ignore
# the request. Turn on the below options to have the server actually do ASCII
# mangling on files when in ASCII mode.
#
# You may activate the "-R" option to the builtin ls. This is disabled by
# default to avoid remote users being able to cause excessive I/O on large
# sites. However, some broken FTP clients such as "ncftp" and "mirror" assume
# the presence of the "-R" option, so there is a strong case for enabling it.
#ls_recurse_enable=YES
#
# When "listen" directive is enabled, vsftpd runs in standalone mode and
# listens on IPv4 sockets. This directive cannot be used in conjunction
# with the listen_ipv6 directive.
listen=YES
#
# This directive enables listening on IPv6 sockets. By default, listening
# on the IPv6 "any" address (::) will accept connections from both IPv6
# and IPv4 clients. It is not necessary to listen on *both* IPv4 and IPv6
# sockets. If you want that (perhaps because you want to listen on specific
# addresses) then you must run two copies of vsftpd with two configuration
# files.
# Make sure, that one of the listen options is commented !!
#listen_ipv6=YES

pam_service_name=vsftpd
userlist_enable=YES
tcp_wrappers=YES
pasv_min_port=61001
pasv_max_port=62000
allow_writeable_chroot=YES
想要详细了解配置的可以参考:史上最详细的vsftpd配置文件讲解
3、在根目录下创建一个访问ftp服务器时访问的文件夹(这里在那创建都可以)
mkdir /ftpfile
4、添加匿名用户(不要忘了用passwd设置密码)
useradd ftpuser -d /ftpfile(自己的文件夹) -s /sbin/nologin
5、修改ftpfile文件夹权限
chown -R ftpuser.ftpuser /ftpfile
6、将我们的用户添加到chroot_list中
vim /etc/vsftpd/chroot_list
添加创建的用户ftpuser,然后保存退出
7、将SELinux关闭
vim /etc/selinux/config
修改SELINUX=disabled
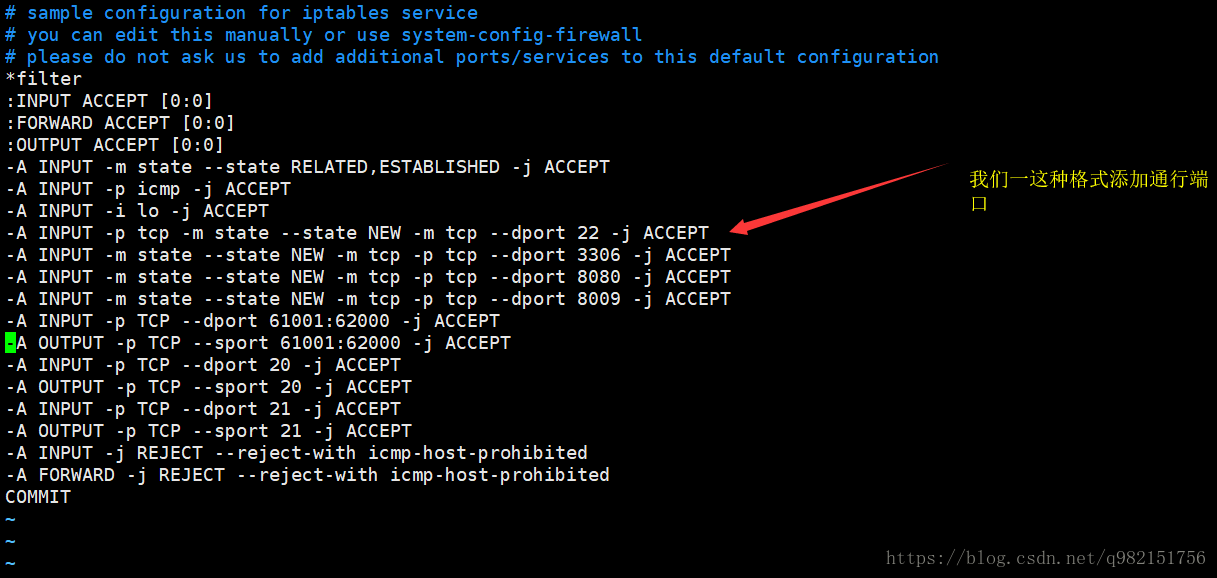
三、让防火墙通行ftp相关的端口
在防火墙配置文件中添加:
-A INPUT -p tcp -m state --state NEW -m tcp --dport 22 -j ACCEPT
-A INPUT -m state --state NEW -m tcp -p tcp --dport 3306 -j ACCEPT
-A INPUT -m state --state NEW -m tcp -p tcp --dport 8080 -j ACCEPT
-A INPUT -m state --state NEW -m tcp -p tcp --dport 8009 -j ACCEPT
-A INPUT -p TCP --dport 61001:62000 -j ACCEPT
-A OUTPUT -p TCP --sport 61001:62000 -j ACCEPT
4、访问
这里的文件夹就是我们的ftpfile,我在其中添加了一些文件,还有就是我用的域名访问,如果没有域名,可以用ip访问
