1、安装 font-spider
npm install font-spider --save
//或
yarn add font-spider
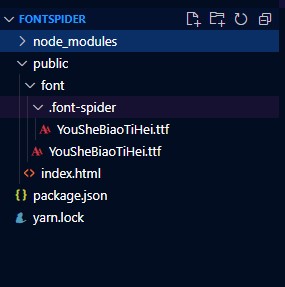
2、创建html 及 font文件目录
在 public 文件夹内创建 index.html 及font文件夹 在index.html 内写入需要保留的字体。
index.html
<!DOCTYPE html>
<html lang="">
<head>
<meta charset="utf-8">
<meta http-equiv="X-UA-Compatible" content="IE=edge">
<meta name="viewport" content="width=device-width,initial-scale=1.0">
</head>
<style>
@font-face {
font-family: "YouSheBiaoTiHei";
src: url("../public/font/YouSheBiaoTiHei.ttf");
}
.YouSheBiaoTiHei {
font-family: "YouSheBiaoTiHei" !important;
}
</style>
<body>
<noscript>
<strong>We're sorry but <%= htmlWebpackPlugin.options.title %> doesn't work properly without JavaScript enabled.
Please enable it to continue.</strong>
</noscript>
<div id="app">
</div>
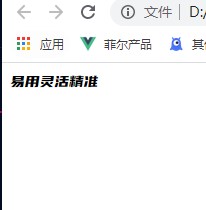
<div class="YouSheBiaoTiHei">易用灵活精准</div>
<!-- built files will be auto injected -->
</body>
</html>
font文件夹 放入字体

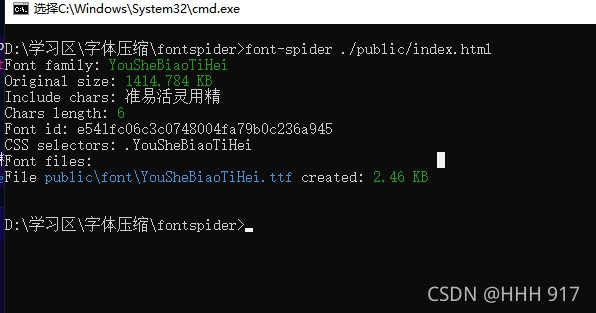
3.效果
font文件夹下字体变小, 生成 .font-spider文件夹,.font-spider文件夹里面存储源字体文件。
使用压缩后的字体仍生效(使用vue npm run build 压缩后的dist文件内进行进行字体压缩好像不行 待解决,目前使用原生html生效,uniapp h5 压缩也可以)