1、maven依赖
    <dependencies>
        <!-- Spring上下文依赖 -->
        <dependency>
            <groupId>org.springframework</groupId>
            <artifactId>spring-context</artifactId>
            <version>5.1.9.RELEASE</version>
        </dependency>

        <!-- junit测试依赖 -->
        <dependency>
            <groupId>junit</groupId>
            <artifactId>junit</artifactId>
            <version>4.13-beta-3</version>
            <scope>test</scope>
        </dependency>
    </dependencies>
2、XML配置
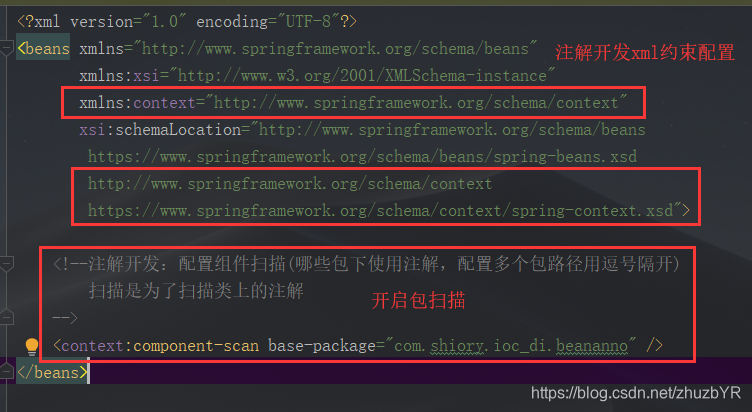
<?xml version="1.0" encoding="UTF-8"?>
<beans xmlns="http://www.springframework.org/schema/beans"
       xmlns:xsi="http://www.w3.org/2001/XMLSchema-instance"
       xmlns:context="http://www.springframework.org/schema/context"
       xsi:schemaLocation="http://www.springframework.org/schema/beans
        https://www.springframework.org/schema/beans/spring-beans.xsd
        http://www.springframework.org/schema/context
        https://www.springframework.org/schema/context/spring-context.xsd">

    <!--注解开发:配置组件扫描(哪些包下使用注解,配置多个包路径用逗号隔开)
        扫描是为了扫描类上的注解
    -->
    <context:component-scan base-package="com.shiory.ioc_di.beananno" />
</beans>
注解开发配置文件注意事项:
- 注解开发xml约束配置
- 开启包扫描
3、注解的使用
1、注解详解
    /**
     *  Spring的Bean注解详解
     *      使用注解的前提:在配置文件中配置了包扫描
     *      @Component("名称") : 组件
     *          修饰一个类,将这个类交给Spring管理。
     *          该注解有三个衍生注解(功能类似):
     *              @Repository("名称") : Dao层的类使用
     *              @Service("名称")   : Service层的类使用
     *              @Controller("名称"): Web层的类使用
     *
     *      属性注入的注解
     *          属性如果有Setter方法,需要将属性注入的注解添加到Setter方法上
     *          属性如果没有Setter方法,需要将属性注入的注解添加到属性上
     *
     *          普通类型属性注解
     *              @Value("具体的值")  :设置普通类型属性的值
     *          对象类型属性注解
     *              @Autowired  :设置对象类型属性的值。但是它是按照类型来完成属性的注入,跟名称没有关系
     *                  例:即使@Repository("personDao")改成了@Repository("personDao1111"), @Autowired也能完成注入
     *                  开发习惯是按照名称来完成属性的注入
     *                  那就必须让 @Autowired这个注解和@Qualifier("Dao层的名称")一起使用来完成按照名称属性注入
     *              @Resource(name = "Dao层的名称") :完成对象类型的属性注入,按照名称完成属性注入
     *                  实际开发中使用该注解来替换:@Autowired和@Qualifier配合使用
     *                  该注解不是Spring本身提供,而是Spring实现的一套规范提供:javax.annotation.Resource
     *
     *      Bean的其他注解
     *          生命周期相关注解:
     *              @PostConstruct  :初始化,修饰一个方法
     *              @PreDestroy     :销毁,修饰一个方法
     *          Bean的作用域注解
     *              @Scope  : 作用域。,修饰一个类
     *                  取值:
     *                      singleton       :单例,默认取值
     *                      prototype       :多例
     *                      request         :应用在web项目中,Spring创建这个类以后,将这个类存入到request范围中
     *                      session         :应用在web项目中,Spring创建这个类以后,将这个类存入到session范围中
     *                      globalsession   :应用在web项目中,必须在porlet环境(有子网站)下使用。但是如果没有这种环境,相当于session
     */
2、使用举例
Dao层
public interface PersonDao {
    public void addPersion(String str);
}
@Repository("personDao")
public class PersonDaoImpl implements PersonDao{
@Override
public void addPersion(String str) {
System.out.println("PersonDao.addPersion()被调用了。。。" + str);
}
}Service层
public interface PersonService {
    public void addPerson();
}
//@Component("personService")
@Service("personService")
//相当于在XML文件中写了:<bean id="personService" class="com.shiory.ioc_di.beananno.PersonServiceImpl" ></bean>
//@Scope("prototype")
//相当于:<bena id="" class="" scope="prototype" ></bean>
public class PersonServiceImpl implements PersonService{
// 普通类型属性注入
@Value("普通类型属性注入")
private String str;
// 对象类型属性注入
/*@Autowired
@Qualifier("personDao")*/
@Resource(name = "personDao")
private PersonDao personDao;
@Override
public void addPerson() {
personDao.addPersion(str);
}
// 下面两个方法的注解相当于:<bena id="" class="" init-method="init" destroy-method="destroy" ></bean>
/**
* 初始化方法
*/
@PostConstruct //相当于:init-method
public void init(){
System.out.println("PersonService初始化了。。。。。");
}
/**
* 销毁方法
*/
@PreDestroy //相当于:destroy-method
public void destroy(){
System.out.println("PersonService销毁了。。。。。");
}
}测试
public class IocTest {

    /**
     * Bean注解开发
     */
    @Test
    public void ioc_di01(){
        //  创建工厂对象
        ClassPathXmlApplicationContext factory = new ClassPathXmlApplicationContext("applicationContext.xml");
        PersonServiceImpl personService = factory.getBean("personService", PersonServiceImpl.class);
        personService.addPerson();
        //  关闭工厂
        factory.close();
    }

    /**
     * Bean注解开发-作用域
     */
    @Test
    public void ioc_di02(){
        //  创建工厂对象
        ClassPathXmlApplicationContext factory = new ClassPathXmlApplicationContext("applicationContext.xml");
        PersonServiceImpl personService1 = factory.getBean("personService", PersonServiceImpl.class);
        personService1.addPerson();

        PersonServiceImpl personService2 = factory.getBean("personService", PersonServiceImpl.class);
        personService2.addPerson();
        //  多例不会关闭工厂
        factory.close();
    }

}
4、扩展
XML和注解整合开发
XML和注解的比较
    /**
     *      XML和注解的比较
     *          适用场景:
     *              XML:可以适用任何场景
     *                  结构清晰,后期维护方便
     *              注解:有些地方适用不了。比如这个类不是自己提供的(第三方类)
     *                  开发方便
     *     XML和注解整合开发(各取所长)
     *          使用XML管理Bean,使用注解来完成属性的注入
     */
在上面的基础上去掉类上的注解
将xml配置文件内容换为下面的内容
<?xml version="1.0" encoding="UTF-8"?>
<beans xmlns="http://www.springframework.org/schema/beans"
       xmlns:xsi="http://www.w3.org/2001/XMLSchema-instance"
       xmlns:context="http://www.springframework.org/schema/context"
       xsi:schemaLocation="http://www.springframework.org/schema/beans
        https://www.springframework.org/schema/beans/spring-beans.xsd
        http://www.springframework.org/schema/context
        https://www.springframework.org/schema/context/spring-context.xsd">

    <!--在没有使用扫描的情况下,来使用属性注入的注解
            可以使用:@Resource、@Value、@Autowired、@Qualifier。。。
    -->
    <context:annotation-config/>

    <bean id="personDao" class="com.shiory.ioc_di.xmlanno.PersonDaoImpl" ></bean>
    <bean id="personService" class="com.shiory.ioc_di.xmlanno.PersonServiceImpl" ></bean>
</beans>
与基于注解的区别
