嘿!我是目录
一、JDBC到Mybatis
1. JDBC与Mybatis介绍
- JDBC介绍
Java数据库连接(Java Database Connectivity,简称JDBC)是Java语言中用来规范客户端程序如何来访问数据库的应用程序接口,提供了诸如查询和更新数据库中数据的方法。
- Mybatis介绍
MyBatis 本是apache的一个开源项目iBatis, 2010年这个项目由apache software foundation 迁移到了google code,并且改名为MyBatis 。2013年11月迁移到Github。 iBATIS一词来源于“internet”和“abatis”的组合,是一个基于Java的持久层框架。iBATIS提供的持久层框架包括SQL Maps和Data Access Objects(DAOs)。
MyBatis 是一款优秀的持久层框架,它支持定制化SQL、存储过程以及高级映射。MyBatis 避免了几乎所有的 JDBC代码和手动设置参数以及获取结果集。MyBatis 可以使用简单的 XML 或注解来配置和映射原生信息,将接口和 Java 的 POJOs(Plain Ordinary Java Object,普通的 Java对象)映射成数据库中的记录。MyBatis 是支持普通 SQL查询,存储过程和高级映射的优秀持久层框架。MyBatis 消除了几乎所有的JDBC代码和参数的手工设置以及结果集的检索。MyBatis 使用简单的 XML或注解用于配置和原始映射,将接口和 Java 的POJOs(Plain Ordinary Java Objects,普通的 Java对象)映射成数据库中的记录。
2. Mybatis对比JDBC
- JDBC开发的缺点:
代码比较多,开发效率低。
需要关注 Connection ,Statement, ResultSet 对象创建和销毁。
对 ResultSet 查询的结果,需要自己封装为 List。
重复的代码比较多。
业务代码和数据库的操作混在一起,不利于现代的开发习惯。
- MyBatis解决的问题:
减轻使用 JDBC 的复杂性,不用编写重复的创建 Connetion , Statement 。
不用编写关闭资源代码。
直接使用 java 对象,表示结果数据,让开发者专注 SQL 的处理,其他分心的工作由 MyBatis 代劳。
二、项目实例
1. 新建项目
打开IntelliJ IDEA,右上角file,选择project→new project
按如下图示选择:


Web → Spring Web:

SQL → Jdbc API、Mybatis Framework、Mysql Driver:
注:千万不要选错了,不然在你不知道是什么错误导致程序运行不了的情况下,会被困很久!!!


finash后就完成了。
2. 项目文件配置
- pom.xml文件:

pom.xml中,前面勾选的各种依赖都会出现在文件里,代码应该是这样的:
<?xml version="1.0" encoding="UTF-8"?>
<project xmlns="http://maven.apache.org/POM/4.0.0" xmlns:xsi="http://www.w3.org/2001/XMLSchema-instance"
         xsi:schemaLocation="http://maven.apache.org/POM/4.0.0 https://maven.apache.org/xsd/maven-4.0.0.xsd">
    <modelVersion>4.0.0</modelVersion>
    <parent>
        <groupId>org.springframework.boot</groupId>
        <artifactId>spring-boot-starter-parent</artifactId>
        <version>2.5.5</version>
        <relativePath/> <!-- lookup parent from repository -->
    </parent>
    <groupId>com.example</groupId>
    <artifactId>mybatis_test</artifactId>
    <version>0.0.1-SNAPSHOT</version>
    <name>mybatis_test</name>
    <description>Demo project for Spring Boot</description>
    <properties>
        <java.version>1.8</java.version>
    </properties>
    <dependencies>
        <dependency>
            <groupId>org.springframework.boot</groupId>
            <artifactId>spring-boot-starter-jdbc</artifactId>
        </dependency>
        <dependency>
            <groupId>org.springframework.boot</groupId>
            <artifactId>spring-boot-starter-web</artifactId>
        </dependency>
        <dependency>
            <groupId>org.mybatis.spring.boot</groupId>
            <artifactId>mybatis-spring-boot-starter</artifactId>
            <version>2.2.0</version>
        </dependency>

        <dependency>
            <groupId>mysql</groupId>
            <artifactId>mysql-connector-java</artifactId>
            <scope>runtime</scope>
        </dependency>
        <dependency>
            <groupId>org.springframework.boot</groupId>
            <artifactId>spring-boot-starter-test</artifactId>
            <scope>test</scope>
        </dependency>
    </dependencies>

    <build>
        <plugins>
            <plugin>
                <groupId>org.springframework.boot</groupId>
                <artifactId>spring-boot-maven-plugin</artifactId>
            </plugin>
        </plugins>
    </build>

</project>
Spring Boot通过pom.xml中引入模块化的Stater,使得常规的开发场景可以很快把应用搭建起来。
在使用Spring Boot的过程中,除了可以在pom.xml中配置一些内容外,一些项目相关的配置也可以application.properties中通过配置来完成。
- 修改application.properties文件
application.properties是项目自带的配置文件,也可以建立其他的配置文件,可以在文件中添加端口、数据源、mybatis等相关数据。
添加以下内容:
application.properties:
server.port=8080
spring.datasource.driver-class-name=com.mysql.cj.jdbc.Driver
spring.datasource.url=jdbc:mysql://localhost:3306/runoob?useUnicode=true&characterEncoding=UTF-8&serverTimezone=UTC
#3306端口号后为数据库名
spring.datasource.username=root  #账号
spring.datasource.password=****  #密码
mybatis.mapper-locations=classpath:mapper/*Mapper.xml
3. 构建项目文件
构建好后的目录:

①
- entity 实体层:用于存放实体类,与数据库中属性值基本保持一致,实现set和get的方法。
- 写入Website 的代码:
注意:com.example.mybatis2是自己存放项目的包名,在自己的程序中一定要改为自己的包名,后面的代码中也是如此。
package com.example.mybatis2.entity;

public class Website {


    private int id;
    private String name;
    private String url;
    private int alexa;
    private String country;

    public int getId(){


        return id;
    }
    public void setId(){


        this.id = id;
    }
    public String  getName(){


        return name;
    }
    public void setName(){


        this.name = name;
    }
    public String getUrl(){


        return url;
    }
    public void setUrl(){


        this.url = url;
    }
    public int getAlexa(){


        return alexa;
    }
    public void setAlexa(){


        this.alexa = alexa;
    }
    public String getCountry(){


        return country;
    }
    public void setCountry(){


        this.country = country;
    }
    @Override
    public String toString() {


        return "WebSite{" +
                "name=" + name +
                ", url='" + url + '\'' +
                ", Alexa='" + alexa + '\'' +
                ",country=" + country + '\'' +
                '}';
    }
}
②
- mapper 映射层:用于对数据库进行数据持久化操作,其中的方法语句是直接针对数据库操作的,主要实现一些增删改查操作,在mybatis中方法主要与*Mapper.xml内相互一一映射。
- 写入WebsiteMapper代码:
package com.example.mybatis2.mapper;

import com.example.mybatis2.entity.Website;
import org.apache.ibatis.annotations.Mapper;
import java.util.List;
@Mapper
public interface WebsiteMapper {


    public List<Website> findAllWebsite();
    public List<Website> findWebsiteById(int id);
}
③
- 创建Mapper映射对应的WebsiteMapper.xml文件:
- 注意存放的路径:(resources 目录下的mapper包中)

- 写入WebsiteMapper.xml 代码:
<?xml version="1.0" encoding="UTF-8"?>
<!DOCTYPE mapper PUBLIC "-//mybatis.org/DTD Mapper 3.0//EN" "http://mybatis.org/dtd/mybatis-3-mapper.dtd">
<mapper namespace="com.example.mybatis2.mapper.WebsiteMapper">
    <resultMap id="result" type="com.example.mybatis2.entity.Website">
        <result column="id" jdbcType="INTEGER" property="id" />
        <result column="name" jdbcType="VARCHAR" property="name" />
        <result column="url" jdbcType="VARCHAR" property="url" />
        <result column="alexa" jdbcType="INTEGER" property="alexa" />
        <result column="country" jdbcType="VARCHAR" property="country" />
    </resultMap>

    <select id="findAllWebsite" resultType="com.example.mybatis2.entity.Website">
        select  * from websites;
    </select>

    <select id="findWebsiteById" resultType="com.example.mybatis2.entity.Website">
        select * from websites where id=#{id};
    </select>
</mapper>
④
- service业务层:用于给controller 层的类提供接口进行调用。
- 写入WebsiteService 代码:
package com.example.mybatis2.service;


import com.example.mybatis2.entity.Website;
import com.example.mybatis2.mapper.WebsiteMapper;
import org.springframework.beans.factory.annotation.Autowired;
import org.springframework.stereotype.Service;

import java.util.List;
@Service
public class WebsiteService {


    @Autowired(required=false)
    public WebsiteMapper websiteMapper;

    public List<Website> findAllWebsite(){


        return websiteMapper.findAllWebsite();
    }
    public List<Website> findWebsiteById(int id){


        return websiteMapper.findWebsiteById(id);
    }
}
⑤
- controller 控制层:用于负责具体模块的业务流程控制,需要调用service 逻辑设计层的接口来控制业务流程。
- 写入WebsiteController 代码:
package com.example.mybatis2.controller;


import com.example.mybatis2.entity.Website;
import com.example.mybatis2.service.WebsiteService;
import org.springframework.beans.factory.annotation.Autowired;
import org.springframework.web.bind.annotation.PathVariable;
import org.springframework.web.bind.annotation.RequestMapping;
import org.springframework.web.bind.annotation.RestController;

import java.util.List;

@RestController
@RequestMapping("/website")
class WebsiteController {


    @Autowired
    private WebsiteService websiteService;

    @RequestMapping("/getAllshow")
    public List<Website> findAll(){


        return websiteService.findAllWebsite();
    }

    @RequestMapping("/getWebsiteId/{id}")
    public List<Website> findWebsiteById(@PathVariable int id){


        return websiteService.findWebsiteById(id);
    }
}
4. 数据库文件
一个名为runboot的数据库:

若不知道怎么构建数据库,可见此类上一次博客:博客中 三、数据库中的操作:创建数据表。
三、测试结果
-
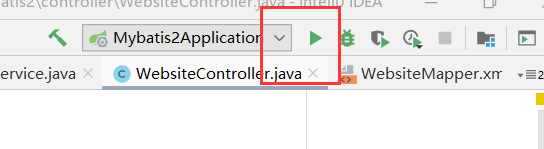
构建运行:点击绿色小三角
-
在浏览器中输入:
http://localhost:8080/website/getAllshow
结果如下:

- 按
id查找,在浏览器输入http://localhost:8080/website/getWebsiteId/3
结果如下:

小小的总结
在IDEA里用JDBC的时候需要导入一个包,而sql语句则是直接在代码里构造;
用Mybatis则是需要加入依赖,且需要配置,但sql语句与代码是分开的,直接在映射文件里更改sql就行了,当数据库的变更比较频繁时或查询的需求变化时,Mybatis的使用更有利于代码的维护。
在构建项目的时候一定不要选错东西,过来人经验!会卡很久!但其实就很离谱!最后我将pom.xml文件中的代码替换掉后(就是新添了需要的依赖),虽然得到了结果,但得出的结果不太像按正常步骤做出来的,有点奇怪。
参考文献
Github源码下载链接: Mybatis