一、HarmonyOS应用基础详解
1、布局设置
(1)Java代码布局
public class SecondAbilitySlice extends AbilitySlice {


    @Override
    public void onStart(Intent intent) {


        super.onStart(intent);
        DependentLayout layout = new DependentLayout(this);
        layout.setHeight(MATCH_PARENT);
        layout.setWidth(MATCH_PARENT);
        ShapeElement shapeElement = new ShapeElement();
        shapeElement.setRgbColor(new RgbColor(255, 255, 255));
        layout.setBackground(shapeElement);

        Text text = new Text(this);
        text.setText("第二个页面");
        text.setTextColor(Color.BLACK);
        text.setTextSize(20, Text.TextSizeType.FP);
        // 文本布局
        DependentLayout.LayoutConfig layoutConfig = new DependentLayout.LayoutConfig(MATCH_CONTENT, MATCH_CONTENT);
        layoutConfig.addRule(DependentLayout.LayoutConfig.CENTER_IN_PARENT);
        text.setLayoutConfig(layoutConfig);

        layout.addComponent(text);
        super.setUIContent(layout);
    }
}
(2)XML代码布局
<?xml version="1.0" encoding="utf-8"?>
<DependentLayout
    xmlns:ohos="http://schemas.huawei.com/res/ohos"
    ohos:width="match_parent"
    ohos:height="match_parent"
    ohos:background_element="#ffffff">

    <Text
        ohos:id="$+id:text"
        ohos:height="match_content"
        ohos:width="match_content"
        ohos:text="$ohos:string:request_location_reminder_title"
        ohos:text_color="#000000"
        ohos:text_size="20fp"
        ohos:center_in_parent="true"
        ohos:bottom_padding="30vp"/>

    <Button
        ohos:id="$+id:button"
        ohos:height="match_content"
        ohos:width="match_content"
        ohos:text="跳转到下一页"
        ohos:text_color="#ffffff"
        ohos:text_size="20fp"
        ohos:top_padding="8vp"
        ohos:bottom_padding="8vp"
        ohos:left_padding="80vp"
        ohos:right_padding="80vp"
        ohos:background_element="$graphic:button_bg"
        ohos:below="$id:text"
        ohos:horizontal_center="true"/>

</DependentLayout>
2、读取文件
(1)获取系统资源
public class MainAbilitySlice extends AbilitySlice {


    @Override
    public void onStart(Intent intent) {


        super.onStart(intent);
        super.setUIContent(ResourceTable.Layout_ability_main);

		ResourceManager resourceManager = this.getResourceManager();
		try {


            String title = resourceManager.getElement(ohos.global.systemres.ResourceTable.String_request_location_reminder_title).getString();
        } catch (Exception e) {


            e.printStackTrace();
        }
    }
}
xml中获取系统资源
<?xml version="1.0" encoding="utf-8"?>
<DependentLayout
    xmlns:ohos="http://schemas.huawei.com/res/ohos"
    ohos:width="match_parent"
    ohos:height="match_parent"
    ohos:background_element="#ffffff">

    <Text
        ohos:id="$+id:text"
        ohos:height="match_content"
        ohos:width="match_content"
        ohos:text="$ohos:string:request_location_reminder_title"
        ohos:text_color="#000000"
        ohos:text_size="20fp"
        ohos:center_in_parent="true"
        ohos:bottom_padding="30vp"/>

</DependentLayout>
(2)获取element/string.json
public class MainAbilitySlice extends AbilitySlice {


    @Override
    public void onStart(Intent intent) {


        super.onStart(intent);
        super.setUIContent(ResourceTable.Layout_ability_main);

		ResourceManager resourceManager = this.getResourceManager();
		try {


            String title =  getResourceManager().getElement(ResourceTable.String_entry_MainAbility).getString();
        } catch (Exception e) {


            e.printStackTrace();
        }
    }
}
(3)获取element/color.json
public class MainAbilitySlice extends AbilitySlice {


    @Override
    public void onStart(Intent intent) {


        super.onStart(intent);
        super.setUIContent(ResourceTable.Layout_ability_main);

        ResourceManager resourceManager = this.getResourceManager();
        try {


            String title = getResourceManager().getElement(ResourceTable.String_entry_MainAbility).getString();
        } catch (Exception e) {


            e.printStackTrace();
        }
    }
}
(4)获取profile下的文件内容
public class MainAbilitySlice extends AbilitySlice {


    @Override
    public void onStart(Intent intent) {


        super.onStart(intent);
        super.setUIContent(ResourceTable.Layout_ability_main);

        ResourceManager resourceManager = this.getResourceManager();
        try {


            Resource resource = getResourceManager().getResource(ResourceTable.Profile_ttt);
            InputStreamReader inputStreamReader = new InputStreamReader(resource, StandardCharsets.UTF_8);
            BufferedReader bufferedReader = new BufferedReader(inputStreamReader);
            String lineText;
            while ((lineText = bufferedReader.readLine()) != null) {


                text.append("," + lineText);
            }
        } catch (Exception e) {


            e.printStackTrace();
        }
    }
}
(5)获取rawfile下的文件内容
public class MainAbilitySlice extends AbilitySlice {


    @Override
    public void onStart(Intent intent) {


        super.onStart(intent);
        super.setUIContent(ResourceTable.Layout_ability_main);

        try {


            Resource resource = getResourceManager().getRawFileEntry("resources/rawfile/test.txt").openRawFile();
            InputStreamReader inputStreamReader = new InputStreamReader(resource, StandardCharsets.UTF_8);
            BufferedReader bufferedReader = new BufferedReader(inputStreamReader);
            String lineText;
            while ((lineText = bufferedReader.readLine()) != null) {


                text.append("," + lineText);
            }
        } catch (IOException e) {


            e.printStackTrace();
        }
    }
}
3、事件监听
(1)点击事件
public class MainAbilitySlice extends AbilitySlice {


    @Override
    public void onStart(Intent intent) {


        super.onStart(intent);
        super.setUIContent(ResourceTable.Layout_ability_main);

        // 点击事件处理
        Button button = (Button) findComponentById(ResourceTable.Id_button);
        button.setClickedListener(component -> {


            // 点击事件处理
        });
    }
}
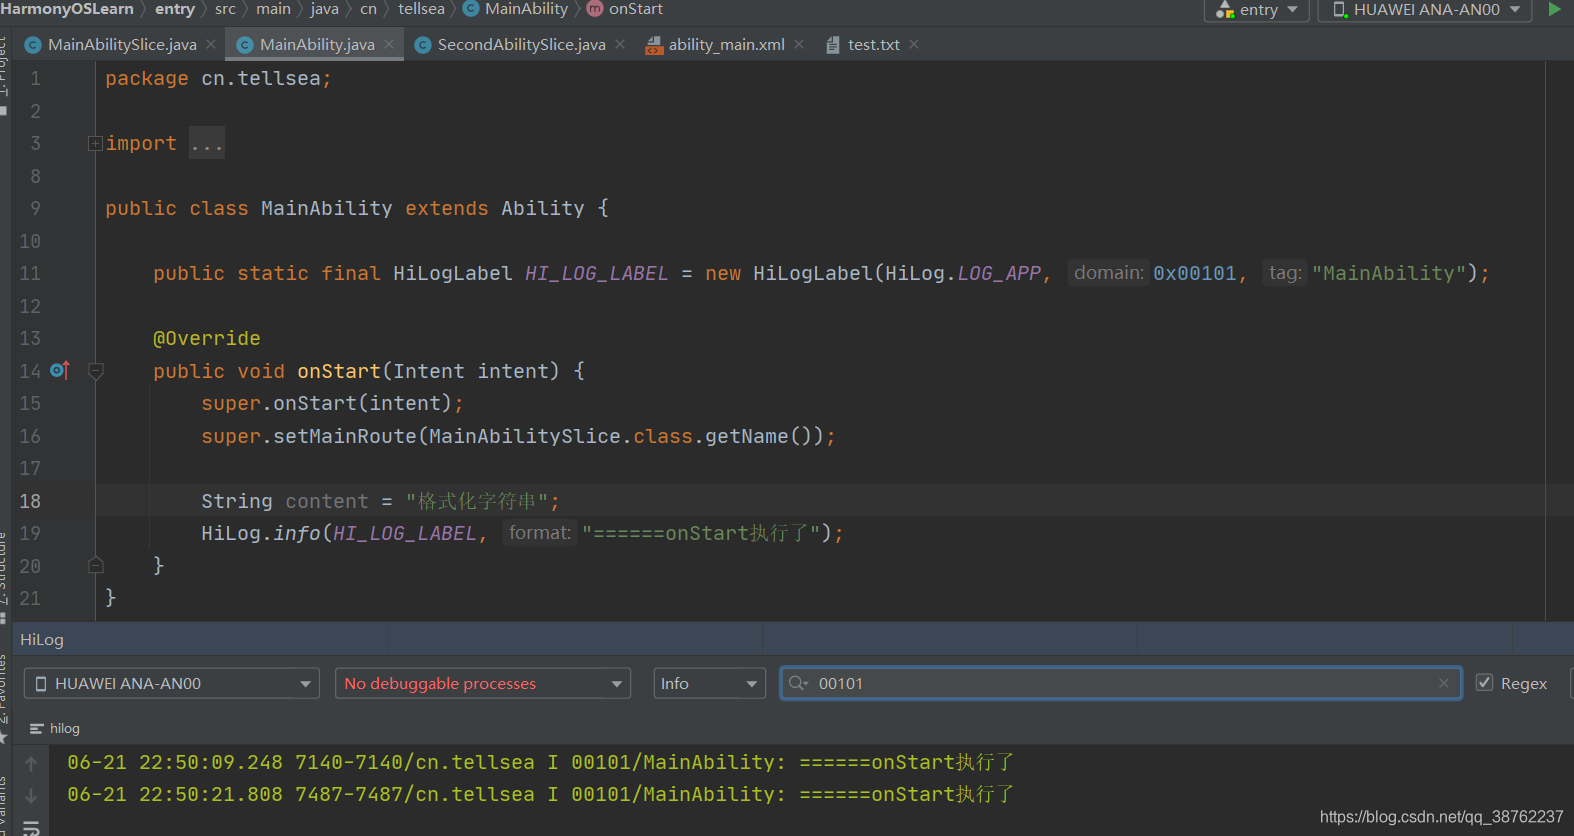
4、系统日志
(1)HiLog
public static final HiLogLabel HI_LOG_LABEL = new HiLogLabel(HiLog.LOG_APP, 0x00101, "MainAbility");
        HiLog.info(HI_LOG_LABEL, "======onStart执行了");
        HiLog.warn(LABEL, "Failed to visit %{private}s, reason:%{public}d.", url, errno);
5、路由配置
(1)准备多个路由
- AbilitySlice1 第一个界面
public class AbilitySlice1 extends AbilitySlice {


    @Override
    protected void onStart(Intent intent) {


        super.onStart(intent);
        super.setUIContent(ResourceTable.Layout_ability_1);
    }
}
<?xml version="1.0" encoding="utf-8"?>
<DependentLayout
    xmlns:ohos="http://schemas.huawei.com/res/ohos"
    ohos:width="match_parent"
    ohos:height="match_parent"
    ohos:background_element="#ffffff">

    <Text
        ohos:id="$+id:text_ability1"
        ohos:height="match_content"
        ohos:width="match_content"
        ohos:text="AbilitySlice1"
        ohos:text_color="#000000"
        ohos:text_size="20fp"
        ohos:center_in_parent="true"
        ohos:bottom_padding="30vp"/>

</DependentLayout>
- AbilitySlice2 第二个界面
public class AbilitySlice2 extends AbilitySlice {


    @Override
    protected void onStart(Intent intent) {


        super.onStart(intent);
        super.setUIContent(ResourceTable.Layout_ability_2);
    }
}
<?xml version="1.0" encoding="utf-8"?>
<DependentLayout
    xmlns:ohos="http://schemas.huawei.com/res/ohos"
    ohos:width="match_parent"
    ohos:height="match_parent"
    ohos:background_element="#ffffff">

    <Text
        ohos:id="$+id:text_ability2"
        ohos:height="match_content"
        ohos:width="match_content"
        ohos:text="AbilitySlice2"
        ohos:text_color="#000000"
        ohos:text_size="20fp"
        ohos:center_in_parent="true"
        ohos:bottom_padding="30vp"/>

</DependentLayout>
- 主页面配置路由跳转
public class MainAbility extends Ability {


    @Override
    public void onStart(Intent intent) {


        super.onStart(intent);
        super.setMainRoute(MainAbilitySlice.class.getName());

		// 一个Page中绑定多个子页面
        super.addActionRoute("AbilitySlice1", "cn.tellsea.slice.AbilitySlice1");
        super.addActionRoute("AbilitySlice2", AbilitySlice2.class.getName());
    }
}
- config.json 中配置路由:AbilitySlice1,AbilitySlice2
"abilities": [
      {


        "skills": [
          {


            "entities": [
              "entity.system.home"
            ],
            "actions": [
              "action.system.home",
              "AbilitySlice1",
              "AbilitySlice2"
            ]
          }
        ],
        "orientation": "unspecified",
        "name": "cn.tellsea.MainAbility",
        "icon": "$media:icon",
        "description": "$string:mainability_description",
        "label": "$string:entry_MainAbility",
        "type": "page",
        "launchType": "standard"
      }
    ]
(2)无参跳转
点击文本,跳转到路由AbilitySlice1
public class MainAbilitySlice extends AbilitySlice {


    @Override
    public void onStart(Intent intent) {


        super.onStart(intent);
        super.setUIContent(ResourceTable.Layout_ability_main);

        Text text = (Text) findComponentById(ResourceTable.Id_text);
        text.setClickedListener(component -> {


            Intent intent1 = new Intent();
            present(new AbilitySlice1(), intent1);
        });
    }
}
(2)有参跳转
点击文本,跳转到路由AbilitySlice1,并携带参数user
主界面设置参数
public class MainAbilitySlice extends AbilitySlice {


    @Override
    public void onStart(Intent intent) {


        super.onStart(intent);
        super.setUIContent(ResourceTable.Layout_ability_main);

        Text text = (Text) findComponentById(ResourceTable.Id_text);
        text.setClickedListener(component -> {


            Intent intent1 = new Intent();
            intent1.setParam("user", "Tellsea");
            present(new AbilitySlice1(), intent1);
        });
    }
}
第二个界面接收参数,并设置到text中
public class AbilitySlice1 extends AbilitySlice {


    @Override
    protected void onStart(Intent intent) {


        super.onStart(intent);
        super.setUIContent(ResourceTable.Layout_ability_1);

        Text text = (Text) findComponentById(ResourceTable.Id_text_ability1);
        if (intent != null) {


            String user = intent.getStringParam("user");
            text.append("," + user);
        }
    }
(3)有返回值跳转
第二个界面中,使用setResult设置数据
public class AbilitySlice1 extends AbilitySlice {


    @Override
    protected void onStart(Intent intent) {


        super.onStart(intent);
        super.setUIContent(ResourceTable.Layout_ability_1);

        Text text = (Text) findComponentById(ResourceTable.Id_text_ability1);
        if (intent != null) {


            String user = intent.getStringParam("user");
            text.append("," + user);
        }

        text.setClickedListener(component -> {


            Intent intent1 = new Intent();
            intent1.setParam("password", "123456");
            setResult(intent1);
            // 关闭当前页面,自动返回上一页
            terminate();
        });
    }
}
第一个页面中,重写onResult接收数据
public class MainAbilitySlice extends AbilitySlice {


    private Text text;

    @Override
    public void onStart(Intent intent) {


        super.onStart(intent);
        super.setUIContent(ResourceTable.Layout_ability_main);

        text = (Text) findComponentById(ResourceTable.Id_text);
        text.setClickedListener(component -> {


            Intent intent1 = new Intent();
            intent1.setParam("user", "Tellsea");
            presentForResult(new AbilitySlice1(), intent1, 1314);
        });
    }

    @Override
    protected void onResult(int requestCode, Intent resultIntent) {


        // 接收并处理返回的值
        // requestCode可以用来区分是哪个路由跳转的结果
        if (requestCode == 1314) {


            String password = resultIntent.getStringParam("password");
            text.append("," + password);
        }
        super.onResult(requestCode, resultIntent);
    }

    @Override
    public void onActive() {


        super.onActive();
    }

    @Override
    public void onForeground(Intent intent) {


        super.onForeground(intent);
    }
}
(4)不同主Page之间的跳转
public class MainAbilitySlice extends AbilitySlice {


    @Override
    public void onStart(Intent intent) {


        super.onStart(intent);
        super.setUIContent(ResourceTable.Layout_ability_main);

        Text text = (Text) findComponentById(ResourceTable.Id_text);
        text.setClickedListener(component -> {


            // 跨页面跳转
            Intent intent1 = new Intent();
            intent1.setOperation(new Intent.OperationBuilder()
                    .withDeviceId("")
                    .withBundleName("cn.tellsea")
                    .withAbilityName(SecondAbility.class)
                    .build());
            startAbility(intent1);
        });
    }
}
无参,带参,有返回值的三种情况也是一样的写法
(5)主Page跳转与非主Page的跳转
1、在主Page中点击文本,跳转到另一个Page的非主界面
2、给第二个Page增加一个非主界面
3、在第二个Page的Ability添加路由页面
super.addActionRoute("secondAbilitySlice1", SecondAbilitySlice1.class.getName());
4、在config.json中的第二个Page容器注册非主界面
        "skills": [
          {


            "actions": [
              "secondAbilitySlice1"
            ]
          }
        ],
public class MainAbilitySlice extends AbilitySlice {


    @Override
    public void onStart(Intent intent) {


        super.onStart(intent);
        super.setUIContent(ResourceTable.Layout_ability_main);

        Text text = (Text) findComponentById(ResourceTable.Id_text);
        text.setClickedListener(component -> {


            // 跨页面跳转
            Intent intent1 = new Intent();
            // 老版本写法,已过期
            // intent1.setAction("secondAbilitySlice1");
            // 新版本写法
            intent1.setOperation(new Intent.OperationBuilder().withAction("secondAbilitySlice1").build());
            startAbility(intent1);
        });
    }
}
6、设备迁移
(1)获取权限、声明权限
Ability对应的config.json中声明多设备协同访问的权限,和module平级
三方应用部署权限、分布式数据传输的权限、系统应用使用权限的申请
{


    "reqPermissions": [
        {

    "name": "ohos.permission.DISTRIBUTED_DATASYNC"},
        {

    "name": "ohos.permission.servicebus.ACCESS_SERVICE"},
        {

    "name": "com.huawei.hwddmp.servicebus.BIND_SERVICE"}
    ]
}
声明分布式获取设备列表及设备信息的权限
{


    "reqPermissions": [
        {

    "name": "ohos.permission.DISTRIBUTED_DEVICE_STATE_CHANGE"},
        {

    "name": "ohos.permission.GET_DISTRIBUTED_DEVICE_INFO" },
        {

    "name": "ohos.permission.GET_BUNDLE_INFO"}
    ]
}
在需要使用的位置声明权限
public class MainAbility extends Ability {


    @Override
    public void onStart(Intent intent) {


        super.onStart(intent);
        super.setMainRoute(MainAbilitySlice.class.getName());

        // 开发者显示声明需要使用的权限
        requestPermissionsFromUser(new String[]{

    "ohos.permission.DISTRIBUTED_DATASYNC",
                "ohos.permission.servicebus.ACCESS_SERVICE",
                "com.huawei.hwddmp.servicebus.BIND_SERVICE"}, 0);
    }
}
(2)远程启动FA界面
核心代码
public class MainAbilitySlice extends AbilitySlice {


    private Button btn1;

    @Override
    public void onStart(Intent intent) {


        super.onStart(intent);
        super.setUIContent(ResourceTable.Layout_ability_main);

        btn1 = (Button) findComponentById(ResourceTable.Id_migration_btn_01);
        btn1.setClickedListener(component -> {


            // 实现跨设备启动FA
            // 获取设备ID
            List<DeviceInfo> deviceList = DeviceManager.getDeviceList(DeviceInfo.FLAG_GET_ONLINE_DEVICE);
            if (deviceList.isEmpty()) {


                return;
            }
            int deviceNum = deviceList.size();
            List<String> deviceIds = new ArrayList<>(deviceNum);
            List<String> deviceNames = new ArrayList<>(deviceNum);
            deviceList.forEach((device) -> {


                deviceIds.add(device.getDeviceId());
                deviceNames.add(device.getDeviceName());
            });
            // 假设拿第一个设备作为远程设备
            String deviceIdStr = deviceIds.get(0);

            // 启动远程设备
            Intent intent1 = new Intent();
            intent.setOperation(new Intent.OperationBuilder()
                    .withDeviceId(deviceIdStr)
                    .withBundleName("cn.tellsea")
                    .withAbilityName(RemoteAbility.class)
                    .withFlags(Intent.FLAG_ABILITYSLICE_MULTI_DEVICE)
                    .build());
            startAbility(intent1);
        });
    }

}
(3)迁移到远程设备
MigrationAbility(需要迁移的FA)和MigrationAbilitySlice都需要实现AbilityContinuation接口
public class MigrationAbility extends Ability implements IAbilityContinuation {


    @Override
    public void onStart(Intent intent) {


        super.onStart(intent);
        super.setMainRoute(MigrationAbilitySlice.class.getName());
    }

    @Override
    public boolean onStartContinuation() {


        System.out.println("发起迁移时调用");
        return true;
    }

    @Override
    public boolean onSaveData(IntentParams intentParams) {


        System.out.println("发起迁移时保存数据");
        return true;
    }

    @Override
    public boolean onRestoreData(IntentParams intentParams) {


        System.out.println("迁移完成时恢复数据");
        return true;
    }

    @Override
    public void onCompleteContinuation(int i) {


        System.out.println("迁移完成");
    }
}
public class MigrationAbilitySlice extends AbilitySlice implements IAbilityContinuation {


    private TextField textField;
    private Button mgBtn;
    private String tfStr = "请输入...";

    @Override
    public void onStart(Intent intent) {


        super.onStart(intent);
        super.setUIContent(ResourceTable.Layout_ability_migration);

        textField = (TextField) findComponentById(ResourceTable.Id_textfield_migration);
        textField.setText(tfStr);
        mgBtn = (Button) findComponentById(ResourceTable.Id_migration_button);
        mgBtn.setClickedListener(component -> {


            // 点击按钮实现FA迁移
            String deviceId = DeviceUtils.getDeviceId();
            if (deviceId != null) {


                continueAbility(deviceId);
            }
        });
    }

    @Override
    public void onActive() {


        super.onActive();
    }

    @Override
    public void onForeground(Intent intent) {


        super.onForeground(intent);
    }

    @Override
    public boolean onStartContinuation() {


        return true;
    }

    @Override
    public boolean onSaveData(IntentParams intentParams) {


        intentParams.setParam("data", textField.getText());
        return true;
    }

    @Override
    public boolean onRestoreData(IntentParams intentParams) {


        tfStr = intentParams.getParam("data").toString();
        return true;
    }

    @Override
    public void onCompleteContinuation(int i) {


        // 迁移完成后,关闭本机的,terminateAbility();
    }
}
(4)可迁回的迁移远程设备
与迁移到远程设备一致,将continueAbility(deviceId)修改为continueAbilityReversibly(deviceId)即可
如果需要撤回迁移,调用reverseContinueAbility()即可
7、ServiceAbility
(1)启动、关闭ServiceAbility
首先构建一个Intent
        Intent intent1 = new Intent();
        Operation operation = new Intent.OperationBuilder()
                .withDeviceId("")
                .withBundleName("cn.tellsea")
                .withAbilityName(LocalServiceAbility.class)
                .build();
        intent1.setOperation(operation);
启动ServiceAbility
startAbility(intent1);
关闭uaServiceAbility
stopAbility(intent1);
(2)启动、关闭远程ServiceAbility
远程权限配置
	"reqPermissions": [
        {

    "name": "ohos.permission.DISTRIBUTED_DATASYNC"},
        {

    "name": "ohos.permission.servicebus.ACCESS_SERVICE"},
        {

    "name": "com.huawei.hwddmp.servicebus.BIND_SERVICE"},
        {

    "name": "ohos.permission.DISTRIBUTED_DEVICE_STATE_CHANGE"},
        {

    "name": "ohos.permission.GET_DISTRIBUTED_DEVICE_INFO" },
        {

    "name": "ohos.permission.GET_BUNDLE_INFO"}
    ]
声明需要的权限
		// 开发者显示声明需要使用的权限
        requestPermissionsFromUser(new String[]{

    "ohos.permission.DISTRIBUTED_DATASYNC",
                                                "ohos.permission.servicebus.ACCESS_SERVICE",
                                                "com.huawei.hwddmp.servicebus.BIND_SERVICE"}, 0);
启动远程ServiceAbility
       Intent intent1 = new Intent();
       Operation operation = new Intent.OperationBuilder()
               .withDeviceId(deviceId)
                .withBundleName("cn.tellsea")
                .withAbilityName(LocalServiceAbility.class)
               .withFlags(Intent.FLAG_ABILITYSLICE_MULTI_DEVICE)
               .build();
       intent1.setOperation(operation);
       startAbility(intent1);
关闭远程ServiceAbility
    Intent intent1 = new Intent();
    Operation operation = new Intent.OperationBuilder()
            .withDeviceId(deviceId)
            .withBundleName("cn.ybzy.hmsdemo")
            .withAbilityName("cn.ybzy.hmsdemo.RemoteServiceAbility")
            .withFlags(Intent.FLAG_ABILITYSLICE_MULTI_DEVICE)
            .build();
    intent1.setOperation(operation);
    stopAbility(intent1);
(3)连接、断开ServiceAbility
本地代理实现
远端代理实现
PA通过代理实现调用
微信公众号
