1.先在gulimail_mail数据库中的pms_category表中执行sql导入模拟数据.
2.在gulimail-product模块进行后端开发查询处所有商品分类并以树形结构展示出来。
(1)在CategoryController中:
 /**
     * 查出所有分类以及子分类,以树形结构组装起来
     */
    @RequestMapping("/list、tree")
    public R list(){
       List<CategoryEntity> entities = categoryService.listWithTree();

        return R.ok().put("data", entities);
    }
(2)在CategoryService中:
List<CategoryEntity> listWithTree();(3)在CategoryServiceImpl中:
这里可以引入:
@Autowired
private CategoryDao categoryDao;
但是这里是mybatisplus框架:
@Service("categoryService")
public class CategoryServiceImpl extends ServiceImpl<CategoryDao, CategoryEntity> implements CategoryService {
这里的CategoryServiceImpl已经继承了ServiceImpl,而ServiceImpl里面已经加入了CategoryDao泛型的实现,ServiceImpl里面有一个baseMapper,baseMapper其实就是泛型指定的Mapper,也就是我们的CategoryDao.
所以可以不用注入CategoryDao,直接使用baseMapper进行增删查改即可:
    @Override
    public List<CategoryEntity> listWithTree() {
        //1.查出所有分类,组装成父子树形结构
        List<CategoryEntity> entities = baseMapper.selectList(null);
        return entities;
    }
(4)查询所有的一级分类:(这里使用到了stream流,filter过滤器,lambda表达式)
    @Override
    public List<CategoryEntity> listWithTree() {
        //1.查出所有分类
        List<CategoryEntity> entities = baseMapper.selectList(null);
        //2.组装成父子树形结构
        //(1)找到所有的一级分类
        List<CategoryEntity> level1Menus = entities.stream().filter(categoryEntity ->
             categoryEntity.getParentCid() == 0
        ).collect(Collectors.toList());

        return entities;
    }
(5)在CategoryEntity中加入一个子分类属性:
由于children在数据库表中不存在此字段,所以需要用@TableField(exist = false)标注。
   /**
	* 子分类
	* */
	@TableField(exist = false)
	private List<CategoryEntity> children;
(6)查询所有的一级分类并查出一级分类的子分类:这里用到了递归以及stream()API中的map()映射方法。
    @Override
    public List<CategoryEntity> listWithTree() {
        //1.查出所有分类
        List<CategoryEntity> entities = baseMapper.selectList(null);
        //2.组装成父子树形结构
        //(1)找到所有的一级分类
        List<CategoryEntity> level1Menus = entities.stream().filter(categoryEntity ->
                categoryEntity.getParentCid() == 0
        ).map((menu) -> {
            menu.setChildren(getChildrens(menu, entities));
            return menu;
        }).sorted((menu1, menu2) -> {
            return menu1.getSort() - menu2.getSort();
        }).collect(Collectors.toList());
        return level1Menus;
    }
    //递归查找所有菜单的子菜单
    private List<CategoryEntity> getChildrens(CategoryEntity root, List<CategoryEntity> all) {

        List<CategoryEntity> children = all.stream().filter(categoryEntity -> {
            return categoryEntity.getParentCid() == root.getCatId();
        }).map(categoryEntity -> {
            //1.找到子菜单
            categoryEntity.setChildren(getChildrens(categoryEntity, all));
            return categoryEntity;
            //2.菜单的排序
        }).sorted((menu1,menu2)->{
            return menu1.getSort()-menu2.getSort();
        }).collect(Collectors.toList());
        return children;
    }
这里会报空指针异常:

因为menu.getSort()可能为空,所以有可能返回空值:
        sorted((menu1, menu2) -> {
            return menu1.getSort() - menu2.getSort();
        })
这里用三元表达式改造一下:
sorted((menu1, menu2) -> {
return (menu1.getSort() == null ? 0 : menu1.getSort()) - (menu2.getSort() == null ? 0 : menu2.getSort());
})
3.启动人人前,后端项目,访问前端页面loclhost:8001
(1)在系统管理-菜单管理中新建 商品目录
在商品目录中新建 分类维护菜单
(2)在代码中renren-fast-vue/src/views/modules/product/category.vue路径下
创建category.vue.组件:引入elementui的树组件:
//:data="menus"其实是 v-bind:data="menus"的简写  v-bind指令是单向绑定,可以简写为 :
<el-tree :data="menus" :props="defaultProps" @node-click="handleNodeClick"></el-tree>
请求后台数据:
<template>

  <el-tree :data="data" :props="defaultProps" @node-click="handleNodeClick"></el-tree>

</template>


<script>
  export default {
    data() {
      return {
        data:[],
        defaultProps: {
          children: 'children',
          label: 'label'
        }
      };
    },
    methods: {
      handleNodeClick(data) {
        console.log(data);
      },
      getMenus() {
        this.$http({
          url: this.$http.adornUrl('/product/category/list/tree'),
          method: 'get',
        }).then(data => {
          console.log("成功:", data);
        })
      }
    },
    created() {
      this.getMenus();
    }
  };
</script>

<style>

</style>
此时在页面刷新汇报404错误,因为前端请求地址为:http://localhost:8080/renren-fast/product/category/list/tree
而后端获得数据地址为:http://localhost:12000/product/category/list/tree
所以需要在前端路径中进行配置:
renren-fast-vue/static/config/index.js找到这个js在里卖弄修改访问路径:让其将请求发到网关,让网关同一处理前端发来的请求:
将 http://localhost:8080/renren-fast 改为 http://localhost:88/api
此时刷新前端页面还是会报错:

在网关中找不到验证码图片。因为验证码这个资源请求来源于renren-fast后端项目。可以让网关将所有请求默认转给renren-fast这个服务,所以需要让renren-fast在nacos中配置服务注册发现。
(3)下面来配置renren-fast服务:
先在pom文件中引入common工程,因为里面包含nacos依赖
在yml文件进行配置:
 spring:
    application:
        name: renren-fast
    cloud:
        nacos:
          discovery:
            server-addr: 127.0.0.1:8848
在启动类开启服务注册发现:
@EnableDiscoveryClient(4)配置gateway网关的yml文件:
spring:
  cloud:
    gateway:
      routes:
        - id: test_route
          uri: https://www.baidu.com
          predicates:
            - Query=url,baidu
        - id: qq_route
          uri: https://www.qq.com
          predicates:
            - Query=url,qq
        - id: admin_route
          uri: lb://renren-fast
          predicates:
            - Path=/api/**
# 前端项目,/api

    nacos:
      discovery:
        server-addr: 127.0.0.1
  application:
    name: gulimail-gateway
server:
  port: 88
此时在刷新前端页面依然报错:
前端访问地址:http://localhost:88/api/captcha.jpg
经过网关地址变为:http://localhost:8080/api/captcha.jpg
但是我们需要的·访问地址为:http://localhost:8080/renren-fast/captcha.jpg
此时需要使用网关的重写路径功能:filters: - RewritePath
    - id: admin_route
      uri: lb://renren-fast
      predicates:
        - Path=/api/**
      filters:
        - RewritePath=/api/(?<segment>.*),/renren-fast/$\{segment}
此时刷新前端页面,验证码图片能成功加载出来。但是登录时 会错报跨域不允许:

(5)跨域问题:


解决跨域:


这里我们采用第二种方法解决跨域:
在网关里面写一个filter过滤请求进行添加响应头。响应返回给浏览器之前就添加了响应头。
在gatewey服务下创建config包:包下创建GulimailCorsConfiguretion.java
package com.atguigu.gulimail.gateway.config;


import org.springframework.context.annotation.Configuration;
import org.springframework.web.cors.CorsConfiguration;
import org.springframework.web.cors.reactive.CorsWebFilter;
import org.springframework.web.cors.reactive.UrlBasedCorsConfigurationSource;

@Configuration
public class GulimailCorsConfiguretion {

    @Bean
    public CorsWebFilter corsWebFilter() {
        UrlBasedCorsConfigurationSource source = new UrlBasedCorsConfigurationSource();
        CorsConfiguration corsConfiguration = new CorsConfiguration();
        //1.配置跨域
        corsConfiguration.addAllowedHeader("*");
        corsConfiguration.addAllowedMethod("*");
        corsConfiguration.addAllowedOrigin("*");
        corsConfiguration.setAllowCredentials(true);
        source.registerCorsConfiguration("/**", corsConfiguration);
        return new CorsWebFilter(source);
    }
}
4.商品树在前端页面的展示:
(1)配置完前面的跨域问题已经可以成功登录访问首页,但是访问分类维护(商品树)依然报错:

因为网关现在是将所有请求传给renren-fast服务 。
现在配置网关,让所有的商品请求转给商品服务
 - id: product_orute
   uri: lb://gulimail-product
   predicates:
    - Path=/api/product/**
   filters:
    - RewritePath=api/(?<segment>.*),/$\{segment}
(2)然后配置商品服务,将其注册到注册中心:
在启动类加注解:
@EnableDiscoveryClient在yml加nacos地址以及配置服务名:
spring:
  datasource:
    username: root
    password: root
    url: jdbc:mysql://192.168.43.196:3306/gulimail_pms
    driver-class-name: com.mysql.cj.jdbc.Driver
  cloud:
    nacos:
      discovery:
        server-addr: 127.0.0.1:8848
  application:
    name: gulimail-product

#告诉Mybatis-plus,sql映射文件位置
mybatis-plus:
  mapper-locations: classpath:/mapper/**/*.xml
  #定义实体类主键生成规则
  global-config:
    db-config:
      id-type: auto
server:
port: 12000此时在浏览器访问:http://localhost:88/api/product/category/list/tree
报这个错是因为请求被renren-fast率先拦截,需要在网关路由配置中调换两个id的先后位置。
需要将精确的路由放在前面,模糊的请求放在后面。(优先级问题)更改顺序之后即可成功访问。
此时访问页面:成功获取到数据:


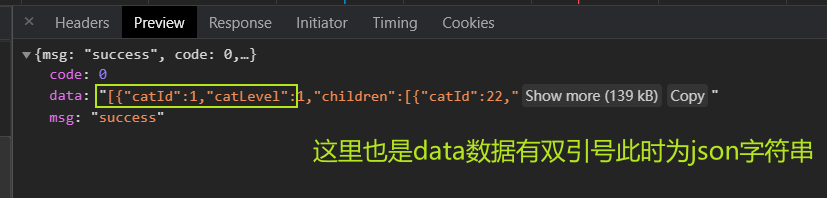
此时数据返回的是一个json数组对象,
这里我做了一个测试来判断后端返回的是json对象还是json字符串:将后端数据用JSON.toJSONString(entities)转为json字符串:
    /**
     * 查出所有分类以及子分类,以树形结构组装起来
     */
    @RequestMapping("/list/tree")
    public R list(){
       List<CategoryEntity> entities = categoryService.listWithTree();

        return R.ok().put("data", JSON.toJSONString(entities));
    }
将返回给前端的数据转化为json字符串,此时前端接收到的的data变成这样:

这里可以清楚的了解到json字符串和json对象的区别,可以参考我的另一篇博客:https://blog.csdn.net/kkkkkfffd/article/details/121282748
这里返回的数据有很多,但我们真正需要的只是data里面的树内容:

所以我们对第一个data进行解构({data}),这样就直接获得了返回内容外面一层的data,然后通过data.data获取到data里面的data得到真正的tree内容。
   methods: {
      handleNodeClick(data) {
        console.log(data);
      },
      getMenus() {
        this.$http({
          url: this.$http.adornUrl('/product/category/list/tree'),
          method: 'get',
        }).then(({data}) => {
          console.log("成功获取到菜单数据...:", data.data);
          this.menus = data.data;
        })
      }
    },
    created() {
      this.getMenus();
    }
打印结果就是tree内容:

如果不进行解构想要获得tree数据:就得用data.data.data才能得到:
   methods: {
      handleNodeClick(data) {
        console.log(data);
      },
      getMenus() {
        this.$http({
          url: this.$http.adornUrl('/product/category/list/tree'),
          method: 'get',
        }).then((data) => {
          console.log("成功获取到菜单数据...:", data.data.data);
          this.menus = data.data.data;
        })
      }
    },
    created() {
      this.getMenus();
    }