

面试经常会问动态代理,
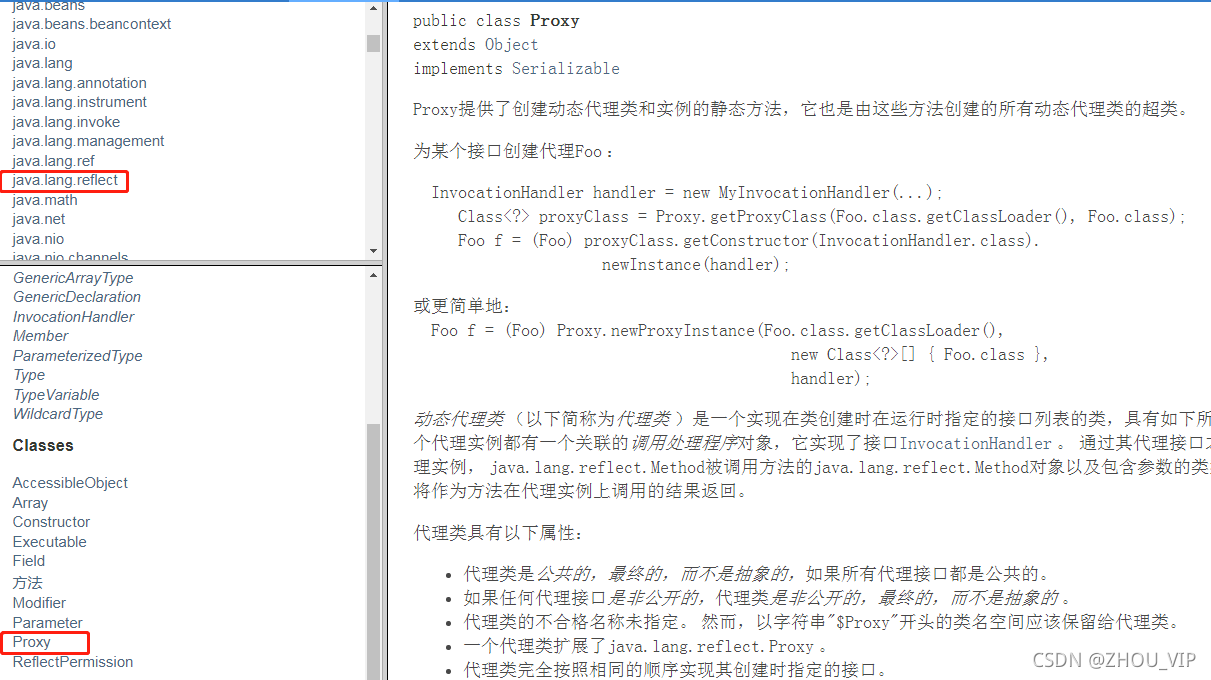
关于动态代理这块有时间要反复地研究,因为它是aop的原理,面试问的概率非常大


文档地址:Java 8 中文版 - 在线API中文手册 - 码工具

扫描二维码关注公众号,回复:
13316805 查看本文章


2 、编写JDK动态代理代码
(1)创建接口,定义方法
(2)创建接口实现类,实现方法
(3)使用Proxy 类创建接口代理对象
package com.company.zs.test;

public interface UserDao {

    public int add( int a, int b);

    public String update(String id);
}


package com.company.zs.test;

import org.springframework.beans.factory.config.BeanPostProcessor;

public class UserDaoImpl implements UserDao {

    @Override
    public int add(int a, int b) {
        return a+b;
    }

    @Override
    public String update(String id) {
        return id;
    }
}


package com.company.zs.test;

import java.lang.reflect.InvocationHandler;
import java.lang.reflect.Method;
import java.lang.reflect.Proxy;
import java.util.Arrays;

public class JDKProxy {
    public static void main(String[] args) {
        //创建接口实现类代理对象
        Class[] interfaces = {UserDao. class};
        //方法1,可以用匿名类
        /*Proxy.newProxyInstance(JDKProxy.class.getClassLoader(), interfaces,
                new InvocationHandler() {
                    @Override
                    public Object invoke(Object proxy, Method method, Object[] args) throws Throwable {
                        return null;
                    }
        });*/
        //方法2
        UserDaoImpl userDao =  new UserDaoImpl();
        UserDao dao = (UserDao)Proxy. newProxyInstance (JDKProxy. class.getClassLoader(), interfaces, new UserDaoProxy(userDao));
        int result = dao.add(1, 2);
        System. out .println( "result:"+result);
    }
}

//创建代理对象代码
class UserDaoProxy  implements InvocationHandler {
        //1 把创建的是谁的代理对象,把谁传递过来
        //有参数构造传递
        private Object  obj;
        public UserDaoProxy(Object obj) {
            this. obj = obj;
        }
        //增强的逻辑
        @Override
        public Object invoke(Object proxy, Method method, Object[] args)  throws Throwable {
            //方法之前
            System.out.println("方法之前执行 ...."+method.getName()+ " : 传递的参数 ..."+ Arrays.toString (args));
            //被增强的方法执行
            Object res = method.invoke( obj, args);
            //方法之后
            System.out.println("方法之后执行 ...."+ obj);
            return res;
        }
}


方法之前执行 ....add : 传递的参数 ...[1, 2]
方法之后执行 ....com.company.zs.test.UserDaoImpl@2f92e0f4
result:3


实际开发一般使用注解的方式,非常方便

![]()
一般切入点表达式execution(* ),写*方便,返回类型可以不写,参数列表(..)代表参数
AOP 操作(AspectJ注解方式)
1 、创建类,在类里面定义方法
package com.company.zs.aop;

public class User {
    public void add() {
        System. out .println( "add.......");
    }
}
2 、创建增强类(编写增强逻辑)
(1)在增强类里面,创建方法,让不同方法代表不同通知类型
package com.company.zs.aop;

//增强类
public class UserProxy {
    public void before() { //前置通知
        System. out .println( "before......");
    }
}
3 、进行通知的配置
(1)在 spring 配置文件中,开启注解扫描
<?xml version="1.0" encoding="UTF-8"?>
<beans xmlns="http://www.springframework.org/schema/beans"
       xmlns:xsi="http://www.w3.org/2001/XMLSchema-instance"
       xmlns:context="http://www.springframework.org/schema/context"
       xmlns:aop="http://www.springframework.org/schema/aop"
       xsi:schemaLocation="http://www.springframework.org/schema/beans http://www.springframework.org/schema/beans/spring-beans.xsd
                        http://www.springframework.org/schema/context http://www.springframework.org/schema/context/spring-context.xsd
                        http://www.springframework.org/schema/aop http://www.springframework.org/schema/aop/spring-aop.xsd">
    <!-- 开启注解扫描 -->
    <context:component-scan base-package="com.company.zs.aop"></context:component-scan>

</beans>
(2)使用注解创建User和UserProxy对象


(3)在增强类上面添加注解@Aspect

(4)在spring 配置文件中开启生成代理对象
<?xml version="1.0" encoding="UTF-8"?>
<beans xmlns="http://www.springframework.org/schema/beans"
       xmlns:xsi="http://www.w3.org/2001/XMLSchema-instance"
       xmlns:context="http://www.springframework.org/schema/context"
       xmlns:aop="http://www.springframework.org/schema/aop"
       xsi:schemaLocation="http://www.springframework.org/schema/beans http://www.springframework.org/schema/beans/spring-beans.xsd
                        http://www.springframework.org/schema/context http://www.springframework.org/schema/context/spring-context.xsd
                        http://www.springframework.org/schema/aop http://www.springframework.org/schema/aop/spring-aop.xsd">
    <!-- 开启注解扫描 -->
    <context:component-scan base-package="com.company.zs.aop"></context:component-scan>

    <!-- 开启Aspect生成代理对象-->
    <aop:aspectj-autoproxy></aop:aspectj-autoproxy>
</beans>
4 、配置不同类型的通知
(1)在增强类的里面,在作为通知方法上面添加通知类型注解,使用切入点表达式配置

package com.company.zs.aop;

import org.aspectj.lang.annotation.Aspect;
import org.aspectj.lang.annotation.Before;
import org.springframework.stereotype.Component;

@Component
@Aspect//生成代理对象
public class UserProxy {
    @Before(value = "execution(* com.company.zs.aop.User.add(..))")
    public void before() { //前置通知
        System. out .println( "before......");
    }
}
测试:

有五种通知类型,下面全部演示一下:
package com.company.zs.aop;

import org.aspectj.lang.ProceedingJoinPoint;
import org.aspectj.lang.annotation.*;
import org.springframework.stereotype.Component;

@Component
@Aspect//生成代理对象
public class UserProxy {
    //前置通知
    //@Before 注解表示作为前置通知
    @Before(value = "execution(* com.company.zs.aop.User.add(..))")
    public void before() { //前置通知
        System. out .println( "before......");
    }

    //后置通知(返回通知)
    @AfterReturning(value = "execution(* com.company.zs.aop.User.add(..))")
    public void afterReturning() {
        System.out.println("afterReturning.........");
    }

    //最终通知
    @After(value = "execution(* com.company.zs.aop.User.add(..))")
    public void after() {
        System.out.println("after.........");
    }

    //异常通知
    @AfterThrowing(value = "execution(* com.company.zs.aop.User.add(..))")
    public void afterThrowing() {
        System.out.println("afterThrowing.........");
    }

    //环绕通知
    @Around(value = "execution(* com.company.zs.aop.User.add(..))")
    public void around(ProceedingJoinPoint proceedingJoinPoint) throws Throwable {
        System.out.println("环绕之前.........");

        //被增强的方法执行
        proceedingJoinPoint.proceed();

        System.out.println("环绕之后.........");
    }
}

细节问题:
5、 相同的切入点抽取

6 、有多个增强类多同一个方法进行增强,设置增强类优先级
(1)在增强类上面添加注解 @Order(数字类型值),数字类型值越小优先级越高

再进一步优化,替代配置文件


测试:
@Test
public void testAopanno(){
    ApplicationContext context = new AnnotationConfigApplicationContext(ConfigAop.class);
    User user = context.getBean("user",User.class);
    user.add();
}
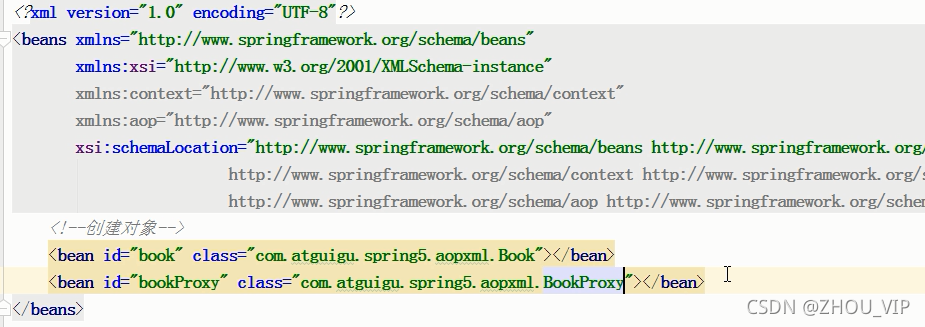
AOP操作(AspectJ 配置文件方式,这种方式不常用,了解即可)
1 、创建两个类,增强类和被增强类,创建方法


2 、在spring配置文件中创建两个类对象
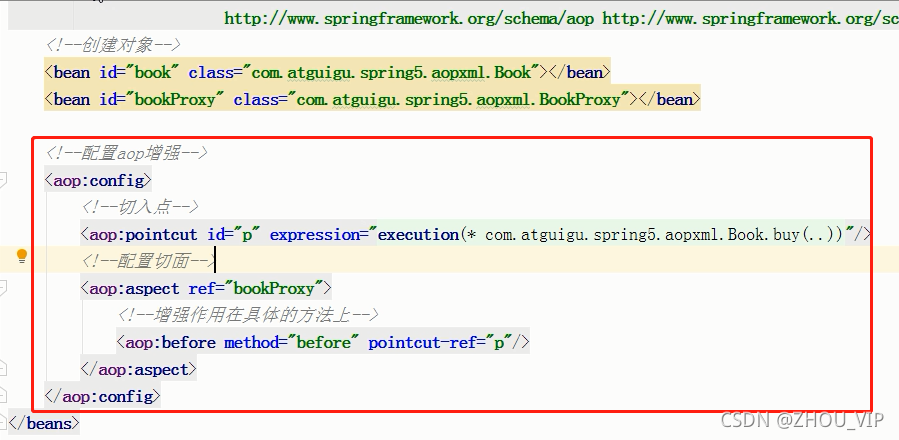
3 、在spring配置文件中配置切入点
测试:
