Question Three:「How?」
源码
弄懂了工作的效果,为了知道工作的原理,我们就要看看工作的流程了
接下来我将在代码中用注释方式来解释代码内容
inflate(resource,root,attachToRoot)
public View inflate(@LayoutRes int resource, @Nullable ViewGroup root, boolean attachToRoot) {
    //利用inflater对象构建的时候的context获取资源
    final Resources res = getContext().getResources();

    //DEBUG模式的日志
    if (DEBUG) {
        Log.d(TAG, "INFLATING from resource: \"" + res.getResourceName(resource) + "\" ("
                + Integer.toHexString(resource) + ")");
    }

    //XML解析器
    final XmlResourceParser parser = res.getLayout(resource);
    try {
        //之所以要try的原因是会抛出转换异常,比如你xml写了矛盾的东西
        //但是try了之后没有catch,所以出了异常还是崩溃
        //try的意义仅仅是为了finally里关闭资源
        return inflate(parser, root, attachToRoot);
    } finally {
        parser.close();
    }
}
由于XmlResourceParser只是XML解析器,对应生成对象,所以这里不写,有兴趣的可以自己深入去看。
这里我们发现跳转到了一个同名的重载方法inflate(parser, root, attachToRoot),接下来看看这个吧
inflate(parser,root,attachToRoot)
仔细查看源码发现,这是真正的转换方法,所有转换最后都会汇聚到这个方法。在看这个方法前,我们可以先了解一下他的JDoc文档
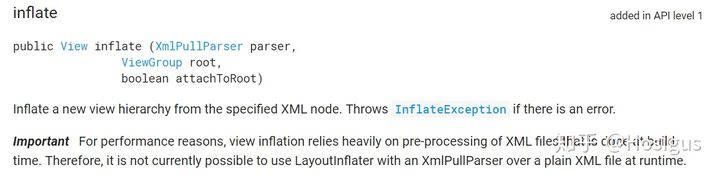
简单翻译如下:
- xml 转换成 view 的过程重度依赖xml在编译期间预处理生成的文档,这样能提高运行时生成View的速度
- 出于以上考虑,不能在运行时转换没有预处理的 xml 为 view
如果能直接转换xml的话,也许热更新又多了一条歪路也说不定,23333
源码如下:
public View inflate(XmlPullParser parser, @Nullable ViewGroup root, boolean attachToRoot) {
    // 锁mConstructorArgs,相同的inflater对象同步进行
    // 因为下面会对这个变量进行修改,不过结束的时候会复原
    synchronized (mConstructorArgs) {
        Trace.traceBegin(Trace.TRACE_TAG_VIEW, "inflate");

        // mContext是LayoutInflater.from(context)的context
        final Context inflaterContext = mContext;
        final AttributeSet attrs = Xml.asAttributeSet(parser);
        // mConstructorArgs[0]临时使用inflaterContext(mContext)的值,
        // 而其原先值临时存到lastContext中
        Context lastContext = (Context) mConstructorArgs[0];
        mConstructorArgs[0] = inflaterContext;

        // 置为root,如果root != null && attachToRoot = true
        // 那么addView()后就直接返回root
        View result = root;

        try {
            // 查找根节点
            int type;
            while ((type = parser.next()) != XmlPullParser.START_TAG &&
                    type != XmlPullParser.END_DOCUMENT) {
                // 跳过所有非START_TAG(<...>)和END_DOCUMENT
            }

            // 可能出现的情况有:
            // 1.找到了START_TAG;
            // 2.没找到START_TAG(遇到END_DOCUMENT结束)
            // 而没有START_TAG意味着xml内容错误,将抛出异常
            if (type != XmlPullParser.START_TAG) {
                throw new InflateException(parser.getPositionDescription()
                        + ": No start tag found!");
            }

            // 解析根布局名,如刚才Q2的测试,这里就会是LinearLayout,View
            final String name = parser.getName();

            if (DEBUG) {
                System.out.println("**************************");
                System.out.println("Creating root view: "
                        + name);
                System.out.println("**************************");
            }

            // <merge>标签单独判断
            if (TAG_MERGE.equals(name)) {
                // <merge>只能在root!=null且attachToRoot=true时使用
                // 否则抛异常
                if (root == null || !attachToRoot) {
                    throw new InflateException("<merge /> can be used only with a valid "
                            + "ViewGroup root and attachToRoot=true");
                }
                // 遍历子标签,详情下文
                rInflate(parser, root, inflaterContext, attrs, false);
            } else {
                // 不是<merge>表明可以作为根元素,命名为temp
                final View temp = createViewFromTag(root, name, inflaterContext, attrs);
                // 创建了LayoutParams,需要用root来实例化
                ViewGroup.LayoutParams params = null;
                // 判断root是否为空
                if (root != null) {
                    if (DEBUG) {
                        System.out.println("Creating params from root: " +
                                root);
                    }
                    // 用root来构建temp的LayoutParams
                    params = root.generateLayoutParams(attrs);
                    if (!attachToRoot) {
                        // attachToRoot为false,那就直接设置LayoutParams
                        // 否则之后会执行addView()
                        temp.setLayoutParams(params);
                    }
                }

                if (DEBUG) {
                    System.out.println("-----> start inflating children");
                }

                // 等于是把temp作为新的root,attachToRoot设为true
                // 转换剩下来的部分
                rInflateChildren(parser, temp, attrs, true);

                if (DEBUG) {
                    System.out.println("-----> done inflating children");
                }

                // 前面说的,root != null && attachToRoot = true的情况
                // 不会直接直接设置LayoutParams,而是addView()
                if (root != null && attachToRoot) {
                    root.addView(temp, params);
                }

                // 不需要addView的话,就返回temp
                if (root == null || !attachToRoot) {
                    result = temp;
                }
            }

        } catch (XmlPullParserException e) {
            final InflateException ie = new InflateException(e.getMessage(), e);
            ie.setStackTrace(EMPTY_STACK_TRACE);
            throw ie;
        } catch (Exception e) {
            final InflateException ie = new InflateException(parser.getPositionDescription()
                    + ": " + e.getMessage(), e);
            ie.setStackTrace(EMPTY_STACK_TRACE);
            throw ie;
        } finally {
            // Don't retain static reference on context.
            mConstructorArgs[0] = lastContext;
            mConstructorArgs[1] = null;

            Trace.traceEnd(Trace.TRACE_TAG_VIEW);
        }

        return result;
    }
}
这样我们就对inflate方法有了一个大致了解,也知道我们实验出来的结果的原理了。
那么接下来我们看看inflate方法里调用的另外俩方法吧
rInflate(parser,parent,context,attrs,finishInflate)
想查文档,但是好像是因为是default的方法,官网只有public的方法文档……
不过我在源文件里找到了文档,一起来看看:
/**
 * Recursive method used to descend down the xml hierarchy and instantiate
 * views, instantiate their children, and then call onFinishInflate().
 * <p>
 * <strong>Note:</strong> Default visibility so the BridgeInflater can
 * override it.
 */
简单来说:rInflate的 r 指的是 Recursive 递归xml布局来初始化view,可以想象xml布局嵌套层数一高会造成多大的性能问题……
源码,请:
void rInflate(XmlPullParser parser, View parent, Context context,
        AttributeSet attrs, boolean finishInflate) throws XmlPullParserException, IOException {
    // 获取深度
    final int depth = parser.getDepth();
    int type;
    boolean pendingRequestFocus = false;

    // 遍历到遇到END_TAG,或者END_DOCUMENT为止
    while (((type = parser.next()) != XmlPullParser.END_TAG ||
            parser.getDepth() > depth) && type != XmlPullParser.END_DOCUMENT) {

        if (type != XmlPullParser.START_TAG) {
            continue;
        }

        final String name = parser.getName();

        // 如果设置了TAG_REQUEST_FOCUS
        if (TAG_REQUEST_FOCUS.equals(name)) {
            pendingRequestFocus = true;
            consumeChildElements(parser);
        } else if (TAG_TAG.equals(name)) {
            // 解析TAG
            parseViewTag(parser, parent, attrs);
        } else if (TAG_INCLUDE.equals(name)) {
            // 解析include
            if (parser.getDepth() == 0) {
                throw new InflateException("<include /> cannot be the root element");
            }
            parseInclude(parser, context, parent, attrs);
        } else if (TAG_MERGE.equals(name)) {
            // 子View不能有merge标签,merge只能用在根布局
            throw new InflateException("<merge /> must be the root element");
        } else {
            //通过createViewFromTag构建这个view
            final View view = createViewFromTag(parent, name, context, attrs);
            // 利用parent作为ViewGroup,构建出LayoutParams,并赋值予子View
            final ViewGroup viewGroup = (ViewGroup) parent;
            final ViewGroup.LayoutParams params = viewGroup.generateLayoutParams(attrs);
            rInflateChildren(parser, view, attrs, true);
            // addView到ViewGroup
            viewGroup.addView(view, params);
        }
    }

    // TAG_REQUEST_FOCUS的处理
    if (pendingRequestFocus) {
        parent.restoreDefaultFocus();
    }

    // finishInflate是方法传参进来的
    if (finishInflate) {
        parent.onFinishInflate();
    }
}
看起来和inflate差不多,就真的只是递归而已,真正生成view的方法应该就是那个createViewFromTag了
View createViewFromTag
这个方法的签名有点长,就不写子标题上了
View createViewFromTag(View parent, String name, Context context, AttributeSet attrs,boolean ignoreThemeAttr)
最后一个参数可不写,默认为false
同样,这也是一个default的方法,文档在代码里
/**
 * Creates a view from a tag name using the supplied attribute set.
 * <p>
 * <strong>Note:</strong> Default visibility so the BridgeInflater can
 * override it.
 *
 * @param parent the parent view, used to inflate layout params
 * @param name the name of the XML tag used to define the view
 * @param context the inflation context for the view, typically the
 *                {@code parent} or base layout inflater context
 * @param attrs the attribute set for the XML tag used to define the view
 * @param ignoreThemeAttr {@code true} to ignore the {@code android:theme}
 *                        attribute (if set) for the view being inflated,
 *                        {@code false} otherwise
 */
简单来说,就是根据提供的attribute set,标签名,来构建View
源码如下:
View createViewFromTag(View parent, String name, Context context, AttributeSet attrs,
        boolean ignoreThemeAttr) {
    if (name.equals("view")) {
        name = attrs.getAttributeValue(null, "class");
    }

    // 判断ignoreThemeAttr,给context配置Theme
    if (!ignoreThemeAttr) {
        final TypedArray ta = context.obtainStyledAttributes(attrs, ATTRS_THEME);
        final int themeResId = ta.getResourceId(0, 0);
        if (themeResId != 0) {
            context = new ContextThemeWrapper(context, themeResId);
        }
        ta.recycle();
    }

    // !?这啥,1995?party?
    // 仔细一看发现BlinkLayout还是LayoutInflater的私有内部静态类
    // 试了一下发现是一个ViewGroup,效果是0.5秒闪烁一次
    // 可以可以,这很1995的patry,disco舞厅闪光灯
    // 看源码送彩蛋,可还行233333
    if (name.equals(TAG_1995)) {
        // 下面这个是官方注释↓
        // Let's party like it's 1995!
        return new BlinkLayout(context, attrs);
    }

    try {
        View view;
        // 这是一个找factory的过程
        // 找mFactory2,mFactory,mPrivateFactory
        if (mFactory2 != null) {
            view = mFactory2.onCreateView(parent, name, context, attrs);
        } else if (mFactory != null) {
            view = mFactory.onCreateView(name, context, attrs);
        } else {
            view = null;
        }

        if (view == null && mPrivateFactory != null) {
            view = mPrivateFactory.onCreateView(parent, name, context, attrs);
        }

        if (view == null) {
            final Object lastContext = mConstructorArgs[0];
            mConstructorArgs[0] = context;
            try {
                // 没有'.'就表示是原生的View,不需要库文件的
                if (-1 == name.indexOf('.')) {
                    // onCreateView其实就调用了
                    // createView(name, prefix:"android.view.", attrs)
                    view = onCreateView(parent, name, attrs);
                } else {
                    view = createView(name, null, attrs);
                }
            } finally {
                mConstructorArgs[0] = lastContext;
            }
        }
        // 结束,返回
        return view;
    } catch (InflateException e) {
        throw e;

    } catch (ClassNotFoundException e) {
        final InflateException ie = new InflateException(attrs.getPositionDescription()
                + ": Error inflating class " + name, e);
        ie.setStackTrace(EMPTY_STACK_TRACE);
        throw ie;

    } catch (Exception e) {
        final InflateException ie = new InflateException(attrs.getPositionDescription()
                + ": Error inflating class " + name, e);
        ie.setStackTrace(EMPTY_STACK_TRACE);
        throw ie;
    }
}
View createView(name,prefix,attrs)
这次有官方文档了
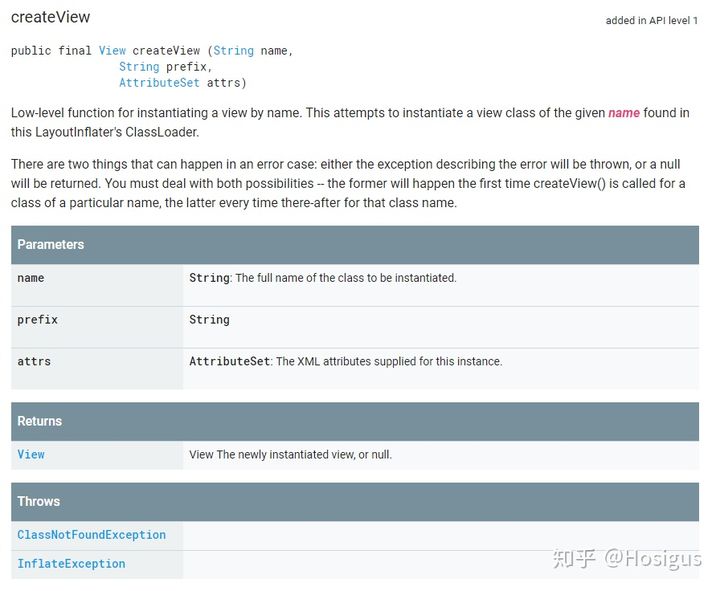
说的是,这个是根据名字实例化View的底层方法,虽然说是public,但是直接调用的时候必须处理 抛出异常 ,返回值为 null 的两种情况
搓手手看源码:
public final View createView(String name, String prefix, AttributeSet attrs)
        throws ClassNotFoundException, InflateException {
    // 全局静态HashMap缓存
    Constructor<? extends View> constructor = sConstructorMap.get(name);
    if (constructor != null && !verifyClassLoader(constructor)) {
        constructor = null;
        sConstructorMap.remove(name);
    }
    Class<? extends View> clazz = null;

    try {
        Trace.traceBegin(Trace.TRACE_TAG_VIEW, name);
        // 查看缓存是否存在
        if (constructor == null) {
            // 没得缓存,自行反射加载
            clazz = mContext.getClassLoader().loadClass(
                    prefix != null ? (prefix + name) : name).asSubclass(View.class);

            // 假的类,这类不能实例化,抛异常
            if (mFilter != null && clazz != null) {
                boolean allowed = mFilter.onLoadClass(clazz);
                if (!allowed) {
                    failNotAllowed(name, prefix, attrs);
                }
            }

            // 反射获取类构造方法
            constructor = clazz.getConstructor(mConstructorSignature);
            constructor.setAccessible(true);
            // 添加到缓存
            sConstructorMap.put(name, constructor);
        } else {
            // 就算已经缓存了,也要通过mFilter进行检查
            if (mFilter != null) {
                // filter对象:咱们见过吗?
                Boolean allowedState = mFilterMap.get(name);
                if (allowedState == null) {
                    // 是新对象! -- 不管行不行,先记小本本上
                    clazz = mContext.getClassLoader().loadClass(
                            prefix != null ? (prefix + name) : name).asSubclass(View.class);

                    boolean allowed = clazz != null && mFilter.onLoadClass(clazz);
                    mFilterMap.put(name, allowed);
                    if (!allowed) {
                        failNotAllowed(name, prefix, attrs);
                    }
                } else if (allowedState.equals(Boolean.FALSE)) {
                    failNotAllowed(name, prefix, attrs);
                }
            }
        }

        Object lastContext = mConstructorArgs[0];
        if (mConstructorArgs[0] == null) {
            // Fill in the context if not already within inflation.
            mConstructorArgs[0] = mContext;
        }
        Object[] args = mConstructorArgs;
        args[1] = attrs;

        // 创建新View实例,args是自定义主题相关的变量
        final View view = constructor.newInstance(args);
        // 如果是ViewStub
        if (view instanceof ViewStub) {
            // 等会用同一个Context加载这个ViewStub的LayoutInflater
            final ViewStub viewStub = (ViewStub) view;
            viewStub.setLayoutInflater(cloneInContext((Context) args[0]));
        }
        mConstructorArgs[0] = lastContext;
        return view;

    } catch (NoSuchMethodException e) {
        final InflateException ie = new InflateException(attrs.getPositionDescription()
                + ": Error inflating class " + (prefix != null ? (prefix + name) : name), e);
        ie.setStackTrace(EMPTY_STACK_TRACE);
        throw ie;

    } catch (ClassCastException e) {
        // If loaded class is not a View subclass
        final InflateException ie = new InflateException(attrs.getPositionDescription()
                + ": Class is not a View " + (prefix != null ? (prefix + name) : name), e);
        ie.setStackTrace(EMPTY_STACK_TRACE);
        throw ie;
    } catch (ClassNotFoundException e) {
        // If loadClass fails, we should propagate the exception.
        throw e;
    } catch (Exception e) {
        final InflateException ie = new InflateException(
                attrs.getPositionDescription() + ": Error inflating class "
                        + (clazz == null ? "<unknown>" : clazz.getName()), e);
        ie.setStackTrace(EMPTY_STACK_TRACE);
        throw ie;
    } finally {
        Trace.traceEnd(Trace.TRACE_TAG_VIEW);
    }
}
稳了,总算看到了怎么实例化view的,也不过是用反射,不过还做了两层缓存,一层全局,一层在inflater对象里
总结
inflate方法先把最外层的root弄好,然后用rInflate去递归把子view都弄好,子view用createViewFromTag方法去解析tag,用createView反射出view,全都弄完再返回。
很明显,整个过程中最耗时(ANR)的地方有两处:
- 解析XML
- 反射获取实例
而Google做的优化是:
- 预编译
- 缓存
而我们可以做的就是,减少布局层次,降低复杂度。其实这样除了能减少inflate的时间,还能减少measure layout draw的时间,不过不是本期重点,就不细讲了。