Vue(JS框架)学习笔记
Vue 是一套用于构建用户界面的渐进式框架。与其它大型框架不同的是,Vue 被设计为可以自底向上逐层应用。Vue 的核心库只关注视图层。Vue 将前端工程化。
vue官方文档:https://cn.vuejs.org/v2/guide/installation.html
vue特点:
-
以数据驱动
-
模块化开发。
-
支持虚拟DOM。
-
实现DOM监听和数据绑定。
其他相关:
-
网络通信:axios(前端通信框架)
-
页面跳转:vue-router (路由)
-
状态管理:vuex
-
Vue-UI:ICE
-
ElementUI:饿了么前端开源维护的Vue UI组件库,组件齐全,基本涵盖后台所需的所有组件。
学习地址:官网/GitHub
1. 前期准备
1.1 环境搭建
安装node和npm
搭建框架,首先要搭建环境。搭建Vue的环境工具:node.js(JavaScript的运行环境),然后再用nodejs里面的npm(包管理和分发工具)来安装依赖包。
node安装教程:https://blog.csdn.net/antma/article/details/86104068
**注意:**这里将全局模块的路径和cache,不要放在nodejs下,放在外面。
安装淘宝镜像 cnpm(非必须)
如果使用 npm 的官方镜像比较慢,可以使用 cnpm 淘宝镜像下载。
# -g 全局安装淘宝镜像加速器(cnpm)
npm install cnpm -g

# 或者使用以下语句解决 npm 速度慢的问题
npm install --registry=https://registry.npm.taobao.org
安装vue-cli脚手架
npm install vue-cli -g
安装 webpack
nom install webpack -g

# 查看webpack版本号
npm webpack -v
1.2 创建项目
这里创建项目的过程,采用的是,创建好vue项目之后,使用 IDEA 打开项目进行后续的代码编写工作。因为,我觉得在外部命令行创建vue项目,创建过程更加清晰。
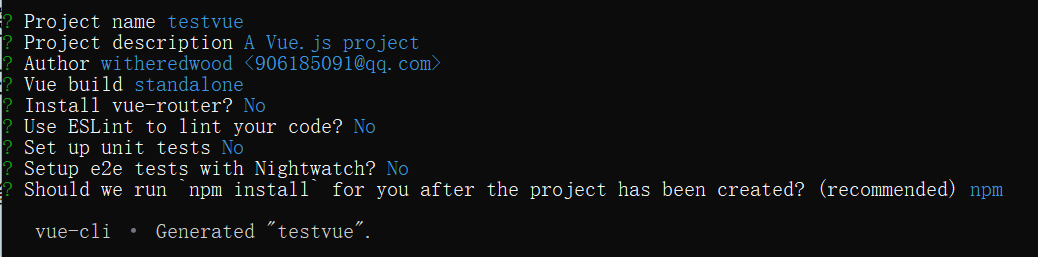
Step1. 创建一个基于 webpack 模板的 vue 项目
打开cmd命令行,输入以下命令
vue init webpack myvue(项目名称)
一路选no,之后再根据需要安装相应的模块,如路由模块。
Step2. 安装项目依赖
npm install
Step3. 打开终端 (如果用IDEA打开项目,则不需要这一步)
进入 myvue 项目,打开命令行输入以下语句
cd myvue
Step4. 启动项目
在命令行终端或IDEA的终端输入以下命令
npm run dev
Step5. 访问网页
通过网址http://localhost:8080 访问网页。网页能正常访问则初始项目没有问题。
注:后续在需要时安装其他模块,比如安装vue路由模板 vue-router。之所以选择在之后使用时安装,是为了更好的理解各个模块。
# -save 发布之后还依赖
npm install vue-router -save
2. 基础知识
2.1 IDEA中安装vue插件
安装路径:settings -> plugins -> vue
可能遇到的问题:
-
IDEA安装
vue.js插件后,右键new没有Vue component。解决参考:https://blog.csdn.net/weixin_45309636/article/details/109751048
推荐阅读:
IDEA中Vue的安装和使用(最全篇):https://www.pianshen.com/article/8200346590/
2.2 一个小demo
导入vue.js。搜索 vue.cdn,找到vue的在线cdn。如果是在HTML中使用vue,需要使用这种导入方式。因为vue是工程化的项目,所以不推荐在html中嵌入vue构建项目。
<script src="https://cdn.bootcdn.net/ajax/libs/vuex/3.1.0/vuex.min.js"></script><script>	var vm = new vue({

                  });</script>
可能遇到的问题:

unresolved type vue:
解决方案:https://blog.csdn.net/weixin_43896125/article/details/102938150
也可以不解决。
2.3 渲染数据
文本: {
{msg}}
<span>Message: {

   { msg }}</span>
原始HTML:{
{}}
<p>Using mustaches: {

   { rawHtml }}</p><p>Using v-html directive: <span v-html="rawHtml"></span></p>
输出结果:

属性:v-bind 指令
<div v-bind:id="dynamicId"></div>
js表达式
{

   { number + 1 }}{

   { ok ? 'YES' : 'NO' }}{

   { message.split('').reverse().join('') }}<div v-bind:id="'list-' + id"></div>
双向绑定
用 v-model 指令在表单 <input>、<textarea> 及 <select> 元素上创建双向数据绑定。
初始化并运行
cd myvuenpm installnpm run dev
2.4 计算属性
计算属性的特性就是将不经常变化的计算结果保存在缓存中,以节省系统开销。计算属性是基于它们的响应式依赖进行缓存的。只在相关响应式依赖发生改变时它们才会重新求值。这就意味着只要 message 还没有发生改变,多次访问 reversedMessage 计算属性会立即返回之前的计算结果,而不必再次执行函数。
<div id="app">    <div>currentTime1: {

   {currentTime1()}} </div>    <div>currentTime2: {

   {currentTime2}} </div></div><script>    /* 创建一个vue对象 */    let vm = new Vue({        el: "#app",        data: {            msg: "I am ok."        },        methods: {            currentTime1: function () {                return Date.now();  // 返回一个时间戳            }        },        computed: {  // 计算属性。methods 和 computer 不能重名,重名时会调用methods方法            currentTime2: function () {                // this.msg;                return Date.now();  // 返回一个时间戳            }        }    });</script>
3. Axios 网络通信
官方文档:http://www.axios-js.com/docs/
特性
- Make XMLHttpRequests from the browser 从浏览器创建XMLHttpRequestes请求
- Make http requests from node.js 从node.js创建http请求
- Supports the Promise API 支持 Promise API
- Intercept request and response 拦截请求和响应
- Transform request and response data 转换请求和响应数据
- Cancel requests 取消请求
- Automatic transforms for JSON data 自动转换json数据
- Client side support for protecting against XSRF 客户端支持防御XSRF
安装
npm install --save axios vue-axios
导入
import axios from 'axios'import VueAxios from 'vue-axios'Vue.use(VueAxios, axios)
get请求示例如下:
<script>/* 创建一个vue对象 */let vm = new Vue({ el: "#vue", mounted() { // 钩子函数。链式编程 axios.get('../data.json').then(response => (console.log(response.data))) }});</script>
将请求返回的数据绑定到页面上。通过 v-bind 将数据绑定到属性上,示例如下(本示例不是按照HTML文件的顺序排列代码):
<script>let vm = new Vue({    el: "#vue",    data() {        return {            msg: {                name: null,                age: null,                sex: null,                url: null            }        }    },    mounted() {  // 钩子函数。链式编程    	axios.get('../data.json').then(response => (this.msg = response.data))    }});</script><div id="vue" v-clock>    <div> {

   {msg.name}} </div>    <div> {

   {msg.age}} </div>    <div> {

   {msg.sex}} </div>    <a v-bind:href="msg.url">点我</a></div><style>    [v-clock] {        display: none;    }</style>
4. 插槽slot
插槽slot 可以实现HTML样式的动态变化。这里以实现一个列表为例,最终的实现效果如下:
这是标题
- java
- linux
- vue
使用插槽的方式实现上述列表,将上述的标题和列表中的单项用slot进行动态的变化。
Step1 定义组件。定义整个样式的组件 todo,其中,两个 slot 在页面渲染时会被相应的 todo-title 和 todo-items 占用。每个slot,都要定义一个相应的组件,编写对应的样式。初学者可以将数据写死,一步步观察slot如何运行的,熟练理解slot如何运用之后,可以代入动态的数据。
<scrpit> // 定义一个todo组件(整个样式) Vue.component("todo", { template: '<div> \ <slot name="todo-title"></slot>\ <ul>\ <slot name="todo-items"></slot>\ </ul>\ </div>' }); // 定义一个todo-title组件(标题样式) Vue.component("todo-title", { template: '<div>这是标题</div>' }); // 定义一个todo-items组件(列表单项样式) Vue.component("todo-items", { template: '<li>java</li>' });</scrpit>
Step2 编写页面。使用上一步定义的组件编写页面。slot="todo-title" :说明这是一个名字为 todo-title 的slot。
<div id="vue"> <todo> <todo-title slot="todo-title"></todo-title> <todo-items slot="todo-items"></todo-items> </todo></div>
Step3 绑定数据。
在组件中添加数据。组件和页面的数据绑定要用到 props 。
// 定义一个todo-title组件(标题样式)Vue.component("todo-title", {    props: ['title'],    template: '<div>{

   {title}}</div>'});
在页面上绑定数据。这里的 title, 是组件中的 props 中定义的,所需要显示的动态数据是 mytitle , 这个数据是在 vue 中定义的。
<todo-title slot="todo-title" v-bind:title="mytitle"></todo-title>
在 vue 中定义数据。
let vm = new Vue({ el: "#vue", data: { mytitle: "这是标题", },});
同样的,绑定 todo-items 上的数据也是这个过程。不同的是, todo-items 的数据需要用 v-for 循环遍历显示,item 绑定的是组件中的 item。
完整的代码如下:
<div id="vue">    <todo>        <todo-title slot="todo-title" :title="mytitle"></todo-title>        <todo-items slot="todo-items" v-for="item in myitems" :item="item"></todo-items>    </todo></div><!-- 导入vue.js --><script src=" https://cdn.staticfile.org/vue/2.2.2/vue.min.js"></script><script>    // 定义slot    Vue.component("todo", {        template:   '<div> \                        <slot name="todo-title"></slot>\                        <ul>\                            <slot name="todo-items"></slot>\                        </ul>\                    </div>'    });    // 定义一个todo-title组件(标题样式)    Vue.component("todo-title", {        props: ['title'],        template: '<div>{

   {title}}</div>'    });    // 定义一个todo-items组件(列表单项样式)    Vue.component("todo-items", {        props: ['item'],        template: '<li>{

   {item}}</li>'    });    // 创建一个vue对象    let vm = new Vue({        el: "#vue",        data: {            mytitle: "这是标题",            myitems: ['java', 'linux', 'vue']        },    });</script>
5. 自定义内容分发
组件和vue实例之间的事件绑定,需要通过前端(纯页面)作为中间商。
本次示例在 插槽slot 的基础上进行修改,最终实现的效果是点击列表中每项后的删除按钮,则删除该项。

Step1 组件中的样式。修改如下:
// 定义一个todo-items组件(列表单项样式)Vue.component("todo-items", {    props: ['item', 'index'],    template: '<li>{

   {index}} ------ {

   {item}} <button @click="remove">删除</button></li>',    methods: {        remove: function (index) {            console.log("remove ==> " + index + "------------")   		}    }});
Step2 获取列表下标。列表下标可以在前端(纯页面)中获取到。通过 :index='index' , 把前端的 index 绑定到组件中的 index 上。
<todo-items slot="todo-items" v-for="(item, index) in myitems" :item="item" :index="index"></todo-items>
Step3 在组件中自定义事件。自定义删除事件代码如下:
methods: { remove: function (index) { console.log("remove ==> " + index + "------------") }}
Step4 在vue实例中定义事件。如果想要删除列表中的数据,也就是要删除 vue 实例中 myitems 中的数据,需要在 vue 实例中定义一个删除的方法。这里的 index不能修改为其他名字(我也不知道为什么)。
methods: { removeByIndex: function (index) { console.log("removeByIndex ----------------"); this.myitems.splice(index, 1); // 删除一个 }}
Step5 绑定自定义事件和vue实例事件。在前端中将两者绑定,同时在组件中添加自定义事件。
<todo-items slot="todo-items" v-for="(item, index) in myitems" :item="item" :index="index" v-on:remove="removeByIndex(index)"></todo-items>
Step6 在组件删除事件中添加自定义事件。
自定义事件: this.$emit('自定义事件名', args)
remove: function (index) { console.log("remove ----------------") this.$emit('remove', index);}
完整的代码如下:
<div id="vue">    <todo>        <todo-title slot="todo-title" :title="mytitle"></todo-title>        <todo-items slot="todo-items" v-for="(item,index) in myitems"                    :item="item" :index="index" v-on:remove="removeByIndex(index)">        </todo-items>    </todo></div><!-- 导入vue.js --><script src=" https://cdn.staticfile.org/vue/2.2.2/vue.min.js"></script><script>    // 定义slot    Vue.component("todo", {        template:   '<div> \                        <slot name="todo-title"></slot>\                        <ul>\                            <slot name="todo-items"></slot>\                        </ul>\                    </div>'    });    // 定义一个todo-title组件(标题样式)    Vue.component("todo-title", {        props: ['title'],        template: '<div>{

   {title}}</div>'    });    // 定义一个todo-items组件(列表单项样式)    Vue.component("todo-items", {        props: ['item', 'index'],        template: '<li>{

   {index}} ------ {

   {item}}   <button @click="remove">删除</button></li>',        methods: {            remove: function (index) {                console.log("remove ==> " + index + "------------")                this.$emit('remove', index);  // 自定义事件分发            }        }    });    // 创建一个vue对象    let vm = new Vue({        el: "#vue",        data: {            mytitle: "这是标题",            myitems: ['java', 'linux', 'vue']        },        methods: {            removeByIndex: function (index) {                console.log("removeByIndex ----------------");                this.myitems.splice(index, 1);  // 删除一个            }        }    });</script>
6. Webpack 打包工具
Webpack:模块加载器和打包工具,能把各种资源(如JS、ES6、less图片等)都作为模块来处理和使用。
require : node 和 es6 都支持的引入
安装
npm install webpack -gnpm install webpack-cli -g
测试
webpack -vwebpack-cli -g
示例。编写一个文件,命名为 hello.js
// 暴露一个方法exports.say = function() { document.write("<h1>测试<h1>")}
**引入函数。**在另一个文件中引入函数,该文件命名为 main.js。
let hello = require("./hello")hello.say();
**配置。**webpack的配置文件命名为 webpack.config.js ,设置内容如下:
module.exports = {

        entry: './modules/main.js',    output: {

            filename: "./js/bundle.js"    }}
**打包。**在命令行输入 webpack 进行打包。打包之后,会在工程中多出一些文件。之后可以在html中引入打包后的 bundle.js ,也可以输出打包里文件的内容
7. vue-router路由
官方文档:https://router.vuejs.org/zh/installation.html
7.1 路由模块
安装
npm install vue-router --save-dev
注: --save-dev 保存在开发环境中。
导入。 在 main.js 文件中导入并安装路由, 代码如下:
// 导入import router from 'vue-router'// 安装路由Vue.use(router); // 显示声明使用
在工程中一般不采用这种写法,常采用路由模块的写法,在路由模块中存放路由,处理请求。
路由模块(how to write)
接下来,我们将路由配置封装为一个模块。在 src 文件夹下 创建一个文件夹 router ,在该文件夹下 创建一个 index.js 文件,作为路由组件的主配置文件。
Step1 编写主配置。index.js 的代码如下:
import VUe from 'vue'import VueRouter from 'vue-router'// 导入组件import Content from "../components/Content";import Main from "../components/Main";// 安装路由Vue.use(VueRouter);// 配置导出路由export default new VueRouter({ routes: [ { path: '/content', // 路由路径 name: 'content', component: content, // 跳转的组件 }, { path: '/main', // 路由路径 name: 'main', component: Main, // 跳转的组件 } ]})
Step2 在 main.js 中引入路由模块。 代码如下
// 导入路由import router from './router'// 安装路由Vue.use(router);// 配置路由new Vue({ el: '#app', router, // 配置路由 components: { App }, template: '<App/>'})
Step3 使用。在 App.vue 中使用,代码如下:
<div id="app"> <!-- 链接 --> <router-link to="/main">首页</router-link> <router-link to="/content">内容页</router-link> <!-- 视图。展示template模板 --> <router-view></router-view> </div>
7.2 嵌套路由
嵌套路由,又称子路由,在实际应用中,通常由多层嵌套的组件组合而成。比如, /user/profile 和 /user/list 。
Step1 编写两个页面。
在 /src/view/user 下编写两个页面 List.vue 和 Profile.vue ,核心代码如下:
List.vue :该页面只是显示一个标题。
<template> <div> <h1>用户列表</h1> </div></template>
Profile.vue :该页面只是显示一个标题。
<template> <div> <h1>个人信息</h1> </div></template>
Step2 注册路由。想要实现的效果是:在 main 页面上发出两个请求,将两个页面上的内容现在在 main 页面上。在 /src/router/index.js 中注册者两个页面,将这两个页面注册为 main 页面的子路由,代码如下:
{

        path: '/main',   // 路由路径   	component: Main,  // 跳转的组件    children: [        { path: '/user/list', name: 'UserList', component: UserList },        { path: '/user/profile', name: 'UserProfile', component: UserProfile, props: true },    ]},
Step3 在 main 页面上使用。
<template> <div id="app"> <h1>这是首页</h1> <router-link to="/user/list">list</router-link> <router-link to="/user/profile">profile</router-link> <router-view ></router-view> </div></template>
最终实现的效果:
点击 list , 第二个红框中出现 用户列表 ;点击 profile , 第二个红框中出现 个人信息 。

7.3 参数传递
第一种方式:在 url 上添加参数。
Step1 在跳转链接上添加参数。
<router-link :to="{name: 'UserList', params: {id: 1}}">list</router-link>
**Step2 在请求上添加参数。**在 src/router/index.js 中修改:
{

     path: '/user/list/:id', name: 'UserList', component: UserList }
Step3 取数据。在 list.vue 页面上取数据。
<div>    {

   {$route.params.id}}}</div>
第二种方式:通过 props 传递参数。
Step1 在跳转链接上添加参数。
<router-link to="/user/profile">profile</router-link>
**Step2 在请求上添加参数。**在 src/router/index.js 中修改,允许通过 props `传递参数:
{

     path: '/user/profile', name: 'UserProfile', component: UserProfile, props: true },
Step3 取数据。在 profile.vue 页面上取数据。
<template>    <div>        <h1>个人信息</h1>        {

   {id}}    </div></template><script>    export default {      props: ['id', 'name'],      name: 'UserProfile',    }</script>
7.4 路由模式
默认的路由模式有2种:
hash: 路径带 # 符号。如 http://localhost:8080/#/loginhistory: 路径不带 # 符号。如 http://localhost:8080/login
修改路由配置。在 /src/router/index.js `中修改其配置,代码如下:
export default new VueRouter({

      mode: 'history',}
7.5 路由钩子
beforeRouteEnter:在进入路由前执行
beforeRouteLeave:在离开路由前执行
在页面(不是路由)中设置进入/离开路由前要执行的函数,示例如下:
<script> export default { name: 'Content', beforeRouteEnter: (to, from, next) => { console.log("beforeRouteEnter ==> 进入路由之前"); next(); }, beforeRouteLeave: (to, from, next) => { console.log("beforeRouteLeave ==> 离开路由之前"); next(); } }</script>
vm 实例
其中,next 函数中可以跟一个 vm 实例,以在进入路由之前拿到数据为例。
beforeRouteEnter: (to, from, next) => { console.log("beforeRouteEnter ==> 进入路由之前"); next(vm => { // vm 实例 vm.getData(); // 在进入路由之前拿到数据 });},
编写 getData 函数。 在 methods 中添加方法,用来获取数据(数据放在 static/mock/user.json)。在地址栏直接输入 http://localhost:8080/static/mock/user.json ,可以访问到文件内容。
methods: { getData: function () { this.axios({ method: 'get', url: 'http://localhost:8080/static/mock/user.json', }).then((response) => { console.log(response.data); }) }}
8. 组件(how to use my component)
自定义组件的模板如下方所示:
<template></template><script> export default { name: "Content"; }</script><style scoped></style>
注: scoped :作用域,样式只在当前页面使用。
在路由模块中的代码中使用了一个名为 Content 的组件,那么,使用自定义组件的过程是怎么样的呢?在工程中使用自定义组件的流程如下:
-
定义一个组件
-
在路由中配置组件
-
在页面上使用
Step1 定义一个组件 。
在 src/components 下创建一个 Content.vue , 测试内容如下:
<template> <!-- 页面样式 --> <div id="app"> <h1>这是内容页</h1> </div></template><script> export default { name: 'Content', }</script><style scoped> /* 页面标签样式 */ #app { font-family: 'Avenir', Helvetica, Arial, sans-serif; -webkit-font-smoothing: antialiased; -moz-osx-font-smoothing: grayscale; text-align: center; color: #2c3e50; margin-top: 60px; }</style>
Step2 在路由中配置组件。
在 src/router/index.js 中 配置 Content.vue 组件,代码如下:
// 导入组件import Content from "../components/Content";// 添加Content的导出路由export default new VueRouter({ routes: [ { path: '/content', // 路由路径 component: Content, // 跳转的组件 } ]})
Step3 在页面上使用。这里在 App.vue 页面上展示内容页,代码如下:
<template> <div id="app"> <h1>This is APP View</h1> <!-- 链接 --> <router-link to="/content">内容页</router-link> <!-- 视图。展示 template模板 --> <router-view></router-view> </div></template>
注:<router-link> 相当于HTML中的 <a> 链接标签,to 是跳转的请求,要跳转到哪个页面。
9. Element UI
官方文档:https://element.eleme.cn/#/zh-CN
安装
npm i element-ui -S
导入。 在 main.js 中添加以下内容:
import ElementUI from 'element-ui';import 'element-ui/lib/theme-chalk/index.css';Vue.use(ElementUI);new Vue({

      el: '#app',  render: h => h(App),});
10. vue cli
官方文档:https://cli.vuejs.org/guide/installation.html
安装
npm install -g @vue/cli
创建项目
vue create hello-world
选择 default 默认安装方式。
10. 遇到的问题
输入url后无错误但不显示页面内容
在 App.vue 中,即使这个页面什么也不显示,但是作为前端的入口文件,必须包含 <router-view></router-view> ,否则其他的路径不会显示页面内容。
<div id="app"> <router-view></router-view></div>
createError.js:16 Uncaught (in promise) Error: Request failed with status code 404
这次是因为使用了post方式请求了static下面的资源,应该使用get方式请求。
原代码
this.axios({ method: 'post', url: 'http://localhost:8080/static/mock/user.json',}).then((response) => { console.log(response.data);})
修改后的代码。
this.axios({ method: 'get', url: 'http://localhost:8080/static/mock/user.json',}).then((response) => { console.log(response.data);})
推荐阅读
前端模板网站:http://www.mobanwang.com/mb/
vue模板网站:http://www.templatesy.com/Search/tags/48
vue+nuxt:
https://github.com/surmon-china/surmon.me
https://surmon.me/
基于vue + element的后台管理系统解决方案 - vue-manage-system:
http://www.templatesy.com/Article/794.html
基于 vue.js 和 ElementUI - d2-admin:
http://www.templatesy.com/Article/795.html
博客:
vue & nuxt 博客网站 - surmon.me: http://www.templatesy.com/Article/793.html