通过自己编写打包代码,可以更好的了解打包的流程以及webpack打包原理。
案例:实现一个类似于webpack的打包工具,也是基于nodejs。
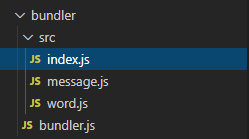
目录结构:
//word.js:
export const word = "hello";

//message.js:
import { word } from "./word.js";  //要去实现类似于webpack的打包工具,即还没有webpack的功能,因此必须写全引用
export const message = `say ${word}`;

//index.js:
import { message } from "./message.js";  //一定要加后缀名,目前模块语法不支持
console.log(message);
流程说明:
- 单个模块分析
- 生成整个项目的Dependencies Graph
- 生成代码
一、模块分析
1.要实现对项目打包,首先需要引入入口文件,之后读取到入口文件中的内容并分析
const fs = require("fs");
const moudleAnalyser = (filename) => {
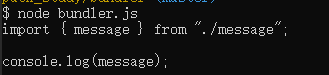
const content = fs.readFileSync(filename, "utf-8"); //1-2、获取到入口文件中的内容
console.log(content);
};
moudleAnalyser("./src/index.js"); //1-1、引入入口文件编译结果如下:
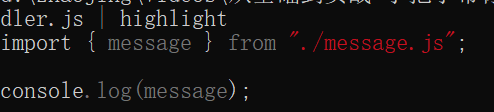
安装高亮显示代码的工具:
npm install cli-highlight -g
node bundler.js | highlight //若是输出stdout is not a tty代表权限不足,用cmd即可看到效果
高亮后效果如下:
2、分析依赖模块:获取到入口文件的源码后,分析源码,找出依赖模块
借助于@babel/parser获取文件中的依赖关系:https://babeljs.io/docs/en/babel-parser
//npm install @babel/parser --save

//根据源码获取抽象语法树AST
const ast = parser.parse(content, {
    sourceType: "module", //ES Module方式引入模块
});

console.log(ast)
如下输出:期中program就是我们的代码,看body,打印出内容:console.log(ast.program.body)


以上输出两个节点:
- 第一个:type说明时引用声明,value为引入的模块
- 第二个:type说明是表达式
@babel/traverse:由上可知:@babel/parser可以找出源码中的依赖关系,但是需遍历整个分析结果找出type是引用声明的,才能找出该文件中所有的依赖模块=》自己写遍历太麻烦,借用@babel/traverse找出源码中所有的引用关系:
//npm install @babel/traverse --save

const traverse = require("@babel/traverse").default; //导出使用的是import from-ES Module形式,必须加默认,默认就是ES M形式
 traverse(ast, {
    ImportDeclaration({ node }) {
      console.log(node);
    },
  });
输出如下,和ast.program.body相比只输出了ImportDeclaration的node,上面是输出两个node:

看上面输出,可知node.source.value就是找出的依赖模块
 const dependencies = []

  traverse(ast, {
    ImportDeclaration({ node }) {//找出抽象语法树中type为ImportDeclaration
      dependencies.push(node.source.value)
    }
  });

console.log(dependencies);
输出如下:
![]()
问题1:数组中模块的路径是相对路径,而且是相对于入口文件index.js的,有上面的路径可知,入口文件和bundler.js不在同一文件夹内,所以在bundler.js处理的时候需绝对路径或相对于根目录的路径
//const path = require("path");
console.log(path.dirname(filename))查看路径如下:![]()
修改路径如下:
const dirname = path.dirname(filename);
const newFile = "./" + path.join(dirname, node.source.value);
console.log(newFile);
dependencies.push(newFile); ![]()
为了以后方便将绝对路径和相对路径都保存下来:
const dependencies = {};
dependencies[node.source.value] = newFile; ![]()
问题2:以上打包的是ES6语法,还需要传换成所有浏览器都支持的语法
//npm install @babel/core --save
//npm install @babel/preset-env --save
const babel = require("@babel/core");
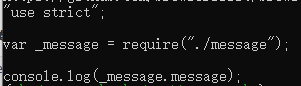
const { code } = babel.transformFromAst(ast, null, {
presets: ["@babel/preset-env"]
});
console.log(code);如下输出,import from转换后为require:
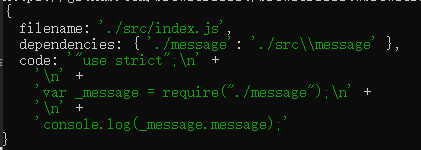
到此,整个入口文件分析完毕,返回分析结果:
const moudleAnalyser = filename=>{
    //.....
    return {
        filename,
        dependencies,
        code,
  };
}

const result = moudleAnalyser("./src/index.js"); //1-1、引入入口文件
console.log(result);
输出如下:
二、生成整个项目的依赖图谱
上面分析了单个模块,接下来就需要对入口文件依赖的模块进行如上分析,之后就是依赖的依赖的分析,把所有涉及的模块都需分析,即递归所有模块,分析后产生项目依赖图谱,才可以打包。
const makeDependenciesGraph = (entry) => {
  const entryMoudle = moduleAnalyser(entry); //1-2、入口文件分析

  //通过队列方式实现类似递归效果
  const graphArr = [entryMoudle];
  for (let i = 0; i < graphArr.length; i++) {
    const item = graphArr[i];
    const { dependencies } = item;
    if (dependencies) {
      for (let dependece in dependencies) {
        graphArr.push(moduleAnalyser(dependencies[dependece]));
      }
    }
  }
  //console.log(graphArr);

  //数组格式对于打包来说不太容易,以下做一个格式的转换
  const graph = {};
  graphArr.forEach((item) => {
    graph[item.filename] = {
      dependencies: item.dependencies,
      code: item.code,
    };
  });

  return graph;
};

const graphInfo = makeDependenciesGraph("./src/index.js"); //1-1、引入入口文件
console.log(graphInfo);

三、打包生成代码
依赖图谱分析完毕,实现打包操作,生成代码
const generateCode = (entry) => {
 // const graph = makeDependenciesGraph(entry);  //如下第一个图输出是object有问题
  const graph = JSON.stringify(makeDependenciesGraph(entry));

  //防止污染全局环境,代码需放在闭包中
  return `(function(graph){})(${graph})`;
};

const code = generateCode("./src/index.js"); //1-1、引入入口文件
console.log(code);![]()

问题:
- 如上输出含有require方法和exports对象,这些在浏览器中是不能直接运行的,会报找不到,因此需要构建require方法和exports对象
  return `
    (function(graph){
        function require(module){
            var exports = {}
            return exports
        }

    require(${entry})  //调用构建的require方法
})(${graph})`;- 如上输出require方法中使用的地址是相对路径,但是bundler.js文件位置问题,需要转换为真实路径
//localRequire:根据相对路径拿到模块真实的路径
//function require(module)中的立即执行函数:eval(code); 执行代码,code包含了require, exports的使用,此时require使用的实际是localRequire

//防止污染全局环境,代码需放在闭包中
  return `
  (function (graph) {
    function require(module) {
      function localRequire(relativePath) {
        return require(graph[module].dependencies[relativePath]);
      }

      var exports = {};
      (function (require, exports, code) {
        eval(code);
      })(localRequire, exports, graph[module].code);

      return exports;
    }

    require("${entry}");
})(${graph})`;注意:如下运行输出的代码拷贝到浏览器的控制台运行,切记如下直接copy bash中的输出黏贴到浏览器控制台运行可能会出错,因为bash因为宽度限制会断开换行,导致整个json格式中间断开有问题,所以要把上面(${graph})输出的这一段的换行符清掉再运行。

去掉换行符运行:打印出了say hello
