使用rsync+inotify实现/www目录实时同步
1. 目标
书接前文:
上一篇实现了client挂载samba实现了远程文件读写.
https://blog.csdn.net/qq_29974229/article/details/121101763
由于samba服务器存在单点风险,这次试用inotify+rsync将samba目录进行备份.
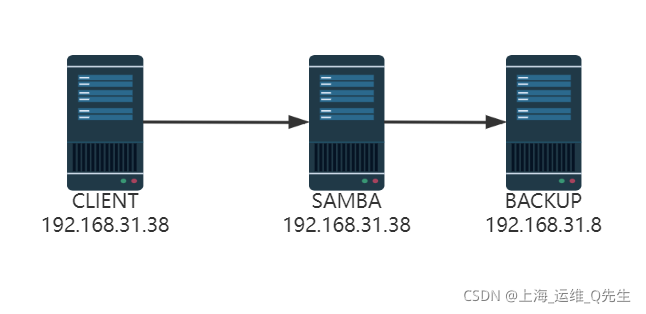
2. Backup服务器(备份目标)
2.1 安装rsync
systemctl stop firewalld
setenforce 0
yum -y install rsync
2.2 配置rsync
cat > /etc/rsyncd.conf <<EOF
log file = /var/log/rsyncd.log
pid file = /var/run/rsyncd.pid
lock file = /var/run/rsyncd.lock
[backup]
path = /data/backup/
comment = backup dir
uid = root
gid = root
port = 873
max connections = 200
read only = no
timeout = 600
auth users = rsync
secrets file = /etc/rsync.pas
hosts allow = 192.168.31.38
EOF
2.3 配置认证文件
echo "rsync:111111" /etc/rsync.pas
chmod 600 /etc/rsync.pas
2.4 设置服务自启动
systemctl enable --now rsyncd
3. Samba服务器(备份源)
3.1 安装rsync和inotify-tools
yum install -y inotify-tools rsync
3.2 配置认证文件
echo "111111" >/etc/rsync.pas
chmod 600 /etc/rsync.pas
3.3 同步测试
rsync -avH --port 873 --delete --timeout=100 --password-file=/etc/rsync.pas /www/share/ [email protected]::backup

3.4 backup服务验证

4. inotify备份脚本
cat >inotify.sh <<EOF
#!/bin/bash
SRC='/www/share/'
DEST='[email protected]::backup'
rpm -q rsync &> /dev/null || yum -y install rsync
inotifywait -mrq --exclude=".*\.swp" --timefmt '%Y-%m-%d %H:%M:%S' --format '%T %w %f' -e create,delete,moved_to,close_write,attrib ${SRC} |while read DATE TIME DIR FILE;do
FILEPATH=${DIR}${FILE}
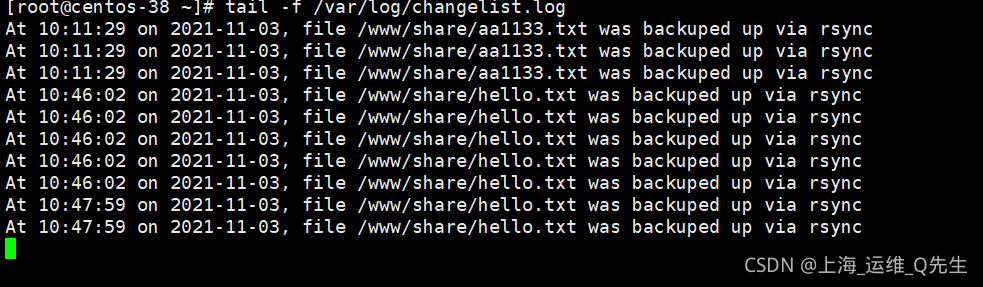
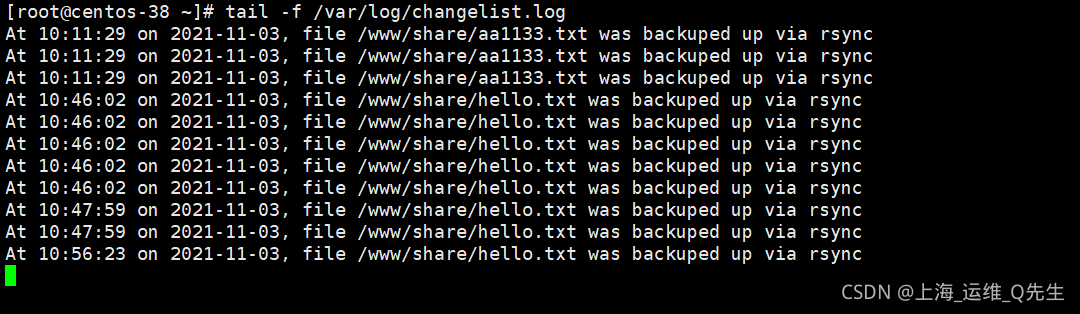
rsync -az --delete --password-file=/etc/rsync.pas $SRC $DEST && echo "At ${TIME} on ${DATE}, file $FILEPATH was backuped up via rsync" >>/var/log/changelist.log
done
EOF
chmod +x inotify.sh
到此配置已经完成了.接下来测试一下吧
5. 测试
5.1 新建文件
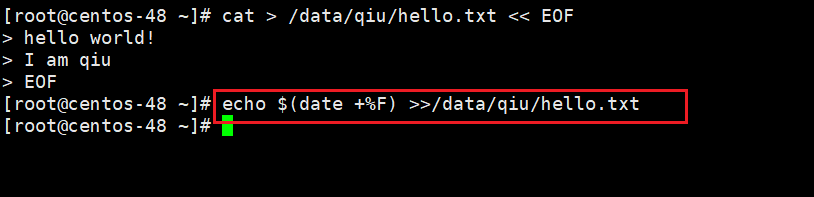
client服务器上创建一个文件

samba服务器

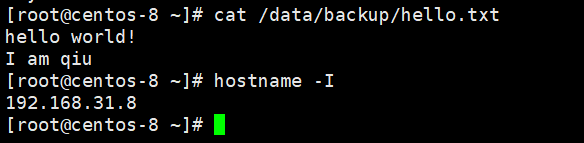
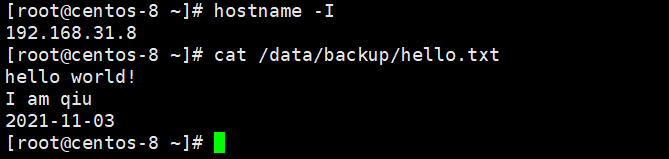
备份服务器上
5.2 更新文件内容
client服务器上更新一个文件
samba服务器
备份服务器上
5.3 删除一个文件
client服务器上更新一个文件

samba服务器
备份服务器上
