这篇文章讲解如何用SpringBoot做一个简单的文件管理系统,还是用SpringBoot来搭建项目吧,方便一点。
假如我C盘有一个upload文件夹,这个是资源管理的根目录。

我们要做的,就是在网页上显示这个目录,然后可以对这个目录里面的资源进行一些操作,比如压缩,下载。
没错,就这么简单。

把选中的三个文件删掉,这样看起来清爽一点。
去https://mvnrepository.com/上搜索Hutool


不管,我们就用最新的。
<dependency>
    <groupId>cn.hutool</groupId>
    <artifactId>hutool-all</artifactId>
    <version>5.7.3</version>
</dependency>
然后relaod一下。

server:
  port: 80

root:
  diskpath: C:\upload
diskpath是我们用于资源管理的根目录。
创建一个IndexController
@Controller
public class IndexController {

    @RequestMapping("/")
    public String index(){
        return "index";
    }

}
意图很明显,就是为了返回一个叫做index的页面。
但是,我们现在还没有index页面。
添加依赖
<dependency>
    <groupId>org.springframework.boot</groupId>
    <artifactId>spring-boot-starter-thymeleaf</artifactId>
</dependency>
注意,每次加了新的依赖,一定要maven - reload!
配置页面路径:
spring:
  thymeleaf:
    prefix: classpath:/templates/
index.html放在这里

<!DOCTYPE html>
<html lang="en"  xmlns:th="http://www.thymeleaf.org">
<head>
    <meta charset="UTF-8">
    <title>资源管理</title>
</head>
<body>
  Hello world!
</body>
</html>
重启项目,访问:http://localhost/

成功了。
获取目录中所有的文件
IndexController.java
@Controller
@ConfigurationProperties(prefix = "root")
@Data
public class IndexController {

    private String diskpath;

    @RequestMapping("/")
    public String index(Model m){
        File[] files = FileUtil.ls(diskpath);
        m.addAttribute("files",files);
        return "index";
    }

}
加@Data是为了自动生成set方法,这样才能让@ConfigurationProperties(prefix = "root")自动去读取yml中的数据。
添加一个依赖,至于为什么要添加,这个在SpringBoot教程里面讲过了。
<dependency>
    <groupId>org.springframework.boot</groupId>
    <artifactId>spring-boot-configuration-processor</artifactId>
    <version>2.5.1</version>
    <optional>true</optional>
</dependency>
注意版本号得是2.5.1,不写版本号默认去下载2.5.2了,我的idea默认的maven下载不到这个jar,估计是源头仓库就没有。
这个问题让站长纠结了好半天。
index.html
<!DOCTYPE html>
<html lang="en"  xmlns:th="http://www.thymeleaf.org">
<head>
    <meta charset="UTF-8">
    <title>资源管理</title>
</head>
<body>
  <ul>
      <li th:each="file:${files}" th:text="${file.getName()}"></li>

  </ul>
</body>
</html>
效果:
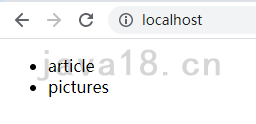
丑一点没关系,我们先把功能给实现了。

<ul>
      <li th:each="file:${files}">
          [[${file.getName()}]]
          <a th:href="@{'download?file='+${file.getName()}}">
              打包下载
          </a>
      </li>

  </ul>
和之前不同,这边不用th:text了,然后在每个文件旁边加一个打包下载的超链接。
打包文件
在IndexController中添加一个新的方法
@RequestMapping("/download")
@ResponseBody
public void index(String file){
    String targetName = diskpath + File.separator + file;
    //打包到当前目录
    ZipUtil.zip(targetName);
}
ZipUtil是Hutool提供的,我们直接拿来用即可。
最后一步就是把文件下下来
重新写download方法,增加下载功能
@RequestMapping("/download")
@ResponseBody
public void download(String file, HttpServletResponse response) throws UnsupportedEncodingException, FileNotFoundException {
    String targetName = diskpath + File.separator + file;
    //打包到当前目录
    ZipUtil.zip(targetName);
    targetName = targetName+".zip";
    response.setContentType("application/force-download");
    //解决下载文件名中文不显示的问题
    String fileName = new String(file.getBytes("utf-8"),"ISO8859-1");
    response.addHeader("Content-Disposition", "attachment;fileName=" + fileName + ".zip");

    //输出流,下载文件
    byte[] buffer = new byte[1024];
    try {
        FileInputStream fis = new FileInputStream(targetName);
        BufferedInputStream bis = new BufferedInputStream(fis);
        OutputStream os = response.getOutputStream();
        int i = bis.read(buffer);
        while (i != -1) {
            os.write(buffer, 0, i);
            i = bis.read(buffer);
        }
    } catch (IOException e) {
        e.printStackTrace();
    }


}
如何下载完毕后就删掉zip文件
很简单,在下载完毕后,立刻调用删除的方法即可。注意,删文件之前,一定要关闭流!
核心代码如下:
//输出流,下载文件
byte[] buffer = new byte[1024];
try {
    FileInputStream fis = new FileInputStream(targetName);
    BufferedInputStream bis = new BufferedInputStream(fis);
    OutputStream os = response.getOutputStream();
    int i = bis.read(buffer);
    while (i != -1) {
        os.write(buffer, 0, i);
        i = bis.read(buffer);
    }
    //关闭流
    fis.close();
    os.close();
    boolean del = FileUtil.del(targetName);
    System.out.println(del);
} catch (IOException e) {
    e.printStackTrace();
}
因为本项目非常简单,如果感兴趣地话,个人建议大家自己动手练一练。(毕竟也没多少行代码)
成果展示

比如我点击第二个打包下载。

就真的下载下来了。

而且,压缩包是自动删掉的。
好了,以上就是用SpringBoot搭建文件下载平台的所有内容,有什么想法欢迎在评论区留言!