https://github.com/da248/where2go
这个项目感觉还是挺好的,虽然没给各个数据集的下载链接,也有一些莫名其妙的bug,但是错误调试提示都还挺全,能一直有进展。
(看了下这个好像不太顶用-纯html调用APIhttps://github.com/alex-engelmann/Where2Go)
目录

自然语言处理natural language processing:
here2go 是专为推荐您的地方,根据你喜欢或不喜欢的地方/字符,而不是基于有廉价航班的目的地。
有很多网站告诉你最便宜的方式去目的地和最便宜的酒店住宿。但他们忘了问你一个非常根本的问题...你知道去哪里吗?文章,如"XX的25大旅游目的地"或"YY的100个地方,你必须访问!
此应用程序的动机之一是建立一个公正的推荐系统,该系统将考虑目的地的特征,而不是查看其他人喜欢的目的地。为此,我决定使用旅行指南来收集目的地信息。我发现,Wikivoyage提供了伟大的旅游指南,告诉你关于这个地方的历史和文化,以及什么看,如何四处走动,等等。
Try it out on www.where2go.help
下一个问题是找出使用哪种模型。传统的自然语言处理推荐系统包括 TF-IDF + cos-similarity和 TF-IDF + SVD + k - means聚类等模型。这些模型可能做伟大的工作,找到类似的目的地,但我想使用模型,让我添加地方字符,如'海滩'或'酒'在我的搜索。因此,我决定去与谷歌最近创建的模型称为word2vec。Word2vec 是一个惊人的模型,它将单词转换为捕捉单词"含义"的矢量。此模型的酷功能是,您可以添加/减去单词,因为它们是矢量。例如,你可以做类似操作'king' - 'man' + 'woman' 产生 a vector that ~= 'queen'。我的 Word2vec 模型了解了 wikivoyage 文章中介绍的单词和地点的旅游特定上下文,允许矢量操作推荐类似位置。
使用 word2vec,我能够获得与搜索查询具有最接近语义含义的单词/目的地的建议。但是,我必须找出一种方法,确定哪些建议实际上是地理位置,哪些只是接近的话。我能够使用Wikivoyage的地理定位数据来检查这一点。
一旦我训练了旅行环境模型,我就构建了一个 Web 应用程序来交付我的数据科学项目。我使用 javascript 执行 AJAX 调用,将用户查询的结果更新到 MapBox map and Bootstrap to format the pages。
*我还收集了《纽约时报》的《旅行、世界和科学》(其中有很多环保文章)新闻来丰富我的数据源,但决定将其排除在外,因为结果过于"新闻化"。
Methodology
The code folder is divided into three sections 1) data collection, 2) EDA, 3) model.
1) Gathering Data
####Wikivoyage There are three files for wikivoyage data.三个wikivoyage数据的文件
-
wikivoyage_xml_to_json.py
The purpose of this file is to convert Wikivoyage travel guide articles to JSON format. Wikivoyage provided a data dump of its articles in XML format and I converted it to JSON format to go through exploratory data analysis with pandas.
wikivoyage_xml_to_json.py
此文件的目的是将 Wikivoyage 旅行指南文章转换为 JSON 格式。Wikivoyage 以 XML 格式提供了文章的数据转储,我将其转换为 JSON 格式,以便用pandas进行探索性数据分析。
运行:
| ImportError: No module named xmltodict |
图形化界面安装
| ImportError: No module named pandas |
图形化界面安装
| Traceback (most recent call last): File "wikivoyage_xml_to_json.py", line 25, in <module> jdata = convert_xml_to_json('data/wikivoyage/enwikivoyage-latest-pages-articles.xml') File "wikivoyage_xml_to_json.py", line 12, in convert_xml_to_json xml_str = open(filename).read() IOError: [Errno 2] No such file or directory: 'data/wikivoyage/enwikivoyage-latest-pages-articles.xml' |
在https://dumps.wikimedia.org/enwikivoyage/latest/找数据集
| (py2_flask) D:\anacondaProject\where2go\code\data_collection>python wikivoyage_xml_to_json.py |
成功运行该文件后在where2go\code\data_collection\data\wikivoyage获得wikivoyage.json一份,耶
2.wikivoyage_geotags_sql.py
The purpose of this file is to gather the geolocations of articles (places). Wikivoyage provided the geolocations of articles as a sql file. I created my own MySQL database to load in and query the data. I also did a bit of data cleaning in this file to remove the accents.
维基航行_地理标记_sql.py
此文件的目的是收集文章(地点)的地理位置。Wikivoyage 提供了文章的地理位置作为 sql 文件。我创建自己的 MySQL 数据库来加载和查询数据。我还在这个文件做了一些数据清理,删除口音。
| (py2_flask) D:\anacondaProject\where2go\code\data_collection>python wikivoyage_geotags_sql.py File "wikivoyage_geotags_sql.py", line 72 geotag_dict = create_geotag_dict(): ^ SyntaxError: invalid syntax |
尝试删除这个冒号
| No module named pymysql.cursors |
pip install pymysql
| Traceback (most recent call last): File "wikivoyage_geotags_sql.py", line 9, in <module> cursorclass=pymysql.cursors.DictCursor)
pymysql.err.OperationalError: (1045, u"Access denied for user 'admin'@'localhost' (using password: NO)") |
查看源码:
| # Connect to the database connection = pymysql.connect(user='admin', db='wiki', cursorclass=pymysql.cursors.DictCursor) |
查看连接方法:https://www.cnblogs.com/woider/p/5926744.html
| pymysql.Connect()参数说明 host(str): MySQL服务器地址 port(int): MySQL服务器端口号 user(str): 用户名 passwd(str): 密码 db(str): 数据库名称 charset(str): 连接编码
connection对象支持的方法 cursor() 使用该连接创建并返回游标 commit() 提交当前事务 rollback() 回滚当前事务 close() 关闭连接
cursor对象支持的方法 execute(op) 执行一个数据库的查询命令 fetchone() 取得结果集的下一行 fetchmany(size) 获取结果集的下几行 fetchall() 获取结果集中的所有行 rowcount() 返回数据条数或影响行数 close() 关闭游标对象 |
修改连接时用户名密码,创建数据库
| pymysql.err.ProgrammingError: (1146, u"Table 'wiki.geo_tags' doesn't exist") |
看项目介绍中Wikivoyage 提供了文章的地理位置作为 sql 文件,继续找数据集https://github.com/baturin/wikivoyage-listings
还是在这里找到(雾):https://dumps.wikimedia.org/hewikivoyage/latest/
| pymysql.err.ProgrammingError: (1146, u"Table 'wiki.page' doesn't exist") |
还在刚刚的页面找到pages.sql
下载的一个sql貌似不是英文,(האיים_הקאריביים)
看到这个貌似是官网https://www.wikidata.org/wiki/Wikidata:Wikivoyage/Resources
全语言长这样:https://www.wikivoyage.org/
英文版的地址长这样:https://en.wikivoyage.org/
同理类推:https://dumps.wikimedia.org/enwikivoyage/latest/
成功找到英文版sql
| IOError: [Errno 2] No such file or directory: '../data/geotag_dict.pkl' |
查看源码为输出文件,新建
成功运行
3.scrap_wikivoyage_banners.py
This file contains code that I used to scrap the banner images of articles from wikivoyage. I also used this to collect the canonical url of the wikivoyage page. I had to search destinations using a special search page on Wikivoyage to overcome minor syntax differences in place names.
此文件包含用于从 wikivoyage 中抓取文章的横幅图像的代码。我也用这个来收集wikivoyage page的标准URL。我不得不在Wikivoyage上使用一个特殊的搜索页面搜索目的地,以克服地名中的微小语法差异。
| self.locations = pkl.load(open('../../data/pickles/geotag_dict.pkl', 'rb')) IOError: [Errno 2] No such file or directory: '../../data/pickles/geotag_dict.pkl' |
复制刚刚的pkl
| CONNECTION ERROR!!! RECONNECT TO page Traceback (most recent call last): File "scrap_wikivoyage_banners.py", line 109, in <module> swb.scrap_banners() File "scrap_wikivoyage_banners.py", line 95, in scrap_banners img_path, wiki_url = self.get_image_and_link(key) File "scrap_wikivoyage_banners.py", line 57, in get_image_and_link return make_default_img_url(place) NameError: global name 'make_default_img_url' is not defined |
| INDEX ERROR!!! page did not exist |
查看源码
| def get_image_and_link(self, place): ''' For a given place, get the canonical wikivoyage url and save the banner. If the banner is just a default banner, save the img path as the default banner to minimize duplicates.
input: place as string output: img_path and wiki_url + (save image in the process) '''
base_url = "https://en.wikivoyage.org/w/index.php?title=Special%3ASearch&profile=default&search=" full_url = base_url + place.title()
try: response = requests.get(full_url).text soup = BeautifulSoup(response, 'html.parser') wiki_url = soup.find(rel='canonical')['href'] img_src = 'https:' + soup.select('div.topbanner a.image')[0].select('img')[0]['src']
except IndexError: print 'INDEX ERROR!!! %s page did not exist' % place return make_default_img_url(place)
except ConnectionError: print 'CONNECTION ERROR!!! RECONNECT TO %s page' % place return make_default_img_url(place)
if 'Pagebanner_default' in img_src or 'default_banner' in img_src: print '%s has default banner!' % place img_path = 'static/banners/default.png'
else: place = place.replace('/', '_') # REPLACE SLASH BECAUSE IT CREATES A DIRECTORY
try: img_response = requests.get(img_src, stream=True) img_path = 'static/banners/%s.png' % place
except IndexError: print 'INDEX ERROR!!! %s page did not exist' % place return make_default_img_url(place)
except ConnectionError: print 'CONNECTION ERROR!!! RECONNECT TO %s page' % place return make_default_img_url(place)
# save the img file if it doesn't already exist. if it already exists, dont overwrite. if not os.path.exists('../../webapp/static/banners/%s.png' % place): with open('../../webapp/static/banners/%s.png' % place, 'wb') as out_file: shutil.copyfileobj(img_response.raw, out_file) del img_response print '%s.png successfully created' % place
else: print '%s.png already exists!' % place
return img_path, wiki_url |
| def scrap_banners(self): ''' Go through every key in the locations dictionary and scrape the wiki url and img_path. ''' for key in self.locations.iterkeys(): # print 'key %s,' % key img_path, wiki_url = self.get_image_and_link(key) self.locations[key]['wiki_url'] = wiki_url self.locations[key]['img_path'] = img_path |
| def load_location(self): ''' load the geolocation data. ''' self.locations = pkl.load(open('../../data/pickles/geotag_dict.pkl', 'rb')) |
| 看来还是pkl中的location出问题了,查看pkl import cPickle as pickle f = open('path') info = pickle.load(f) print info #show file |
| {'': {u'gt_lat': Decimal('56.83330000'), u'page_id': 18192, u'gt_lon': Decimal('60.58330000'), u'page_len': 27110}, '__': {u'gt_lat': Decimal('49.85944444'), u'page_id': 13920, u'gt_lon': Decimal('20.27472222'), u'page_len': 3453}, "_(')": {u'gt_lat': Decimal('-53.32000000'), u'page_id': 14305, u'gt_lon': Decimal('-70.91000000'), u'page_len': 3408}, "__'/": {u'gt_lat': Decimal('-22.92000000'), u'page_id': 13410, u'gt_lon': Decimal('-43.22000000'), u'page_len': 56927}, "/-'_": {u'gt_lat': Decimal('41.94610000'), u'page_id': 14123, u'gt_lon': Decimal('-87.66940000'), u'page_len': 28496},…… |
| 这些key真的诡异极了 |
尝试打印full url
| CONNECTION ERROR!!! RECONNECT TO https://en.wikivoyage.org/w/index.php?title=Special%3ASearch&profile=default&search= page |
尝试打印key
保存副本
更改sql语言版本后成功获得正确key
| INDEX ERROR!!! https://en.wikivoyage.org/w/index.php?title=Special%3ASearch&profile=default&search=Eastern_Cuba -- did not exist Traceback (most recent call last): File "scrap_wikivoyage_banners.py", line 115, in <module> swb.scrap_banners() File "scrap_wikivoyage_banners.py", line 101, in scrap_banners img_path, wiki_url = self.get_image_and_link(key) File "scrap_wikivoyage_banners.py", line 57, in get_image_and_link return make_default_img_url(place) NameError: global name 'make_default_img_url' is not defined |
尝试访问url:
https://en.wikivoyage.org/w/index.php?title=Special%3ASearch&profile=default&search=Eastern_Cuba
发get请求的状态码是302
wiki可以正常访问,但不是这个网址,跳转到
| https://en.wikivoyage.org/wiki/Eastern_Cuba 和make_default_img_url中的地址一样呢 https://en.wikivoyage.org/wiki/ |
但是https://en.wikivoyage.org/w/index.php?title=Special%3ASearch&profile=default
这个搜索页面还在
用搜索框搜索查看发出的请求是
| https://en.wikivoyage.org/w/index.php?=Eastern_Cuba&sort=relevance&search=Eastern_Cuba&title=Special%3ASearch&profile=advanced&fulltext=1&advancedSearch-current=%7B%7D&ns0=1 |
加&fulltext=1或无该名称则不会跳转
所以URL可能没有问题
make_default_img_url并不是全局变量,是不是什么错误让人把它当成全局变量了
尝试修改make_default_img_url
| def make_default_img_url(self, place): ''' input = place output = return the default values for img_path and wiki_url '''
img_path = 'static/banners/default.png' wiki_url = 'https://en.wikivoyage.org/wiki/%s' % place return img_path, wiki_url |
| except IndexError: # print 'INDEX ERROR!!! %s page did not exist' % place print 'INDEX ERROR!!! %s -- did not exist' % full_url # return make_default_img_url(place) return self.make_default_img_url(place) |
更改后虽然还是无法访问,但可以连续运行了,最后报错如下
| File "D:\ProgramData\Anaconda3\envs\py2_flask\lib\site-packages\requests\models.py", line 753, in generate raise ChunkedEncodingError(e) requests.exceptions.ChunkedEncodingError: ("Connection broken: error(10053, '')", error(10053, '')) |
在特殊搜索界面看到一个Developers:
https://www.mediawiki.org/wiki/How_to_contribute
网页API:https://www.mediawiki.org/wiki/API:Web_APIs_hub
API:Geosearch:https://www.mediawiki.org/wiki/API:Geosearch
GET 请求用地理位置的附近坐标或页面名称搜索 wiki 页面。
This module is supported through the Extension:GeoData currently not installed on MediaWiki but Wikipedia. So, in this document, we will use the URL en.wikipedia.org in all API endpoints.
此模块通过扩展支持:地理数据当前未安装在 MediaWiki 上,而是维基百科。因此,在本文中,我们将在所有 API 终结点中使用 URL en.wikipedia.org。
GET Request[edit]
Search for pages near Wikimedia Foundation headquarters by specifying the geographic coordinates of its location:
api.php?action=query&list=geosearch&gscoord=37.7891838|-122.4033522&gsradius=10000&gslimit=10 [try in ApiSandbox]
通过指定维基媒体基金会总部附近的页面,指定其位置的地理坐标
API documentation:https://en.wikipedia.org/w/api.php?action=help&modules=query+geosearch
https://en.wikivoyage.org/w/api.php?action=help&modules=query
API查阅方法https://www.mediawiki.org/wiki/API:Main_page
Examples:
Fetch site info and revisions of Main Page.
api.php?action=query&prop=revisions&meta=siteinfo&titles=Main%20Page&rvprop=user|comment&continue= [open in sandbox]
我之前用过request.urlopen,源码为requests.get,查看这两种区别https://blog.csdn.net/dead_cicle/article/details/86747593
构造一个Request对象,然后使用urlopen拿回来的还是对象
requests是python实现的简单易用的HTTP库,返回一个HTTPresp,该类有属性:text,content,code等。
直接打印的状态码为200,但还是报错,说明请求这一步是没有问题的
| (py2_flask) D:\anacondaProject\where2go\code\data_collection>python scrap_wikivoyage_banners.py <Response [200]> INDEX ERROR!!! https://en.wikivoyage.org/w/index.php?title=Special%3ASearch&profile=default&search=Eastern_Cuba -- did n ot exist |
查看bs:
https://blog.csdn.net/weixin_42231070/article/details/82225529
| importurllib.request frombs4 importBeautifulSoup douban_path = "https://movie.douban.com"response = urllib.request.urlopen(douban_path) soup = BeautifulSoup(response, 'html.parser') # 可以接受response对象soup = BeautifulSoup(response.read().decode('utf-8'), 'html.parser') # 可以接受字符串soup = BeautifulSoup(open(test.html),'html.parser') # 可以接受本地文件 |
刚才尝试打印text报错编码不对,但打印soup能打印出一堆html源码
查看wiki_url成功
| soup.find(rel='canonical')['href'] |
| (py2_flask) D:\anacondaProject\where2go\code\data_collection>python scrap_wikivoyage_banners.py https://en.wikivoyage.org/wiki/Eastern_Cuba |
所以可能是取img_src的问题
| 'https:'+soup.select('div.topbanner a.image')[0].select('img')[0]['src'] |
soup.select :https://blog.csdn.net/geerniya/article/details/77842421
通过采用soup.select()方法,可以得到所需的内容。
其中关键点在于,对于所需内容的精准定位,通过()内的语句来实现
https://blog.csdn.net/weixin_40425640/article/details/79470617
select 的功能跟find和find_all 一样用来选取特定的标签,它的选取规则依赖于css,我们把它叫做css选择器,如果之前有接触过jquery ,可以发现select的选取规则和jquery有点像。
标签名不加任何修饰,会返回一个数组(所以div是标签名
类名前加点,id名前加 #
组合查找可以分为两种,一种是在一个tag中进行两个条件的查找,一种是树状的查找一层一层之间的查找。
| print soup.select('a#link2') |
选择标签名为a,id为link2的tag。
猜测可能是最后的'src'下标无效
查找select('img') https://www.jianshu.com/p/ed2f044bd1fa
Tag或BeautifulSoup对象的.select()方法。
| res = soup.select('#wrapperto') |
-> tag's id |
| res = soup.select('img[src]') |
-> 'img' tags有'src' attributes |
| res = soup.select('img[src=...]') |
-> 'src' attributes是... |
soup.select 查找Img src
https://www.cnblogs.com/calmzone/p/11139980.html
|
|
https://blog.csdn.net/weixin_42231070/article/details/82225529
当属性不存在时,使用 get 返回None,字典形式取值会报错
| print soup.select('div.topbanner a.image') |
| (py2_flask) D:\anacondaProject\where2go\code\data_collection>python scrap_wikivoyage_banners.py [] |
难道这返回了一个空数组,topbanner类的div中根本就没有image类的a
查看https://en.wikivoyage.org/wiki/Eastern_Cuba的源码
发现含有topbanner类的div是有的,但是有两个,而且这个类名字只是包含,是好几个类其中有个wpb-topbanner
一个div元素为了能被多个样式表匹配到(样式复用),通常div的class中由好几段组成,如<div class="user login">能被.user和.login两个选择器选中。如果这两个选择器中有相同的属性值,则该属性值先被改为.user中的值,再被改为.login中的值,即重复的属性以最后一个选择器中的属性值为准。(这个div就有好几个类)
尝试改select中的类名
| a_img_tag=soup.select('div.wpb-topbanner a.image') print a_img_tag # print soup.select('div.topbanner a.image')[0].select('img')[0]
# img_src = 'https:' + soup.select('div.topbanner a.image')[0].select('img')[0]['src'] img_src = 'https:' + soup.select('div.wpb-topbanner a.image')[0].select('img')[0]['src'] |
打印不再是空数组了
| (py2_flask) D:\anacondaProject\where2go\code\data_collection>python scrap_wikivoyage_banners.py [<a class="image" dir="ltr" href="/wiki/File:WV_banner_Eastern_Cuba_Road_to_Guardalavaca.jpg" title="Eastern Cuba"><img class="wpb-banner-image" src="https://upload.wikimedia.org/wikipedia/commons/7/7d/WV_banner_Eastern_Cuba_Road_to_Guardal avaca.jpg" srcset="https://upload.wikimedia.org/wikipedia/commons/thumb/7/7d/WV_banner_Eastern_Cuba_Road_to_Guardalavaca .jpg/640px-WV_banner_Eastern_Cuba_Road_to_Guardalavaca.jpg 640w,https://upload.wikimedia.org/wikipedia/commons/thumb/7/7 d/WV_banner_Eastern_Cuba_Road_to_Guardalavaca.jpg/1280px-WV_banner_Eastern_Cuba_Road_to_Guardalavaca.jpg 1280w,https://u pload.wikimedia.org/wikipedia/commons/7/7d/WV_banner_Eastern_Cuba_Road_to_Guardalavaca.jpg 2560w"/></a>] Traceback (most recent call last): File "scrap_wikivoyage_banners.py", line 123, in <module> swb.scrap_banners() File "scrap_wikivoyage_banners.py", line 109, in scrap_banners img_path, wiki_url = self.get_image_and_link(key) File "scrap_wikivoyage_banners.py", line 80, in get_image_and_link img_response = requests.get(img_src, stream=True) File "D:\ProgramData\Anaconda3\envs\py2_flask\lib\site-packages\requests\api.py", line 75, in get return request('get', url, params=params, **kwargs) File "D:\ProgramData\Anaconda3\envs\py2_flask\lib\site-packages\requests\api.py", line 60, in request return session.request(method=method, url=url, **kwargs) File "D:\ProgramData\Anaconda3\envs\py2_flask\lib\site-packages\requests\sessions.py", line 519, in request prep = self.prepare_request(req) File "D:\ProgramData\Anaconda3\envs\py2_flask\lib\site-packages\requests\sessions.py", line 462, in prepare_request hooks=merge_hooks(request.hooks, self.hooks), File "D:\ProgramData\Anaconda3\envs\py2_flask\lib\site-packages\requests\models.py", line 313, in prepare self.prepare_url(url, params) File "D:\ProgramData\Anaconda3\envs\py2_flask\lib\site-packages\requests\models.py", line 390, in prepare_url raise InvalidURL("Invalid URL %r: No host supplied" % url) requests.exceptions.InvalidURL: Invalid URL u'https:https://upload.wikimedia.org/wikipedia/commons/7/7d/WV_banner_Easter n_Cuba_Road_to_Guardalavaca.jpg': No host supplied |
找到的只有一个a标签,里面也只有一个img标签
Src中的https://upload.wikimedia.org/wikipedia/commons/7/7d/WV_banner_Easter可以访问,出去额外添加的“https:”,报错
| (py2_flask) D:\anacondaProject\where2go\code\data_collection>python scrap_wikivoyage_banners.py [<a class="image" dir="ltr" href="/wiki/File:WV_banner_Eastern_Cuba_Road_to_Guardalavaca.jpg" title="Eastern Cuba"><img class="wpb-banner-image" src="https://upload.wikimedia.org/wikipedia/commons/7/7d/WV_banner_Eastern_Cuba_Road_to_Guardalavaca.jpg" srcset="https://upload.wikimedia.org/wikipedia/commons/thumb/7/7d/WV_banner_Eastern_Cuba_Road_to_Guardalavaca.jpg/640px-WV_banner_Eastern_Cuba_Road_to_Guardalavaca.jpg 640w,https://upload.wikimedia.org/wikipedia/commons/thumb/7/7d/WV_banner_Eastern_Cuba_Road_to_Guardalavaca.jpg/1280px-WV_banner_Eastern_Cuba_Road_to_Guardalavaca.jpg 1280w,https://upload.wikimedia.org/wikipedia/commons/7/7d/WV_banner_Eastern_Cuba_Road_to_Guardalavaca.jpg 2560w"/></a>] CONNECTION ERROR!!! RECONNECT TO eastern_cuba page Traceback (most recent call last): File "scrap_wikivoyage_banners.py", line 123, in <module> swb.scrap_banners() File "scrap_wikivoyage_banners.py", line 109, in scrap_banners img_path, wiki_url = self.get_image_and_link(key) File "scrap_wikivoyage_banners.py", line 89, in get_image_and_link return make_default_img_url(place) NameError: global name 'make_default_img_url' is not defined |
尝试打印请求的response
| (py2_flask) D:\anacondaProject\where2go\code\data_collection>python scrap_wikivoyage_banners.py https://upload.wikimedia.org/wikipedia/commons/7/7d/WV_banner_Eastern_Cuba_Road_to_Guardalavaca.jpg <Response [200]> Traceback (most recent call last): File "scrap_wikivoyage_banners.py", line 124, in <module> swb.scrap_banners() File "scrap_wikivoyage_banners.py", line 110, in scrap_banners img_path, wiki_url = self.get_image_and_link(key) File "scrap_wikivoyage_banners.py", line 94, in get_image_and_link with open('../../webapp/static/banners/%s.png' % place, 'wb') as out_file: IOError: [Errno 2] No such file or directory: '../../webapp/static/banners/eastern_cuba.png' |
尝试创建banners
| (py2_flask) D:\anacondaProject\where2go\code\data_collection>python scrap_wikivoyage_banners.py https://upload.wikimedia.org/wikipedia/commons/7/7d/WV_banner_Eastern_Cuba_Road_to_Guardalavaca.jpg <Response [200]> eastern_cuba.png successfully created https://upload.wikimedia.org/wikipedia/commons/thumb/5/53/Ardrossan_-_SA_WV_Banner.jpg/2560px-Ardrossan_-_SA_WV_Banner.jpg <Response [200]> ardrossan_(south_australia).png successfully created |
不想断网的时候爬信息一直往下滚,漏过了好多,尝试在爬图片网址的时候加了sleep
| import time
except ConnectionError: # print 'CONNECTION ERROR!!! RECONNECT TO %s page' % place print 'CONNECTION ERROR!!! RECONNECT TO -- %s ' % full_url time.sleep(20) # return make_default_img_url(place) return self.make_default_img_url(place) |
这样断网的时候error就不会一直刷屏了,给我一点时间,把网重新连上,怎么下到一半anaconda还卡了呢= =
这回爬得顺利一点,少量index error
| INDEX ERROR!!! https://en.wikivoyage.org/w/index.php?title=Special%3ASearch&profile=default&search=Fjrland&ns0=1 -- img src did not exist Fjrland这个我直接在维基上搜也搜不到,There were no results matching the query. 下拉框有个带梅花a的(打不出来) 找到真实链接为https://en.wikivoyage.org/wiki/Fj%C3%A6rland |
| INDEX ERROR!!! https://en.wikivoyage.org/w/index.php?title=Special%3ASearch&profile=default&search=Heisy_Bordel/Prague/East_Bank_Of_Vltava&ns0=1 -- img src did not exist Heisy_Bordel/Prague/East_Bank_Of_Vltava也搜不到 Heisy Bordel是Prague/East_Bank_Of_Vltava的一个贡献用户 真实链接https://en.wikivoyage.org/wiki/Prague/East_bank_of_Vltava |
| INDEX ERROR!!! https://en.wikivoyage.org/w/index.php?title=Special%3ASearch&profile=default&search=Berlinichthyosaur_State_Park&ns0=1 下拉框有Berlin–Ichthyosaur State Park,真实链接https://en.wikivoyage.org/wiki/Berlin%E2%80%93Ichthyosaur_State_Park 图片:https://en.wikivoyage.org/wiki/File:Berlin%E2%80%93Ichthyosaur_State_Park_banner.JPG |
| INDEX ERROR!!! https://en.wikivoyage.org/w/index.php?title=Special%3ASearch&profile=default&search=Hafnarfjorur&ns0=1 -- img src did not exist |
| INDEX ERROR!!! https://en.wikivoyage.org/w/index.php?title=Special%3ASearch&profile=default&search=Drivingukbanner1.Jpg&ns0=1 -- img src did not exist Drivingukbanner1.Jpg这很奇怪,地名怎么变成jpg了,而且前面的Driving uk也不知道怎么查了 |
| INDEX ERROR!!! https://en.wikivoyage.org/w/index.php?title=Special%3ASearch&profile=default&search=Owl_Ad_Wouters.Jpg&ns0=1 |
| INDEX ERROR!!! https://en.wikivoyage.org/w/index.php?title=Special%3ASearch&profile=default&search=Snogebk&ns0=1 -- img src did not exist |
| INDEX ERROR!!! https://en.wikivoyage.org/w/index.php?title=Special%3ASearch&profile=default&search=Nstved&ns0=1 -- img src did not exist 真实链接 https://en.wikivoyage.org/wiki/N%C3%A6stved |
因为网老断,需要重复多次运行,每次都重复请求url然后判断图片存在太慢了,先判断一波
| def get_image_and_link(self, place): ''' For a given place, get the canonical wikivoyage url and save the banner. If the banner is just a default banner, save the img path as the default banner to minimize duplicates.
input: place as string output: img_path and wiki_url + (save image in the process) ''' if not os.path.exists('../../webapp/static/banners/%s.png' % place): #look over before request base_url = "https://en.wikivoyage.org/w/index.php?title=Special%3ASearch&profile=default&search=" full_url = base_url + place.title() # print 'place %s,' % place # print 'place_title %s' % place.title()
try: response = requests.get(full_url).text soup = BeautifulSoup(response, 'html.parser') wiki_url = soup.find(rel='canonical')['href'] a_img_tag=soup.select('div.wpb-topbanner a.image') # img_src = 'https:' + soup.select('div.topbanner a.image')[0].select('img')[0]['src'] img_src = soup.select('div.wpb-topbanner a.image')[0].select('img')[0]['src'] # mark except IndexError: # print 'INDEX ERROR!!! %s page did not exist' % place print 'INDEX ERROR!!! %s -- img src did not exist' % wiki_url # return make_default_img_url(place) return self.make_default_img_url(place)
except ConnectionError: # print 'CONNECTION ERROR!!! RECONNECT TO %s page' % place print 'CONNECTION ERROR!!! RECONNECT TO -- %s ' % full_url time.sleep(20) # return make_default_img_url(place) return self.make_default_img_url(place)
if 'Pagebanner_default' in img_src or 'default_banner' in img_src: print '%s has default banner!' % place img_path = 'static/banners/default.png'
else: place = place.replace('/', '_') # REPLACE '/' with '_' BECAUSE IT CREATES A DIRECTORY
try: img_response = requests.get(img_src, stream=True) # print img_response img_path = 'static/banners/%s.png' % place
except IndexError: print 'INDEX ERROR!!! %s img did not exist' % place return self.make_default_img_url(place)
except ConnectionError: # print 'CONNECTION ERROR!!! RECONNECT TO %s img' % place print 'CONNECTION ERROR!!! RECONNECT TO %s img' % img_src return self.make_default_img_url(place)
# save the img file if it doesn't already exist. if it already exists, dont overwrite. if not os.path.exists('../../webapp/static/banners/%s.png' % place): with open('../../webapp/static/banners/%s.png' % place, 'wb') as out_file: shutil.copyfileobj(img_response.raw, out_file) del img_response print '%s.png successfully created' % place
else: print '%s.png already exists!' % place #look over before request else: print '%s.png already exists!' % place return self.make_default_img_url(place) return img_path, wiki_url |
(真不容易,电脑总是断网,一直修不好。去工作室蹭网下图片,老师还说有领导参观,不让呆)
网不好真的太难爬了,使用默认网址的模型,剩下的交给别人爬
全部运行完在D:\anacondaProject\where2go\data生成了一个geotag_imglink_wikibanner.pkl
New York Times
4.nyt_articles_api.py
This file was use to gather the most recent NYT articles in World, Science, and Travel sections. MongoDB was used to save the articles called with the official NYT API. Data was collected but was not incorporated to the model because the articles contained too much news like semantics.
此文件用于收集《世界、科学和旅行》部分中最新的《纽约时报》文章。MongoDB 用于保存使用官方的 NYT API 调用的文章。数据收集但未纳入模型,因为文章包含太多像语义的新闻。
| ImportError: No module named pymongo |
去蹭网下叭
| pip install pymongo |
运行了一会儿后报错
| pymongo.errors.ServerSelectionTimeoutError: localhost:27017: [Errno 10061] |
想起来这个是要mongodb的
https://www.jianshu.com/p/c9777b063593
https://blog.csdn.net/huasonl88/article/details/51755621
MongoDB 不同于关系型结构的三层结构——database--> table --> record,它的层级为 database -->collection --> document
https://blog.csdn.net/zwq912318834/article/details/77689568
| import pymongo
# mongodb服务的地址和端口号 mongo_url = "127.0.0.1:27017"
# 连接到mongodb,如果参数不填,默认为“localhost:27017” client = pymongo.MongoClient(mongo_url)
#连接到数据库myDatabase DATABASE = "myDatabase" db = client[DATABASE]
#连接到集合(表):myDatabase.myCollection COLLECTION = "myCollection" db_coll = db[COLLECTION ]
# 在表myCollection中寻找date字段等于2017-08-29的记录,并将结果按照age从大到小排序 queryArgs = {'date':'2017-08-29'} search_res = db_coll.find(queryArgs).sort('age',-1) for record in search_res: print(f"_id = {record['_id']}, name = {record['name']}, age = {record['age']}") |
源码:
| # Define the MongoDB database and table db_cilent = MongoClient() db = db_cilent['nyt_dump'] table = db['articles'] |
| ''' Get all the links, visit the page and scrape the content ''' if not section: links = table.find({'content_txt': {'$exists': False}}, {'web_url': 1}) else: links = table.find({'$and': [{'content_txt': {'$exists': False}}, {'section_name': section}]}, {'web_url': 1}) |
开启mongodb
| D:\Program Files\Mongo\bin>mongod.exe --dbpath "D:\MongoDB\DBData" |
Mongo还用不了了,卸载重装https://www.cnblogs.com/6luv-ml/p/9174818.html
看了下,可能因为上次重装系统的问题,程序与功能里并没有mongodb,直接删除了安装
没再报错了(没看到写入文件,有没有数据也不想管了-反正后面可能也用不着)
Service Name:MongoDB
Data Directory:D:\Program Files\Mongo\data\
2) EDA
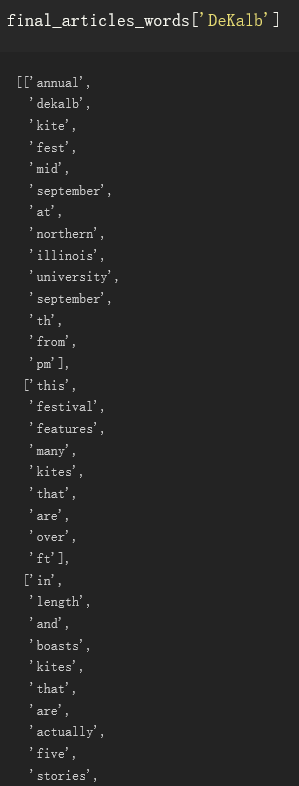
Exploratory data analysis and data cleaning have been performed with ipython notebook. Wikivoyage and NYT data were loaded, cleaned, pickled out as input format for word2vec, which is a list of sentences where each sentence is represented as a list of words. Also, global NOAA weather data was downloaded but I later determined that it leaves out major parts of the world. Thus, more data has to be collected to incorporate weather to the project.
Ipython notebook已执行探索性数据分析和数据清理。Wikivoyage 和 NYT 数据被加载、清理、挑选出来作为 word2vec 的输入格式,该格式是句子列表,其中每个句子都表示为单词列表。此外,全球NOAA天气数据被下载,但我后来确定,它忽略了世界的主要部分。因此,要将天气纳入项目必须收集更多的数据。
Wiki voyage
| (py2_flask) D:\anacondaProject\where2go\code\data_collection>ipython Python 3.7.0 (default, Jun 28 2018, 08:04:48) [MSC v.1912 64 bit (AMD64)] Type 'copyright', 'credits' or 'license' for more information IPython 6.5.0 -- An enhanced Interactive Python. Type '?' for help. |
Anaconda中预置了ipython
可能是用jupyter做的,直接打开看起来像一堆json
Jupyter介绍:http://baijiahao.baidu.com/s?id=1601883438842526311&wfr=spider&for=pc
当你还处于原型开发阶段时,Jupyter Notebooks 的作用更是引人注目。这是因为你的代码是按独立单元的形式编写的,而且这些单元是独立执行的。这让用户可以测试一个项目中的特定代码块,而无需从项目开始处执行代码。
要运行你的 Jupyter Notebooks,只需在命令行输入以下命令即可!
jupyter notebook
完成之后,Jupyter Notebooks 就会在你的默认网络浏览器打开,地址是:
http://localhost:8888/tree
在某些情况下,它可能不会自动打开。而是会在终端/命令行生成一个 URL,并带有令牌密钥提示。你需要将包含这个令牌密钥在内的整个 URL 都复制并粘贴到你的浏览器,然后才能打开一个笔记本。
打开笔记本后,你会看到顶部有三个选项卡:Files、Running 和 Clusters。其中,Files 基本上就是列出所有文件,Running 是展示你当前打开的终端和笔记本,Clusters 是由 IPython 并行提供的。
要打开一个新的 Jupyter 笔记本,点击页面右侧的「New」选项。你在这里会看到 4 个需要选择的选项:
Python 3Text FileFolderTerminal
选择 Text File,你会得到一个空面板。你可以添加任何字母、单词和数字。其基本上可以看作是一个文本编辑器(类似于 Ubuntu 的文本编辑器)。你可以在其中选择语言(有很多语言选项),所以你可以在这里编写脚本。你也可以查找和替换该文件中的词。
选择 Folder 选项时,你会创建一个新的文件夹,你可以在其中放入文件,重命名或删除它。各种操作都可以。
Terminal 完全类似于在 Mac 或 Linux 机器上的终端(或 Windows 上的 cmd)。其能在你的网络浏览器内执行一些支持终端会话的工作。在这个终端输入 python,你就可以开始写你的 Python 脚本了!
在代码上面的菜单中,你有一些操作各个单元的选项:添加、编辑、剪切、向上和向下移动单元、运行单元内的代码、停止代码、保存工作以及重启 kernel。
上图所示的下拉菜单中,你还有 4 个选项:
Code——不言而喻,就是写代码的地方。Markdown——这是写文本的地方。你可以在运行一段代码后添加你的结论、添加注释等。Raw NBConvert——这是一个可将你的笔记本转换成另一种格式(比如 HTML)的命令行工具。Heading——这是你添加标题的地方,这样你可以将不同的章节分开,让你的笔记本看起来更整齐更清晰。这个现在已经被转换成 Markdown 选项本身了。输入一个「##」之后,后面输入的内容就会被视为一个标题。
!%clear、%autosave、%debug 和 %mkdir 等功能你以前肯定见过。现在,神奇的命令可以以两种方式运行:
逐行方式逐单元方式
顾名思义,逐行方式是执行单行的命令,而逐单元方式则是执行不止一行的命令,而是执行整个单元中的整个代码块。
在逐行方式中,所有给定的命令必须以 % 字符开头;而在逐单元方式中,所有的命令必须以 %% 开头
快捷方式是 Jupyter Notebooks 最大的优势之一。当你想运行任意代码块时,只需要按 Ctrl+Enter 就行了。
Jupyter Notebooks 提供了两种不同的键盘输入模式——命令和编辑。命令模式是将键盘和笔记本层面的命令绑定起来,并且由带有蓝色左边距的灰色单元边框表示。编辑模式让你可以在活动单元中输入文本(或代码),用绿色单元边框表示。
你可以分别使用 Esc 和 Enter 在命令模式和编辑模式之间跳跃。
如之前提到的,Ctrl + Enter 会运行你的整个单元块。
•Alt + Enter 不止会运行你的单元块,还会在下面添加一个新单元。
•Ctrl + Shift + F 打开命令面板。
要查看键盘快捷键完整列表,可在命令模式按「H」或进入「Help > Keyboard Shortcuts」。
保存和共享你的笔记本
当我必须写一篇博客文章时,我的代码和评论都会在一个 Jupyter 文件中,我需要首先将它们转换成另一个格式。记住这些笔记本是 json 格式的,这在进行共享时不会很有帮助。我总不能在电子邮件和博客上贴上不同单元块,对不对?
进入「Files」菜单,你会看到「Download As」选项:
你可以用 7 种可选格式保存你的笔记本。其中最常用的是 .ipynb 文件和 .html 文件。使用 .ipynb 文件可让其他人将你的代码复制到他们的机器上,使用 .html 文件能以网页格式打开(当你需要保存嵌入在笔记本中的图片时会很方便)。
你也可以使用 nbconvert 选项手动将你的笔记本转换成 HTML 或 PDF 等格式。
你也可以使用 jupyterhub,地址:https://github.com/jupyterhub/jupyterhub。其能让你将笔记本托管在它的服务器上并进行多用户共享。很多顶级研究项目都在使用这种方式进行协作。
有时候你的文件中有非常大量的代码。看看能不能将你认为不重要的某些代码隐藏起来,之后再引用。这能让你的笔记本看起来整洁清晰,这是非常可贵的。查看这个在 matplotlib 上的笔记本,看看可以如何简练地进行呈现:http://nbviewer.jupyter.org/github/jrjohansson/scientific-python-lectures/blob/master/Lecture-4-Matplotlib.ipynb
另一个额外技巧!在你想创建一个演示文稿时,你可能首先想到的工具是 PowerPoint 和 Google Slides。其实你的 Jupyter Notebooks 也能创建幻灯片!
更改默认保存位置
- 打开Windows的cmd,在cmd中输入
jupyter notebook --generate-config如下图: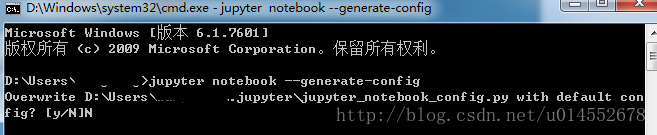
可以看到路径为D:\Users……找到此路径修改jupyter_notebook_config.py文件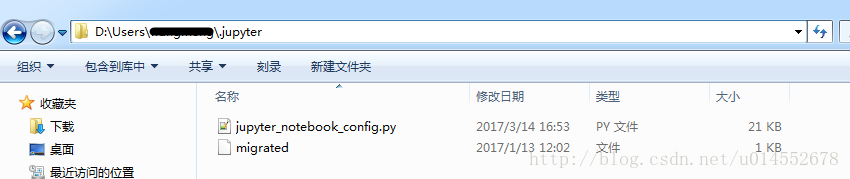
打开此文件找到
## The directory to use for notebooks and kernels. #c.NotebookApp.notebook_dir = ''
将其改为## The directory to use for notebooks and kernels. c.NotebookApp.notebook_dir = 'E:\Jupyter'
其中E:\Jupyter为我的工作空间,你可以改成你自己的,
注意:
1.#c.NotebookApp.notebook_dir = ''中的#必须删除,且前面不能留空格。
2. E:\Jupyter,Jupyter文件夹必须提前新建,如果没有新建,Jupyter Notebook会找不到这个文件,会产生闪退现象。
Cmd中没有jupyter环境,无法运行jupyter notebook --generate-config,在anaconda中修改的配置,也在anaconda中打开
(base) C:\Users\Lenovo>jupyter notebook
反斜杠有可能识别为转义
| c.NotebookApp.notebook_dir = 'D:\\anacondaProject' |
尝试用base环境直接运行,新建Wiki voyage eda副本。
报错
| ModuleNotFoundError: No module named 'gensim' |
暂时不管,待会再看在哪个环境装好
发现py2环境虽然没特地装jupyter,但是居然也可以运行,所有配置和base环境一样(右上角也有个py3的标志)
解决:http://www.360doc.com/content/17/0413/22/1489589_645405947.shtml
Jupyter Notebook的环境和kernels内核有关。用everything搜索kernel.json找到
/jupyter/kernels/python3/kernel.json
(py27)环境还缺少ipykernel
conda install ipykernel
切换

https://blog.csdn.net/castle_cc/article/details/77476081
| python -m pip install ipykernel python -m ipykernel install --user |
成功切换。
运行报错
| FileNotFoundError: [Errno 2] No such file or directory: '../data/wikivoyage.json' |
复制data collection中py生成的文件到该目录D:\anacondaProject\where2go\code\data
报错
| ImportError: matplotlib is required for plotting. |
https://www.cnblogs.com/star-zhao/p/9726212.html
尝试重启IDE,全部重新运行,报错
| LookupError Traceback (most recent call last) <ipython-input-36-3b51d0f0aedc> in <module>() 5 # final_articles_words[key] = convert_article_into_list_of_words(value) 6 #print article ----> 7 final_articles_words[key] = convert_article_into_list_of_words(value) <ipython-input-33-e13c4daff3a0> in convert_article_into_list_of_words(article) 14 text = clean_paragraph(text) 15 #tokenize paragraph to sentences ---> 16 sentences = sent_tokenize(text) 17 18 for sentence in sentences: |
| LookupError: ********************************************************************** Resource punkt not found. Please use the NLTK Downloader to obtain the resource: >>> import nltk >>> nltk.download('punkt') For more information see: https://www.nltk.org/data.html Attempted to load tokenizers/punkt/english.pickle |
https://blog.csdn.net/qq_31747765/article/details/80307450
| 命令行 python import nltk nltk.download() |
切换到models标签,找到punkt
在报错中查找的地址中选一个,更改Download Directory
| D:\\ProgramData\\Anaconda3\\envs\\py2_flask\\nltk_data |
最后生成../data/wikivoyage_list_of_words.pkl
Weather
报错
| No module named haversine |
| pip install haversine |
报错
| No such file or directory: '../../data/pickles/geotag_imglink_wikiurl.pkl' |
没找到拿他作为输出文件的代码,weather_normals_eda-checkpoint和此处都是作为读入文件
尝试拿刚刚生成的pickle改名字
报错
| IOError: [Errno 2] No such file or directory: '../data/weather/ghcnm.tavg.v3.3.0.20150624.qca.dat' |
https://www.jianshu.com/p/3d4b606ec359
全球历史气候网络月度(GHCNm)数据集是来自世界各地数千个气象站的一组月度气候摘要。月度数据具有通过站最早观测可追溯至18改变记录期间日世纪。一些台站记录纯粹是历史性的,不再更新,而其他许多台站仍在运行,并提供对气候监测有用的短时间延迟更新。
地址https://www.ncei.noaa.gov/data/global-historical-climatology-network-monthly/
GHCN:https://www.ncdc.noaa.gov/data-access/land-based-station-data/land-based-datasets/global-historical-climatology-network-ghcn
v4版本的只有qcf、qcu、qfe,没有qca,还是决定下v3的
PHA已经过广泛的评估(例如,Williams等人,2012),并且GHCNm v4数据被提供为均质化(调整)和非均质化(未调整)。均匀化数据由字符串“ qcf ” 已知,而未均匀化数据由字符串“ qcu ” 指定。如Menne等人所述。(2018),PHA作为整体周期性地运行以量化均质化的不确定性。还评估了其他不确定因素。
放到指定文件夹,修改读取文件名中的时间日期
| globaldata = pd.read_fwf('../data/weather/ghcnm.tavg.v3.3.0.20190821.qca.dat',header = None, widths=widths) |
报错:
| IOError: [Errno 2] No such file or directory: '../data/weather/ghcnm.tavg.v3.3.0.20150624.qca.inv' |
解压并改读取文件名
警告:
| D:\ProgramData\Anaconda3\envs\py2_flask\lib\site-packages\ipykernel_launcher.py:6: FutureWarning: The current behaviour of 'Series.argmin' is deprecated, use 'idxmin' instead. The behavior of 'argmin' will be corrected to return the positional minimum in the future. For now, use 'series.values.argmin' or 'np.argmin(np.array(values))' to get the position of the minimum row. D:\ProgramData\Anaconda3\envs\py2_flask\lib\site-packages\ipykernel_launcher.py:7: DeprecationWarning: .ix is deprecated. Please use .loc for label based indexing or .iloc for positional indexing See the documentation here: http://pandas.pydata.org/pandas-docs/stable/indexing.html#ix-indexer-is-deprecated import sys
# ndarray compat argmin = idxmin argmax = idxmax 别名而已
ix和loc、iloc函数都是用来获取某一行或者某一列数据的。
col1 col2 col3 row1 1 2 3 row2 4 5 6 row3 7 8 9 .loc[] is primarily label based, but may also be used with a boolean array. 完全基于标签位置(而不是下标)的索引器,所谓标签位置就是上面定义的'row1','row2'。 使用方法(row1就是行标签):print df.loc['row1']
.iloc[] is primarily integer position based (from 0 to length-1 of the axis), but may also be used with a boolean array.完全基于行号的索引器,所谓行号就是第0、1、2行。 print df.iloc[0]
.ix[] supports mixed integer and label based access. It is primarily label based, but will fall back to integer positional access unless the corresponding axis is of integer type.支持标签和行号混合的索引器,既可以通过标签也可以通过行号,还可以组合在一起(这个函数已经过期,建议使用上面两个函数替代) |
| 源码: closest_station = distance.argmin() temps = master.ix[closest_station][months] |
| 修改: closest_station = distance.idxmin() temps = master.loc[closest_station][months] |
全部运行完成
Nyt
报错
| ImportError: No module named nyt_articles_api |
这是之前collection中的模块
如何在jupyter中调用自己写的Python模块:
https://blog.csdn.net/w371500241/article/details/55809362
https://www.cnblogs.com/master-pokemon/p/6136483.html
放同一个目录或
|
|
Jupyter中直接写绝对路径无法识别,但相对路径可以,加入
| import sys sys.path.append('..\data_collection') |
报错:
| ServerSelectionTimeoutError: localhost:27017: [Errno 10061] |
估计是mongodb的
这回好像装的是个自带server版本,自己就运行了,没再报错了,生成文件
../data/nyt_articles_word_list.pkl','wb'
启动jupyter:
| activate py2_flask jupyter notebook |
3) Model
Where2go is based on a model created at Google called word2vec. Word2vec is a neural network with 1 hidden layer that has continuous bag of words (CBOW) or skip-grams implementation. Where2go uses the version that uses skip-grams and hierarchical softmax for optimization.
On the high level, word2vec tries to train the neural network to paramatize a model that can predict the surrounding words for every word in the corpus. The predictions are then used to backpropogate and optimize the parameters to make words with similar contexts be closer together, while being further away from words that have different contexts. The input-hidden layer weighting matrix, which is also the vector representation of words, is then used to gain insight into the meaning/similarity of words.
In my where2go_model.py file, I implemented gensim's word2vec model and wrote functions to vectorize user search queries and functions to filter the recommendations to actual geolocations and output destinations in geojson format.
Where2go基于谷歌创建的名为word2vec的模型。Word2vec 是一个神经网络,具有 1 个隐藏层,该层具有连续的单词袋 (CBOW) 或skip-grams实现。where2go 使用的版本使用skip-grams 和hierarchical softmax进行优化。
在高层级上,word2vec 试图训练神经网络,以参数化一个模型,该模型可以预测语料库中每个单词的周围单词。然后,这些预测用于回推和优化参数,使具有相似上下文的单词更紧密地联系在一起,同时远离具有不同上下文的单词。然后,使用输入隐藏层加权矩阵(也是单词的矢量表示形式)来深入了解单词的含义/相似性。
在我的 where2go_model.py 文件中,我实现了 gensim 的 word2vec 模型,并编写了矢量化用户搜索查询的函数,和将建议筛选到实际地理位置、以geojson格式输出目的地的函数。
| activate py2_flask cd /d D:\anacondaProject\where2go\code\model python where2go_model.py |
报错:
| IOError: [Errno 2] No such file or directory: '../../data/pickles/geo_imglink_wikiurl.pkl' |
原名称为geotag_imglink_wikiurl,备份,修改名称
报错:
| IOError: [Errno 2] No such file or directory: '../../data/pickles/wikivoyage_list_of_words.pkl' |
将上面eda运行出来的粘上
警告:
| D:\ProgramData\Anaconda3\envs\py2_flask\lib\site-packages\gensim\models\base_any2vec.py:743: UserWarning: C extension not loaded, training will be slow. Install a C compiler and reinstall gensim for fast training. "C extension not loaded, training will be slow. " |
https://blog.csdn.net/menghuanguaishou/article/details/90546838
| pip uninstall gensim pip install gensim==3.6 |
警告:
| D:\ProgramData\Anaconda3\envs\py2_flask\lib\site-packages\gensim\utils.py:1212: UserWarning: detected Windows; aliasing chunkize to chunkize_serial warnings.warn("detected Windows; aliasing chunkize to chunkize_serial") |
https://blog.csdn.net/qq_41185868/article/details/88344862
据说没有关系
警告:
| D:\ProgramData\Anaconda3\envs\py2_flask\lib\site-packages\gensim\models\phrases.py:598: UserWarning: For a faster implementation, use the gensim.models.phrases.Phraser class warnings.warn("For a faster implementation, use the gensim.models.phrases.Phraser class") |
| 源码使用: bigram = gensim.models.Phrases(self.wikivoyage_list, min_count=10)
trigram = gensim.models.Phrases(bigram[self.wikivoyage_list], min_count=10) |
奇怪,没有看到解决这个警告的
https://blog.csdn.net/lwhsyit/article/details/82750218
应当生成../../data/pickles/where2go_model.pkl
Webapp
I was able to launch my own website using python Flask. I used javascript to perform AJAX calls for the search engine so that I could run a user's search query on my model to predict the most similar places and show my recommendations on the map. The Flask file is named 'app.py' and can be found in the folder 'webapp'; the 'index.html' file contains the html and javascript and can be found in the folder 'templates'. I used Bootstrap to design my website.
我能够运行我自己的网站使用python Flask。我使用 javascript 对搜索引擎执行 AJAX 调用,以便可以在模型上运行用户的搜索查询,以预测最相似的位置并在地图上显示我的建议。Flask 文件名为"app.py",可在文件夹"webapp"中找到;"index.html"文件包含 html 和 javascript,可以在文件夹"模板"中找到。我用Bootstrap来设计我的网站。
Final Remarks
This project has been very fun and intellectually challenging. I started this application as a capstone project but there are many things I would like to add to this app. I really want to add more travel guide data to make my results more robust, add historical weather data to help users decide when to go to a destination, and add average flight and hotel costs to help users choose plausible places. If you have any comments and recommendations for this project, please feel free to contact me.
这个项目很有趣,智力上很有挑战性。我开始这个应用程序作为一个顶点项目,但有很多东西我想添加到这个app。我希望添加更多的旅游指南数据,使我的搜索结果更加可靠,添加历史天气数据,以帮助用户决定何时前往目的地,并增加平均航班和酒店费用,以帮助用户选择合理的地方。如果您有任何意见和建议这个项目,请随时与我联系。
启动项目
该项目为python2。在我anaconda,py3,py2共存的环境中使py2能够使用。
发现需要的模块还挺多,决定在anaconda中新建py2虚拟环境
图形界面(fetching的过程挺长的):
https://www.cnblogs.com/zimo-jing/p/7834808.html?utm_source=debugrun&utm_medium=referral
命令行:https://jingyan.baidu.com/article/455a9950500494a166277808.html
安装模块:
| Traceback (most recent call last): File "app.py", line 10, in <module> from where2go_model import Where2Go_Model File "../code/model\where2go_model.py", line 1, in <module> import gensim ImportError: No module named gensim |
pip install genism(在图形化界面中安装总是报错,安装失败)
报错无满足版本
pip install --upgrade gensim
安装(可能网络问题)报错
| File "D:\ProgramData\Anaconda3\envs\py2_flask\lib\site-packages\pip\_vendor\urllib3\response.py", line 374, in _error_catcher raise ReadTimeoutError(self._pool, None, 'Read timed out.') ReadTimeoutError: HTTPSConnectionPool(host='files.pythonhosted.org', port=443): Read timed out. |
重复安装命令
缺少模块
| Traceback (most recent call last): File "app.py", line 1, in <module> from flask import Flask ImportError: No module named flask |
图形化界面安装
| Traceback (most recent call last): File "app.py", line 10, in <module> from where2go_model import Where2Go_Model File "../code/model\where2go_model.py", line 7, in <module> from bs4 import BeautifulSoup ImportError: No module named bs4 |
安装beautifulsoup4
图形化界面安装报错
pip install bs4
安装成功
When I run the web app in a python2.7 environment with all the dependencies, I get the following error:
| Traceback (most recent call last): File "app.py", line 44, in <module> app.where2go = load_pickle() File "app.py", line 19, in load_pickle return pkl.load(open('../data/pickles/where2go_model.pkl', 'rb')) IOError: [Errno 2] No such file or directory: '../data/pickles/where2go_model.pkl' |
查看源码:
| Showing the top four matches Last indexed Jun 30, 2018 Python
Showing the top three matches Last indexed Jun 30, 2018 Python
|
尝试使用code文件夹中代码搜集数据集
启动显示:
| (py2_flask) D:\anacondaProject\where2go\webapp>python app.py D:\ProgramData\Anaconda3\envs\py2_flask\lib\site-packages\gensim\utils.py:1212: UserWarning: detected Windows; aliasing chunkize to chunkize_serial warnings.warn("detected Windows; aliasing chunkize to chunkize_serial") * Serving Flask app "app" (lazy loading) * Environment: production WARNING: This is a development server. Do not use it in a production deployment. Use a production WSGI server instead. * Debug mode: on * Restarting with stat D:\ProgramData\Anaconda3\envs\py2_flask\lib\site-packages\gensim\utils.py:1212: UserWarning: detected Windows; aliasing chunkize to chunkize_serial warnings.warn("detected Windows; aliasing chunkize to chunkize_serial") * Debugger is active! * Debugger PIN: 232-882-558 * Running on http://0.0.0.0:80/ (Press CTRL+C to quit) |
成功打开网页
使用方法:
| To search travel destinations, you can |
| 要搜索旅游目的地,您可以 1. 写入目的地和/或特征 2. 在单词前面放置一个 +(添加)或 -(减去) 符号以表示首选项 3. 将单词乘以数字以增强(大于 1.0)或更低(小于 1.0)其影响
where2go 可能会推荐与输入处于相同描述级别的位置。这意味着,在搜索城市时,它更有可能返回城市名称而不是国家/地区名称。您最好输入... 个别国家/城市Individual country/cities Spain 输入相同级别的位置Adding places of same level description level hong kong + singapore 地点+特征Adding places + characteristic french polynesia + guam + scuba diving Search Tips: 至少放一个地点Try to put at least one place word2vec searches similar words so it is likely to return places with names related to the search *权重Play around with the place multipliers san francisco + 1.5*malaga will yield results more like malaga than san francisco + malaga 当你想在B国到A这样的城市When you want cities like A but in country B City A - Country of Place A + Country of Place B. |
无法搜索,报错
| 127.0.0.1 - - [02/Sep/2019 13:09:16] "POST /map HTTP/1.1" 500 - Traceback (most recent call last): File "D:\ProgramData\Anaconda3\envs\py2_flask\lib\site-packages\flask\app.py", line 2463, in __call__ return self.wsgi_app(environ, start_response) File "D:\ProgramData\Anaconda3\envs\py2_flask\lib\site-packages\flask\app.py", line 2449, in wsgi_app response = self.handle_exception(e) File "D:\ProgramData\Anaconda3\envs\py2_flask\lib\site-packages\flask\app.py", line 1866, in handle_exception reraise(exc_type, exc_value, tb) File "D:\ProgramData\Anaconda3\envs\py2_flask\lib\site-packages\flask\app.py", line 2446, in wsgi_app response = self.full_dispatch_request() File "D:\ProgramData\Anaconda3\envs\py2_flask\lib\site-packages\flask\app.py", line 1951, in full_dispatch_request rv = self.handle_user_exception(e) File "D:\ProgramData\Anaconda3\envs\py2_flask\lib\site-packages\flask\app.py", line 1820, in handle_user_exception reraise(exc_type, exc_value, tb) File "D:\ProgramData\Anaconda3\envs\py2_flask\lib\site-packages\flask\app.py", line 1949, in full_dispatch_request rv = self.dispatch_request() File "D:\ProgramData\Anaconda3\envs\py2_flask\lib\site-packages\flask\app.py", line 1935, in dispatch_request return self.view_functions[rule.endpoint](**req.view_args) File "D:\anacondaProject\where2go\webapp\app.py", line 41, in userinput return json.dumps(app.result) File "D:\ProgramData\Anaconda3\envs\py2_flask\lib\json\__init__.py", line 244, in dumps return _default_encoder.encode(obj) File "D:\ProgramData\Anaconda3\envs\py2_flask\lib\json\encoder.py", line 207, in encode chunks = self.iterencode(o, _one_shot=True) File "D:\ProgramData\Anaconda3\envs\py2_flask\lib\json\encoder.py", line 270, in iterencode return _iterencode(o, 0) File "D:\ProgramData\Anaconda3\envs\py2_flask\lib\json\encoder.py", line 184, in default raise TypeError(repr(o) + " is not JSON serializable") TypeError: Decimal('113.26700000') is not JSON serializable |
查看源码
| def userinput(): data = request.data
ms = app.where2go.most_similar(data) top_places_json = app.where2go.get_top_places_json(ms)
app.result['top_places'] = top_places_json print top_places_json return json.dumps(app.result) |
报错
| [(1.0, 'beijing')]
[(u'guangzhou', 0.7928651571273804), (u'seoul', 0.7863544225692749), (u'nanjing', 0.7803971767425537), (u'tianjin', 0.776152491569519), (u'shanghai', 0.7680126428604126), (u'hangzhou', 0.747714638710022), (u'wuhan', 0.7452333569526672), (u'kunming', 0.7269240021705627), (u'fuzhou', 0.720137357711792), (u'xiamen', 0.7125382423400879), (u'beijing_shanghai', 0.7124168872833252), (u'busan', 0.7067762613296509), (u'harbin', 0.7055091857910156), (u'xian', 0.703764796257019), (u'taipei', 0.7032514810562134), (u'moscow', 0.7001821994781494), (u'urumqi', 0.6986857652664185), (u'shenyang', 0.6914734244346619), (u'chengdu', 0.6909835338592529), (u'munich', 0.6862865686416626), (u'vienna', 0.6839408874511719), (u'ulaanbaatar', 0.6831813454627991), (u'budapest', 0.6821123957633972), (u'vladivostok', 0.6806952953338623), (u'zhengzhou', 0.6783512830734253), (u'brussels', 0.6768432259559631), (u'copenhagen', 0.6743952035903931), (u'pyongyang', 0.6742997169494629), (u'bratislava', 0.667781412601471), (u'astana', 0.6674197912216187), (u'ningbo', 0.6667413711547852), (u'chongqing', 0.6655149459838867), (u'shenzhen', 0.6651620864868164), (u'qingdao', 0.6618784070014954), (u'sofia', 0.6600873470306396), (u'frankfurt', 0.6579354405403137), (u'nanning', 0.6576802730560303), (u'berlin', 0.6552646160125732), (u'wuchang', 0.6497694253921509)] 127.0.0.1 - - [02/Sep/2019 14:35:10] "POST /map HTTP/1.1" 500 - Traceback (most recent call last): File "D:\ProgramData\Anaconda3\envs\py2_flask\lib\site-packages\flask\app.py", line 2463, in __call__ return self.wsgi_app(environ, start_response) File "D:\ProgramData\Anaconda3\envs\py2_flask\lib\site-packages\flask\app.py", line 2449, in wsgi_app response = self.handle_exception(e) File "D:\ProgramData\Anaconda3\envs\py2_flask\lib\site-packages\flask\app.py", line 1866, in handle_exception reraise(exc_type, exc_value, tb) File "D:\ProgramData\Anaconda3\envs\py2_flask\lib\site-packages\flask\app.py", line 2446, in wsgi_app response = self.full_dispatch_request() File "D:\ProgramData\Anaconda3\envs\py2_flask\lib\site-packages\flask\app.py", line 1951, in full_dispatch_request rv = self.handle_user_exception(e) File "D:\ProgramData\Anaconda3\envs\py2_flask\lib\site-packages\flask\app.py", line 1820, in handle_user_exception reraise(exc_type, exc_value, tb) File "D:\ProgramData\Anaconda3\envs\py2_flask\lib\site-packages\flask\app.py", line 1949, in full_dispatch_request rv = self.dispatch_request() File "D:\ProgramData\Anaconda3\envs\py2_flask\lib\site-packages\flask\app.py", line 1935, in dispatch_request return self.view_functions[rule.endpoint](**req.view_args) File "D:\anacondaProject\where2go\webapp\app.py", line 39, in userinput app.result['top_places'] = top_places_json TypeError: 'NoneType' object does not support item assignment |
top_places_json、app.result是一个list
查看json.dumps的使用方法:
django自带encoder,无法序列化时增加一个cls=NpEncoder的参数。
也可能是数据中带有numpy等数据类型,dumps无法识别
此处Decimal('113.26700000')是小数的意思
自定义类:https://blog.csdn.net/rt5476238/article/details/91398332
https://stackoverflow.com/questions/1960516/python-json-serialize-a-decimal-object/8274307#8274307
Simplejson 2.1 2.1 and higher has native support for Decimal type: json.dumps(Decimal('3.9'), use_decimal=True)
Note that use_decimal is True by default
Simplejson:是一个简单,快速,完整,正确和可扩展的JSON[http://json.org]编码器和解码器的Python 2.5+和Python 3.3*。它是纯 Python 代码,没有依赖项,但包括可选的 C 扩展,用于严重提升速度。
简单json的最新文档可以在这里在线阅读:https://simplejson.readthedocs.io/
simplejson 是 Python 2.6 和 Python 3.0 附带的 json 库的外部维护开发版本,但保留了与 Python 2.5 的向后兼容性。
使用文档:https://simplejson.readthedocs.io/en/latest/
尝试引入:
| 修改import json 为import simplejson as json |
| pip install simplejson |
(除了存的banner图片还没放到文件夹里)全部完成,但是没有包含线路,和客户关注信息。
Anaconda常用命令
新建虚拟环境
(base) C:\Users\zdp>conda create -n django
激活虚拟环境
(base) C:\Users\zdp>activate py2_flask
进入项目文件夹路径
(django) C:\Users\laugo>cd /d D:\anacondaProject\where2go\webapp
运行py文件:
python app.py
| 爬的时候运行: activate py2_flask cd /d D:\anacondaProject\where2go\code\data_collection python scrap_wikivoyage_banners.py |
| 打开app时: |
| activate py2_flask cd /d D:\anacondaProject\where2go\webapp python app.py |
查看flask版本:
| python import flask flask.__version__ |
常用算法
下一个问题是找出使用哪种模型。传统的自然语言处理推荐系统包括 TF-IDF + cos-similarity和 TF-IDF + SVD + k - means聚类等模型。
自然语言处理natural language processing:
自然语言处理技术(NLP)在推荐系统中的应用https://blog.csdn.net/heyc861221/article/details/80130263
相比结构化信息(例如商品的属性等),文本信息在具体使用时具有一些先天缺点:结构代表着信息量,无论是使用算法还是业务规则,都可以根据结构化信息来制定推荐策略;信息量不确定;歧义问题较多
优点:数据量大;多样性丰富;信息及时
推荐系统中常见的文本处理方法:
文本数据的一些“显式”使用方法:
词袋模型(Bag of Words,简称BOW模型):核心假设是认为一篇文档是由文档中的词组成的多重集合(多重集合与普通集合的不同在于考虑了集合中元素的出现次数)构成的。
统一度量衡:权重计算和向量空间模型
简单的词袋模型在经过适当预处理之后,可以用来在推荐系统中召回候选物品。但是在计算物品和关键词的相关性,以及物品之间的相关性时,仅仅使用简单的词频作为排序因素显然是不合理的。为了解决这个问题,我们可以引入表达能力更强的基于TF-IDF的权重计算方法。其中tft,d代表t在d中出现的频次,而dft指的是包含t的文档数目
这些方法的目的都是使对词在文档中重要性的度量更加合理,在此基础之上,我们可以对基于词频的方法进行改进,例如,可以将之前使用词频来对物品进行排序的方法,改进为根据TF-IDF得分来进行排序。
但是除此以外,我们还需要一套统一的方法来度量关键词和文档,以及文档和文档之间的相关性,这套方法就是向量空间模型(Vector Space Model,简称VSM)。
VSM的核心思想是将一篇文档表达为一个向量,向量的每一维可以代表一个词,在此基础上,可以使用向量运算的方法对文档间相似度进行统一计算。文本相关性计算方面,我们可以使用TFIDF填充向量,同时也可以用N-gram,以及后面会介绍的文本主题的概率分布、各种词向量等其他表示形式。
隐语义模型:
(Latent Semantic Analysis,简称LSA)
模型的核心假设,是认为虽然一个文档由很多的词组成,但是这些词背后的主题并不是很多。换句话说,词不过是由背后的主题产生的,这背后的主题才是更为核心的信息。这种从词下沉到主题的思路,贯穿着我们后面要介绍到的其他模型,也是各种不同文本主体模型(Topic Model)的共同中心思想
LSA的做法是将这个原始矩阵C进行SVD分解
可以看到LSA相比关键词来说前进了一大步,主要体现在信息量的提升,维度的降低,以及对近义词和多义词的理解。但是LSA同时也具有一些缺点,例如:训练复杂度高。LSA的训练时通过SVD进行的,而SVD本身的复杂度是很高的,在海量文档和海量词汇的场景下难以计算,虽然有一些优化方法可降低计算的复杂度,但该问题仍然没有得到根本解决。
检索(召回)复杂度高。如上文所述,使用LSA做召回需要先将文档或者查询关键词映射到LSA的向量空间中,这显然也是一个耗时的操作。
LSA中每个主题下词的值没有概率含义,甚至可能出现负值,只能反应数值大小关系。这让我们难以从概率角度来解释和理解主题和词的关系,从而限制了我们对其结果更丰富的使用。
概率隐语义模型:
将文档和词的关系看作概率分布,然后试图找出这个概率分布来
从矩阵的角度来看,LSA和pLSA看上去非常像,但是它们的内涵却有着本质的不同,这其中最为重要的一点就是两者的优化目标是完全不同的:LSA本质上是在优化SVD分解后的矩阵和原始矩阵之间的平方误差,而pLSA本质上是在优化似然函数,是一种标准的机器学习优化套路。也正是由于这一点本质的不同,导致了两者在优化结果和解释能力方面的不同。
但是pLSA仍然存在一些问题,主要包括:
由于pLSA为每个文档生成一组文档级参数,模型中参数的数量随着与文档数成正比,因此在文档数较多的情况下容易过拟合。
pLSA将每个文档d表示为一组主题的混合,然而具体的混合比例却没有对应的生成概率模型,换句话说,对于不在训练集中的新文档,pLSA无法给予一个很好的主题分布。简言之,pLSA并非完全的生成式模型。
而LDA的出现,就是为了解决这些问题。
生成式概率模型:
(Latent Dirichlet Allocation,简称LDA)
Latent:这个词不用多说,是说这个模型仍然是个隐语义模型。
Dirichlet:这个词是在说该模型涉及到的主要概率分布式狄利克雷分布。
Allocation:这个词是在说这个模型的生成过程就是在使用狄利克雷分布不断地分配主题和词
LDA的中心思想就是在pLSA外面又包了一层先验,使得文档中的主题分布和主题下的词分布都有了生成概率,从而解决了上面pLSA存在的“非生成式”的问题,顺便也减少了模型中的参数,从而解决了pLSA的另外一个问题
捕捉上下文信息:神经概率语言模型
pLSA/LDA有一个很重要的假设,那就是文档集合中的文档,以及一篇文档中的词在选定了主题分布的情况下都是相互独立,可交换的,换句话说,模型中没有考虑词的顺序以及词和词之间的关系,这种假设隐含了两个含义:在生成词的过程中,之前生成的词对接下来生成的词是没有影响的。
两篇文档如果包含同样的词,但是词的出现顺序不同,那么在LDA看来他们是完全相同的
这样的假设使得LDA会丢失一些重要的信息,而近年来得到关注越来越多的以word2vec为代表的神经概率语言模型恰好在这方面和LDA形成了一定程度的互补关系,从而可以捕捉到LDA所无法捕捉到的信息。
word2vector的中心思想用一句话来讲就是:A word is characterized by the company it keeps(一个词的特征由它周围的词所决定)。
很像是成语中的“物以类聚人以群分”
具体来讲,词向量模型使用“周围的词=>当前词”或“当前词=>周围的词”这样的方式构造训练样本,然后使用神经网络来训练模型,训练完成之后,输入词的输入向量表示便成为了该词的向量表示,如图3所示。

LDA天然就可以做到词的聚类和相似词的计算,那么使用word2vec计算出来的结果和LDA有什么不同:第一是聚类的粒度不同,LDA关注的主题级别的粒度,层次更高,而词向量关注的是更低层次的语法语义级别的含义。例如“苹果”,“小米”和“三星”这三个词,在LDA方法中很可能会被聚类在一个主题中,但是在词向量的角度来看,“苹果”和“小米”可能会具有更高的相似度,就像“乔布斯”和“雷军”在词向量下的关系一样,所以在词向量中可能会有:“vector(小米)- vector(苹果)+vector(乔布斯)= vector(雷军)”这样的结果。
除此以外,由于word2vec有着“根据上下文预测当前内容”的能力,将其做适当修改之后,还可以用来对用户行为喜好做出预测。首先我们将用户的行为日志进行收集,进行session划分,得到类似文本语料的训练数据,在这个数据上训练word2vec模型,可以得到一个“根据上下文行为预测当前行为”的模型。
沿着这样的思路,我们还可以对word2vec作进一步修改,得到对时序关系更为敏感的模型,以及尝试使用RNN、LSTM等纯时序模型来得到更好的预测结果
Word2vec原理
Word2vec概述:http://www.mamicode.com/info-detail-2150217.html无监督学习
概要(比较专业详细):https://www.jianshu.com/p/bca4e7bfb86d
应用, 序列数据 + 局部强关联
聚类, 找同义词, 词性分析
文本序列: 近邻强关联, 可通过上下文预测目标词(选词填空)
社交网络: 随机游走生成序列, 然后使用word2vec训练每个节点的向量.
推荐系统, 广告(APP下载序列: word2vec + similarity = aggr to )
word2vec 从原理到实现:https://zhuanlan.zhihu.com/p/43736169
word2vec中哈夫曼树原理https://www.jianshu.com/p/f9351532f281
genism中关于word2vec使用的文档https://radimrehurek.com/gensim/models/word2vec.html
word2vec原理介绍:https://www.zhihu.com/topic/19886836/hot(其中的几篇参考也值得一看)
Hierarchical softmax 和 negative sampling优化:https://www.cnblogs.com/Determined22/p/5807362.html
网站细节
我能够运行网站使用python Flask。使用 javascript 对搜索引擎执行 AJAX 调用,以便可以在模型上运行用户的搜索查询,以预测最相似的位置并在地图上显示建议。
Flask 文件名为"app.py",可在文件夹"webapp"中找到;
"index.html"文件包含 html 和 javascript,可以在文件夹"模板"中找到。Bootstrap来设计网站。
Html
Html中点击查询,onClick="sendToFlask()"
| function sendToFlask() { data = $('#user_input').val();
$.ajax({ 'url': '/map', 'data': data, 'type': 'POST', 'contentType': 'application/json', 'success': function (data) { model_output = JSON.parse(data) var center_location = model_output['center_location']; var geojson = model_output['top_places'];
//Initialize $('#error_msg').remove() $('#portfolio').empty()
//if geojson list is empty, display error message. if (geojson.length==0) { error_message() };
var portfolio_header = '<br/><div class="col-lg-12 text-center"><h3 class="section-heading">Places 2 Go</h2></div>'
$('#portfolio').append(portfolio_header);
addtoPortfolio(geojson);
// Clear the map before adding new markers mapSimple.removeLayer(myLayer);
// Create new layer myLayer = L.mapbox.featureLayer();
// Add custom popups to each using our custom feature properties myLayer.on('layeradd', function(e) { var marker = e.layer, feature = marker.feature;
// Create custom popup content var popupContent = '<a target="_blank" class="popup" href="' + feature.properties.url + '">' + '<div class=crop><img src="' + feature.properties.image + '" height/></div><div class=text-center style="padding:15px 0 0 0"><font size="5">' + feature.properties.title + '</font></div></a>';
// http://leafletjs.com/reference.html#popup marker.bindPopup(popupContent,{ closeButton: true, minWidth: 320 }); });
myLayer.setGeoJSON(geojson).addTo(mapSimple);
mapSimple.fitBounds(myLayer.getBounds()); // mapSimple.clearLayers(); }, 'error': function (request, status, error) { $('#error_msg').remove() error_message(); console.log('Oh no!! Something went wrong.'); } }); }; |
网页使用mapbox
地图无法显示了,有可能是因为token失效或者没连上网(控制台提示'L' is not defined)
Font awesome的icon使用(没有CSDN,不打算用了)
虽然不影响使用,貌似有一些没下载下来?
| GET /static/font-awesome/css/font-awesome.min.css HTTP/1.1" 304 - 127.0.0.1 - - [29/Dec/2019 21:39:05] "GET /static/css/bootstrap.min.css HTTP/1.1" 304 - 127.0.0.1 - - [29/Dec/2019 21:39:05] "GET /static/css/agency.css HTTP/1.1" 304 - 127.0.0.1 - - [29/Dec/2019 21:39:05] "GET /static/js/jquery.js HTTP/1.1" 304 - 127.0.0.1 - - [29/Dec/2019 21:39:05] "GET /static/js/bootstrap.min.js HTTP/1.1" 304 - 127.0.0.1 - - [29/Dec/2019 21:39:05] "GET /static/js/cbpAnimatedHeader.js HTTP/1.1" 304 - 127.0.0.1 - - [29/Dec/2019 21:39:05] "GET /static/js/agency.js HTTP/1.1" 304 - 127.0.0.1 - - [29/Dec/2019 21:39:05] "GET /static/js/classie.js HTTP/1.1" 304 - |
Flask后台接口
范例:
| @app.route('/1' , methods=['POST']) def aa(): #传什么返回什么 with open('1.txt','a') as f: print(str(request.data, encoding='utf-8'),file=f)
return request.data
if __name__=='__main__': app.run(port=3002)#默认不填写的话,是5000端口 |
文件为app.py
| app.run(host= '0.0.0.0', port=80, debug=True) |
| @app.route('/map', methods=['POST']) def userinput(): data = request.data
ms = app.where2go.most_similar(data) top_places_json = app.where2go.get_top_places_json(ms) # print top_places_json app.result['top_places'] = top_places_json return json.dumps(app.result) |
Model
在我的 where2go_model.py 文件中,我实现了 gensim 的 word2vec 模型,并编写了矢量化用户搜索查询的函数,和将建议筛选到实际地理位置、以geojson格式输出目的地的函数。
| use the trained word2vec model to give most similar recommendations to the input
input = search string in the format of place/char + place/char -... output = top recommendations in json format |
| 使用经过训练的 word2vec 模型为输入提供最类似的建议 |
| terms = self.parse_search_query(input) 将用户查询解析为乘数和目标 |
| # Set to make sure the output doesn't include one of the input destinations. check = set() |
| 确保输出中不包含输入的目的地 |
| # For (multiplier, destination), get the multiplier * vector of that destination. # Then sum up to the master vector. for i, term in enumerate(terms): multiplier, word = term check.add(word) if i == 0: master_vector = multiplier * self.model[word] else: master_vector += multiplier * self.model[word] |
| 对于(乘数、目的地),获取该目标的乘数 + 矢量。 然后加到主向量中 |
| # Find the most similar vectors to the amter vector ms = self.model.most_similar(positive=[master_vector], topn=topn) ms_wo_search_terms = [dest for dest in ms if dest[0] not in check]
print ms_wo_search_terms
return ms_wo_search_terms |
| 查找与 master 矢量最相似的矢量 |
疑问,ms到底怎么查出来的,
| ms = self.model.most_similar(positive=[master_vector], topn=topn) |
是自己调用自己吗,还是word2vec自带方法
有可能是自带方法,但貌似不建议使用,警告:
| DeprecationWarning: Call to deprecated `most_similar` (Method will be removed in 4.0.0, use self.wv.most_similar() instead). """Entry point for launching an IPython kernel. |
| 方法将在 4.0.0 中删除,改用self.wv.most_similar() |
类分析
| import cPickle as pkl#序列化 from where2go_model import Where2Go_Model#模型 |
| def load_pickle(): return pkl.load(open('../data/pickles/where2go_model.pkl', 'rb')) |
| ms = app.where2go.most_similar(data) |
运行时只有导入的where2go_model中有Where2Go_Model类,反序列化model也是它
但Where2Go_Model中也加载了其他pkl(找了一会在哪生成的,记忆模糊,拎不清了,离生成这些pkl已经过了很久了,猜测既然where2go_model中没有把其他code文件导入,应该没有其他类了,其他类之后抽空再看)
Pkl
Java 中有序列化与反序列化的操作, 在 Python 中可以进行同样的操作。使用 Python 进行对象的序列化(dump)与反序列化(load)操作时, 我们不用考虑其中的细节, 因为 Python 已经帮我们封装好了相关的类cPickle。
模型分析
Eda
Exploratory data analysis and data cleaning have been performed with ipython notebook. Wikivoyage and NYT data were loaded, cleaned, pickled out as input format for word2vec, which is a list of sentences where each sentence is represented as a list of words. Also, global NOAA weather data was downloaded but I later determined that it leaves out major parts of the world. Thus, more data has to be collected to incorporate weather to the project.
Ipython notebook已执行探索性数据分析和数据清理。Wikivoyage 和 NYT 数据被加载、清理、挑选出来作为 word2vec 的输入格式,该格式是句子列表,其中每个句子都表示为单词列表。此外,全球NOAA天气数据被下载,但我后来确定,它忽略了世界的主要部分。因此,要将天气纳入项目必须收集更多的数据。
使用文件/data/wikivoyage.json(第一步Gathering Data的enwikivoyage-latest-pages-articles.xml转化得来)369M有空去官网对该文件了解
处理数据,作为输入格式
Model
Where2go is based on a model created at Google called word2vec. Word2vec is a neural network with 1 hidden layer that has continuous bag of words (CBOW) or skip-grams implementation. Where2go uses the version that uses skip-grams and hierarchical softmax for optimization.
On the high level, word2vec tries to train the neural network to paramatize a model that can predict the surrounding words for every word in the corpus. The predictions are then used to backpropogate and optimize the parameters to make words with similar contexts be closer together, while being further away from words that have different contexts. The input-hidden layer weighting matrix, which is also the vector representation of words, is then used to gain insight into the meaning/similarity of words.
In my where2go_model.py file, I implemented gensim's word2vec model and wrote functions to vectorize user search queries and functions to filter the recommendations to actual geolocations and output destinations in geojson format.
Where2go基于谷歌创建的名为word2vec的模型。Word2vec 是一个神经网络,具有 1 个隐藏层,该层具有连续单词袋 (CBOW) 或skip-grams实现。where2go 使用的版本使用skip-grams 和hierarchical softmax进行优化。
在高层级上,word2vec 试图训练神经网络,以参数化一个模型,该模型可以预测语料库中每个单词的周围单词。然后,这些预测用于回推和优化参数,使具有相似上下文的单词更紧密地联系在一起,同时远离具有不同上下文的单词。然后,使用输入隐藏层加权矩阵(也是单词的矢量表示形式)来深入了解单词的含义/相似性。
在我的 where2go_model.py 文件中,我实现了 gensim 的 word2vec 模型,并编写了矢量化用户搜索查询的函数,和将建议筛选到实际地理位置、以geojson格式输出目的地的函数
模型建立取最相似(word2vec):
| bigram = gensim.models.Phrases(wikivoyage_list, min_count = 10) model_bigrams = gensim.models.Word2Vec(bigram[wikivoyage_list], min_count=10, size = 200) Ms = model_bigrams.most_similar(positive=['paris','london','sevilla'], negative = [], topn=20) top_places = [] for entry in ms: place, sim = entry |
模型使用
| terms = self.parse_search_query(input)
# Set to make sure the output doesn't include one of the input destinations. check = set()
# For (multiplier, destination), get the multiplier * vector of that destination. # Then sum up to the master vector. for i, term in enumerate(terms): multiplier, word = term check.add(word) if i == 0: master_vector = multiplier * self.model[word] else: master_vector += multiplier * self.model[word]
# Find the most similar vectors to the amter vector ms = self.model.most_similar(positive=[master_vector], topn=topn) ms_wo_search_terms = [dest for dest in ms if dest[0] not in check] |
Word2vec模型实现原理与源码:
word2vec 算法包括skip-gram & CBOW模型,使用hierarchical softmax or negative sampling
我们这用的是skip-gram+hierarchical softmax
很多人以为 word2vec 是一种模型和方法,其实 word2vec 只是一个工具,背后的模型是 CBOW 或者 Skip-gram,并且使用了 Hierarchical Softmax 或者 Negative Sampling 这些训练的优化方法。所以准确说来,word2vec 并不是一个模型或算法,只不过 Mikolov 恰好在当时把他开源的工具包起名叫做 word2vec 而已。
softmax(正则的指数函数)是输出层函数,他可以用于计算至少两种不同类型的常见词嵌入:word2vec, FastText。另外,它与sigmoid和tanh函数都是许多种类型的神经网络架构的激活步骤
这个算法的复杂性就直接是我们单词表的大小O(V)。事实表明,我们使用二叉树的结构可以简化这个复杂性,即分层(hierarchical) softmax
模型需要学习的参数:每个单词的词向量Xw + 霍夫曼树每个内部结点的θ
基于 H-softmax 模型的梯度计算
涉及到的公式太多了,在此直接把刘建平博客里的梯度计算过程贴过来:

spark mllib 里的 word2vec 实现就是采用的此方式,知道了上面梯度公式,spark word2vec源码就能看懂了。
// 省略了建树的过程,在建树的过程中会给每个内部结点编码
while (pos < sentence.length) {
  val word = sentence(pos)
  val b = random.nextInt(window)
  // Train Skip-gram,
  // syn0 是词向量 x 参数数组,长度为 vocab_size * emb_size
  // syn1 是霍夫曼树内部结点 w 参数数组,长度同上
  var a = b
  while (a < window * 2 + 1 - b) {
    if (a != window) {
      val c = pos - window + a
      if (c >= 0 && c < sentence.length) {
        val lastWord = sentence(c)
        val l1 = lastWord * vectorSize
        val neu1e = new Array[Float](vectorSize)
        // Hierarchical softmax
        var d = 0
        while (d < bcVocab.value(word).codeLen) {
          val inner = bcVocab.value(word).point(d)
          val l2 = inner * vectorSize
          // Propagate hidden -> output
          var f = blas.sdot(vectorSize, syn0, l1, 1, syn1, l2, 1)     // 计算 x^Tw
          if (f > -MAX_EXP && f < MAX_EXP) {
            val ind = ((f + MAX_EXP) * (EXP_TABLE_SIZE / MAX_EXP / 2.0)).toInt
            f = expTable.value(ind)                                   // 计算 f = sigmoid(x^Tw)
            val g = ((1 - bcVocab.value(word).code(d) - f) * alpha).toFloat // 计算梯度 g = (1-d-f) * alpha, d 是该节点的编码(0/1),alpha是学习率
            blas.saxpy(vectorSize, g, syn1, l2, 1, neu1e, 0, 1)       // 累加 e = e + gw, e 初始化 0
            blas.saxpy(vectorSize, g, syn0, l1, 1, syn1, l2, 1)       // 更新 w = w + gx
            syn1Modify(inner) += 1
          }
          d += 1
        }
        blas.saxpy(vectorSize, 1.0f, neu1e, 0, 1, syn0, l1, 1)        // 更新 x = x + e
        syn0Modify(lastWord) += 1
      }
    }
    a += 1
  }
  pos += 1
}


