文章目录
一、搭建环境
模拟service层,首先创建个UserService接口:
package com.wzq.service;

public interface UserService {


    void add();
    void delete();
    void update();
    void query();
}
UserService接口的实现类:
package com.wzq.service;

public class UserServiceImpl implements UserService{


    public void add() {


        System.out.println("增加了一条信息");
    }

    public void delete() {


        System.out.println("删除了一条信息");
    }

    public void update() {


        System.out.println("更新了一条信息");
    }

    public void query() {


        System.out.println("查询了一条信息");
    }
}
在pom.xml中注入aspectjweaver依赖:
<dependency>
    <groupId>org.aspectj</groupId>
    <artifactId>aspectjweaver</artifactId>
    <version>1.9.4<ersion>
    <scope>runtime</scope>
</dependency>
二、用注解实现AOP
使用注解,需要在自定义的类上面加上@Aspect
在执行方法前、后、环绕方法上分别加上@Before()、@After()、@Around(),括号里面是具体的哪个类哪个方法需要执行
package com.wzq.log;

import org.aspectj.lang.ProceedingJoinPoint;
import org.aspectj.lang.Signature;
import org.aspectj.lang.annotation.After;
import org.aspectj.lang.annotation.Around;
import org.aspectj.lang.annotation.Aspect;
import org.aspectj.lang.annotation.Before;

//标记这个类是一个切面
@Aspect
public class AnnotationPointCut {


    @Before("execution(* com.wzq.service.UserServiceImpl.*(..))")
    public void before() {


        System.out.println("==========方法执行前==========");
    }

    @After("execution(* com.wzq.service.UserServiceImpl.*(..))")
    public void after() {


        System.out.println("==========方法执行前==========");
    }

    //在环绕增强中,可以给定一个参数,代表想要获取处理切入的点
    @Around("execution(* com.wzq.service.UserServiceImpl.*(..))")
    public void around(ProceedingJoinPoint jp) throws Throwable {


        System.out.println("Around  ==========方法执行前==========");
        //执行
        Object proceed = jp.proceed();
        //获取签名
        Signature signature = jp.getSignature();
        System.out.println(signature);
        System.out.println("Around  ==========方法执行后==========");
    }
}
三、配置xml
使用注解,需要开启注解支持:
<aop:aspectj-autoproxy />
完整代码:
<?xml version="1.0" encoding="UTF-8"?>
<beans xmlns="http://www.springframework.org/schema/beans"
       xmlns:xsi="http://www.w3.org/2001/XMLSchema-instance"
       xmlns:aop="http://www.springframework.org/schema/aop"
       xsi:schemaLocation="http://www.springframework.org/schema/beans
        https://www.springframework.org/schema/beans/spring-beans.xsd
        http://www.springframework.org/schema/aop
        https://www.springframework.org/schema/aop/spring-aop.xsd">

    <bean id="userService" class="com.wzq.service.UserServiceImpl" />

    <!-- 方式三 -->
    <bean id="annotationPointCut" class="com.wzq.log.AnnotationPointCut" />
    <!-- 开启注解支持 -->
    <aop:aspectj-autoproxy />

</beans>
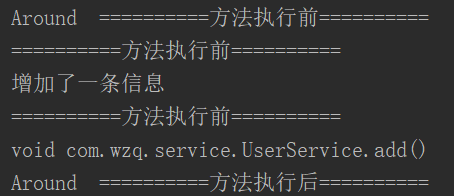
四、测试
import com.wzq.service.UserService;
import org.junit.Test;
import org.springframework.context.ApplicationContext;
import org.springframework.context.support.ClassPathXmlApplicationContext;

public class MyTest {


    @Test
    public void Test() {


        ApplicationContext context = new ClassPathXmlApplicationContext("applicationContext.xml");
        UserService service = (UserService) context.getBean("userService");
        service.add();
    }
}