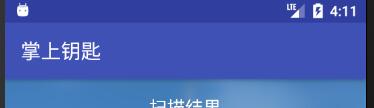
通常的APP标题栏是这样的:
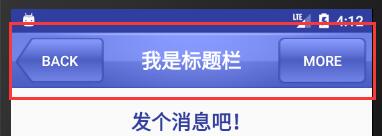
当然这样的标题栏也不是说一无是处,还是很方便用的。不过如果你想做一个更好看一些的标题栏,那就要自定义一个标题栏了,像这个样子:
如果你想做一个漂亮的标题栏,有无从下手,那就跟着本文一起学习一下吧。
1.分析一下如何实现的:
首先你要写一个布局文件,这个布局文件里面就只有你想要的标题栏的布局,像步骤2里面的那样,然后你在代码里面将默认的标题栏屏蔽掉,再把刚才自己写的标题栏的布局加到Activity的布局文件的顶部就完成了。另外如果你要对标题栏加按钮啊或者其什么要监听的控件,还要写一个这个标题栏布局的java文件去实现它,本文就是添加了两个按钮并且对它们写了监听事件。
2. 你要自定义的这个标题栏是一个布局文件
像上面的那个图片中的标题栏是这样早定义的:
<?xml version="1.0" encoding="utf-8"?>
<LinearLayout xmlns:android="http://schemas.android.com/apk/res/android"
    android:orientation="horizontal"
    android:layout_width="match_parent"
    android:layout_height="wrap_content"
    android:background="@drawable/title_bg"
    >
    <Button
        android:id="@+id/mBt_back"
        android:layout_width="wrap_content"
        android:layout_height="wrap_content"
        android:text="BACK"
        android:textColor="#ffffff"
        android:background="@drawable/back_bg"
        android:layout_margin="5dp"
        android:layout_gravity="center"/>
    <TextView
        android:id="@+id/mTv_title"
        android:layout_width="0dp"
        android:layout_weight="1"
        android:layout_height="wrap_content"
        android:layout_gravity="center"
        android:text="我是标题栏"
        android:textColor="#ffffff"
        android:gravity="center"
        android:layout_marginTop="10dp"
        android:textSize="20sp"
        android:textStyle="bold"
        android:layout_marginBottom="10dp"
        />
    <Button
        android:id="@+id/mBt_more"
        android:layout_width="wrap_content"
        android:layout_height="wrap_content"
        android:text="more"
        android:textColor="#ffffff"
        android:background="@drawable/edit_bg"
        android:layout_margin="5dp"
        android:layout_gravity="center"/>
</LinearLayout>
这个布局文件的布局如下图:

如上图所示,只是一个标题栏的布局,没其他任何东西,因为不需要,我们要的就是这么一个顶端的布局,最后只是把这个布局加到我们想要添加自定义标题栏的布局最顶端去而已。
3.接下来我们就把我们写的标题栏添加到我们想添加的布局中去
我就只复制主要的代码,注意里面的注释:
<?xml version="1.0" encoding="utf-8"?>
<RelativeLayout xmlns:android="http://schemas.android.com/apk/res/android"
    android:orientation="vertical"
    android:layout_width="match_parent"
    android:layout_height="match_parent">

    <!--
      不自定义标题栏java文件的时候直接用include添加辩题栏,记得在代码里面将默认的标题栏屏蔽掉
    -->
    <!--<include
        android:id="@+id/title"
        layout = "@layout/title"
        android:layout_height="55dp"
        android:layout_width="match_parent" />-->
    <!--
          自定义了标题栏java文件的时候用下面代码添加,记得在代码里面将默认的标题栏屏蔽掉,
        -->
    <com.example.lyp.myapp_layout.TitleLayout
        android:id="@+id/title"
        android:layout_width="match_parent"
        android:layout_height="55dp"
        />
    <!--
          下面是你在界面里面添加的其他控件,比如一个TextView
        -->
    <TextView
        android:id="@+id/mTv"
这样就把自定义的标题栏添加到布局中去了,效果如下图:

是不是有点疑惑,为什么本来的标题栏还在,默认的标题栏我们要在主代码中屏蔽,所以在这里看到是没关系的下面我们来看看是怎么屏蔽默认的标题栏的
4.主java代码中屏蔽默认的标题栏
就是在onCreate()函数中加入如下代码就OK了:
//屏蔽默认的状态栏
        ActionBar actionBar = getSupportActionBar ();
        if (actionBar!=null){
            actionBar.hide ();
        }
这样就屏蔽了默认的标题栏,这样自定义标题栏就完成了,那下面我们来看一下运行起来的样子吧:

5.最后说说标题栏按键的点击响应的实现
要实现自定义标题栏的按键,就需要自己写一个java文件进行实现了,下面是我写的:
import android.content.Context;
import android.util.AttributeSet;
import android.view.LayoutInflater;
import android.view.View;
import android.widget.Button;
import android.widget.LinearLayout;
import android.widget.Toast;
//名字要和我上面标红色的相对应
public class TitleLayout extends LinearLayout{

    private Button mBt_back;
    private Button mBt_more;
    public TitleLayout(Context context, AttributeSet attrs){
        super(context,attrs);
        LayoutInflater.from ( context ).inflate ( R.layout.title,this );
        mBt_back = findViewById ( R.id.mBt_back );
        mBt_more = findViewById ( R.id.mBt_more );
        mBt_back.setOnClickListener ( new OnClickListener () {
            @Override
            public void onClick(View view) {
                Toast.makeText (getContext (),"想返回,哼,天真的地球人!",Toast.LENGTH_SHORT ).show ();
            }
        } );
        mBt_more.setOnClickListener ( new OnClickListener () {
            @Override
            public void onClick(View view) {
                Toast.makeText ( getContext (),"啥也没了",Toast.LENGTH_SHORT ).show ();
            }
        } );
    }
}
这样就完成了一个自定义的标题栏!!!