Springcloud服务治理EureKa
Eureka 的服务注册中心搭建
-
创建项目,选择Spring Initializr。
选择依赖 Cloud Discover(Eureka Server)
该项目为服务注册中心 -
修改启动类程序
启动类加上@EnableEurekaServer注解。
用于启动服务注册中心,以提供给其他应用一个对话,声明这是一个Eureka Serverhttp://localhost:8080/
![[外链图片转存失败,源站可能有防盗链机制,建议将图片保存下来直接上传(img-2n4SqxRt-1610984750588)(img.png)]](https://img-blog.csdnimg.cn/20210118235738432.png?x-oss-process=image/watermark,type_ZmFuZ3poZW5naGVpdGk,shadow_10,text_aHR0cHM6Ly9ibG9nLmNzZG4ubmV0L1poYW5neGcwMjA2,size_16,color_FFFFFF,t_70)
-
修改配置文件
控制台不断报错问题:
默认服务注册中心也可以作为客户端,使得服务注册中心也可以把自己注册,因此要禁止自己注册自己的这种行为。
在application.yml中增加配置server: port: 8080 spring: application: name: eurekaApplication eureka: client: service-url: defaultZone: 'http://localhost:8080/eureka/' # 不向注册中心注册自己 register-with-eureka: false
Eureka 的服务提供者
单机注册
- 创建springboot项目 eurekaprovider
导入依赖Cloud Discovery(Eureka Discovery client)spring-cloud-starter-netflix-eureka-client
- 启动类加上@EnableEurekaClient注解,激活Eureka 的客户端
@SpringBootApplication @EnableEurekaClient public class EurekaproviderApplication { public static void main(String[] args) { SpringApplication.run(EurekaproviderApplication.class, args); } } - 编写一个Controller用于测试
package com.cloudtest.eurekaprovider.controller;

import org.slf4j.Logger;
import org.slf4j.LoggerFactory;
import org.springframework.beans.factory.annotation.Autowired;
import org.springframework.beans.factory.annotation.Qualifier;
import org.springframework.cloud.client.ServiceInstance;
import org.springframework.cloud.client.discovery.DiscoveryClient;

import org.springframework.cloud.client.serviceregistry.Registration;
import org.springframework.web.bind.annotation.GetMapping;
import org.springframework.web.bind.annotation.RestController;

import java.util.List;

@RestController
public class MyController {


    @Autowired
    private DiscoveryClient client;


    @Qualifier("eurekaRegistration")
    @Autowired
    private Registration registration; //服务注册

    private final Logger logger = LoggerFactory.getLogger(MyController.class);

    @GetMapping("/hello")
    public String hello(){


        ServiceInstance instance = serviceInstance();
        String result = "host:port="+instance.getUri()+", service_id"+instance.getServiceId();
        logger.info(result);
        return "hello eureka";
    }

    private ServiceInstance serviceInstance() {


        List<ServiceInstance> list = client.getInstances(registration.getServiceId());
        if(list!=null && list.size()>0){


            for(ServiceInstance itm:list){


                //后面步骤客户端端口更改,此步也需更改端口一致
                if(itm.getPort()==8081){


                    return itm;
                }
            }
        }
        return null;
    }
}
- 修改application.yml配置文件,让应用可以注册到服务注册中心。
server:
  port: 8081
spring:
  application:
    name: providerService
eureka:
  client:
    service-url:
      defaultZone: 'http://localhost:8080/eureka/'
defaultZone 为配置服务中心的地址。
-
启动eurekaprovider应用。
新建的应用已经注册成功
![[外链图片转存失败,源站可能有防盗链机制,建议将图片保存下来直接上传(img-HPXK5E4F-1610984750593)(img_1.png)]](https://img-blog.csdnimg.cn/20210118234713410.png)
访问 http://localhost:8081/hello 控制台输出
![[外链图片转存失败,源站可能有防盗链机制,建议将图片保存下来直接上传(img-8FNK6Q4t-1610984750595)(img_2.png)]](https://img-blog.csdnimg.cn/20210118234728172.png)
Eureka Server 的高可用
高可用搭建
- 启动服务注册中心1
server:
  port: 8080
spring:
  application:
    name: eurekaApplication1
eureka:
  client:
    service-url:
      defaultZone: http://localhost:8081/eureka/
    register-with-eureka: false
- 启动服务注册中心2
server:
  port: 8081
spring:
  application:
    name: eurekaApplication2
eureka:
  client:
    service-url:
      defaultZone: http://localhost:8080/eureka/
    register-with-eureka: false
- 对client进行注册
server:
  port: 8083
spring:
  application:
    name: providerService
eureka:
  client:
    service-url:
      # 单节点
      #defaultZone: http://localhost:8080/eureka/
      defaultZone: http://localhost:8080/eureka/,http://localhost:8081/eureka/
访问 http://localhost:8080/ 和 http://localhost:8081/
会发现client被注册成功。
Eureka 消费
RestTemplate调用
- 创建项目
启动类
@SpringBootApplication
@EnableEurekaClient
public class Eurekaconsumer2Application {


    public static void main(String[] args) {


        SpringApplication.run(Eurekaconsumer2Application.class, args);
    }

    @Bean
    @LoadBalanced
    RestTemplate restTemplate(){


        return new RestTemplate();
    }

}
restTemplate只是类似于httpclient的一种发送rest风格的请求,它是无法识别微服务名称,所以会出现java.net.UnknownHostException错误.
只有
@loadBalance注解修饰的restTemplate才能实现服务名的调用,没有修饰的restTemplate是没有该功能的。原因就是当使用微服务名称的时候,可能有多个服务提供者,restTemplate不知道去调用哪个服务提供者,只有设置负载均衡之后服务消费者才会去访问某个微服务提供者
- 自定义Controller
@RestController
public class ConsumerController {


    @Autowired
    RestTemplate restTemplate;

    @GetMapping("/consumer")
    public String consumer(){


        return restTemplate.getForEntity("http://PROVIDERSERVICE/hello",String.class).getBody();
//        return restTemplate.getForEntity("http://localhost:8083/hello",String.class).getBody();

    }

}
restTemplate.getForEntity(“http://localhost:8083/hello”,String.class).getBody();
这种方式没有走服务注册中心,如果有多台服务器,URL不会存在负载均衡,所以一般会选择第一种方式。
- 配置文件
server:
  port: 8084
spring:
  application:
    name: consumerService
eureka:
  client:
    service-url:
      #defaultZone: http://localhost:8080/eureka/
      defaultZone: http://localhost:8080/eureka/,http://localhost:8081/eureka/
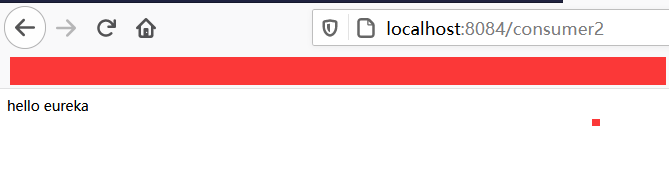
- 效果

![[外链图片转存失败,源站可能有防盗链机制,建议将图片保存下来直接上传(img-jME4pBUK-1610984750597)(img_3.png)]s](https://img-blog.csdnimg.cn/20210118235432971.png)
![[外链图片转存失败,源站可能有防盗链机制,建议将图片保存下来直接上传(img-x6QVInio-1610984750601)(img_4.png)]](https://img-blog.csdnimg.cn/2021011823550937.png)
LoadBalancerClient调用
@RestController
public class ConsumerController {


    @Autowired
    RestTemplate restTemplate;

    @Autowired
    LoadBalancerClient loadBalancerClient;

    /**
     * loadBalancerClient调用
     * 需要去掉restTemplate这个Bean的 @LoadBalanced 注解
     * @return
     */
    @GetMapping("/consumer2")
    public String consumer2(){


        ServiceInstance serviceInstance = loadBalancerClient.choose("PROVIDERSERVICE");
        String url = String.format("http://%s:%s",serviceInstance.getHost(),serviceInstance.getPort())+"/hello";
        return restTemplate.getForEntity(url,String.class).getBody();

    }
}
	@Bean
    RestTemplate restTemplate(){


        return new RestTemplate();
    }
使用LoadBalancerClient的choose方法,选择服务id获取实例。然后从实例获取主机、端口、拼接URL。