QT 学习笔记之QML与C++(上)
目录
C++ 对象注册到元对象系统
- 使用 Q_INVOKABLE 进行申明,这个宏是将函数申明为元对象系统可调用的函数。QtQuick 也在元对象系统内,所以也就可以访问这个函数。
class TestCpp : public QObject
{
    Q_OBJECT
public:
    explicit TestCpp(QObject *parent = nullptr);

    Q_INVOKABLE  void setNumber(int number);
    Q_INVOKABLE  void getNumber();

private:
    int m_iNumber{};

signals:

};
- 实现
void TestCpp::setNumber(int number)
{
    m_iNumber = number;
}

int TestCpp::getNumber()
{
    return  m_iNumber;
}
- 将TestCpp这个类注册到QML中
- ①添加头文件 (main.cpp文件中)
#include <QQmlContext>
#include "testcpp.h"
- ② 实例化对象并进行注册(main.cpp文件中)
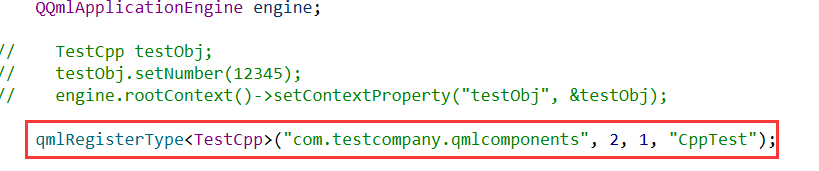
QQmlApplicationEngine engine;

//添加如下代码
TestCpp testObj;
testObj.setNumber(12345);
engine.rootContext()->setContextProperty("testObj", &testObj);
- ③ Qml文件中进行使用(main.qml文件中)
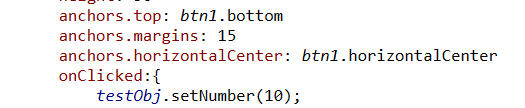
import QtQuick 2.12
import QtQuick.Controls 2.5

ApplicationWindow {
    visible: true
    width: 640
    height: 480
    title: qsTr("QmlTest")


    Button{
        id: btn1
        width: 120
        height: 50
        anchors.centerIn: parent
        onClicked:
            text = testObj.getNumber();
    }

    Button{
        id: btn2
        width: 120
        height: 50
        anchors.top: btn1.bottom
        anchors.margins: 15
        anchors.horizontalCenter: btn1.horizontalCenter
        onClicked:
            text = testObj.setNumber(67890);
    }
}
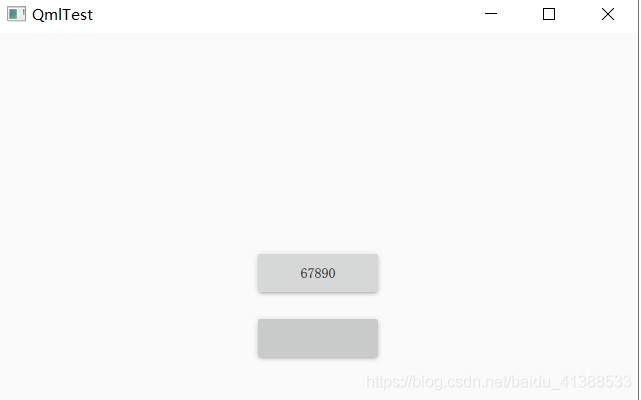
- 效果
C++ 类注册到 Qml 系统
- qmlRegisterType 注册C++类:C++ 端注册的时候,C++ 类并没有实例化,而实例化是放到了 Qml 端来完成的。
template<typename T>
int qmlRegisterType(const char *uri, int versionMajor, int versionMinor, const char *qmlName);

template<typename T, int metaObjectRevision>
int qmlRegisterType(const char *uri, int versionMajor, int versionMinor, const char *
- 使用示例:参考 https://doc.qt.io/qt-5/qqmlengine.html#qmlRegisterType
- For example, this registers a C++ class
MySliderItemas a QML type namedSliderfor version 1.0 of a type namespace called "com.mycompany.qmlcomponents":qmlRegisterType<MySliderItem>("com.mycompany.qmlcomponents", 1, 0, "Slider");
- 使用
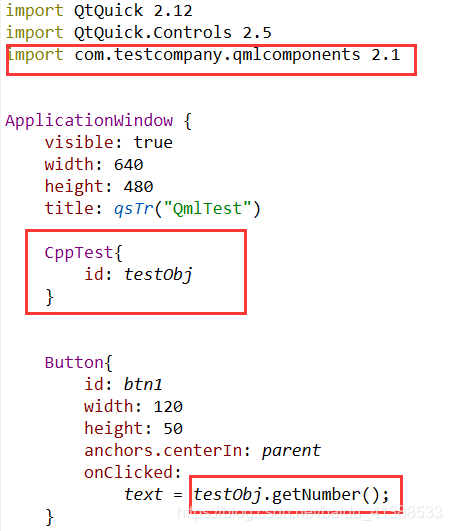
import com.mycompany.qmlcomponents 1.0

Slider {
    // ...
}
【练习示例】
- main.qml 文件中
C++ 创建/获取Qml对象
- 可参考:https://blog.csdn.net/xiezhongyuan07/article/details/109318209
- ①新建一个名称为 TestQml.qml 的 Qml 文件
- 代码
import QtQuick 2.12
import QtQuick.Controls 2.5
import QtQuick.Window 2.2

Window {
    width: 300
    height: 300
    color: "pink"
}
- ② main.cpp添加
//添加头文件
#include <QQmlComponent>

//添加代码
/*const QUrl url(QStringLiteral("qrc:/main.qml"));
QObject::connect(&engine, &QQmlApplicationEngine::objectCreated,
                 &app, [url](QObject *obj, const QUrl &objUrl) {
    if (!obj && url == objUrl)
        QCoreApplication::exit(-1);
}, Qt::QueuedConnection);
engine.load(url);*/

QQmlComponent qmlComponent(&engine);
qmlComponent.loadUrl(QUrl(QStringLiteral("qrc:/TestQml.qml")));

QObject* qmlTest = qmlComponent.create();
qmlTest->setParent(engine.rootObjects()[0]);

engine.rootContext()->setContextProperty("qmlTest", qmlTest);
- ③ main.qml添加
ApplicationWindow {
    visible: true
    width: 640
    height: 480
    title: qsTr("QmlTest")


    Button{
        id: btn1
        width: 120
        height: 50
        anchors.centerIn: parent
        onClicked: {
            qmlTest.visible = true;
            qmlTest.color  = "green"
        }
    }

    Button{
        id: btn2
        width: 120
        height: 50
        anchors.top: btn1.bottom
        anchors.margins: 15
        anchors.horizontalCenter: btn1.horizontalCenter
        onClicked:{
           qmlTest.color  = "blue"
           qmlTest.visible = true;
        }
    }
}
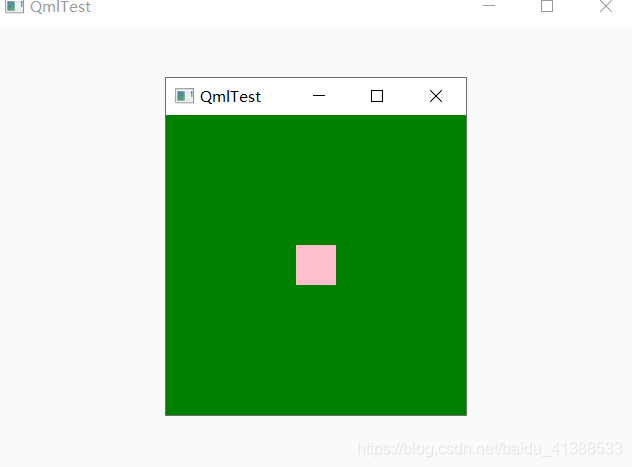
- 在TestQml.qml做修改,在窗体内部增加一个 rectangle
- main.cpp,通过 findChild 查找子窗体的对象
QObject *qmlRect = qmlTest->findChild<QObject*>("rectangle");
qmlRect->setProperty("color", "pink");
- 效果:

Qml 调用 C++ 对象公共函数
- C++ Q_INVOKABL 注册的函数。
Qml 访问 C++ 对象属性(对象成员变量)
- 使用 Q_PROPERTY
Q_PROPERTY(int number READ getNumber WRITE setNumber NOTIFY numberChanged)
- 在 testcpp.h
- 注意代码的位置(Q_OBJECT 下面一行), 然后增加一个信号, 当属性变化是触发的信号是 numberChanged
- 在 main.cpp中注册
QQmlApplicationEngine engine;

//添加如下代码
TestCpp testObj;
testObj.setNumber(12345);
engine.rootContext()->setContextProperty("testObj", &testObj);
- main.qml添加


Qml 调用 C++ 对象槽函数
public slots:
     void setNumber(int number);
void TestCpp::setNumber(int number) { m_iNumber += number; }
- Qml 可以直接进行槽函数的调用, 因为槽函数本来就在元对象系统里,而 C++ 类已经注册进元对象系统里。