Security中文版文档官网:https://www.springcloud.cc/spring-security-zhcn.html#abstractsecuritywebapplicationinitializer-with-spring-mvc
今日分享:
- 整合Security安全框架
- 测试框架的可用性
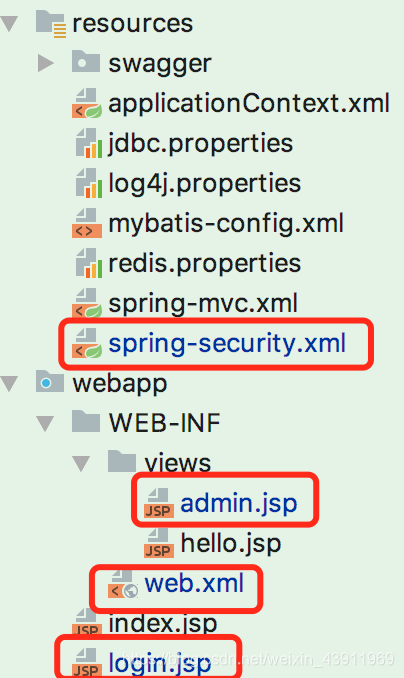
项目结构
在官方网站中我们可以看到标准的官方web.xml过滤器配置
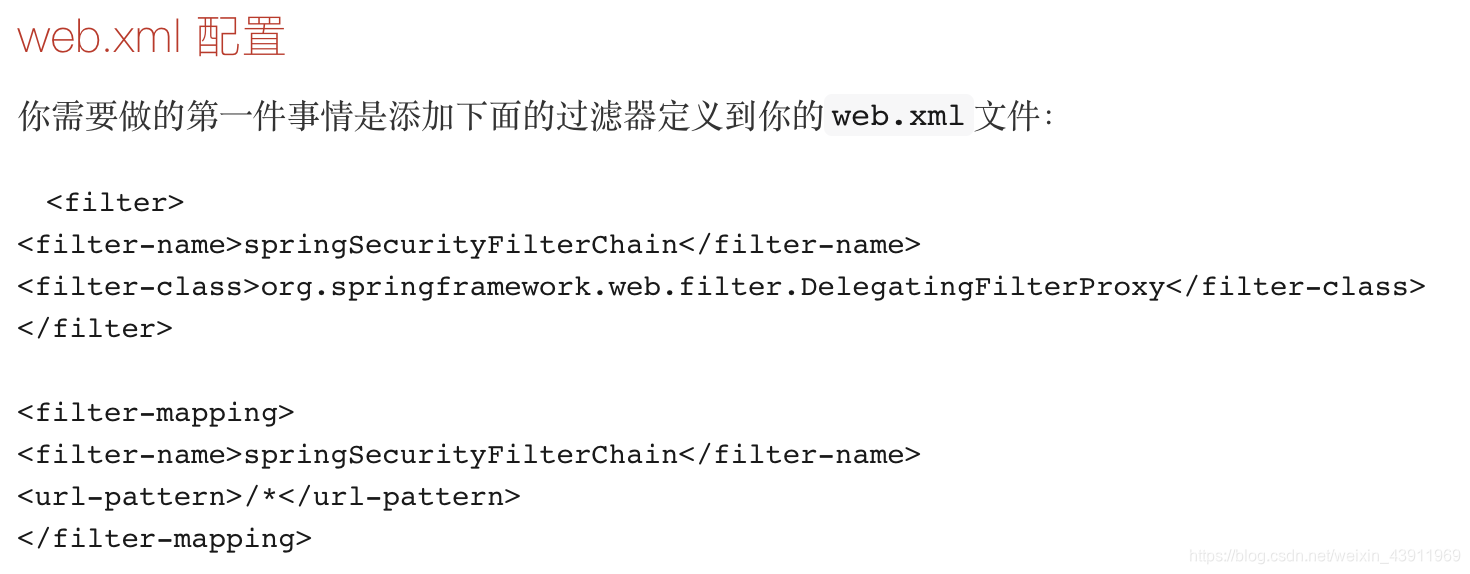
	<filter>
        <filter-name>springSecurityFilterChain</filter-name>
        <filter-class>org.springframework.web.filter.DelegatingFilterProxy
        </filter-class>
    </filter>
    <filter-mapping>
        <filter-name>encodingFilter</filter-name>
        <url-pattern>/*</url-pattern>
    </filter-mapping>
注意:如果直接复制,可能会在有些不同版本的idea版本检测时会报红,解决方法:查看自己的web.xml中是否配置了其他的过滤器,比如:字符过滤器等等。那么我们的配置就应该这样放
 <!-- 字符过滤器 传值乱码-->
    <filter>
        <filter-name>encodingFilter</filter-name>
        <filter-class>org.springframework.web.filter.CharacterEncodingFilter</filter-class>
        <init-param>
            <param-name>encoding</param-name>
            <param-value>UTF-8</param-value>
        </init-param>
    </filter>
    <!-- Spring Security -->
    <filter>
        <filter-name>springSecurityFilterChain</filter-name>
        <filter-class>org.springframework.web.filter.DelegatingFilterProxy
        </filter-class>
    </filter>
    <filter-mapping>
        <filter-name>encodingFilter</filter-name>
        <url-pattern>/*</url-pattern>
    </filter-mapping>

    <filter-mapping>
        <filter-name>springSecurityFilterChain</filter-name>
        <url-pattern>/*</url-pattern>
    </filter-mapping>
接下来是我们需要先配置Security的xml
spring-security.xml
<?xml version="1.0" encoding="UTF-8"?>
<beans xmlns="http://www.springframework.org/schema/beans"
       xmlns:security="http://www.springframework.org/schema/security"
       xmlns:xsi="http://www.w3.org/2001/XMLSchema-instance"
       xsi:schemaLocation="http://www.springframework.org/schema/beans
          http://www.springframework.org/schema/beans/spring-beans.xsd
          http://www.springframework.org/schema/security
          http://www.springframework.org/schema/security/spring-security.xsd">

<!--         不拦截的页面,可以设置一些静态资源 或 下面配置拦截所有请求的时候,选择不拦截登录页面,下面这一行仅作为案例,并没有什么用处,因为我们的登录页面肯定是面对所有用户的 -->
    <security:http pattern="/login.jsp" security="none"/>
<!--    auto-config="true"  表示自动加载springsecurity的配置文件-->
    <security:http auto-config="true">
        <!-- 对/admin** 的url进行拦截,只有拥有ROLE_USER权限的用户才能进入 -->
        <security:intercept-url pattern="/admin**" access="ROLE_USER" />
        <!--
            login-page="/login.jsp" 拦截以后重定向到自定义的登录页面
            authentication-failure-url="/login.jsp"登录的用户没有 ROLE_USER权限跳转的页面
            default-target-url="/admin"  登录的用户有  ROLE_USER权限跳转的页面
        -->
        <security:form-login login-page="/login.jsp" authentication-failure-url="/login.jsp"
                        default-target-url="/admin" />
        <!--
        		点击注销  跳转的页面
       			与 <a href="<c:url value="/logout" />" > 注销</a> 配合使用
         -->
        <security:logout logout-url="/logout" logout-success-url="/login.jsp" invalidate-session="true"/>
    </security:http>

    <security:authentication-manager>
        <security:authentication-provider>
            <security:user-service>
                <!-- 给root 用户 配置 "ROLE_USER" 权限 -->
               <security:user name="root" password="123456" authorities="ROLE_USER" />
            </security:user-service>
        </security:authentication-provider>
    </security:authentication-manager>
</beans>
我们配置好了之后,那么就需要把这个xml放到contextConfigLocation监听(在web.xml)里面
一般SSM框架是完整的话,那么我们的监听器里面肯定已经有一个xml配置,那么我们需要按照下面的图片格式写,因为他的分割是以逗号和classpath分割拿取

目前我们还少了两个页面,一个是登陆页面login.jsp,登录成功之后的页面admin.jsp
login.jsp
<%@ page language="java" contentType="text/html; charset=UTF-8"
         pageEncoding="UTF-8"%>
<!DOCTYPE html PUBLIC "-//W3C//DTD HTML 4.01 Transitional//EN" "http://www.w3.org/TR/html4/loose.dtd">
<html>
<head>
    <meta http-equiv="Content-Type" content="text/html; charset=UTF-8">
    <title>Insert title here</title>
</head>
<body>
<%--
    j_spring_security_check为被访问的接口(http://localhost:8080/j_spring_security_check)
    j_spring_security_check为官方提供的监控一个使用用户名和密码基于form登录的认证
    j_username,j_password均为官方提供
--%>
<form action="j_spring_security_check" method="post">

    <input type="text" name="j_username"
           placeholder=用户名 maxlength="11"  style="border-radius: 4px; outline:none;
                           ;width: 300px;height: 35px;text-indent: 10px"/><br/>
    <input type="password" name="j_password"
           placeholder=密码 maxlength="11"  style="border-radius: 4px; outline:none;
                           ;width: 300px;height: 35px;text-indent: 10px"/><br/>

    <input type="submit"
           style="width: 305px;height: 45px;background-color: orange" value="登录"
           οnmοusemοve="this.style.backgroundColor='darkorange';"
           οnmοuseοut="this.style.backgroundColor='orange   ';"/>

</form>
</body>
</html>
admin.jsp
<%@ page language="java" contentType="text/html; charset=UTF-8"
         pageEncoding="UTF-8" session="true"%>
<%@taglib prefix="c" uri="http://java.sun.com/jsp/jstl/core"%>

<!DOCTYPE html PUBLIC "-//W3C//DTD HTML 4.01 Transitional//EN" "http://www.w3.org/TR/html4/loose.dtd">
<html>
<head>
    <meta http-equiv="Content-Type" content="text/html; charset=UTF-8">
    <title>Insert title here</title>
</head>
<body>
<h1>标题: here</h1>
<h1>消息 : message</h1>

    <h2>欢迎: 管理员用户 | <a href="<c:url value="/logout" />" > 注销</a></h2>

</body>
</html>
有问题欢迎指出。