1.1 切入点表达式
1.1.1 项目目录

1.1.2 常用标签说明
#<aop:config>
作用:声明aop配置
#<aop:aspect>:
作用:配置切面
属性:id:唯一标识切面的名称 ref:引用通知类bean的id
#<aop:pointcut>
作用:配置切入点表达式
属性:id:唯一标识切入点表达式名称 expression:定义切入点表达式
1.1.3 代码示例
CustomerService
package cn.guardwhy.service;
/**
 * 客户service接口
 */
public interface CustomerService {


    /**
     * 保存客户
     */
    void saveCustomer();

    /**
     * 根据客户id查询客户
     */
    void findCustomerById(Integer id);
}
CustomerServiceImpl
package cn.guardwhy.service.impl;

import cn.guardwhy.service.CustomerService;
/**
 * 客户service实现类
 */
public class CustomerServiceImpl implements CustomerService {


    @Override
    public void saveCustomer() {


        System.out.println("保存客户操作");
    }

    @Override
    public void findCustomerById(Integer id) {


        // 根据客户id查询客户
        System.out.println("根据客户id查询客户,客户id: " + id);
    }
}
LogAdvice
package cn.guardwhy.advice;
/**
 * 日志通知
 */
public class LogAdvice {


    /**
     * 记录用户操作日志
     */
    public void printLog(){


        System.out.println("记录用户操作日志");
    }
}
bean.xml
<?xml version="1.0" encoding="UTF-8"?>
<beans xmlns="http://www.springframework.org/schema/beans"
       xmlns:xsi="http://www.w3.org/2001/XMLSchema-instance"
       xmlns:aop="http://www.springframework.org/schema/aop"
       xsi:schemaLocation="http://www.springframework.org/schema/beans
       http://www.springframework.org/schema/beans/spring-beans.xsd
       http://www.springframework.org/schema/aop
       http://www.springframework.org/schema/aop/spring-aop.xsd">
    <!--配置客户service-->
    <bean id="customerService" class="cn.guardwhy.service.impl.CustomerServiceImpl"></bean>

    <!--配置日志通知-->
    <bean id="logAdvice" class="cn.guardwhy.advice.LogAdvice"></bean>

<!--配置aop:四个步骤-->
    <aop:config>
        <aop:aspect id="logAspect" ref="logAdvice">
            <aop:before method="printLog" pointcut-ref="pt1"></aop:before>

            <!--切入点表达式演化
                表达式组成:
                    访问修饰符  返回值  包名称 类名称  方法名称 (参数列表)
                演化过程:
                    全匹配模式:
                        public void com.itheima.service.impl.CustomerServiceImpl.saveCustomer()
                    访问修饰符可以省略:
                        void com.itheima.service.impl.CustomerServiceImpl.saveCustomer()
                    返回值可以使用通配符:*
                        * com.itheima.service.impl.CustomerServiceImpl.saveCustomer()
                    包名称可以使用通配符:*(有多少个包,就需要多少个*)
                        * *.*.*.*.CustomerServiceImpl.saveCustomer()
                    类名称可以使用通配符:*
                        * *.*.*.*.*.saveCustomer()
                    方法名称可以使用通配符:*
                        * *.*.*.*.*.*()
                    参数列表可以使用通配符:*(此时必须要有参数)
                        * *.*.*.*.*.*(*)
                    参数列表可以使用:..(有无参数都可以)
                        * *.*.*.*.*.*(..)
            -->
            <aop:pointcut id="pt1" expression="execution(* cn.guardwhy.service..*.*(..))"></aop:pointcut>
        </aop:aspect>
    </aop:config>
</beans>
CustomerController
package cn.guardwhy.controller;

import cn.guardwhy.service.CustomerService;
import org.springframework.context.ApplicationContext;
import org.springframework.context.support.ClassPathXmlApplicationContext;

/**
 * 客户表现层
 */
public class CustomerController {


    public static void main(String[] args) {


        // 1.加载spring配置文件,创建spring容器
        ApplicationContext context = new ClassPathXmlApplicationContext("classpath:bean.xml");
        // 2.获取客户service
        CustomerService customerService = (CustomerService) context.getBean("customerService");
        // 3.保存客户
        customerService.saveCustomer();
        // 4.根据客户id查询客户
        customerService.findCustomerById(1);
    }
}
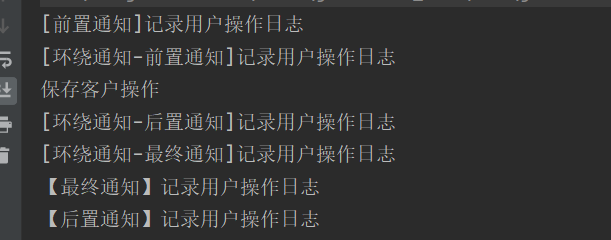
执行结果

2.1 通知类型
2.1.1 项目目录

2.1.2 常见通知基本概念
#<aop:before>
作用:配置前置通知,在目标方法执行前执行
属性:
    method:指定通知方法名称
    pointcut:定义切入点表达式
    pointcut-ref:引用切入点表达式的id
#<aop:after-returning>
作用:配置后置通知,无论目标方法正常返回,还是发生异常都会执行。
属性:
    method:指定通知方法名称
    pointcut:定义切入点表达式
    pointcut-ref:引用切入点表达式的id
#<aop:after-throwing>
作用:配置异常通知,在目标方法发生异常后执行。它和后置通知只能执行一个.
属性:
    method:指定通知方法名称
    pointcut:定义切入点表达式
    pointcut-ref:引用切入点表达式的id
#<aop:after>
作用:配置最终通知,在目标方法正常返回后执行。它和异常通知只能执行一个.
属性:
    method:指定通知方法名称.
    pointcut:定义切入点表达式.
    pointcut-ref:引用切入点表达式的id.
#<aop:around>
作用:配置环绕通知,综合了前面四类通知,可以手动控制通知的执行时间点和顺序
属性:
    method:指定通知方法名称
    pointcut:定义切入点表达式
    pointcut-ref:引用切入点表达式的id
2.1.3 代码示例
LogAdvice
package cn.guardwhy.advice;

import org.aspectj.lang.ProceedingJoinPoint;

/**
 * 日志通知
 */
public class LogAdvice {


    /**
     * 前置通知
     */
    public void beforeLog(){


        System.out.println("[前置通知]记录用户操作日志");
    }

    /**
     * 后置通知
     */
    public  void afterReturningLog(){


        System.out.println("【后置通知】记录用户操作日志");
    }

    /**
     * 异常通知
     */
    public  void afterThrowingLog(){


        System.out.println("【异常通知】记录用户操作日志");
    }

    /**
     * 最终通知
     */
    public  void afterLog(){


        System.out.println("【最终通知】记录用户操作日志");
    }

    /**
     * 环绕通知:
     *      1.它是spring框架为我们提供了手动控制通知执行时间点和顺序的一种特殊通知类型
     * 原理分析:
     *      2.spring框架提供了ProceedingJoinPoint接口,作为环绕通知的参数。在环绕通知
     *      执行的时候,spring框架会提供实例化对象,我们直接使用即可。该接口中提供了
     *      两个方法:
     *          getArgs:获取参数列表
     *          proceed:相当于反射中的invoke方法
     *
     */
    public void aroundLog(ProceedingJoinPoint pjp){


        // 前置通知
        System.out.println("[环绕通知-前置通知]记录用户操作日志");

        try {


            // 获取参数列表
            Object[] args = pjp.getArgs();
            // 反射调用目标方法
            Object retv = pjp.proceed(args);
            // 后置通知
            System.out.println("[环绕通知-后置通知]记录用户操作日志");
        } catch (Throwable throwable) {


            throwable.printStackTrace();
            // 异常通知
            System.out.println("[环绕通知-异常通知]记录用户操作日志");
        }
        // 最终通知
        System.out.println("[环绕通知-最终通知]记录用户操作日志");
    }
}
配置bean.xml
<?xml version="1.0" encoding="UTF-8"?>
<beans xmlns="http://www.springframework.org/schema/beans"
       xmlns:xsi="http://www.w3.org/2001/XMLSchema-instance"
       xmlns:aop="http://www.springframework.org/schema/aop"
       xsi:schemaLocation="http://www.springframework.org/schema/beans
       http://www.springframework.org/schema/beans/spring-beans.xsd
       http://www.springframework.org/schema/aop
       http://www.springframework.org/schema/aop/spring-aop.xsd">
    <!--配置客户service-->
    <bean id="customerService" class="cn.guardwhy.service.impl.CustomerServiceImpl"/>

    <!--配置日志通知-->
    <bean id="logAdvice" class="cn.guardwhy.advice.LogAdvice"/>

    <!--配置aop -->
    <aop:config>
        <aop:aspect id="logAspect" ref="logAdvice">
            <!--前置通知-->
            <aop:before method="beforeLog" pointcut-ref="pt1"/>
            <!--后置通知-->
            <aop:after-returning method="afterReturningLog" pointcut-ref="pt1"/>
            <!--异常通知-->
            <aop:after-throwing method="afterThrowingLog" pointcut-ref="pt1"/>
            <!--最终通知-->
            <aop:after method="afterLog" pointcut-ref="pt1"/>

            <!--环绕通知-->
            <aop:around method="aroundLog" pointcut-ref="pt1"/>
            <!--切入点表达式-->
            <aop:pointcut id="pt1" expression="execution(* cn.guardwhy.service..*.*(..))"/>
        </aop:aspect>
    </aop:config>
</beans>
CustomerController
package cn.guardwhy.controller;

import cn.guardwhy.service.CustomerService;
import org.springframework.context.ApplicationContext;
import org.springframework.context.support.ClassPathXmlApplicationContext;

/**
 * 客户表现层
 */
public class CustomerController {


    public static void main(String[] args) {


        // 1.加载spring配置文件,创建spring容器
        ApplicationContext context = new ClassPathXmlApplicationContext("classpath:bean.xml");
        // 2.获取客户service
        CustomerService customerService = (CustomerService) context.getBean("customerService");
        // 3.保存客户
        customerService.saveCustomer();
    }
}
执行结果