http升级https
1、注册域名

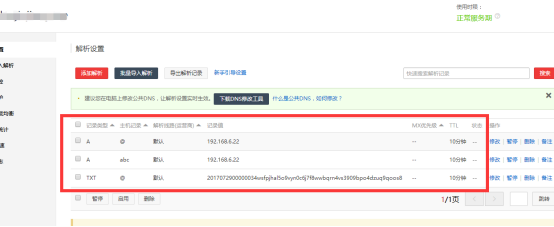
2、添加域名解析。

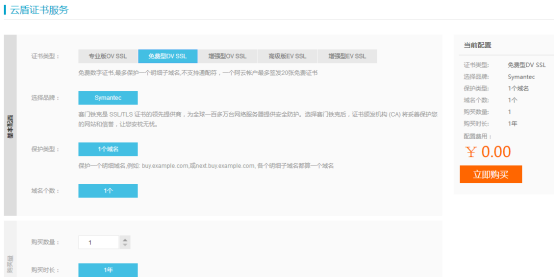
3、申请ssl证书

进入证书服务,购买自己需要的证书,我这里选择的是免费证书,因为我只要测试使用。
支付完之后在我的证书里面可以看到刚刚购买的证书。

然后去里面补全信息。然后等待审核通过下发证书。
4、下载证书。
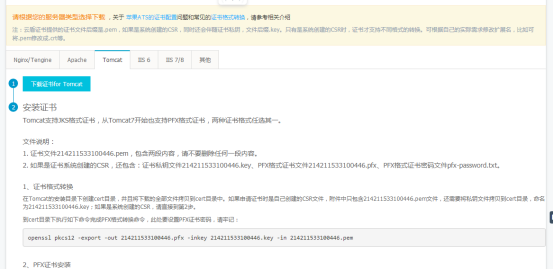
里面提供多种服务器的ssl证书下载以及教程,我项目所用的是tomcat服务器,所以这里以tomcat服务为例。
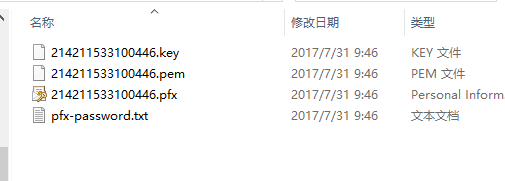
下载解压得到:(补全证书信息的时候我选择的是系统自动生成,如果选择的是自己生成文件会不一样)

5、tomcat配置证书
先进行证书转换
使用Java jdk将PFX格式证书转换为JKS格式证书(windows环境注意在%JAVA_HOME%/jdk/bin目录下执行)
Keytool -importkeystore -srckeystore 213996013500014.pfx -destkeystore your-name.jks -srcstoretype PKCS12 -deststoretype JKS切记一定是bin文件目录下,这里213996013500014.pfx和your-name.jks可以换成绝对路径的,your-name可以换成任意名字,否则需要将对应的文件放在bin目录下,打开命令提示符的时候建议用管理员模式,避免不必要的麻烦。
期间会输入3次密码,另外说一下,命令提示符下输入密码是不会在控制台上显示的,其实已经输入成功了,之前还因为这个问题纠结半天,是我台嫩了。前两次都是输入jks证书的密码,自己随意设置,第3次输入的是pfx源文件的密码,这个密码在pfx-password.txt有,理论上这两个密码可以不同,但是官方建议输入一样的,所以我们就按照官方的来吧。成功之后在bin目录下可以找到生成的jks文件。
打开conf下的server.xml 将如下的代码注释去掉
<!-- <Connector port="8443" protocol="HTTP/1.1" SSLEnabled="true" maxThreads="150" scheme="https" secure="true" clientAuth="false" sslProtocol="TLS" /> -->修改为↓
<Connector port="8443" protocol="HTTP/1.1" SSLEnabled="true" maxThreads="150" scheme="https" secure="true" clientAuth="false" sslProtocol="TLS" keystoreFile="cert/xxx.jks" keystorePass="password"/>其中xxx.jks为之前证书格式转换设置的名称,password为之前设置的密码,即三次输入那块。
切记,在64位系统下,上面的protocol=”HTTP/1.1” 需要修改为
“org.apache.coyote.http11.Http11Protocol”,
这可能是tomcat的bug吧,也是上网搜索的许久才找到的原因,如果不改,启动时候会提示错误。
重新启动tomcat,在地址中输入https://www.xxx.com:8443 其中xxx为你的域名,你会发现成功了。
输入https://www.xxx.com 即可访问,不带端口号
但是我们想要的是不带8443端口号的地址也可以访问,这里把上面的8433改为443就可以了,http默认端口80,https默认443,除了改好上面的,还需要更改以下两处:
<Connector port="8443" protocol="HTTP/1.1" SSLEnabled="true"

               maxThreads="150" scheme="https" secure="true"

               clientAuth="false" sslProtocol="TLS"

        keystoreFile="cert/xxx.jks"

        keystorePass="password"/>

 <Connector port="80" protocol="HTTP/1.1"

               connectionTimeout="20000"

               redirectPort="8443" />

 <Connector port="8222" protocol="AJP/1.3" redirectPort="8443" />
以上三处处8443均需要改为443;
6、域名强转
输入域名或者http://强制跳转到https://服务
这里我们只需要修改conf文件夹下的web.xml文件
找到如下代码片段(在最下面)
 <welcome-file-list>

        <welcome-file>index.html</welcome-file>

        <welcome-file>index.htm</welcome-file>

        <welcome-file>index.jsp</welcome-file>

 </welcome-file-list>
在 /welcome-file-list 下面添加
<login-config>

 <!-- Authorization setting for SSL -->

 <auth-method>CLIENT-CERT</auth-method>

 <realm-name>Client Cert Users-only Area</realm-name>

 </login-config>

 <security-constraint>

<!-- Authorization setting for SSL -->

 <web-resource-collection >

 <web-resource-name >SSL</web-resource-name>

 <url-pattern>/*</url-pattern>

 </web-resource-collection>

 <user-data-constraint>

 <transport-guarantee>CONFIDENTIAL</transport-guarantee>

 </user-data-constraint>

 </security-constraint>
即
 <welcome-file-list>

        <welcome-file>index.html</welcome-file>

        <welcome-file>index.htm</welcome-file>

        <welcome-file>index.jsp</welcome-file>

 </welcome-file-list>


 <login-config>

 <!-- Authorization setting for SSL -->

 <auth-method>CLIENT-CERT</auth-method>

 <realm-name>Client Cert Users-only Area</realm-name>

 </login-config>

 <security-constraint>

<!-- Authorization setting for SSL -->

 <web-resource-collection >

 <web-resource-name >SSL</web-resource-name>

 <url-pattern>/*</url-pattern>

 </web-resource-collection>

 <user-data-constraint>

 <transport-guarantee>CONFIDENTIAL</transport-guarantee>

 </user-data-constraint>

 </security-constraint>