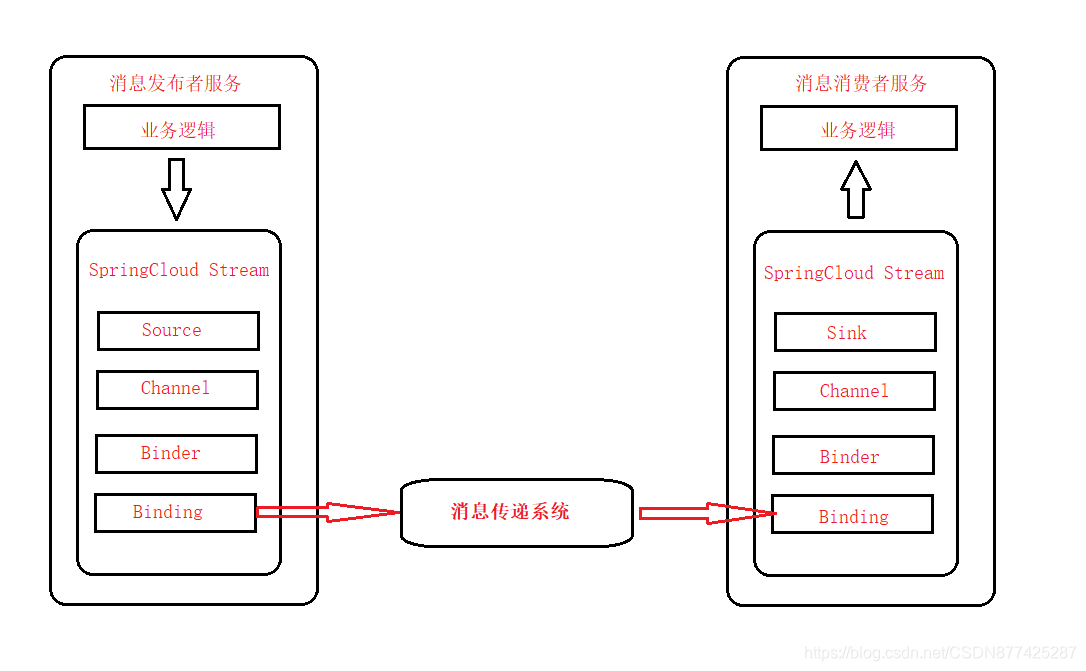
前言
SpringCloud Stream整合的时候还是有一些坑的,请保持和我使用的版本一致!前期准备好RocketMQ环境!搭建教程往期文章RocketMQ搭建!好人做到第吧,本文demo已在gitee托管
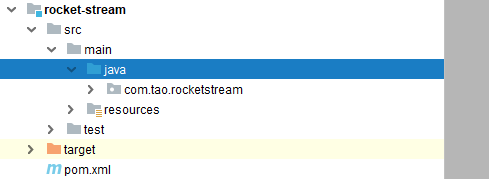
搭建项目
1.创建SpringBoot工程
2.添加pom依赖
 <groupId>com.tao</groupId>
    <artifactId>rocket-stream</artifactId>
    <version>0.0.1-SNAPSHOT</version>
    <name>rocket-stream</name>
    <description>Demo project for Spring Boot</description>

    <properties>
        <java.version>1.8</java.version>
        <spring-boot.version>2.2.5.RELEASE</spring-boot.version>
        <spring-cloud-alibaba.version>2.2.1.RELEASE</spring-cloud-alibaba.version>
    </properties>

    <dependencyManagement>
        <dependencies>
            <dependency>
                <groupId>org.springframework.boot</groupId>
                <artifactId>spring-boot-dependencies</artifactId>
                <version>${

    spring-boot.version}</version>
                <type>pom</type>
                <scope>import</scope>
            </dependency>
            <dependency>
                <groupId>com.alibaba.cloud</groupId>
                <artifactId>spring-cloud-alibaba-dependencies</artifactId>
                <version>${

    spring-cloud-alibaba.version}</version>
                <type>pom</type>
                <scope>import</scope>
            </dependency>
        </dependencies>
    </dependencyManagement>

    <dependencies>
        <dependency>
            <groupId>org.springframework.boot</groupId>
            <artifactId>spring-boot-starter-web</artifactId>
        </dependency>

        <dependency>
            <groupId>org.springframework.boot</groupId>
            <artifactId>spring-boot-starter-test</artifactId>
            <scope>test</scope>
        </dependency>

        <dependency>
            <groupId>com.alibaba.cloud</groupId>
            <artifactId>spring-cloud-starter-stream-rocketmq</artifactId>
        </dependency>

    </dependencies>
注意版本!
3.编写application.properties文件
spring.application.name=spring-cloud-stream
#客户端连接RocketMq的地址
spring.cloud.stream.rocketmq.binder.name-server=192.168.0.177:9876;192.168.0.188:9876

#生产者
spring.cloud.stream.bindings.output.destination=test-topic
spring.cloud.stream.bindings.output.content-type=text/plain
spring.cloud.stream.bindings.output.group=test-group
#消费者
spring.cloud.stream.bindings.input.destination=test-topic
spring.cloud.stream.bindings.input.content-type=text/plain
spring.cloud.stream.bindings.input.group=test-group
3.编写生产者
import org.springframework.beans.factory.annotation.Autowired;
import org.springframework.cloud.stream.messaging.Source;
import org.springframework.messaging.support.MessageBuilder;
import org.springframework.stereotype.Service;

@Service
public class SenderService {


	@Autowired
    private Source source;

	//使用默认source发送消息
	public void send(String msg) throws Exception{


        boolean flag = source.output().send(MessageBuilder.withPayload(msg).build());
        System.out.println("使用默认source消息发送==>"+flag );
    }
}
4.编写消费者
import org.springframework.beans.factory.annotation.Autowired;
import org.springframework.cloud.stream.annotation.StreamListener;
import org.springframework.cloud.stream.messaging.Sink;
import org.springframework.stereotype.Service;

@Service
public class ReceiveService {


	@Autowired
    private Sink sink;

	@StreamListener(value = Sink.INPUT)
    public void receiveMessage(String message){


        System.out.println("接收的消息input==>"+message);
    }
}
5.编写controller
@RestController
public class SendMessageController
{


	@Autowired
    private SenderService senderService;
    @GetMapping(value = "/input")
    public String input(String msg) throws Exception {


        senderService.send(msg);
        return "ok";
    }

}
6.启动类添加@EnableBinding
@EnableBinding(value = {

    Source.class, Sink.class})
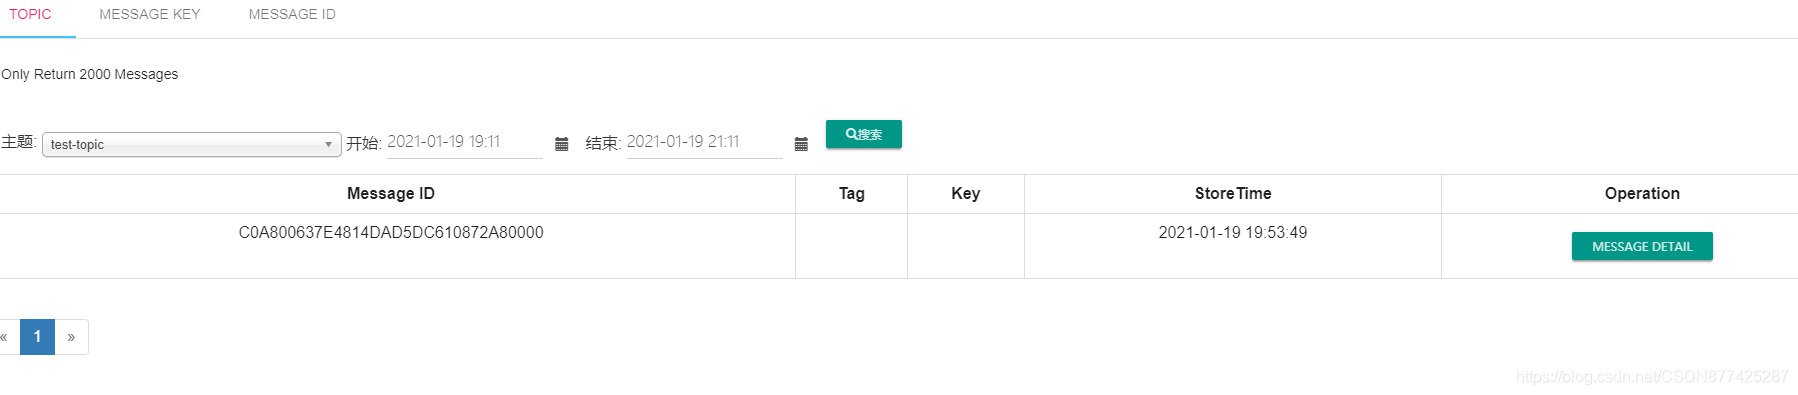
7.启动服务测试

自定义消息发送
1.修改application.properties文件
新增如下配置
#自定义消息1
spring.cloud.stream.bindings.output1.destination=test-topic1
spring.cloud.stream.bindings.output1.content-type=text/plain
spring.cloud.stream.bindings.output1.group=test-group1
spring.cloud.stream.bindings.input1.destination=test-topic1
spring.cloud.stream.bindings.input1.content-type=text/plain
spring.cloud.stream.bindings.input1.group=test-group1

#自定义消息2
spring.cloud.stream.bindings.output2.destination=test-topic2
spring.cloud.stream.bindings.output2.content-type=text/plain
spring.cloud.stream.bindings.output2.group=test-group2
spring.cloud.stream.bindings.input2.destination=test-topic2
spring.cloud.stream.bindings.input2.content-type=text/plain
spring.cloud.stream.bindings.input2.group=test-group2
2.创建自定义Source
public interface MySource {


 	String OUTPUT = "output1";

    @Output(MySource.OUTPUT)
    MessageChannel output1();

    String OUTPUT2 = "output2";

    @Output(MySource.OUTPUT2)
    MessageChannel output2();

}
3.创建自定义Sink
public interface MySink {


    String INPUT = "input1";

    @Input(MySink.INPUT)
    SubscribableChannel input1();

    String INPUT2 = "input2";

    @Input(MySink.INPUT2)
    SubscribableChannel input2();

}
4.消息生产者
import org.springframework.beans.factory.annotation.Autowired;
import org.springframework.cloud.stream.messaging.Source;
import org.springframework.messaging.support.MessageBuilder;
import org.springframework.stereotype.Service;

@Service
public class SenderService {


	@Autowired
    private MySource mySource;

	public void send1(String msg) throws Exception{


        boolean flag = mySource.output1().send(MessageBuilder.withPayload(msg).build());
        System.out.println("消息发送output1==>"+flag );
    }

    public void send2(String msg) throws Exception{


        boolean flag = mySource.output2().send(MessageBuilder.withPayload(msg).build());
        System.out.println("消息发送output2==>"+flag );
    }

}
5.消息消费者监听
import org.springframework.beans.factory.annotation.Autowired;
import org.springframework.cloud.stream.annotation.StreamListener;
import org.springframework.cloud.stream.messaging.Sink;
import org.springframework.stereotype.Service;

@Service
public class ReceiveService {


	@StreamListener(value = MySink.INPUT)
    public void receiveMessage1(String message){


        System.out.println("接收的消息input1==>"+message);
    }

    @StreamListener(value = MySink.INPUT2)
    public void receiveMessage2(String message){


        System.out.println("接收的消息input2==>"+message);
    }
}
6.编写controller调用自定义消息业务
	@Autowired
    private SenderService senderService;

	@GetMapping(value = "/input1")
    public String input1(String msg) throws Exception {


        senderService.send1(msg);
        return "ok";
    }

    @GetMapping(value = "/input2")
    public String input2(String msg) throws Exception {


        senderService.send2(msg);
        return "ok";
    }
7.主启动类
@EnableBinding(value = {

    Source.class, Sink.class, MySource.class, MySink.class})
8.重启服务
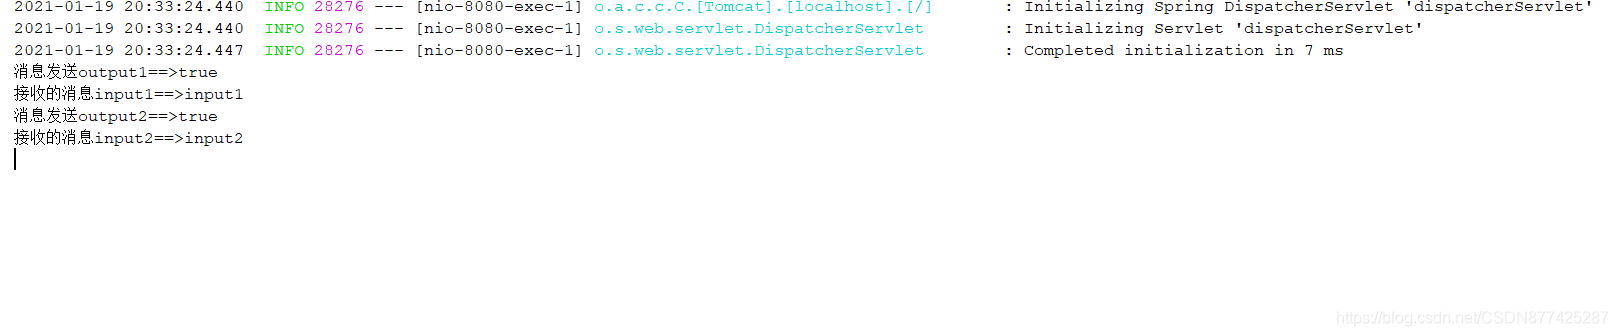


搞定!
事务消息
1.修改application.properties文件
spring.cloud.stream.bindings.outputTX.destination=TransactionTopic
spring.cloud.stream.bindings.outputTX.content-type=text/plain
spring.cloud.stream.rocketmq.bindings.outputTX.producer.group=myTXProducerGroup
#默认事务是关闭的
spring.cloud.stream.rocketmq.bindings.outputTX.producer.transactional=true

spring.cloud.stream.bindings.inputTX.destination=TransactionTopic
spring.cloud.stream.bindings.inputTX.content-type=text/plain
spring.cloud.stream.bindings.inputTX.group=transaction-group
spring.cloud.stream.rocketmq.bindings.inputTX.consumer.broadcasting=false
2.创建自定义Source
public interface MySource {


 	String OUTPUTTX = "outputTX";

    @Output(MySource.OUTPUTTX)
    MessageChannel outputTX();

}
3.创建自定义Sink
public interface MySink {


    String INPUTTX = "inputTX";

    @Input(MySink.INPUTTX)
    SubscribableChannel inputTX();

}
4.事务监听
import org.apache.rocketmq.spring.annotation.RocketMQTransactionListener;
import org.apache.rocketmq.spring.core.RocketMQLocalTransactionListener;
import org.apache.rocketmq.spring.core.RocketMQLocalTransactionState;
import org.springframework.messaging.Message;
//myTXProducerGroup和properties中的配置producer.group的值一样
@RocketMQTransactionListener(txProducerGroup = "myTXProducerGroup",corePoolSize = 5,maximumPoolSize = 10)
public class TransactionListenerImpl implements RocketMQLocalTransactionListener {
/**
* @description: 执行本地事务,也是执行本地业务逻辑
* @author TAO
* @date 2021/1/19 18:35
*/
@Override
public RocketMQLocalTransactionState executeLocalTransaction(Message msg, Object arg) {
Object num = msg.getHeaders().get("test");
if ("1".equals(num)){
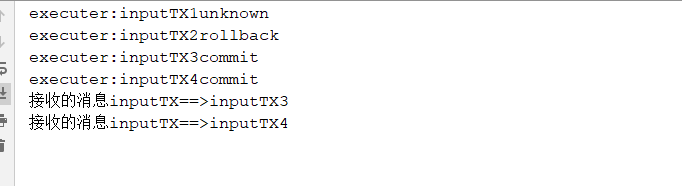
System.out.println("executer:"+new String((byte[]) msg.getPayload())+"unknown");
return RocketMQLocalTransactionState.UNKNOWN;
}else if("2".equals(num)){
System.out.println("executer:"+new String((byte[]) msg.getPayload())+"rollback");
return RocketMQLocalTransactionState.ROLLBACK;
}
System.out.println("executer:"+new String((byte[]) msg.getPayload())+"commit");
return RocketMQLocalTransactionState.COMMIT;
}
/**
* @description: 回调检查
* @author TAO
* @date 2021/1/19 18:34
*/
@Override
public RocketMQLocalTransactionState checkLocalTransaction(Message msg) {
System.out.println("check:"+new String((byte[]) msg.getPayload()));
return RocketMQLocalTransactionState.COMMIT;
}
}
5.消息生产者
import org.springframework.beans.factory.annotation.Autowired;
import org.springframework.cloud.stream.messaging.Source;
import org.springframework.messaging.Message;
import org.springframework.messaging.MessageHeaders;
import org.springframework.messaging.support.MessageBuilder;
import org.springframework.stereotype.Service;
import org.springframework.util.MimeTypeUtils;

@Service
public class SenderService {


	@Autowired
    private MySource mySource;

	public <T> void sendTransactionalMsg(T msg,int num){


        MessageBuilder builder = MessageBuilder.withPayload(msg)
                .setHeader(MessageHeaders.CONTENT_TYPE, MimeTypeUtils.APPLICATION_JSON)
                .setHeader("test", String.valueOf(num));
        Message message=builder.build();
        mySource.outputTX().send(message);
    }
}
6.消息消费者
import org.springframework.beans.factory.annotation.Autowired;
import org.springframework.cloud.stream.annotation.StreamListener;
import org.springframework.cloud.stream.messaging.Sink;

import org.springframework.stereotype.Service;

@Service
public class ReceiveService {


	@StreamListener(value = MySink.INPUTTX)
    public void receiveMessageTX(String message){


        System.out.println("接收的消息inputTX==>"+message);
    }


}
7.controller
	@Autowired
    private SenderService senderService;

	@GetMapping(value = "/inputTX")
    public String inputTX(String msg) throws Exception {


        senderService.sendTransactionalMsg(msg+"1",1);
        senderService.sendTransactionalMsg(msg+"2",2);
        senderService.sendTransactionalMsg(msg+"3",3);
        senderService.sendTransactionalMsg(msg+"4",4);
        return "ok";
    }
8.重启服务器测试
发送标签消息
配置不用加了直接使用已存在的Source、Sink信道发送和接收消息!
1.消息生产者
import org.apache.rocketmq.common.message.MessageConst;
import org.springframework.beans.factory.annotation.Autowired;
import org.springframework.cloud.stream.messaging.Source;
import org.springframework.messaging.Message;
import org.springframework.messaging.MessageHeaders;
import org.springframework.messaging.support.MessageBuilder;
import org.springframework.stereotype.Service;
import org.springframework.util.MimeTypeUtils;

@Service
public class SenderService {


	@Autowired
    private MySource mySource;

	public <T> void sendObject(T msg,String tag) throws Exception{


        Message message=MessageBuilder.withPayload(msg)
                .setHeader(MessageConst.PROPERTY_TAGS, tag)
                .setHeader(MessageHeaders.CONTENT_TYPE, MimeTypeUtils.APPLICATION_JSON)
                .build();

        boolean flag = mySource.output2().send(message);
        System.out.println("sendObject==>"+flag );
    }
}
消息接收者就不用写了,上面案例中已经写了receiveMessage2
2.编写controller
	@GetMapping(value = "/sendObject")
    public String sendObject() throws Exception {


        JSONObject ss = new JSONObject();
        ss.put("name", "TAO");
        senderService.sendObject(ss,"myTag");
        return "ok";
    }
3.重启服务器测试

这里消费者监听的时候也可以根据TAG标签选择性的接收消息!在application.properties文件中添加下面配置,即可添加消息消费者限制!
spring.cloud.stream.rocketmq.bindings.input2.consumer.tags=myTag
完整配置如下图!
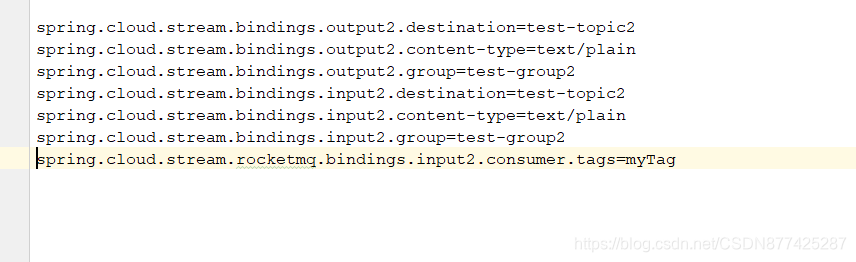
那么此消费者信道就只能监听tag为myTag的消息