目录
一、Nexus介绍
对maven来说仓库分为两类:本地仓库和远程仓库,有三种专门的Maven仓库管理软件可以用来帮助我们建立私服:chiva、Artifactory和Nexus。Nexus是当前最流行的Maven仓库管理软件。Nexus包含了各种类型的仓库的概念,包括代理仓库、宿主仓库、仓库组等。每一种仓库都提供了丰富实用的配置参数,方便用户根据需要进行定制。
二、2.X环境安装部署
这里以2.X最新版为例,版本号2.14.16
1、Nexus官网下载地址
https://www.sonatype.com/download-oss-sonatype
2.X版本下载地址:https://help.sonatype.com/repomanager2/download
3.X版本下载地址:https://help.sonatype.com/repomanager3/download
2、解压到本地
tar -xzvf nexus-2.14.16-01-bundle.tar.gz
3、修改Nexus端口(默认为8081)
我这里查询端口已经占用了,所以需要修改端口,vi nexus.properties,这里修改application-port为8090
[root@yang opt]# netstat -aon | grep "8081"
tcp6       0      0 :::8081                 :::*                    LISTEN      off (0.00/0/0)
[root@yang opt]# lsof -i :8081
COMMAND   PID USER   FD   TYPE   DEVICE SIZE/OFF NODE NAME
jsvc    17634  web   49u  IPv6 63482708      0t0  TCP *:tproxy (LISTEN)
[root@yang opt]# ps -ef | grep 17634
root      7323 31243  0 11:27 pts/0    00:00:00 grep --color=auto 17634
web      17634 17633  0 Jan16 ?        03:58:22 jsvc.exec -java-home /opt/jdk1.8.0_151 -user web -pidfile /export/apache-tomcat-8.5.43/logs/catalina-daemon.pid -wait 10 -outfile /export/apache-tomcat-8.5.43/logs/catalina-daemon.out -errfile &1 -classpath /export/apache-tomcat-8.5.43/bin/bootstrap.jar:/export/apache-tomcat-8.5.43/bin/commons-daemon.jar:/export/apache-tomcat-8.5.43/bin/tomcat-juli.jar -Djava.util.logging.config.file=/export/apache-tomcat-8.5.43/conf/logging.properties -Djava.util.logging.manager=org.apache.juli.ClassLoaderLogManager -Dignore.endorsed.dirs= -Dcatalina.base=/export/apache-tomcat-8.5.43 -Dcatalina.home=/export/apache-tomcat-8.5.43 -Djava.io.tmpdir=/export/apache-tomcat-8.5.43/temp org.apache.catalina.startup.Bootstra
[root@yang conf]# vi nexus.properties
#
# Sonatype Nexus (TM) Open Source Version
# Copyright (c) 2008-present Sonatype, Inc.
# All rights reserved. Includes the third-party code listed at http://links.sonatype.com/products/nexus/oss/attributions.
#
# This program and the accompanying materials are made available under the terms of the Eclipse Public License Version 1.0,
# which accompanies this distribution and is available at http://www.eclipse.org/legal/epl-v10.html.
#
# Sonatype Nexus (TM) Professional Version is available from Sonatype, Inc. "Sonatype" and "Sonatype Nexus" are trademarks
# of Sonatype, Inc. Apache Maven is a trademark of the Apache Software Foundation. M2eclipse is a trademark of the
# Eclipse Foundation. All other trademarks are the property of their respective owners.
#
# Sonatype Nexus
# ==============
# This is the most basic configuration of Nexus.
# Jetty section
application-port=8090
application-host=0.0.0.0
nexus-webapp=${bundleBasedir}/nexus
nexus-webapp-context-path=/nexus
# Nexus section
nexus-work=${bundleBasedir}/../sonatype-work/nexus
runtime=${bundleBasedir}/nexus/WEB-INF
# orientdb buffer size in megabytes
storage.diskCache.bufferSize=40964、开放防火墙
vi /etc/sysconfig/iptables
添加:-A INPUT -p tcp -m state --state NEW -m tcp --dport 8090 -j ACCEPT
service iptables restart
5、修改启动文件
/opt/nexus-2.14.16-01/bin/nexus添加root启动,或者添加nexus用户(useradd nexus),
否则启动报错If you insist running as root, then set the environment variable RUN_AS_USER=root before running this script.
修改RUN_AS_USER=root //注意删除前面的#号
修改JDK路径vi wrapper.conf(./bin/jsw/conf/wrapper.conf)
修改参数wrapper.java.library.path.1=/opt/jdk1.8.0_151/bin/
6、启动
/opt/nexus-2.14.16-01/bin/nexus
[root@yang bin]# ./nexus start &
[1] 2514
[root@yang bin]# ****************************************
WARNING - NOT RECOMMENDED TO RUN AS ROOT
****************************************
Starting Nexus OSS...
Started Nexus OSS.
[1]+ Done ./nexus start
[root@yang bin]# ps -ef | grep nexus
root 2558 1 0 14:03 ? 00:00:00 /opt/nexus-2.14.16-01/bin/../bin/jsw/linux-x86-64/wrapper /opt/nexus-2.14.16-01/bin/../bin/jsw/conf/wrapper.conf wrapper.syslog.ident=nexus wrapper.pidfile=/opt/nexus-2.14.16-01/bin/../bin/jsw/linux-x86-64/nexus.pid wrapper.daemonize=TRUE wrapper.lockfile=/var/lock/subsys/nexus
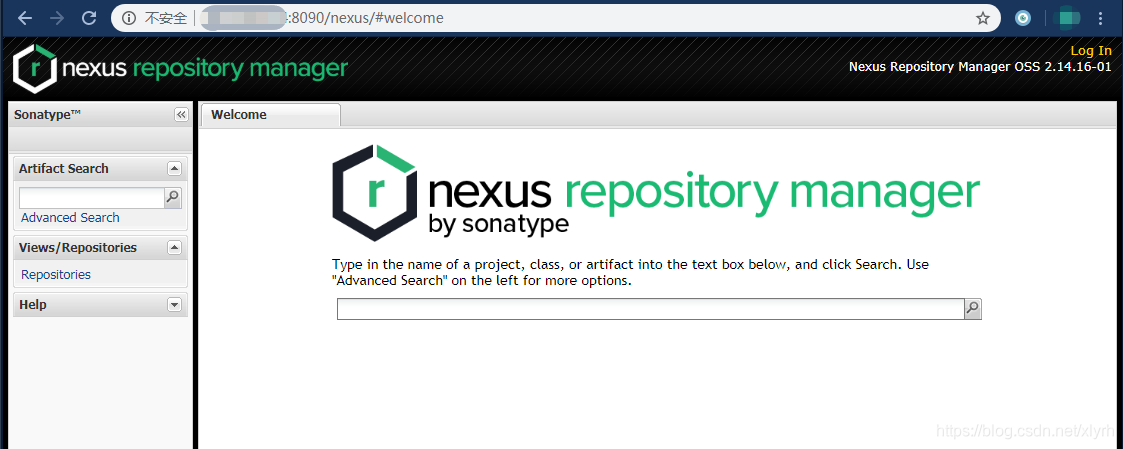
root 2564 2558 87 14:03 ? 00:00:24 java -Djava.io.tmpdir=./tmp -Djava.net.preferIPv4Stack=true -Dcom.sun.jndi.ldap.connect.pool.protocol=plain ssl -Xms256m -Xmx768m -Djava.library.path=/opt/jdk1.8.0_151/bin/ -classpath bin/jsw/lib/wrapper-3.2.3.jar:./lib/jetty-server-8.1.16.v20140903.jar:./lib/jetty-http-8.1.16.v20140903.jar:./lib/metrics-jetty-2.2.0.jar:./lib/logback-core-1.2.3.jar:./lib/jetty-servlet-8.1.16.v20140903.jar:./lib/metrics-core-2.2.0.jar:./lib/logback-access-1.2.3.jar:./lib/nexus-bootstrap-2.14.16-01.jar:./lib/jetty-xml-8.1.16.v20140903.jar:./lib/jul-to-slf4j-1.7.25.jar:./lib/jetty-util-8.1.16.v20140903.jar:./lib/jetty-client-8.1.16.v20140903.jar:./lib/javax.servlet-3.0.0.v201112011016.jar:./lib/jetty-io-8.1.16.v20140903.jar:./lib/jetty-deploy-8.1.16.v20140903.jar:./lib/logback-classic-1.2.3.jar:./lib/jetty-rewrite-8.1.16.v20140903.jar:./lib/jetty-continuation-8.1.16.v20140903.jar:./lib/slf4j-api-1.7.25.jar:./lib/plexus-interpolation-1.16.jar:./lib/metrics-logback-2.2.0.jar:./lib/jetty-webapp-8.1.16.v20140903.jar:./lib/jetty-security-8.1.16.v20140903.jar:./lib/jetty-jmx-8.1.16.v20140903.jar:./conf/ -Dwrapper.key=iRiyGKHQ9Yp5stNP -Dwrapper.port=32000 -Dwrapper.jvm.port.min=31000 -Dwrapper.jvm.port.max=31999 -Dwrapper.pid=2558 -Dwrapper.version=3.2.3 -Dwrapper.native_library=wrapper -Dwrapper.service=TRUE -Dwrapper.cpu.timeout=10 -Dwrapper.jvmid=1 org.sonatype.nexus.bootstrap.jsw.JswLauncher ./conf/jetty.xml ./conf/jetty-requestlog.xml7、访问nexus
http://ip地址:8090/nexus/ 默认账号和密码:admin/admin123
三、3.X环境安装部署
3.x和2.x有一些差异,这里也一并记录一下
3.X版本下载地址:https://help.sonatype.com/repomanager3/download
1、解压
tar -xzvf nexus-3.21.2-03-unix.tar.gz
解压后是两个文件夹nexus-3.21.2-03和sonatype-work
2、修改Nexus默认端口
路径有小变动,配置文件在/opt/nexus-3.21.2-03/etc路径下vi nexus-default.properties
这里修改为application-port=8091
3、开防火墙
vi /etc/sysconfig/iptables
添加:-A INPUT -p tcp -m state --state NEW -m tcp --dport 8091 -j ACCEPT
service iptables restart
4、添加启动用户
经测试,使用root启动问题还挺多的,这里添加nexus用户启动
useradd nexus
修改文件所属用户及用户组:
chown -R nexus:nexus /opt/nexus-3.21.2-0
chown -R nexus:nexus /opt/sonatype-work
drwxr-xr-x 9 nexus nexus      4096 Mar 24 20:09 nexus-3.21.2-03
-rw-r--r-- 1 root  root  140760762 Mar 24 17:33 nexus-3.21.2-03-unix.tar.gz
drwxr-xr-x 5 nexus nexus      4096 Mar 25 14:29 sonatype-work
5、启动nexus
./nexus run 或者后台运行 nohup ./bin/nexus run > logs/nexus.log 2>&1 &
出现如下信息时启动成功,可以通过网页访问
-------------------------------------------------

Started Sonatype Nexus OSS 3.21.2-03

-------------------------------------------------
问题解决:
若启动时报如下错误
2020-03-25 14:11:40,914+0800 ERROR [ForkJoinPool.commonPool-worker-1] *SYSTEM com.orientechnologies.orient.core.storage.impl.local.paginated.OLocalPaginatedStorage - Exception `4BCD73AB` in storage `plocal:/opt/sonatype-work/nexus3/db/config`: 2.2.36 (build d3beb772c02098ceaea89779a7afd4b7305d3788, branch 2.2.x)
com.orientechnologies.orient.core.exception.OStorageException: Storage config is not opened.
        DB name="config"
解决方法:
将sonatype-work/下的nexus3重命名或者删除,再重启(参考文献:https://www.cnblogs.com/ccbloom/p/10932822.html)
[nexus@yang opt]$ cd sonatype-work/
[nexus@yang sonatype-work]$ ls
nexus  nexus3  README.txt
[nexus@yang sonatype-work]$ mv nexus3/ nexus3_backup
[nexus@yang sonatype-work]$ ll
total 12
drwxr-xr-x 15 nexus nexus 4096 Mar 24 21:41 nexus
drwxr-xr-x 13 nexus nexus 4096 Mar 25 14:10 nexus3_backup
-rw-r--r--  1 nexus nexus  350 Jan 15 03:57 README.txt
6、访问3.X版本Nexus
地址:http://IP地址:8091/ 用户名为admin,密码在cat /opt/sonatype-work/nexus3/admin.password,首次登陆后需要修改密码


问题解决:
后台报错异常:
2020-03-25 15:19:01,965+0800 WARN [qtp356953667-47] admin com.sonatype.nexus.plugins.outreach.internal.outreach.SonatypeOutreach - Could not download page bundle
org.apache.http.conn.ConnectTimeoutException: Connect to sonatype-download.global.ssl.fastly.net:443 [sonatype-download.global.ssl.fastly.net/31.13.72.17] failed: connect timed out
解决方法:
打开【System】==>【Capabilities】,将【Outreach:Management】禁用即可
重设密码:
