go http2 server push 及client push handle 示例
1、项目初始化
在GOPATH之外,创建一个新目录,并使用go mod init 初始化go.mod文件
sudo mkdir -p /opt/workspace/gomod/http2demo
cd /opt/workspace/gomod/http2demo
sudo go mod init github.com/custhk/http2demo
其它go mod命令
| 命令 | 说明 |
|---|---|
| init | initialize new module in current directory(在当前目录初始化mod) |
| download | download modules to local cache(下载依赖包) |
| edit | edit go.mod from tools or scripts(编辑go.mod) |
| tidy | add missing and remove unused modules(拉取缺少的模块,移除不用的模块) |
| graph | print module requirement graph (打印模块依赖图) |
| vendor | make vendored copy of dependencies(将依赖复制到vendor下) |
| verify | verify dependencies have expected content (验证依赖是否正确) |
| why | explain why packages or modules are needed(解释为什么需要依赖) |
2、http2依赖替换(替换后client支持push handle)
go.mod 提供了module, require、replace和exclude 四个命令来配置依赖,其中replace命令用于依赖替换
| 命令 | 说明 |
|---|---|
| module | 语句指定包的名字(路径) |
| require | 语句指定的依赖项模块 |
| replace | 语句可以替换依赖项模块 |
| exclude | 语句可以忽略依赖项模块 |
替换net/http2为支持client push handle的net/http包
sudo gedit /opt/workspace/gomod/http2demo/go.mod

## 添加
require golang.org/x/net v0.0.0-20200324143707-d3edc9973b7e

replace golang.org/x/net v0.0.0-20200324143707-d3edc9973b7e => github.com/custhk/net v0.0.0-20200326042854-adbd26198b9f
3、项目结构

client:客户端相关内容
pem:证书相关内容
resdata:资源
resource:资源数据结构
server:服务器相关内容
4、生成证书
sudo mkdir -p /opt/workspace/gomod/http2demo/pem
cd /opt/workspace/gomod/http2demo/pem
sudo gedit generate_cert.go

## 拷贝
## https://github.com/golang/go/blob/master/src/crypto/tls/generate_cert.go
## 内容到generate_cert.go内

## 下载依赖
cd /opt/workspace/gomod/http2demo/
export GOPROXY=https://goproxy.io
go mod download

## 这里生成了pem格式的证书和秘钥
cd /opt/workspace/gomod/http2demo/pem
sudo go run ./generate_cert.go --host localhost
5、编写客户端及服务端代码
github仓库地址:
https://github.com/custhk/http2demo
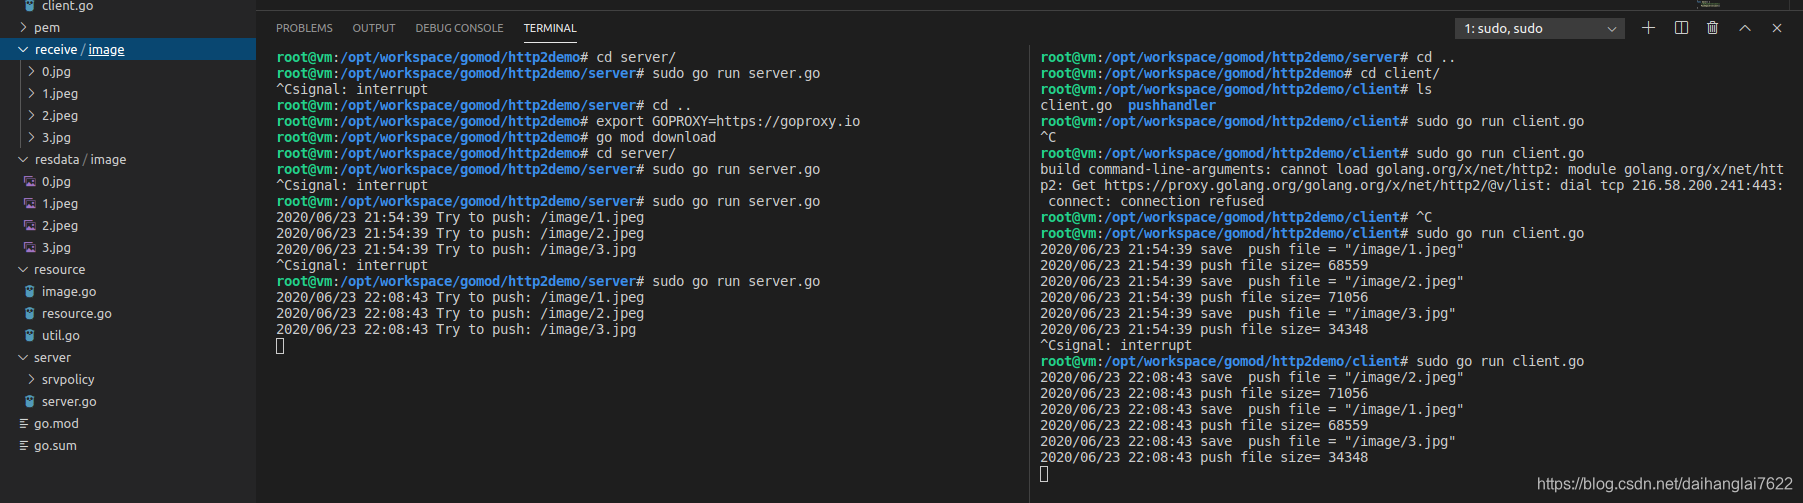
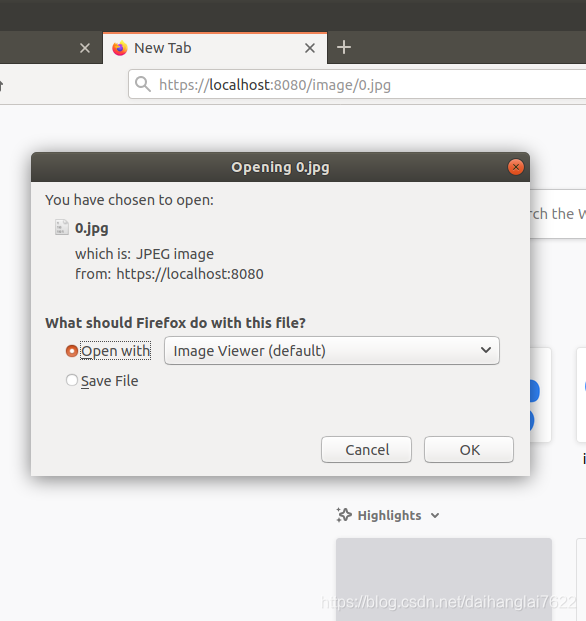
6、测试(需要先用浏览器访问一遍,并选择信赖)
浏览器直接访问(no push)

用客户端访问(指定push)