一.AspectJ
1.概念:基于java语言的AOP框架,用于实现Spring AOP
2.AspectJ实现Spring AOP的方式:
(1)基于XML配置开发AspectJ
(2)基于注解开发AspectJ
二.基于XML配置开发AspectJ
<aop:config>:aop配置标签,开发AspectJ的顶层配置元素
<aop:aspect>:配置切面
属性:
- id:切面的唯一标识,只有一个切面时,不用写id
- ref:指定关联的是哪个对象
<aop:pointcut>:配置切入点
属性:
(1) expression:切入点表达式,execution(表达式
execution(* com.spring.service.*(..))
- 第一个*代表前面可以有final关键字或static关键字或没有关键字
- com.spring.service:表示目标类所在包的包名
- 第二个*代表包中任意类的类名
- 第三个*代表方法名,代表该类中的任意方法
- (…)代表方法的参数为任意参数(无参或有参)
还可写成:
execution(* com.spring..*(..))
..表示com.spring包下的任意子包
(2) id:切入点的唯一标识
<aop:before>:配置前置通知。
前置通知在切入点执行之前执行
<aop:after-returning>:配置后置通知。
后置通知在切入点执行之后执行,发生异常时不执行
<aop:after>:配置最终通知
切入点执行之后执行,发生异常和不发生异常都要执行
<aop:after-throwing>:配置异常通知
切入点发生异常时执行
<aop:around>:配置环绕通知
切入点执行之前执行一部分,切入点执行之后执行一部分
所有通知配置标签的属性:
- method:通知中的方法名
- pointcut-ref:指定关联的切入点
实例:
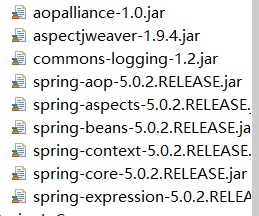
lib目录下导入这些包:
: - 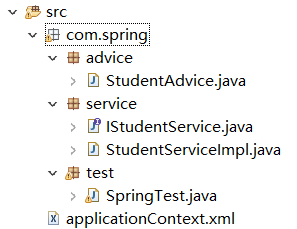
接口:
public interface IStudentService {


	public void add();
	public void delete();
	public void update(int id);
}
目标类:
//目标类
public class StudentServiceImpl implements IStudentService{


	@Override
	public void add() {


		System.out.println("添加成功");
	}
	@Override
	public void delete() {


		System.out.println("删除成功");
	}
	@Override
	public void update(int id) {


		System.out.println("修改成功");
	}
}
切面类:
用来编写各种类型的通知
//通知类(切面类)
public class StudentAdvice {


	//前置通知
	public void start() {


		System.out.println("开启事务");
	}
	//后置通知
	public void after() {


		System.out.println("结束事务");
	}
	//异常通知
	public void except() {


		System.out.println("发生异常");
	}
	//环绕通知
	public Object around(ProceedingJoinPoint pjp) throws Throwable {


		System.out.println("环绕开启");
		//执行目标类的方法
		Object obj = pjp.proceed();
		System.out.println("环绕结束");
		return obj;
	}
	//最终通知
	public void end(){


		System.out.println("最终通知");
}
配置文件:
<?xml version="1.0" encoding="UTF-8"?>
<beans xmlns="http://www.springframework.org/schema/beans"
	xmlns:aop="http://www.springframework.org/schema/aop"
    xmlns:xsi="http://www.w3.org/2001/XMLSchema-instance"
    xsi:schemaLocation="http://www.springframework.org/schema/beans
    	http://www.springframework.org/schema/beans/spring-beans.xsd
    	http://www.springframework.org/schema/aop
    	http://www.springframework.org/schema/aop/spring-aop.xsd">
    <!-- 创建目标对象 -->
    <bean id="target" class="com.spring.service.StudentServiceImpl"></bean>
    <!-- 创建通知对象 -->
    <bean id="advice" class="com.spring.advice.StudentAdvice"></bean>
    <!-- 配置aop -->
    <aop:config>
    	<!-- 配置切入点 -->
    	<aop:pointcut expression="execution(* com.spring..*.*(..))" id="student_pointcut"/>
    	<!-- 配置切面 -->
    	<aop:aspect ref="advice">
    		<!-- 配置前置通知 -->
    		<aop:before method="start" pointcut-ref="student_pointcut"/>
    		<!-- 配置后置通知 -->
    		<aop:after-returning method="after" pointcut-ref="student_pointcut"/>
    		<!-- 配置环绕通知 -->
    		<aop:around method="around" pointcut-ref="student_pointcut"/>
    		<!-- 配置异常通知 -->
    		<aop:after-throwing method="except" pointcut-ref="student_pointcut"/>
    		<!-- 配置最终后置通知 -->
    		<aop:after method="end" pointcut-ref="student_pointcut"/>
    	</aop:aspect>
    </aop:config>
</beans>
测试类:
 //测试类
public class SpringTest {


	public static void main(String[] args) {


		ApplicationContext app = new ClassPathXmlApplicationContext("applicationContext.xml");
		IStudentService studentService = (IStudentService)app.getBean("target");
		studentService.add();
	}
}
三.基于注解开发AspectJ
@Aspect:声明该类是一个切面类,注解在切面类上
@Pointcut:定义一个切入点表达式
@Before:声明该方法是前置通知
@AfterReturning:声明该方法是后置通知
@Around:声明该方法是环绕通知
@AfterThrowing:声明该方法是异常通知
@After:声明该方法是最终通知
通知类注解的属性都是value,value的值为切入点表达式或已经定义的切入点
@EnableAspectJAutoProxy:允许切面自动代理,只有在配置类中写上该注解才能实现代理
全注解实现上述代码:
接口类同上,目标类加注解@Service(“studentService”)
切面类:
//通知类(切面类)
@Aspect
@Component
public class StudentAdvice {


	/**
	 * 定义切入点
	 */
	@Pointcut("execution(* com.spring..*.*(..))")
	private void myPointCut() {


	}
	/**
	 * 前置通知
	 */
	@Before("myPointCut()")
	public void start() {


		System.out.println("开启事务");
	}
	/**
	 * 后置通知
	 */
	@AfterReturning("myPointCut()")
	public void after() {


		System.out.println("结束事务");
	}
	/**
	 * 异常通知
	 */
	@AfterThrowing("myPointCut()")
	public void except() {


		System.out.println("发生异常");
	}
	/**
	 * 环绕通知
	 * @param pjp
	 * @return
	 * @throws Throwable
	 */
	@Around("myPointCut()")
	public Object around(ProceedingJoinPoint pjp) throws Throwable {


		System.out.println("环绕开启");
		//执行目标类的方法
		Object obj = pjp.proceed();
		System.out.println("环绕结束");
		return obj;
	}
	/**
	 * 最终通知
	 */
	@After("myPointCut()")
	public void end() {


		System.out.println("最终通知");
	}
}
配置类:
//配置类
@Configuration
@ComponentScan("com.spring")
@EnableAspectJAutoProxy
public class Config {


}
配置类中一个要加@EnableAspectJAutoProxy注解,目标方法才会被代理。
测试类:
//测试类
public class SpringTest {


	public static void main(String[] args) {


		ApplicationContext app = new AnnotationConfigApplicationContext(Config.class);
		IStudentService studentService = (IStudentService)app.getBean("studentService");
		studentService.update(1);
	}
}

不使用配置类,使用配置文件的写法:
配置文件
<?xml version="1.0" encoding="UTF-8"?>
<beans xmlns="http://www.springframework.org/schema/beans"
	xmlns:xsi="http://www.w3.org/2001/XMLSchema-instance"
	xmlns:aop="http://www.springframework.org/schema/aop"
	xmlns:context="http://www.springframework.org/schema/context"
	xsi:schemaLocation="http://www.springframework.org/schema/beans
	http://www.springframework.org/schema/beans/spring-beans.xsd
	http://www.springframework.org/schema/aop
	http://www.springframework.org/schema/aop/spring-aop.xsd
	http://www.springframework.org/schema/context
	http://www.springframework.org/schema/context/spring-context.xsd">
	<!-- 指定需要扫描的包,使注解生效 -->
	<context:component-scan base-package="com.spring.advice"/>
	<context:component-scan base-package="com.spring.service"/>
	<!-- 启动基于注解的AspectJ配置 -->
	<aop:aspectj-autoproxy/>
</beans>
配置文件中一定要加aop:aspectj-autoproxy/,代理才能生效
测试类:
//测试类
public class SpringTest {


	public static void main(String[] args) {


		ApplicationContext app = new ClassPathXmlApplicationContext("applicationContext.xml");
		IStudentService studentService = (IStudentService)app.getBean("studentService");
		studentService.add();
	}
}