AndroidStuido作为当前Android的主要开发工具,已不必单纯依赖于某个jar包,其内部兼容了多种依赖方式,提供了丰富的资源获取方式,故记录一下AndroidStudio依赖相关的知识 ~
其实此文最早记录于2017年,但是当时仅简单记录了几个小知识点,近期在回顾这方面知识时,发现稍有不足,所以整理后重新发于2021年 ~
Catalog
前情了解
双解 bulid.gradle
建立Android项目后,在Gradle Script下经常能看到 bulid.gradle(Project)和build.gradle(app),针对于此做一个解释
bulid.gradle(Project)
配置作用于整个工程,是项目运行的基本
//gradle脚本执行所需依赖,分别是对应的maven库和插件
buildscript {


    repositories {


        google()
        jcenter()
    }
    dependencies {


        classpath 'com.android.tools.build:gradle:3.1.1'

        // NOTE: Do not place your application dependencies here; they belong
        // in the individual module build.gradle files
    }
}
//项目本身需要的依赖,比如要添加maven中的某个库,那么应该将 maven { url ' https://maven.aliyun.com/repository/jcenter' } 写在此处,而不是buildscript中,否则系统找不到
allprojects {


    repositories {


        google()
        jcenter()

        maven {

     url ' https://maven.aliyun.com/repository/jcenter' }
    }
}

task clean(type: Delete) {


    delete rootProject.buildDir
}
build.gradle(app)
添加项目运行所需要的依赖包,主要作用于app
//说明module的类型  com.android.application为应用程序,com.android.library为类库
apply plugin: 'com.android.application'

android {


	//编译的SDK版本,最佳选择为最新的API级别
    compileSdkVersion 25

	//编译的Tools版本,最佳选择为最新的API级别
    buildToolsVersion "25.0.2"

	//默认配置
    defaultConfig {


		//应用程序的包名
        applicationId "com.nk.xxxx"
		//支持的最低版本,操作系统会拒绝将应用安装在系统版本低于此标准的设备上
        minSdkVersion 16
		//支持的目标版本,最佳选择为最新的API级别
        targetSdkVersion 28
        //允许自动化测试
        testInstrumentationRunner "android.support.test.runner.AndroidJUnitRunner"
		//版本号
        versionCode 1
		//版本名
        versionName "1.0"
        // 设置支持的SO库架构
        ndk {


			abiFilters 'armeabi', 'x86', 'x86','x86_64', 'armeabi-v7a', 'arm64- v8a'
		}
		//是否支持分包
		multiDexEnabled true
    }

	//build类型
   buildTypes {


		//发布
        release {


			//是否混淆
            minifyEnabled false
            //对齐优化设置为true,否则找不到该task (默认不写也是true)
            zipAlignEnabled true
			//指定混淆规则文件
            proguardFiles getDefaultProguardFile('proguard-android.txt'), 'proguard-rules.pro'
            //移除无用的资源文件
            shrinkResources true
        }
        //调试
        debug {


       		//是否混淆
            minifyEnabled false
            //移除无用的资源文件
            shrinkResources true
        }
    }

//依赖配置,类似mavean
dependencies {


    //依赖lib目录下的.jar文件
    implementation fileTree(include: ['*.jar'], dir: 'libs')
    //依赖的基础库
    implementation 'com.android.support:appcompat-v7:28+'
    //测试需要的依赖包,大部分仅支持debug模式下,relase可调用不到哦!
    testImplementation 'junit:junit:4.12'
    androidTestImplementation 'com.android.support.test:runner:1.0.2'
    androidTestImplementation 'com.android.support.test.espresso:espresso-core:3.0.2'
    androidTestCompile('com.android.support.test.espresso:espresso-core:2.2.2', {


        exclude group: 'com.android.support', module: 'support-annotations'
    })
    //依赖的第三方开源库
    implementation 'com.zhy:okhttputils:2.6.2'
}
依赖分类
不知讲的对否 ? 根据这几年的开发经验,我认为AndroidStudio严格来说应该拥有三种方式,一种为本地依赖,一本为模块依赖,最后一种为远端依赖 ~
在一切开始前,看一段引用 ~ 如没秒懂,继续往下看 ~
apply plugin: 'com.android.application'

android {

     ... }

dependencies {


    // Dependency on local binaries
	翻译后: 依赖一组本地二进制文件
    implementation fileTree(dir: 'libs', include: ['*.jar'])

    // Dependency on a local library module
	翻译后: 依赖一个本地库模块
    implementation project(":mylibrary")

    // Dependency on a remote binary
	翻译后: 依赖一个远程二进制文件
    implementation 'com.example.android:app-magic:12.3'
}
本地依赖
场景:多见于引用工程中libs目录下的jar、arr、so 等包,关于jar和arr的知识可以来这里科普 ~
整体引用 - 二进制依赖(常见)
dependencies {


    implementation fileTree(dir: 'libs', include: ['*.jar'])
}
单独引用 - 二进制依赖(常见)
dependencies {


    implementation files('libs/aaa.jar', 'libs/bbb.jar')
    implementation files('libs/nkSdk.aar')
}
模块依赖
引用项目中的本地model ~
dependencies {


    implementation project(':projectL')
}
远端依赖
二进制依赖(常见)
dependencies {


    implementation 'androidx.appcompat:appcompat:1.0.2'
}
完整写法(扩展)
dependencies {


    implementation  group: 'androidx.appcompat', name:'appcompat', version:'1.0.2'
}
依赖写法
第一种(完整写法)- Maven官方建议
compile group: 'com.zaxxer', name: 'HikariCP', version: '3.2.0'
第二种(简写)- 日常使用
compile ('com.zaxxer:HikariCP:3.2.0') 或者 compile 'com.zaxxer:HikariCP:3.2.0'
第三种(添加多种依赖)- 较少使用
compile (
        "com.zaxxer:HikariCP:3.2.0",
        "mysql:mysql-connector-java:5.1.38"
)
依赖引用
本地依赖
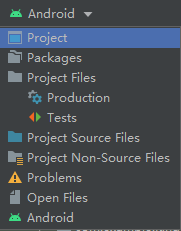
步骤1:将Android层级切换到Project层级目录
步骤2:如图,查看libs下的jar、arr 等包 → Add as Library
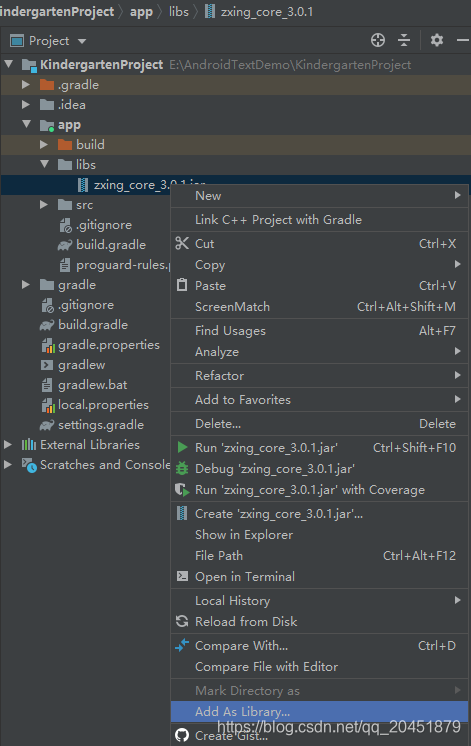
步骤3:查看build.gradle(app),发现新增以下配置
dependencies {


    implementation 'androidx.appcompat:appcompat:1.1.0'
    implementation 'com.google.android.material:material:1.1.0'
    implementation 'androidx.constraintlayout:constraintlayout:1.1.3'
    //Look Here:此处为新增的本地依赖
    implementation files('libs\\zxing_core_3.0.1.jar')
    testImplementation 'junit:junit:4.+'
    androidTestImplementation 'androidx.test.ext:junit:1.1.1'
    androidTestImplementation 'androidx.test.espresso:espresso-core:3.2.0'
}
模块依赖
步骤1:将目录层级从Android切换到Project,一般都可以查看到相关的模块
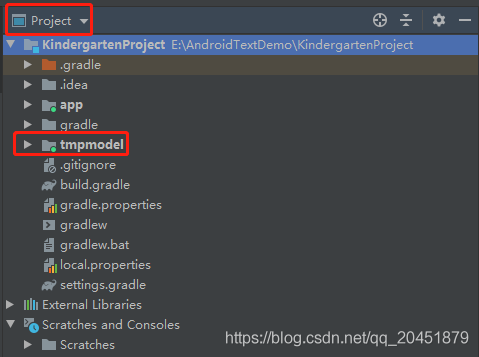
步骤2:也可通过File - Project Structure… 查看下去标红区域的项目信息
步骤3:查看settings.gradle可看到相关的项目依赖
include ':tmpmodel'
include ':app'
rootProject.name = "KindergartenProject"
远程依赖
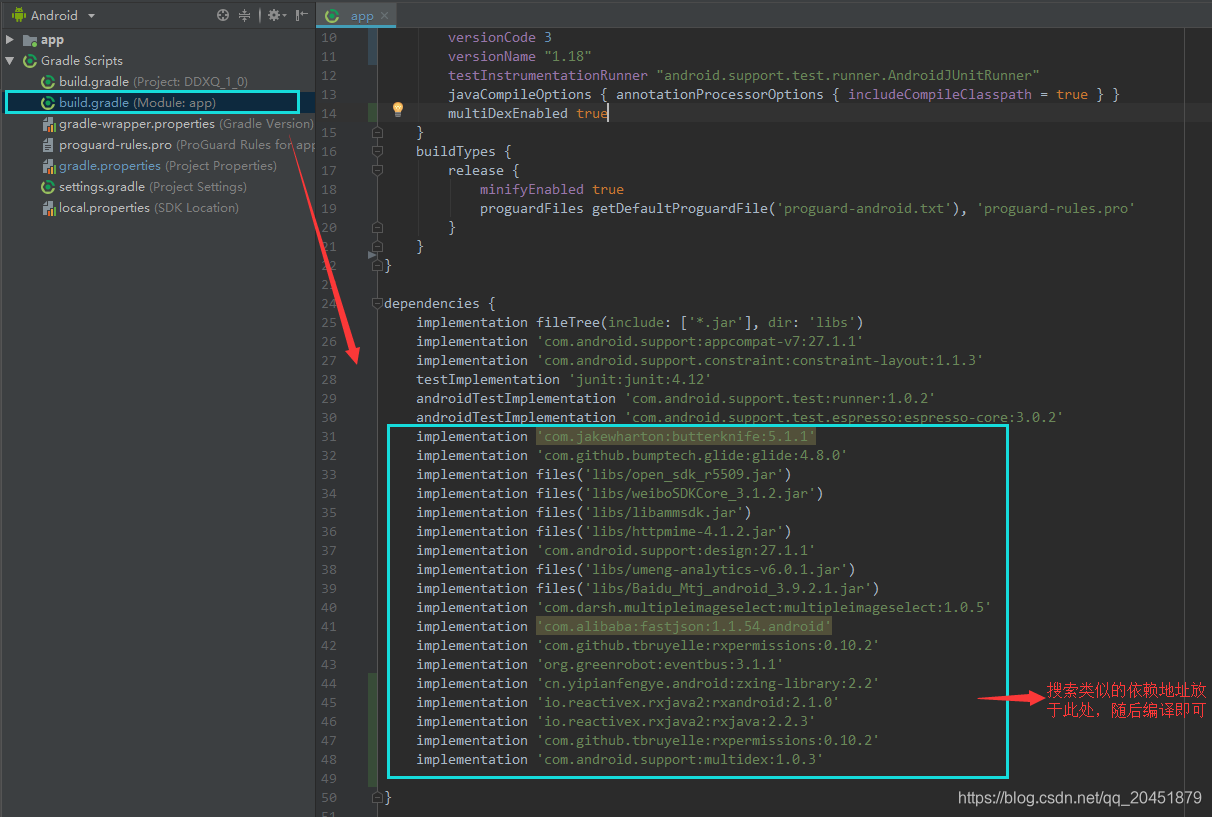
已知地址
直接在百度、Google等搜索引擎内搜索三方库相关的依赖地址,然后copy到build.gradle(app)下编译即可,如下图(ps:图中有本地依赖,也有远端依赖)
查询地址
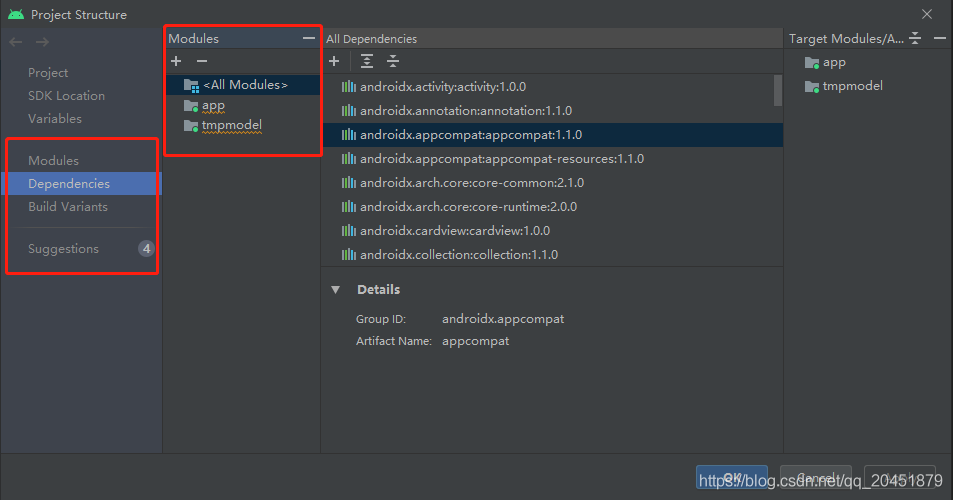
通过As工具自带的一种依赖方式,动态搜索三方依赖进行增删,但其实现方式其实与第一种方式相同
1-1:File → Project Struture…(使用As的File下的设置,也可以快捷键直接调用)
1-2 :app → Dependencies 自行进行增删
1-3 :增加Lib依赖
1- 4:直接可在此处搜索三方库的关键字
1- 5:添加Lib成功结果(添加之后会默认在build文件下生成对应的依赖)
1- 6:已有依赖,若需删除,需选中之后点击右侧删除功能键
依赖关键词(compile)
AndroidStudio3.x之后已经弃用了compile,采用了implementation、api (如在使用中遇到了com.android.support版本冲突,可以Go Here ~)
依赖说明,详细使用介绍→ 查看此处
| 说明 | 2.x | 3.x |
|---|---|---|
| 参与编译和打包 | compile | implementation,api(implementation:依赖库私有,只会在当前module中生效,无法传递至上层;api:依赖库可传递,上层依赖了该module时,可以使用该module下api依赖的库) |
| 只编译,不参与打包 | provided | compileOnly |
| 不编译,只参与打包,很少用 | apk | runtimeOnly |
| 只在单元测试代码的编译以及最终打包测试apk时有效 | testCompile | testImplementation |
| 只参与debug模式的编译和最终的debug apk打包 | debugCompile | debugImplementation |
| 只参与release模式的编译和最终的Release apk打包 | releaseCompile | releaseImplementation |
场景扩展
根据Task类型引入
debug,release,test包的引入方式
dependencies {


    testImplementation 'junit:junit:4.12'

    androidTestImplementation 'com.android.support.test:runner:1.0.1'
    androidTestImplementation 'com.android.support.test.espresso:espresso-core:3.0.1'

    debugImplementation 'com.squareup.leakcanary:leakcanary-android:2.0-beta-2'
    releaseImplementation 'com.squareup.leakcanary:leakcanary-android-no-op:2.0-beta-2'
}
排除重复依赖引用
由于依赖库比较多,而有些库在引入的时候也会用到第三方库,就难免出现同一库被多次引入的情况,如果库版本不一致还可能导致新的问题
implementation('some-library') {


    transitive = true,依赖同于没有使用 exclude 排除依赖 ,每个包的依赖项都会被递归分析并添加进来。默认为true
    transitive = false,则依赖关系同于用 exclude 排除依赖。
   //exclude 会排除transitive=true的一些库,用exclude包含的库表示该库不需要引入,直接引入宿主app的该库即可
    exclude group: 'com.example.imgtools', module: 'native'
}
1、有时候为了解决引入的冲突,需要在引入远端包的同时排除这些包的某几个依赖
dependencies {


    implementation ('com.github.bumptech.glide:glide:4.9.0'){


        exclude group:'com.android.support', module: 'support-fragment'
        exclude group:'com.android.support', module: 'support-core-ui'
        exclude group:'com.android.support', module: 'support-compat'
        exclude group:'com.android.support', module: 'support-annotations'
    }
}
2、一次性排除所有重复依赖项,使其使用同一版本的该公共库
//解决不同依赖库support版本不一致警告问题
configurations.all {


        resolutionStrategy.eachDependency {

     DependencyResolveDetails details ->
            def requested = details.requested
            if (requested.group == 'com.android.support') {


                if (!requested.name.startsWith("multidex")) {


                    details.useVersion '27.1.1'
                }
            }
        }
}
3、出现冲突时强制使用某一个版本
// 强制使用 support-v4 26.1.0版本
compile('com.android.support:support-v4:26.1.0') {


   force = true
}
4、不同库使用不同的版本
configurations.all {


// 遍历所有的依赖,根据 moduleName 使用对应的版本。确实可行
resolutionStrategy.eachDependency {

     DependencyResolveDetails details ->
    def requested = details.requested
    if (requested.group == 'com.android.support') {


        if (requested.name.startsWith("multidex")) {


            details.useVersion '26.1.0'
        } else if (requested.name.startsWith("advrecyclerview")) {


            details.useVersion '27.0.0'
        } else {


            details.useVersion '25.3.0'
        }
    }
  }
}
参考文献