文章目录
Maven的安装
- 首先在官网下载安装软件
http://mirrors.advancedhosters.com/apache/maven/maven-3/3.6.3/binaries/apache-maven-3.6.3-bin.zip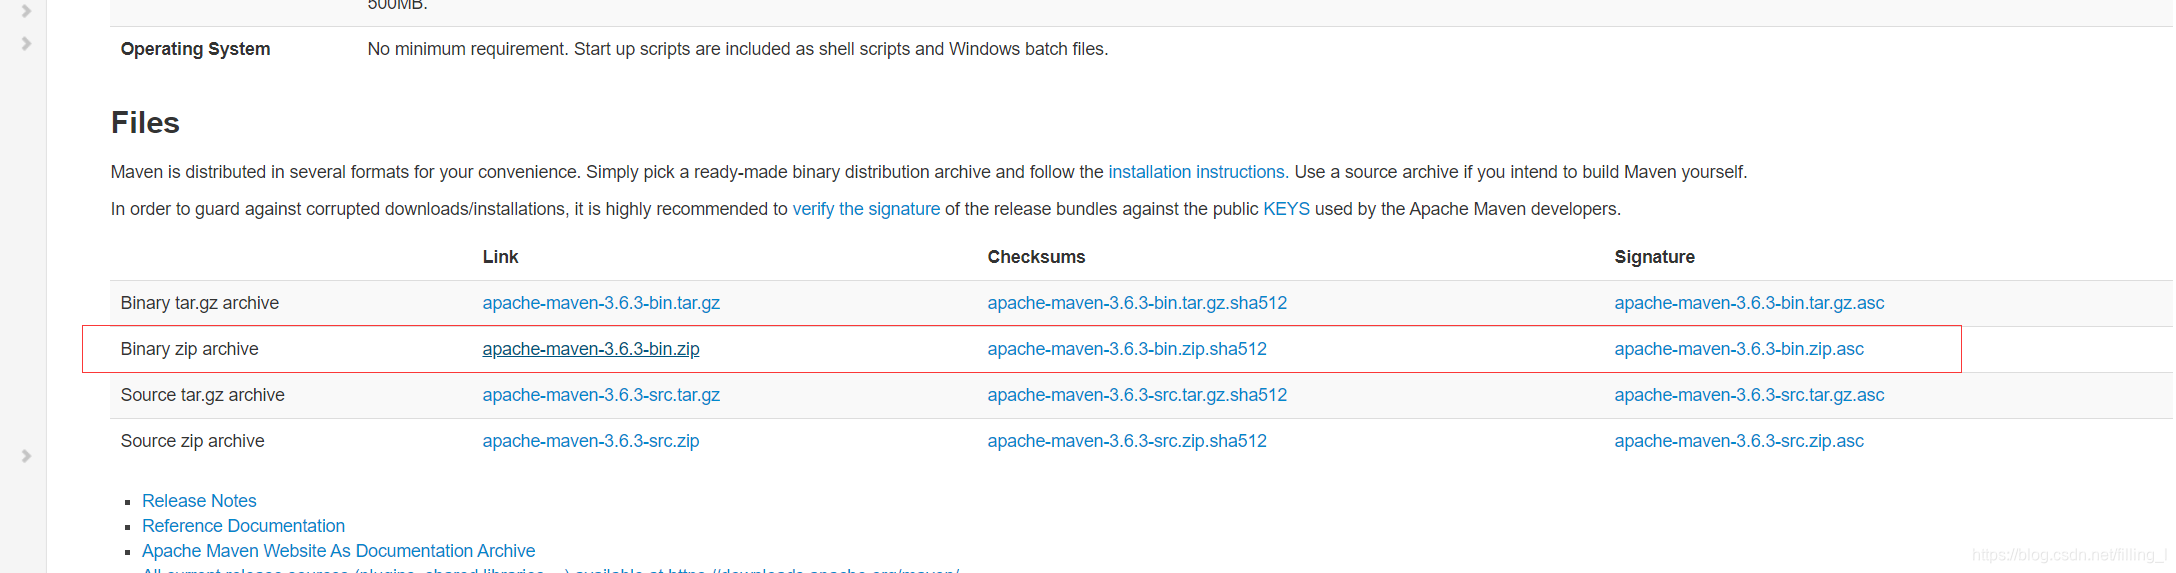
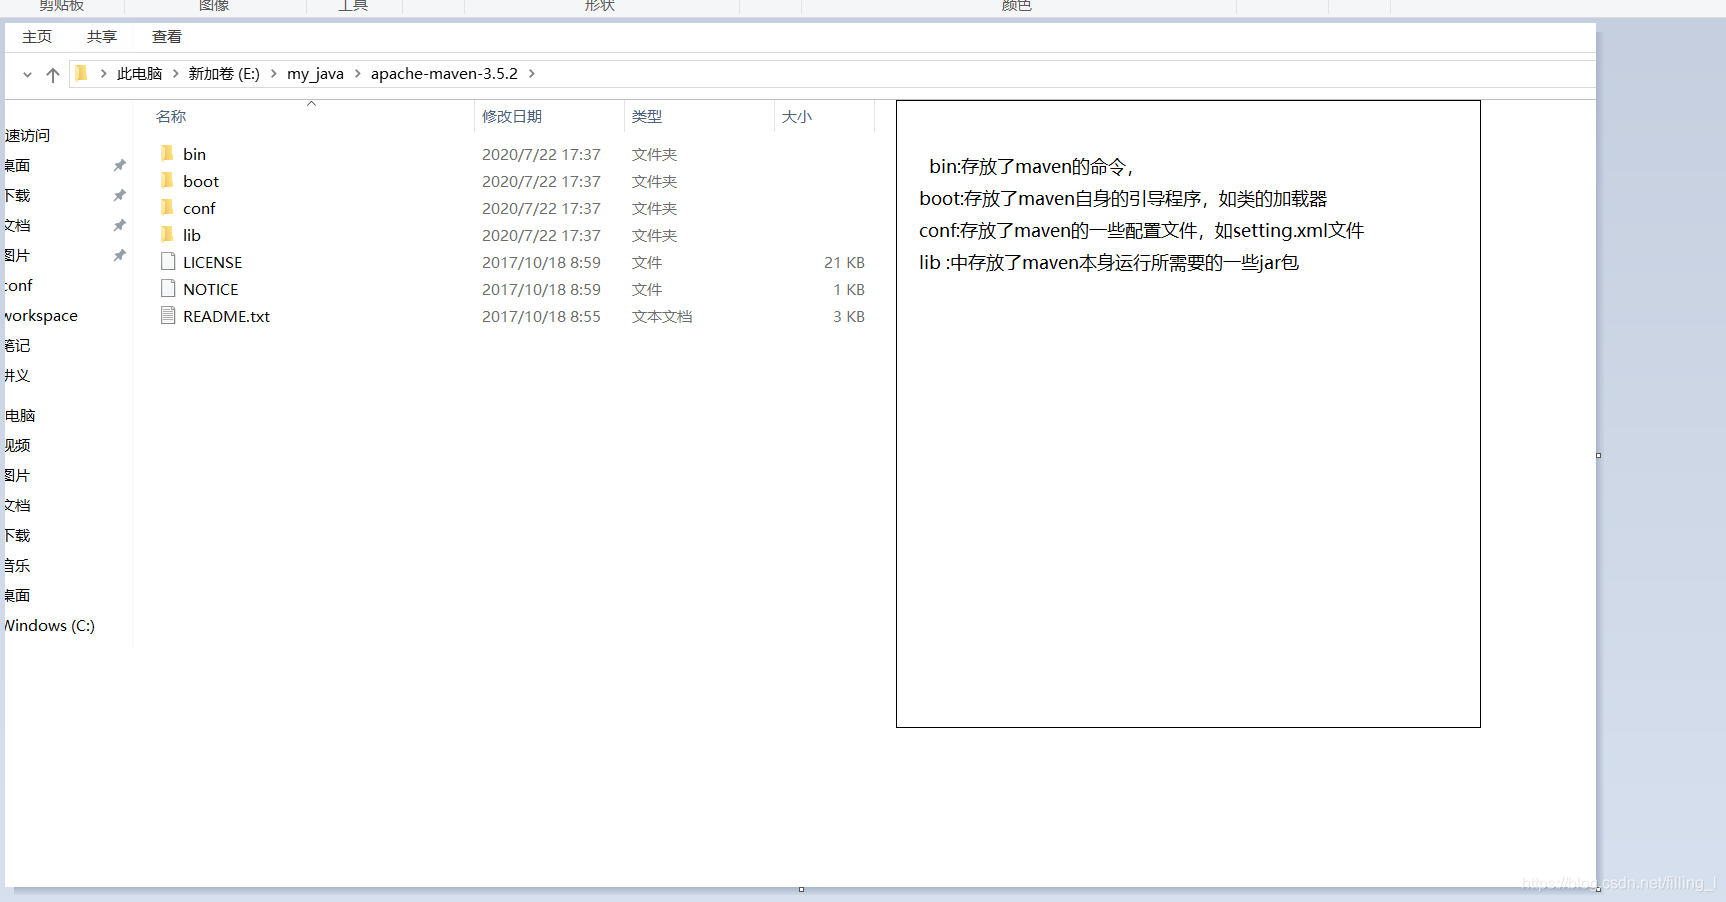
然后将下载的文件解压缩到没有中文和没有空格的路径下面 - maven目录解释
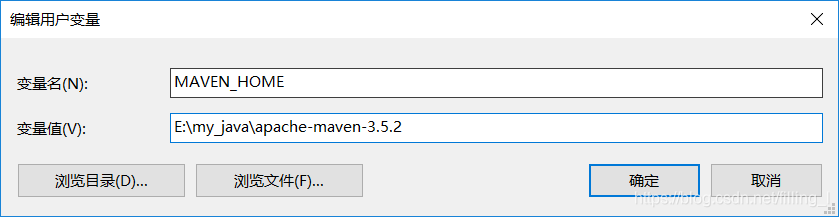
- 环境变量配置 ,配置MAVEN_HOME ,变量值就是mavend的安装路径,如下图,然后配置path.
- 通过mvn -v 命令可以检测maven是否安装成功,如图

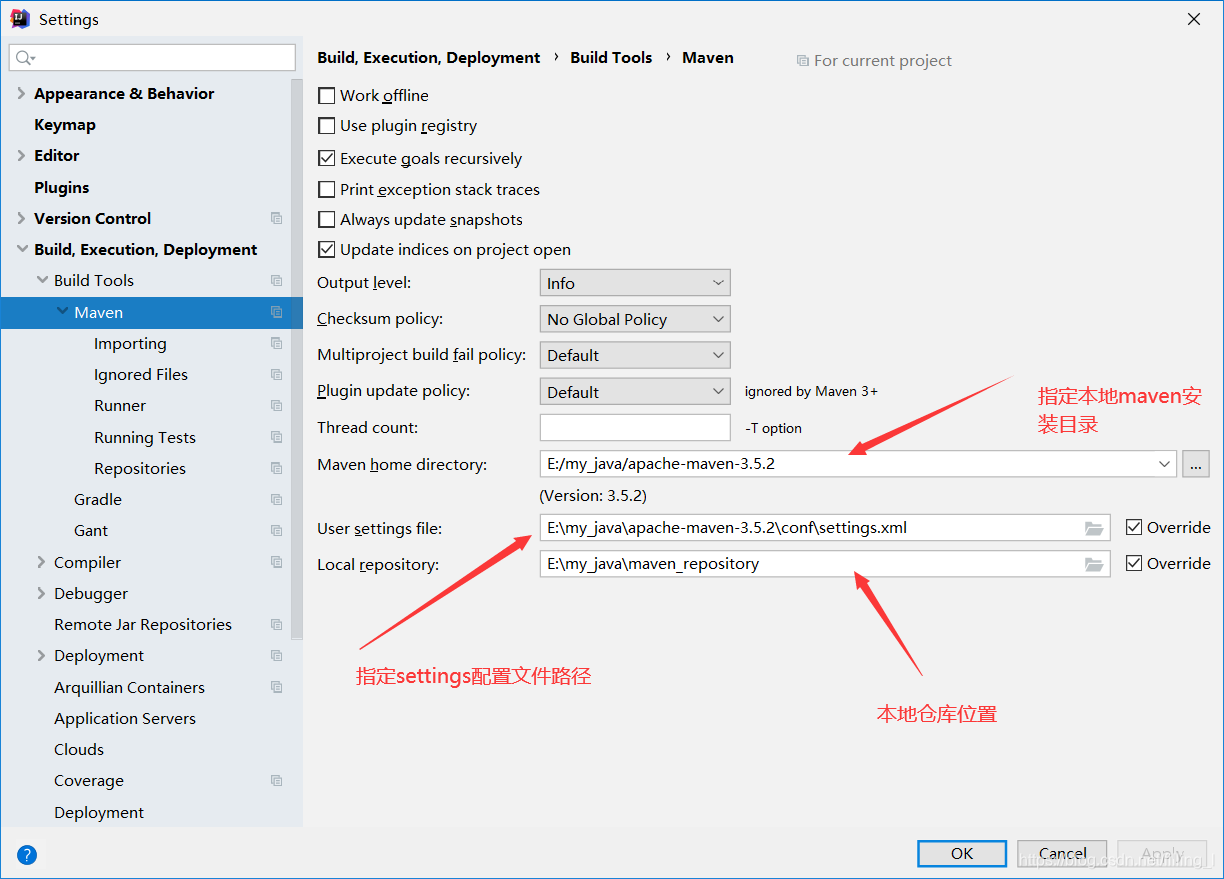
idea的maven配置
打开→File→Settings配置maven,如下图
maven的主要功能
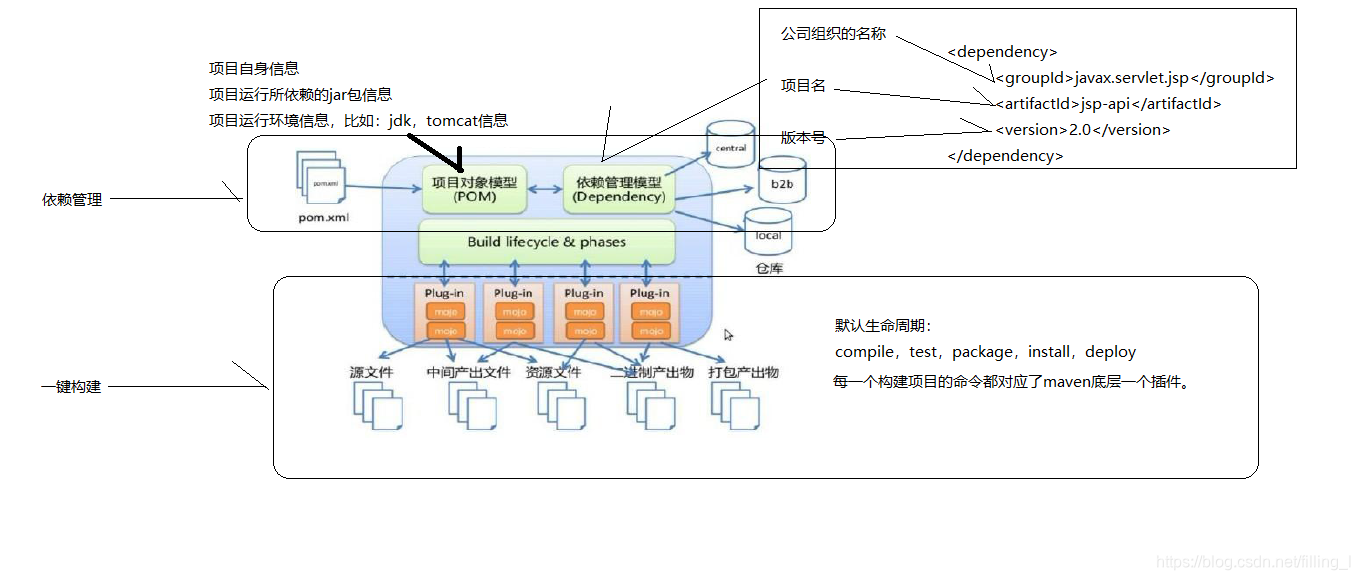
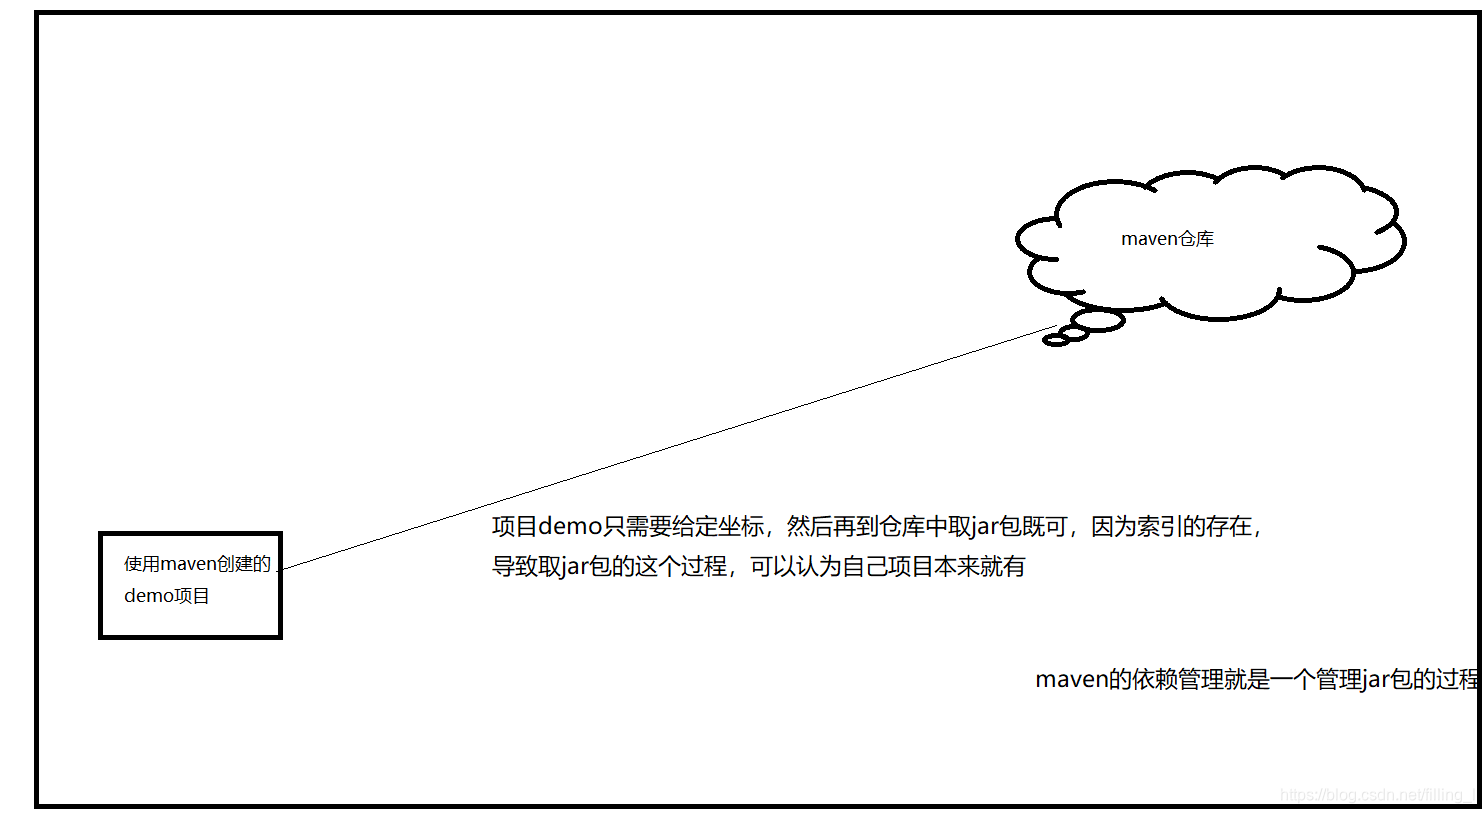
Maven的依赖管理
maven工程中不直接将jar包导入到工程中,而是通过在pom.xml文件中添加所需jar包坐标,这样就可以很好的避免了jar直接引进进来,在需要用到jar包的时候只需要找pom.xml,然后到一个专门存放jar包的仓库中根据坐标找这些jar包。
maven的依赖传递
在maven中,依赖传递是可以传递的,假设存在三个项目,分别是项目A,项目B,项目C。假设C依赖B,B依赖A,那么根据maven项目依赖的特征不难推出项目C也依赖于项目A.


通过上图也可以看出,在项目中直接依赖了spring-webmvc,而spring-webmvc依赖了Spring-aop,spring-beans等,也就是在项目中有依赖了spring-aop和spring-beans等等。
maven的依赖冲突
spring-webmvc(版本为5.2.0)依赖了spring-beans,spring-aop(版本为5.2.9)也依赖了spring-beans,由于在pom文件中,将spring-webmvc写在了前面,所以在项目中spring-beans的版本为(5.2.0),但是如果希望在工程中引入spring-aop(版本为5.2.9)这就造成了依赖冲突。


如何解决依赖冲突
1 使用maven提供的依赖调节原则
第一声明者优先原则
路径者优先原则
在pom文件中定义依赖,用先声明的依赖为准。也就是根据坐标的导入顺序来确定最终使用哪个传递过来的依赖。就如同上图中的将Spring-webmvc写在了spring-aop 的上面。所以spring-beans在项目中使用的是和spring-webmvc相同的版本。
2 排除依赖
使用exclusions标签将传递过来的依赖排除出去。如果将spring-webmvc依赖的spring-beans排除出去,项目中使用的将是spring-aop传递过来的spring-beans。

3 版本锁定
采用直接锁定版本的方法确定依赖jar包的版本,版本锁定后 就不考虑依赖的声明顺序或者依赖的路径,已锁定的版本为准添加到工程中,这个方法在企业开发中经常使用。
版本锁定的使用方式:
第一步:在dependencyManagement标签中锁定依赖的版本
第二部:在dependencies标签中声明需要导入的maven坐标
- 在dependencyManagement标签中锁定依赖的版本,并不会真正的将jar包导入到项目中,只是对这些jar的版本经行锁定。项目中使用了哪些jar包,还需要在dependcies中经行声明。
如下图所示
    <dependencyManagement>
        <dependencies>
            <dependency>
                <groupId>org.springframework</groupId>
                <artifactId>spring-webmvc</artifactId>
                <version>5.2.8.RELEASE</version>
            </dependency>

            <dependency>
                <groupId>org.springframework</groupId>
                <artifactId>spring-beans</artifactId>
                <version>5.2.8.RELEASE</version>
            </dependency>
        </dependencies>
    </dependencyManagement>
- 在dependencies标签中声明需要导入的maven坐标,
<dependencies>
    <!--由于在前面已经在dependencyManagement标签中锁定了依赖jar包的版本,
    后面需要导入依赖的时只需要指定groupId和artifactild,无须再指定verison-->
    <dependency>
        <groupId>org.springframework</groupId>
        <artifactId>spring-webmvc</artifactId>
    </dependency>
    <dependency>
        <groupId>org.springframework</groupId>
        <artifactId>spring-beans</artifactId>
    </dependency>
</dependencies>
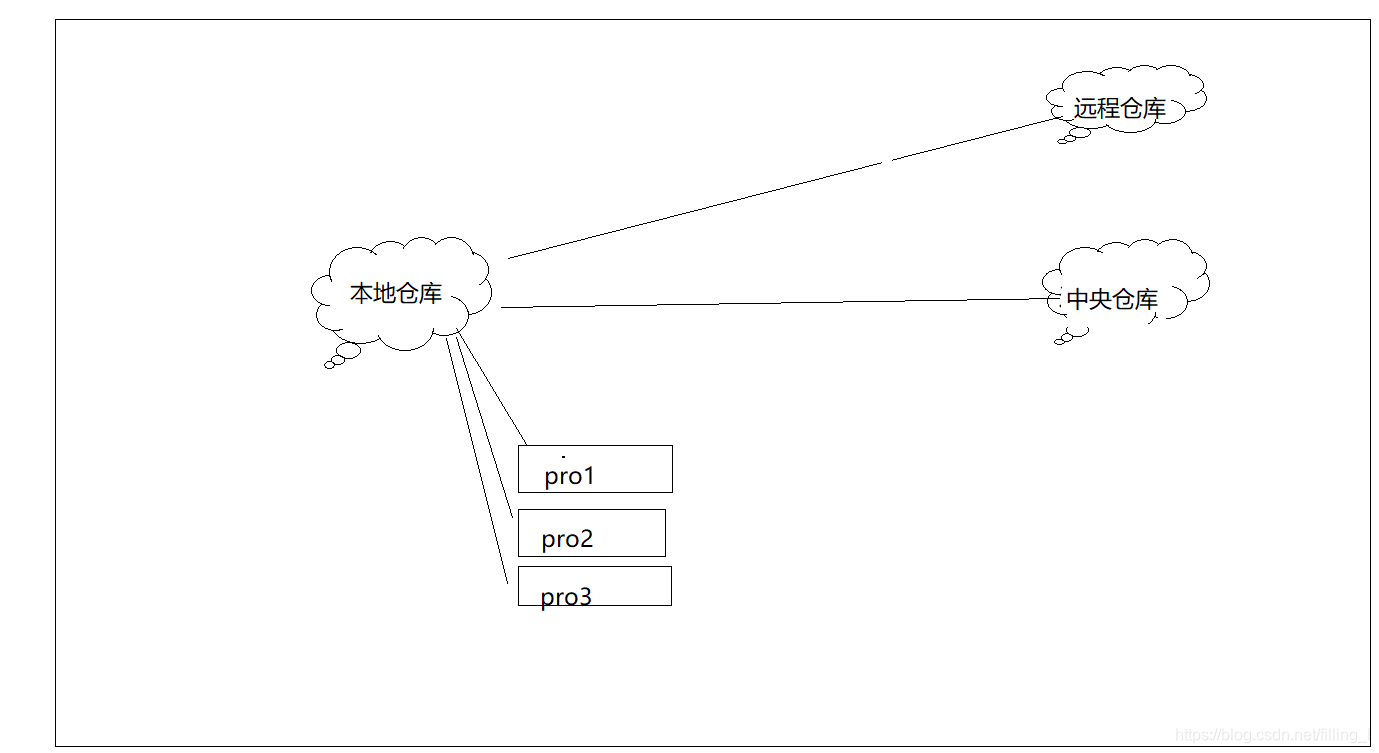
Maven仓库分类
- 本地仓库:用来存储从远程仓库或中央仓库下载的插件和jar包,项目中使用的插件和包优先在本地仓库中查找默认的本地仓库是 ${user.home}/.m2/settings.xml ,${user.home}代表windows用户目录
- 远程仓库:如果本地需要插件或者jar包,本地仓库没有,默认去远程仓库中下载,远程仓库可以在局域网也可以在互联网(包括公司私服和apache提供的远程仓库等等)。
- 中央仓库:在maven软件中内置一个远程仓库的地址url,Maven团队自己维护,里面存储了非常全的jar包,它包含了世界上大部分流行的开源项目构建。
更改本地仓库位置.在maven的安装目录下找到conf文件夹下的settings.xml文件

项目的一键构建
-
Maven项目的生命周期
使用maven完成项目的构建,项目的构建包括:清理,编译,测试,部署等过程,maven将这些过程规范为一个生命周期,如下是生命周期的各各阶段。
maven管理项目是通过插件完成的。基于maven构建ssm工程案列
实现通过id查询员工信息的功能.
- 数据库环境搭建
- 创建数据库ssmtest
CREATE DATABASE ssmtest DEFAULT CHARSET utf8;
- 创建员工表employee
CREATE TABLE `employee` (
  `id` int(11) NOT NULL AUTO_INCREMENT,
  `name` varchar(20) DEFAULT NULL COMMENT '员工名称',
  `age` int(11) NOT NULL COMMENT '员工年龄',
  `sex` varchar(2) DEFAULT NULL COMMENT '员工性别',
  `telephone` varchar(10) DEFAULT NULL COMMENT '员工电话',
  KEY `id` (`id`)
) ENGINE=InnoDB DEFAULT CHARSET=utf8
- maven项目构建
- 创建maven web项目
- 配置pom.xml文件
- 实现spring-mybatis整合
创建POJO类,持久层DAO接口编写,Mapper映射文件编写,业务层Service编写,spring配置文件applicationContext-dao.xml文件编写,spring配置文件applicationContext-service.xml文件编写
<?xml version="1.0" encoding="UTF-8"?>
<beans xmlns="http://www.springframework.org/schema/beans"
       xmlns:xsi="http://www.w3.org/2001/XMLSchema-instance"
       xmlns:context="http://www.springframework.org/schema/context"
       xsi:schemaLocation="http://www.springframework.org/schema/beans http://www.springframework.org/schema/beans/spring-beans.xsd http://www.springframework.org/schema/context http://www.springframework.org/schema/context/spring-context.xsd">
     <!-- 1 引入数据库配置文件-->
    <context:property-placeholder location="classpath:druid.properties"></context:property-placeholder>
    <!--2 配置数据库连接源-->
    <bean id="dataSource" class="com.alibaba.druid.pool.DruidDataSource">
        <property name="username" value="${usernamehah}"></property>
        <property name="password" value="${password}"></property>
        <property name="url" value="${url}"></property>
        <property name="driverClassName" value="${driverClassName}"></property>
    </bean>
   <!--3 配置获取spring整合mybatis框架的SqlSessionFactoryBean-->
  <bean class="org.mybatis.spring.SqlSessionFactoryBean">
    <property name="dataSource" ref="dataSource"></property>
  </bean>
         <!--4 mapper扫描器,用于生产代理对象-->
    <bean class="org.mybatis.spring.mapper.MapperScannerConfigurer">
        <property name="basePackage" value="cn.lf.dao"></property>
    </bean>
</beans>
<?xml version="1.0" encoding="UTF-8"?>
<beans xmlns="http://www.springframework.org/schema/beans"
       xmlns:xsi="http://www.w3.org/2001/XMLSchema-instance"
       xmlns:context="http://www.springframework.org/schema/context"
       xmlns:tx="http://www.springframework.org/schema/tx"
       xsi:schemaLocation="http://www.springframework.org/schema/beans http://www.springframework.org/schema/beans/spring-beans.xsd http://www.springframework.org/schema/context http://www.springframework.org/schema/context/spring-context.xsd http://www.springframework.org/schema/tx http://www.springframework.org/schema/tx/spring-tx.xsd">
    <!--1 扫描servcice包-->
    <context:component-scan base-package="cn.lf.service"></context:component-scan>
    <!--配置事务管理器-->
  <bean   id="transactionManager class="org.springframework.jdbc.datasource.DataSourceTransactionManager">
        <property name="dataSource" ref="dataSource"></property>
    </bean>
<!--事务注解驱动开发-->
    <tx:annotation-driven transaction-manager="transactionManager"></tx:annotation-driven>
</beans>
- 加入springmvc相关配置
    表现层Controller编写,springmvc.xml文件编写,配置web.xml文件
<?xml version="1.0" encoding="UTF-8"?>
<beans xmlns="http://www.springframework.org/schema/beans"
       xmlns:xsi="http://www.w3.org/2001/XMLSchema-instance"
       xmlns:contex="http://www.springframework.org/schema/context"
       xmlns:context="http://www.springframework.org/schema/cache"
       xmlns:mvc="http://www.springframework.org/schema/mvc"
       xsi:schemaLocation="http://www.springframework.org/schema/beans http://www.springframework.org/schema/beans/spring-beans.xsd
       http://www.springframework.org/schema/context http://www.springframework.org/schema/context/spring-context.xsd
       http://www.springframework.org/schema/context http://www.springframework.org/schema/context/spring-context.xsd
        http://www.springframework.org/schema/mvc http://www.springframework.org/schema/mvc/spring-mvc.xsd">
    <contex:component-scan base-package="cn.lf.controller"></contex:component-scan>
        <mvc:annotation-driven></mvc:annotation-driven>
        <mvc:default-servlet-handler></mvc:default-servlet-handler>
 <beans>
<?xml version="1.0" encoding="UTF-8"?>
<web-app xmlns="http://xmlns.jcp.org/xml/ns/javaee"
         xmlns:xsi="http://www.w3.org/2001/XMLSchema-instance"
         xsi:schemaLocation="http://xmlns.jcp.org/xml/ns/javaee http://xmlns.jcp.org/xml/ns/javaee/web-app_4_0.xsd"
         version="4.0">

  <display-name>Archetype Created Web Application</display-name>

  <!--指定Spring配置文件位置-->
  <context-param>
    <param-name>contextConfigLocation</param-name>
    <param-value>classpath*:ApplicationContext*.xml</param-value>
  </context-param>

  <!--配置Spring框架启动时使用的监听器-->
  <listener>
    <listener-class>org.springframework.web.context.ContextLoaderListener</listener-class>
  </listener>
  <!--配置SpringMVC的前端控制器-->
  <servlet>
    <servlet-name>springmvc</servlet-name>
    <servlet-class>org.springframework.web.servlet.DispatcherServlet</servlet-class>
    <init-param>
      <param-name>contextConfigLocation</param-name>
      <param-value>classpath:springmvc.xml</param-value>
    </init-param>
  </servlet>
  <servlet-mapping>
    <servlet-name>springmvc</servlet-name>
    <url-pattern>*.do</url-pattern>
  </servlet-mapping>
</web-app>
分模块构建maven工程
maven工程的继承
在Java语言中,类之间是可以继承的,通过继承,子类就可以引用父类中非private的属性和方法.同样,在maven工程之间也可以继承,子工程继承父工程后,就可以引用在父工程中引入的依赖.继承的目的是为了消除重复代码.
被继承的maven工程通常被称为夫父工程,父工程的打包方式必须为pom,所以我们区分某个maven工程是否为父工程就是看这个工程的打包方式是否为pom.
继承其他maven父工程的工程通常称为子工程,在pom.xml文件中通过parent标签经行父工程的继承.
maven工程的聚合
在maven工程的pom.xml文件中可以使用标签将其他maven工程聚合到一起,聚合的目的是为了进行统一操作。
例如拆分后的maven工程有多个,如果要进行打包,就需要针对每个工程分别执行打包命令,操作起来非常繁琐。这时就可以使用标签将这些工程统一聚合到maven工程中,需要打包的时候,只需要在此工程中执行一次打包命令,其下被聚合的工程就都会被打包了。