环境搭建01——Ubuntu如何查看显卡信息及安装NVDIA显卡驱动
原来的贴子有点老了,这里更新一下,算是一个快速安装的笔记吧!
https://blog.csdn.net/tanmx219/article/details/86553485
1.查看显卡型号
输入如下命令:
lshw -c video
会显示以下信息
WARNING: you should run this program as super-user.
  *-display
       description: VGA compatible controller
       product: GM107M [GeForce GTX 950M]
       vendor: NVIDIA Corporation
       physical id: 0
       bus info: pci@0000:04:00.0
       version: a2
       width: 64 bits
       clock: 33MHz
       capabilities: vga_controller bus_master cap_list rom
       configuration: driver=nouveau latency=0
       resources: irq:30 memory:fa000000-faffffff memory:d0000000-dfffffff memory:ce000000-cfffffff ioport:ec00(size=128) memory:c0000-dffff
WARNING: output may be incomplete or inaccurate, you should run this program as super-user.
2.查找你的显卡的驱动
使用这个命令查看你可以使用的驱动:
ubuntu-drivers devices
显示结果如下,
matth32@matth32-Thurley:~/下载$ ubuntu-drivers devices

== /sys/devices/pci0000:00/0000:00:07.0/0000:04:00.0 ==
modalias : pci:v000010DEd0000139Asv00001025sd0000091Bbc03sc00i00
vendor   : NVIDIA Corporation
model    : GM107M [GeForce GTX 950M]
driver   : nvidia-driver-440 - distro non-free recommended
driver   : nvidia-driver-390 - distro non-free
driver   : nvidia-driver-435 - distro non-free
driver   : xserver-xorg-video-nouveau - distro free builtin
去NVDIA driver search page搜索显卡需要的驱动型号并下载(如图)。
选择推荐的那个驱动程序,
nvidia-driver-440 - distro non-free recommended
下载完后安装
sudo sh NVIDIA-Linux-x86_64-440.100.run
附1:如何卸载Nouveau.
How to remove Nouveau kernel driver (fix Nvidia install error)
这是因为,在安装前,Nouveau可能已经启动,所以无法安装Nvidia成功。
#---open a terminal---
sudo apt-get remove nvidia*
sudo apt autoremove
sudo apt-get install dkms build-essential linux-headers-generic

sudo vim /etc/modprobe.d/blacklist.conf
#---save the following info into file blacklist.conf---
blacklist nouveau
blacklist lbm-nouveau
options nouveau modeset=0
alias nouveau off
alias lbm-nouveau off
#---end of the info saved----

#---go back to the terminal---
echo options nouveau modeset=0 | sudo tee -a /etc/modprobe.d/nouveau-kms.conf
sudo update-initramfs -u
reboot
————————————————
参考链接:https://blog.csdn.net/tanmx219/java/article/details/86553485
附2:安装过程中碰到的问题
 The distribution-provided pre-install script failed!  Are you sure you want
  to continue?

                 Continue installation      Abort installation

----> Continue installation

Would you like to register the kernel module sources with DKMS? This will
  allow DKMS to automatically build a new module, if you install a different
  kernel later.

                          Yes                       No
---->No

 The CC version check failed:

  The kernel was built with gcc version 7.4.0 (Ubuntu 7.4.0-1ubuntu1~18.04.1),
  but the current compiler version is cc (Ubuntu 7.5.0-3ubuntu1~18.04) 7.5.0.

  This may lead to subtle problems; if you are not certain whether the
  mismatched compiler will be compatible with your kernel, you may wish to
  abort installation, set the CC environment variable to the name of the
  compiler used to compile your kernel, and restart installation.

                Ignore CC version check     Abort installation

----> select ignore

 WARNING: Ignoring CC version mismatch:

           The kernel was built with gcc version 7.4.0 (Ubuntu
           7.4.0-1ubuntu1~18.04.1), but the current compiler version is cc
           (Ubuntu 7.5.0-3ubuntu1~18.04) 7.5.0.

                                       OK
----> OK

Install NVIDIA's 32-bit compatibility libraries?

                          Yes                       No
----> No

 An incomplete installation of libglvnd was found. All of the essential
  libglvnd libraries are present, but one or more optional components are
  missing. Do you want to install a full copy of libglvnd? This will overwrite
  any existing libglvnd libraries.

      Don't install  Install and overw          Abort installation.

---->Install and overw

Would you like to run the nvidia-xconfig utility to automatically update
  your X configuration file so that the NVIDIA X driver will be used when you
  restart X?  Any pre-existing X configuration file will be backed up.

                          Yes                       No

---->Yes

Your X configuration file has been successfully updated.  Installation of
  the NVIDIA Accelerated Graphics Driver for Linux-x86_64 (version: 440.100)
  is now complete.

                                       OK
----> OK
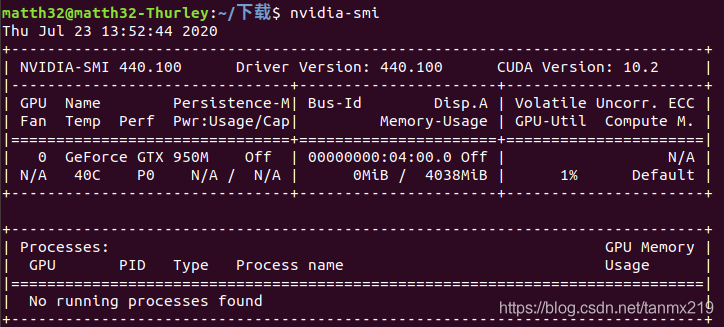
三,安装后检查
查看NVIDIA版本检验是否安装完成
$ nvidia-smi
环境搭建02——Ubuntu安装cuda和cudnn
查看安装的nvidia驱动版本号
nvidia-smi //第一行信息

~$ nvidia-smi
Fri Jul 24 11:55:29 2020
+-----------------------------------------------------------------------------+
| NVIDIA-SMI 440.100      Driver Version: 440.100      CUDA Version: 10.2     |
|-------------------------------+----------------------+----------------------+
| GPU  Name        Persistence-M| Bus-Id        Disp.A | Volatile Uncorr. ECC |
| Fan  Temp  Perf  Pwr:Usage/Cap|         Memory-Usage | GPU-Util  Compute M. |
|===============================+======================+======================|
|   0  GeForce GTX 950M    Off  | 00000000:04:00.0  On |                  N/A |
| N/A   35C    P8    N/A /  N/A |    189MiB /  4038MiB |      1%      Default |
+-------------------------------+----------------------+----------------------+

+-----------------------------------------------------------------------------+
| Processes:                                                       GPU Memory |
|  GPU       PID   Type   Process name                             Usage      |
|=============================================================================|
|    0      1129      G   /usr/lib/xorg/Xorg                            12MiB |
|    0      1179      G   /usr/bin/gnome-shell                          47MiB |
|    0      3130      G   /usr/lib/xorg/Xorg                            59MiB |
|    0      3281      G   /usr/bin/gnome-shell                          62MiB |
|    0      3990      G   /usr/lib/firefox/firefox                       1MiB |
+-----------------------------------------------------------------------------+
可以看到版本是10.2.
选择安装的CUDA版本并下载
找到DOWNLOAD-》LEGACY RELEASES类似的按钮,最后找到所需要的版本
安装cuda
采用官网提供的安装方式
Base Installer
Installation Instructions:
wget http://developer.download.nvidia.com/compute/cuda/10.2/Prod/local_installers/cuda_10.2.89_440.33.01_linux.run
sudo sh cuda_10.2.89_440.33.01_linux.run
网络不好的话会有点慢,2G多。当然也可用工具下载完后再安装。
安装时会问你要不要接受什么之类的,输入accept回车然后再直接选回车安装。
一般情况下,如果安装成功,会给出下面这样的提示性字样
===========
= Summary =
===========

Driver:   Installed
Toolkit:  Installed in /usr/local/cuda-10.2/
Samples:  Installed in /home/matthew/, but missing recommended libraries

Please make sure that
 -   PATH includes /usr/local/cuda-10.2/bin
 -   LD_LIBRARY_PATH includes /usr/local/cuda-10.2/lib64, or, add /usr/local/cuda-10.2/lib64 to /etc/ld.so.conf and run ldconfig as root

To uninstall the CUDA Toolkit, run cuda-uninstaller in /usr/local/cuda-10.2/bin
To uninstall the NVIDIA Driver, run nvidia-uninstall

Please see CUDA_Installation_Guide_Linux.pdf in /usr/local/cuda-10.2/doc/pdf for detailed information on setting up CUDA.
Logfile is /var/log/cuda-installer.log
如果安装不成功,大多是是因为图形界面启用了drm什么之类的,用下面的办法切换到text console模式,然后再使用安装命令
sudo sh cuda_10.2.89_440.33.01_linux.run
当然,如果你是第一次使用字符界面,最好先设置密码,免得出现无法登陆的情况,
sudo passwd root
然后再使用下面的办法在字符界面安装。安装完后返回图形界面即可。
安装时报错的情况 --切换到字符界面
报错 ERROR: An NVIDIA kernel module ‘nvidia-drm’ appears to already be loaded in your kernel.
关闭用户图形界面
sudo systemctl set-default multi-user.target
sudo reboot
开启用户图形界面
sudo systemctl set-default graphical.target
sudo reboot
一般来说,切换到字符界面下后,安装就没有问题,如果切换到图形界面有困难,可以考虑下面的办法
(1)edit  /etc/default/grub
GRUB_CMDLINE_LINUX_DEFAULT="text"
GRUB_TERMINAL=console

(2)After saving changes you need to run:
sudo update-grub
sudo systemctl enable multi-user.target --force
sudo systemctl set-default multi-user.target

(3)Undoing text-mode
sudo systemctl enable graphical.target --force
sudo systemctl set-default graphical.target
安装后配置Cuda环境变量
在text console模式下安装成功后,会有一段提示,我们按提示配置即可,这里我们按照网上大多数人的做法配置一下,
sudo gedit ~/.bashrc
在 ~/.bashrc 的最后添加 (网上共看到三种添加内容):
第一种
export PATH=/usr/local/cuda-10.2/bin${PATH:+:${PATH}}
export LD_LIBRARY_PATH=/usr/local/cuda-10.2.0/lib64${LD_LIBRARY_PATH:+:${LD_LIBRARY_PATH}}
第二种
export PATH=/usr/local/cuda-10.2/bin:$PATH
export LD_LIBRARY_PATH=/usr/local/cuda10.2/lib64
第三种(* $PATH表示添加到PATH)
export PATH=/usr/local/cuda-10.2/bin:$PATH
export LD_LIBRARY_PATH=/usr/local/cuda-10.2/lib64:$LD_LIBRARY_PATH
export CUDA_HOME=/usr/local/cuda
配置完环境变量之后,一定要更新一下,否则不能立即生效。也可以通过重启电脑使得环境变量生效:
$source ~/.bashrc
或者:
$source /etc/profile
source ~/.bashrc
nvcc --version
如果显示下面的文字就说明安装成功了:
nvcc: NVIDIA (R) Cuda compiler driver
Copyright (c) 2005-2019 NVIDIA Corporation
Built on Wed_Oct_23_19:24:38_PDT_2019
Cuda compilation tools, release 10.2, V10.2.89
CUDNN的安装
下载cuDNN
首先到官网下载cuDNN( https://developer.nvidia.com/cudnn ),需要注册为开发者才能下载,而且直接下载可能速度非常慢。注意选择版本,比如我选择的是,
libcudnn7_7.6.5.32-1+cuda10.2_amd64.deb
对应
Download cuDNN v7.6.5 (November 18th, 2019), for CUDA 10.2
Library for Windows, Mac, Linux, Ubuntu and RedHat/Centos(x86_64architecture)
cuDNN Library for Windows 7
cuDNN Library for Windows 10
cuDNN Library for Linux
cuDNN Runtime Library for Ubuntu18.04 (Deb) ---> Select this package
cuDNN Developer Library for Ubuntu18.04 (Deb)
cuDNN Code Samples and User Guide for Ubuntu18.04 (Deb)
cuDNN Runtime Library for Ubuntu16.04 (Deb)
cuDNN Developer Library for Ubuntu16.04 (Deb)
cuDNN Code Samples and User Guide for Ubuntu16.04 (Deb)
下载下来后,右键“用软件安装打开”--》“安装”,然后就OK了。
当然你也可以用copy的方式,打开DEB包,里面有个data包,里面的文件都是按路径放置好的了。官方给出的安装办法是
-
Navigate to your directory containing the cuDNN Tar file.
-
Unzip the cuDNN package.
$ tar -xzvf cudnn-10.2-linux-x64-v7.6.5.32.tgz -
Copy the following files into the CUDA Toolkit directory, and change the file permissions.
$ sudo cp cuda/include/cudnn.h /usr/local/cuda/include
$ sudo cp cuda/lib64/libcudnn* /usr/local/cuda/lib64
$ sudo chmod a+r /usr/local/cuda/include/cudnn.h /usr/local/cuda/lib64/libcudnn*
重复说一下,主要是解压,然后执行
sudo cp cuda/include/cudnn.h /usr/local/cuda/include/
sudo cp cuda/lib64/libcudnn* /usr/local/cuda/lib64/
手动拷贝还要设置一下权限
sudo chmod a+r /usr/local/cuda/include/cudnn.h
sudo chmod a+r /usr/local/cuda/lib64/libcudnn*
检查查看cudnn版本
cat /usr/local/cuda/include/cudnn.h | grep CUDNN_MAJOR -A 2
如果显示下面的文字就说明安装成功了:
#define CUDNN_MAJOR 7
#define CUDNN_MINOR 6
#define CUDNN_PATCHLEVEL 5
--
#define CUDNN_VERSION (CUDNN_MAJOR * 1000 + CUDNN_MINOR * 100 + CUDNN_PATCHLEVEL)

#include "driver_types.h"
参考资料:
「1」:https://blog.csdn.net/qiancaobaicheng/article/details/95096354