本篇博客主要讲解SpringBoot整合Thymleaf模板使用,以及springboot的一个映射规则的讲解。
目录
在学习整合Thymleaf之前,我们先捋一遍Springboot的映射配置,捋明白这个之后学起来也不至于脑袋懵懵的,我相信很多人在学习一个东西,并不只是想要学会怎么用吧,接下来跟着小编的思路来进行学习吧。

SpringBoot对静态资源的映射规则
1、了解配置存放地址
在使用之前简单捋一遍思路,springboot之所以开箱即用是因为框架内部,各种框架配置已经都帮我们配置好了,其中也包含了thymeleaf。
这个autoconfigure包下放着各种框架的配置。

xxxxAutoConfiguration:帮我们给容器中自动配置组件;
xxxxProperties:配置类来封装配置文件的内容;
在了解了以上内容之后再来简单了解一下Springboot对SpringMVC的默认配置。
页面跳转以及静态资源等等这些都是由SpringMVC来帮我们完成的。
autoconfigure包下的servlet包下WebMvcAutoConfiguration类,就是springboot为我们配置的SpringMVC配置文件

2、了解静态资源地址
其中这个配置文件当中就配置了页面访问地址,以及静态资源访问地址。
http://localhost:8080/
新建的项目访问这个,就会去以下几个目录找index.html
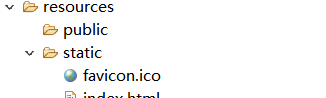
以下是静态资源存放地址:每一个都可以的
“classpath:/META‐INF/resources/”,
“classpath:/resources/”,
“classpath:/static/”,
“classpath:/public/” ,
“/”:当前项目的根路径
3、ico设置
其次的话我们浏览器上面的ico也是会去以上静态目录去找
这里我给大家找了一个根据图片生成ioc的网站,大家可以拿来用
根据图片生成ico: https://www.csdn.net/.
可能有的人不知道ico是什么,一般每个网站都有自己的ico,我们可以用上面的网站生成自己的ico,然后放到任意一个静态资源目录即可。
这个时候访问我们的项目就会发现图标就是我们存放的ico图片。

4、需要注意的

假如不引用Thymleaf依赖,这样是会报错的
@RequestMapping("/index")
public String index(){


    return "index";
}

初步了解thymeleaf
Thymeleaf是一款用于渲染XML/XHTML/HTML5内容的模板引擎。类似JSP,Velocity,FreeMaker等,那么什么是模板引擎呢,在我们没用springboot开发的时候,经常都会用jsp来作为模板引擎。
springboot是嵌入式的tomcat,不支持jsp,如果用纯html来开发的话,循环列表等等取值啥的很不方便。
Spring Boot推荐使用Thymeleaf、Freemarker等后现代的模板引擎技术;一但导入相关依赖,会自动配置ThymeleafAutoConfiguration、FreeMarkerAutoConfiguration。
SpringBoot对 thymeleaf 的配置,就存放在autoconfigure包下的这个位置。想要了解的可以自己打开看看,大概了解一下。

从这里我们可以看出springboot给我们配置的thymeleaf 页面地址。
只要我们把HTML页面放在classpath:/templates/,thymeleaf就能自动渲染;
SpringBoot整合 thymeleaf 使用
接下来通过一个示例来演示其用法
1、导入starter-thymeleaf
这里我把我的demo依赖全部贴出来了,尽可能大家在用的时候少走弯路,这里我用的springboot版本是2.4.1
<properties>
	<java.version>1.8</java.version>
	<project.build.sourceEncoding>UTF-8</project.build.sourceEncoding>
	<project.reporting.outputEncoding>UTF-8</project.reporting.outputEncoding>
</properties>

<parent>
	<groupId>org.springframework.boot</groupId>
	<artifactId>spring-boot-starter-parent</artifactId>
	<version>2.4.1</version>
	<relativePath/> <!-- lookup parent from repository -->
</parent>

<dependencies>
	<dependency>
		<groupId>org.springframework.boot</groupId>
		<artifactId>spring-boot-starter-web</artifactId>
	</dependency>

	<dependency>
		<groupId>org.springframework.boot</groupId>
		<artifactId>spring-boot-starter-tomcat</artifactId>
		<scope>provided</scope>
	</dependency>
	<dependency>
		<groupId>org.springframework.boot</groupId>
		<artifactId>spring-boot-starter-test</artifactId>
		<scope>test</scope>
	</dependency>

	<dependency>
		<groupId>org.springframework.boot</groupId>
		<artifactId>spring-boot-starter-thymeleaf</artifactId>
	</dependency>
</dependencies>
假如我们用的springboot版本低的话,那么springboot帮我们管理的版本当中的thymeleaf版本就低。
这里的话thymeleaf一般建议用3.0版本往后的,因为相对而言他比2.0多了很多东西的。
这里的layout是布局功能的支持程序,thymeleaf3的主程序 应该用layout2以上版本。
这个时候我们可以通过自己修改版本,让他用thymeleaf3版本。

<properties>
	<thymeleaf.version>3.0.9.RELEASE</thymeleaf.version>
	<!-- 布局功能的支持程序  thymeleaf3主程序  layout2以上版本 -->
	<!-- thymeleaf2 用的是  layout1-->
	<thymeleaf-layout-dialect.version>2.2.2</thymeleaf-layout-dialect.version>
</properties>
2、template文件夹下创建模板文件
注意:我们使用thymeleaf创建的html,需要引入名称空间。
名称空间作用:他可以给我们提供语法提示,语法校验等。
<html lang="en" xmlns:th="http://www.thymeleaf.org">
<!DOCTYPE html>
<html lang="en" xmlns:th="http://www.thymeleaf.org">
<head>
    <meta charset="UTF-8">
    <title>Title</title>
</head>
<body>

<hr/>
<!-- th:each每次遍历都会生成当前这个标签: 3个h4 -->
<h4 th:text="${user}"  th:each="user:${users}"></h4>
<hr/>

</body>
</html>
3、测试接口
package com.gzl.cn.controller;

import org.springframework.stereotype.Controller;
import org.springframework.web.bind.annotation.RequestMapping;

import java.util.Arrays;
import java.util.Map;

@Controller
public class HelloController {


    //查出用户数据,在页面展示
    @RequestMapping("/success")
    public String success(Map<String,Object> map){


        map.put("hello","<h1>你好</h1>");
        map.put("users",Arrays.asList("zhangsan","lisi","wangwu"));
        return "success";
    }
}
4、测试页面&取值

5、项目结构

Thymleaf语法
由于Thymleaf语法较多,本篇博客就不讲解Thymleaf语法了,在这里给大家提供下载用户手册的地址,所以语法什么的咱们也不用去搜百度什么的,直接看官方手册就行,而且还特别全。
下载Thymleaf模板语法
thymeleaf官网: https://www.thymeleaf.org/documentation.html.
官网是纯英文的,这个是我从百度上搜的中文使用手册,大家直接下载学习即可。
下载地址:链接: http://pan.baidu.com/s/1dEOIuPF.
密码:y1lz
总结
相对来说使用springboot来整合Thymleaf的时候,根本没什么配置,springboot都已经帮我们配置好了,我们只需要记住映射地址即可。
