5、MyBatis 动态SQL
- 动态SQL是MyBatis强大特性之一。极大的简化我们拼装SQL的操作。
- 动态SQL 元素和使用JSTL 或其他类似基于XML 的文本处理器相似。
- MyBatis 采用功能强大的基于OGNL 的表达式来简化操作。
–if
–choose (when, otherwise)
–trim (where, set)
–foreach
(1)if:判断
<!-- 查询员工,要求携带了哪个字段,查询就带上这个字段的值 -->
<!-- public List<Employee> getEmpsByConditionIf(Employee employee); -->
<select id="getEmpsByConditionIf" resultType="com.mycode.mybatis.bean.Employee">
select * from tbl_employee
<where>
<!-- test:判断表达式(OGNL)
OGNL 参照 PPT 或者官方文档
从参数中取值进行判断
遇见特殊符号应该去写转义字符
&&:&&
-->
<if test="id!=null">
id=#{id}
</if>
<if test="lastName!=null && lastName!=""">
and last_name like #{lastName}
</if>
<if test="email!=null and email.trim()!=""">
and email=#{email}
</if>
/* ognl 会进行字符串与数字的转换判断 "0"==0 */
<if test="gender==0 or gender==1">
and gender=#{gender}
</if>
</where>
</select>
(2)choose (when, otherwise):分支选择,带了 break 的 switch-case
	<!-- 如果带了 id,就用 id 查,如果带了 lastName 就用 lastName 查;只会进入其中一个 -->
    <!-- public List<Employee> getEmpsByConditionChoose(Employee employee); -->
    <select id="getEmpsByConditionChoose" resultType="com.mycode.mybatis.bean.Employee">
        select * from tbl_employee
        <where>
            <choose>
                <when test="id!=null">
                    id=#{id}
                </when>
                <when test="lastName!=null">
                    last_name like #{lastName}
                </when>
                <when test="email!=null">
                    email=#{email}
                </when>
                <otherwise>
                    gender = 0
                </otherwise>
            </choose>
        </where>
    </select>
(3)trim :字符串截取(where(封装查询条件), set(封装修改条件))
where
<select id="getEmpsByConditionIf" resultType="com.mycode.mybatis.bean.Employee">
select * from tbl_employee
<!--where:去除拼串前面多余的 and 或者 or-->
<where>
<if test="id!=null">
id=#{id}
</if>
<if test="lastName!=null && lastName!=""">
and last_name like #{lastName}
</if>
<if test="email!=null and email.trim()!=""">
and email=#{email}
</if>
<if test="gender==0 or gender==1">
and gender=#{gender}
</if>
</where>
</select>
set
	<!-- public void updateEmp(Employee employee); -->
    <update id="updateEmp">
        <!-- Set 标签的使用:去除拼串后面多余的逗号 -->
        update tbl_employee
        <set>
            <if test="lastName!=null">
                last_name=#{lastName},
            </if>
            <if test="email!=null">
                email=#{email},
            </if>
            <if test="gender!=null">
                gender=#{gender}
            </if>
        </set>
        where id=#{id}
        <!--
        Trim:更新拼串
        update tbl_employee
        <trim prefix="set" suffixOverrides=",">
            <if test="lastName!=null">
                last_name=#{lastName},
            </if>
            <if test="email!=null">
                email=#{email},
            </if>
            <if test="gender!=null">
                gender=#{gender}
            </if>
        </trim>
        where id=#{id}-->
    </update>
trim
<!-- public List<Employee> getEmpsByConditionTrim(Employee employee); -->
<select id="getEmpsByConditionTrim" resultType="com.mycode.mybatis.bean.Employee">
select * from tbl_employee
<!-- 后面多出的 and 或者 or ,where 标签不能解决
prefix="":前缀,trim 标签体中是整个字符串拼串后的结果。
prefix 给拼串后的整个字符串加一个前缀
prefixOverrides="":前缀覆盖,去掉整个字符串前面多余的字符
suffix="":后缀,suffix 给拼串后的整个字符串加一个后缀
suffixOverrides="":后缀覆盖,去掉整个字符串后面多余的字符
-->
<!-- 自定义字符串的截取规则 -->
<trim prefix="where" suffixOverrides="and">
<if test="id!=null">
id=#{id} and
</if>
<if test="lastName!=null && lastName!=""">
last_name like #{lastName} and
</if>
<if test="email!=null and email.trim()!=""">
email=#{email} and
</if>
<!-- ognl 会进行字符串与数字的转换判断 "0"==0 -->
<if test="gender==0 or gender==1">
gender=#{gender}
</if>
</trim>
</select>
(4)foreach
- 动态 SQL 的另外一个常用的必要操作是需要对一个集合进行遍历,通常是在构建 IN 条件语句的时候。
	<!-- public List<Employee> getEmpsByConditionForeach(List<Integer> ids); -->
    <select id="getEmpsByConditionForeach" resultType="com.mycode.mybatis.bean.Employee">
        select * from tbl_employee
        <!--
            collection:指定要遍历的集合:
                list 类型的参数会特殊处理封装在 map 中,map 的 key 就叫 list
            item:将遍历出的元素赋值给指定的变量
            separator:每个元素之间的分割符
            open:遍历出所有结果拼接一个开始的字符
            close:遍历出所有结果拼接一个结束的字符
            index:索引。遍历 list 的时候 index 是索引,item 是当前值
                        遍历 map 的时候 index 表示的就是 map 的 key,item 就是 map 的值

            #{变量名}就能取出变量的值,也就是当前遍历出的元素
        -->
        <foreach collection="ids" item="item_id" separator=","
                 open="where id in(" close=")">
            #{item_id}
        </foreach>
    </select>
- 当迭代列表、集合等可迭代对象或者数组时
– index 是当前迭代的次数,item 的值是本次迭代获取的元素 - 当使用字典(或者 Map.Entry 对象的集合)时
– index 是键,item 是值
使用 foreach 标签进行批量保存
MySQL:
	<!-- 批量保存 -->
    <!-- public void addEmps(@Param("emps") List<Employee> emps); -->
    <!-- MySQL 下批量保存:可以 foreach 遍历,mysql支持values(),(),()语法 -->
    <insert id="addEmps">
        INSERT INTO tbl_employee(last_name,email,gender,d_id)
        VALUES
        <foreach collection="emps" item="emp" separator=",">
            (#{emp.lastName},#{emp.email},#{emp.gender},#{emp.dept.id})
        </foreach>
    </insert>

    <!-- 这种方式需要数据库连接属性 allowMultiQueries=true;
    	这种分号分隔多个 sql 可以用于其他的批量操作(删除、修改)-->
    <!--<insert id="addEmps">
    <foreach collection="emps" item="emp" separator=";">
        insert into tbl_employee(last_name,email,gender,d_id)
        values(#{emp.lastName},#{emp.email},#{emp.gender},#{emp.dept.id})
    </foreach>
    </insert>-->
Oracle:
	<!-- Oracle 数据库批量保存 :
        Oracle 不支持 values(),(),()
        Oracle 支持的批量方式
        1、多个 insert 放在 begin - end 里面
            begin
                insert into employees(employee_id,last_name,email)
                values(employees_seq.nextval,'test_001','[email protected]');
                insert into employees(employee_id,last_name,email)
                values(employees_seq.nextval,'test_002','[email protected]');
            end;
        2、利用中间表
            insert into employees(employee_id,last_name,email)
                select employees_seq.nextval,lastName,email from(
                    select 'test_a_01' lastName,'test_a_e01' email from dual
                    union
                    select 'test_a_02' lastName,'test_a_e02' email from dual
                    union
                    select 'test_a_03' lastName,'test_a_e03' email from dual
                )
    -->
    <!-- oracle 第一种批量方式 -->
    <insert id="addEmps" databaseId="oracle">
        <foreach collection="emps" item="emp" open="begin" close="end;">
            insert into employees(employee_id,last_name,email)
            values(employees_seq.nextval,#{emp.lastName},#{emp.email});
        </foreach>
    </insert>

    <!-- oracle 第二种批量方式 -->
    <insert id="addEmps" databaseId="oracle">
        insert into employees(employee_id,last_name,email)
            <foreach collection="emps" item="emp" separator="union"
                     open="select employees_seq.nextval,lastName,email from(" close=")">
                select #{emp.lastName} lastName,#{emp.email} email from dual
            </foreach>
    </insert>
(5)两个内置参数
不只是方法传递过来的参数可以用来判断,取值,mybatis 默认还有两个内置参数:
-
_parameter:代表整个参数
-
单个参数:_parameter 就是这个参数
-
多个参数:参数会被封装为一个 map;_parameter 就是代表这个 map
-
-
_databaseId:如果配置了 DatabaseIdProvider 标签
_databaseId 就是代表当前数据库的别名 mysql
	<!-- public List<Employee> getEmpsTestInnerParameter(Employee employee); -->
    <select id="getEmpsTestInnerParameter" resultType="com.mycode.mybatis.bean.Employee">
        <if test="_databaseId=='mysql'">
            select * from tbl_employee
            <if test="_parameter!=null">
                where last_name=#{_parameter.lastName}
            </if>
        </if>
        <if test="_databaseId=='oracle'">
            select * from employees
            <if test="_parameter!=null">
                where last_name=#{_parameter.lastName}
            </if>
        </if>
    </select>
(6)bind
- bind 元素可以从 OGNL 表达式中创建一个变量并将其绑定到上下文。比如:

(7)sql 标签
抽取可重用的 sql 片段,方便后面引用
sql 标签里也能写动态标签做动态判断
	<sql id="insertColumn">
        <if test="_databaseId=='oracle'">
            employee_id,last_name,email
        </if>
        <if test="_databaseId=='mysql'">
            last_name,email,gender,d_id
        </if>
    </sql>
引用:
	<insert id="addEmps">
        INSERT INTO tbl_employee(
            <!-- 引用外部定义的 sql -->
            <include refid="insertColumn"></include>
        )
        VALUES
        <foreach collection="emps" item="emp" separator=",">
            (#{emp.lastName},#{emp.email},#{emp.gender},#{emp.dept.id})
        </foreach>
    </insert>

6、MyBatis 缓存机制
-
MyBatis 包含一个非常强大的查询缓存特性,它可以非常方便地配置和定制。缓存可以极大的提升查询效率。
-
MyBatis 系统中默认定义了两级缓存。
-
一级缓存和二级缓存。
- 默认情况下,只有一级缓存(SqlSession 级别的缓存,也称为本地缓存)开启。
- 二级缓存需要手动开启和配置,他是基于 namespace 级别的缓存。
- 为了提高扩展性。MyBatis 定义了缓存接口 Cache。我们可以通过实现 Cache 接口来自定义二级缓存
6.1 一级缓存
-
一级缓存(local cache), 即本地缓存, 作用域默认为 sqlSession。当 Session flush 或 close 后, 该 Session 中的所有 Cache 将被清空。
-
本地缓存不能被关闭, 但可以调用 clearCache() 来清空本地缓存, 或者改变缓存的作用域.
-
在 mybatis3.1 之后, 可以配置本地缓存的作用域,在 mybatis.xml 中配置

一级缓存演示&失效情况
-
同一次会话期间只要查询过的数据都会保存在当前 SqlSession 的一个 Map 中
- key:hashCode+查询的SqlId+编写的sql查询语句+参数
-
一级缓存失效的四种情况
① 不同的 SqlSession 对应不同的一级缓存
② 同一个 SqlSession 但是查询条件不同
③ 同一个 SqlSession 两次查询期间执行了任何一次增删改操作
④ 同一个 SqlSession 两次查询期间手动清空了缓存
	@Test
    public void testFirstLevelCache() throws IOException {


        SqlSessionFactory sqlSessionFactory = getSqlSessionFactory();

        try(SqlSession openSession = sqlSessionFactory.openSession();
            SqlSession openSession2 = sqlSessionFactory.openSession()) {


            EmployeeMapper mapper = openSession.getMapper(EmployeeMapper.class);
            Employee employee1 = mapper.getEmployeeById(1);
            System.out.println(employee1);

            // 1、sqlSession 不同
//            EmployeeMapper mapper2 = openSession2.getMapper(EmployeeMapper.class);
//            Employee employee2 = mapper2.getEmployeeById(1);
//            System.out.println(employee2);
//            System.out.println(employee1==employee2);

            // 2、sqlSession 相同,查询条件不同
//            Employee employee2 = mapper.getEmployeeById(3);
//            Employee employee3 = mapper.getEmployeeById(3);
//            System.out.println(employee2);
//            System.out.println(employee3);
//            System.out.println(employee2==employee3);

            // 3、sqlSession 相同,两次查询之间执行了增删改操作
//            mapper.addEmployee(new Employee(null,"testCache","cache@qq,com","1"));
//            System.out.println("数据添加成功");

            // 4、sqlSession 相同,手动清除了一级缓存(缓存清空)
            openSession.clearCache();

            Employee employee2 = mapper.getEmployeeById(1);
            System.out.println(employee2);
            System.out.println(employee1==employee2);

        }
    }
6.2 二级缓存
二级缓存(second level cache),全局作用域缓存,基于 namespace 级别的缓存,一个 namespace 对应一个二级缓存
(1)工作机制
-
一个会话,查询一条数据,这个数据就会被放在当前会话的一级缓存中;
-
如果会话关闭,一级缓存中的数据会被保存到二级缓存中;新的会话查询信息,就可以参照二级缓存中的内容
-
不同 namespace 查出的数据会放在自己对应的缓存中(map 中)
效果:数据会从二级缓存中获取,查出的数据都会被默认放在一级缓存中。 只有会话提交或者关闭以后,一级缓存中的数据才会转移到二级缓存中 -
二级缓存默认不开启,需要手动配置
(2)使用步骤
-
开启全局二级缓存配置;
<setting name="cacheEnabled" value="true"/> -
需要使用二级缓存的映射文件处使用 cache 配置缓存;
<cache></cache> -
注意:POJO 需要实现 Serializable 接口
(3)cache 标签相关的属性
<cache eviction="FIFO" flushInterval="60000" readOnly="false" size="1024" type=""></cache>
-
eviction:缓存的回收策略
- LRU –最近最少使用的:移除最长时间不被使用的对象。
- FIFO –先进先出:按对象进入缓存的顺序来移除它们。
- SOFT –软引用:移除基于垃圾回收器状态和软引用规则的对象。
- WEAK –弱引用:更积极地移除基于垃圾收集器状态和弱引用规则的对象。
- 默认的是LRU。
-
flushInterval:缓存刷新间隔,缓存多长时间清空一次,默认不清空,设置一个毫秒值
-
readOnly:是否只读:
- true:只读,mybatis 认为所有从缓存中获取数据的操作都是只读操作,不会修改数据。mybatis 为了加快获取速度,直接就会将数据在缓存中的引用交给用户。不安全,速度快
- false:非只读,mybatis 觉得获取的数据可能会被修改。mybatis 会利用序列化&反序列化的技术克隆一份新的数据给你。安全,速度慢
-
size:缓存存放多少元素
-
type:指定自定义缓存的全类名;实现 Cache 接口即可
6.3 缓存有关设置
(1)全局 setting 的 cacheEnable
<setting name="cacheEnabled" value="true"/>开启缓存<setting name="cacheEnabled" value="false"/>关闭缓存(二级缓存关闭,一级缓存一直可用)
(2)select 标签的 useCache 属性
- useCache=“true” 开启缓存(默认)
- useCache=“false”:不使用缓存(一级缓存依然使用,二级缓存不使用)
(3)insert、delete、update、select 标签的 flushCache 属性
- flushCache=“true”:(一级二级都会清除)增删改执行后就会清除缓存
- flushCache=“false”:执行完后不清除缓存
- 注意:增删改默认为 true,查默认为 false
(4)sqlSession.clearCache(); :只是清除当前 session 的一级缓存
(5)在 mybatis3.1 之后, 可以配置本地缓存的作用域,在 mybatis.xml 中配置 localCacheScope
- SESSION:本地缓存作用域(一级缓存),当前会话的所有数据保存在会话缓存中
- STATEMENT:可以禁用一级缓存;
6.4 缓存原理图示

6.5 第三方缓存整合
-
EhCache 是一个纯 Java 的进程内缓存框架,具有快速、精干等特点,是 Hibernate 中默认的 CacheProvider。
-
MyBatis 定义了 Cache 接口方便我们进行自定义扩展。
-
整合步骤:
- 导入 ehcache 包,以及整合包,日志包
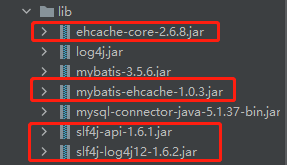
ehcache-core-2.6.8.jar、mybatis-ehcache-1.0.3.jar、slf4j-api-1.6.1.jar、slf4j-log4j12-1.6.2.jar
- 编写 ehcache.xml 配置文件
<?xml version="1.0" encoding="UTF-8"?> <ehcache xmlns:xsi="http://www.w3.org/2001/XMLSchema-instance" xsi:noNamespaceSchemaLocation="../config/ehcache.xsd"> <!-- 磁盘保存路径 --> <diskStore path="D:\IDEA2020.2\ehcache"/> <defaultCache maxElementsInMemory="10000" maxElementsOnDisk="10000000" eternal="false" overflowToDisk="true" timeToIdleSeconds="120" timeToLiveSeconds="120" diskExpiryThreadIntervalSeconds="120" memoryStoreEvictionPolicy="LRU"> </defaultCache> </ehcache> <!-- 属性说明: l diskStore:指定数据在磁盘中的存储位置。 l defaultCache:当借助CacheManager.add("demoCache")创建Cache时,EhCache便会采用<defalutCache/>指定的的管理策略 以下属性是必须的: l maxElementsInMemory - 在内存中缓存的element的最大数目 l maxElementsOnDisk - 在磁盘上缓存的element的最大数目,若是0表示无穷大 l eternal - 设定缓存的elements是否永远不过期。如果为true,则缓存的数据始终有效,如果为false那么还要根据timeToIdleSeconds,timeToLiveSeconds判断 l overflowToDisk - 设定当内存缓存溢出的时候是否将过期的element缓存到磁盘上 以下属性是可选的: l timeToIdleSeconds - 当缓存在EhCache中的数据前后两次访问的时间超过timeToIdleSeconds的属性取值时,这些数据便会删除,默认值是0,也就是可闲置时间无穷大 l timeToLiveSeconds - 缓存element的有效生命期,默认是0.,也就是element存活时间无穷大 diskSpoolBufferSizeMB 这个参数设置DiskStore(磁盘缓存)的缓存区大小.默认是30MB.每个Cache都应该有自己的一个缓冲区. l diskPersistent - 在VM重启的时候是否启用磁盘保存EhCache中的数据,默认是false。 l diskExpiryThreadIntervalSeconds - 磁盘缓存的清理线程运行间隔,默认是120秒。每个120s,相应的线程会进行一次EhCache中数据的清理工作 l memoryStoreEvictionPolicy - 当内存缓存达到最大,有新的element加入的时候, 移除缓存中element的策略。默认是LRU(最近最少使用),可选的有LFU(最不常使用)和FIFO(先进先出) -->- 配置cache标签
<cache type="org.mybatis.caches.ehcache.EhcacheCache"></cache> - 导入 ehcache 包,以及整合包,日志包
-
参照缓存:若想在命名空间中共享相同的缓存配置和实例。可以使用 cache-ref 元素来引用另外一个缓存。
<!-- 引用缓存:namespace:指定和哪个名称空间下的缓存一样 -->
    <cache-ref namespace="com.mycode.mybatis.dao.EmployeeMapper"/>

7、MyBatis-Spring 整合
(1)查看不同MyBatis版本整合Spring时使用的适配包
http://www.mybatis.org/spring/点击进入
(2)下载整合适配包
https://github.com/mybatis/spring/releases点击进入

(3)官方整合示例:jpetstore-6
https://github.com/mybatis/jpetstore-6点击进入
具体配置如下:
web.xml
<?xml version="1.0" encoding="UTF-8"?>
<web-app xmlns="http://xmlns.jcp.org/xml/ns/javaee"
         xmlns:xsi="http://www.w3.org/2001/XMLSchema-instance"
         xsi:schemaLocation="http://xmlns.jcp.org/xml/ns/javaee http://xmlns.jcp.org/xml/ns/javaee/web-app_4_0.xsd"
         version="4.0">

    <!-- Spring配置:-->
    <context-param>
        <param-name>contextConfigLocation</param-name>
        <param-value>classpath:applicationContext.xml</param-value>
    </context-param>

    <listener>
        <listener-class>org.springframework.web.context.ContextLoaderListener</listener-class>
    </listener>

    <!-- SpringMVC配置 -->
    <servlet>
        <servlet-name>spring</servlet-name>
        <servlet-class>org.springframework.web.servlet.DispatcherServlet</servlet-class>
        <load-on-startup>1</load-on-startup>
    </servlet>

    <servlet-mapping>
        <servlet-name>spring</servlet-name>
        <url-pattern>/</url-pattern>
    </servlet-mapping>
</web-app>
spring-servlet.xml
<?xml version="1.0" encoding="UTF-8"?>
<beans xmlns="http://www.springframework.org/schema/beans"
       xmlns:xsi="http://www.w3.org/2001/XMLSchema-instance"
       xmlns:context="http://www.springframework.org/schema/context"
       xmlns:mvc="http://www.springframework.org/schema/mvc"
       xsi:schemaLocation="http://www.springframework.org/schema/beans http://www.springframework.org/schema/beans/spring-beans.xsd
                           http://www.springframework.org/schema/context http://www.springframework.org/schema/context/spring-context.xsd
                           http://www.springframework.org/schema/mvc http://www.springframework.org/schema/mvc/spring-mvc.xsd">

    <!-- SpringMVC 只是控制网站跳转逻辑 -->
    <!-- 只扫描控制器 -->
    <context:component-scan base-package="com.mycode.mybatis" use-default-filters="false">
        <context:include-filter type="annotation" expression="org.springframework.stereotype.Controller"/>
    </context:component-scan>

    <!-- 视图解析器 -->
    <bean class="org.springframework.web.servlet.view.InternalResourceViewResolver">
        <property name="prefix" value="/WEB-INF/pages/"></property>
        <property name="suffix" value=".jsp"></property>
    </bean>

    <!-- SpringMVC 基本配置 -->
    <mvc:annotation-driven></mvc:annotation-driven>
    <mvc:default-servlet-handler/>
</beans>
applicationContext.xml
<?xml version="1.0" encoding="UTF-8"?>
<beans xmlns="http://www.springframework.org/schema/beans"
       xmlns:xsi="http://www.w3.org/2001/XMLSchema-instance"
       xmlns:context="http://www.springframework.org/schema/context"
       xmlns:mybatis-spring="http://mybatis.org/schema/mybatis-spring"
       xmlns:tx="http://www.springframework.org/schema/tx"
       xsi:schemaLocation="http://www.springframework.org/schema/beans http://www.springframework.org/schema/beans/spring-beans.xsd
                           http://www.springframework.org/schema/context http://www.springframework.org/schema/context/spring-context.xsd
                           http://www.springframework.org/schema/tx http://www.springframework.org/schema/tx/spring-tx.xsd
                           http://mybatis.org/schema/mybatis-spring http://mybatis.org/schema/mybatis-spring.xsd">

    <!-- Spring 希望管理所有的业务逻辑组件,等... -->
    <context:component-scan base-package="com.mycode.mybatis">
        <context:exclude-filter type="annotation" expression="org.springframework.stereotype.Controller"/>
    </context:component-scan>

    <!-- 引入数据库的配置文件 -->
    <context:property-placeholder location="classpath:dbconfig.properties"/>
    <!-- Spring 用来控制业务逻辑,数据源、事务控制、aop -->
    <bean id="dataSource" class="com.alibaba.druid.pool.DruidDataSource">
        <property name="url" value="${jdbc.url}"></property>
        <property name="driverClassName" value="${jdbc.driver}"></property>
        <property name="username" value="${jdbc.username}"></property>
        <property name="password" value="${jdbc.password}"></property>
    </bean>
    <!-- spring 事务管理 -->
    <bean id="dataSourceTransactionManager" class="org.springframework.jdbc.datasource.DataSourceTransactionManager">
        <property name="dataSource" ref="dataSource"></property>
    </bean>

    <!-- 开启基于注解的事务 -->
    <tx:annotation-driven transaction-manager="dataSourceTransactionManager"/>
    <!-- 整合 mybatis
        目的:1、Spring 管理所有组件,mapper 的实现类。
                service ==> Dao   @Autowired:自动注入 mapper
              2、spring 用来管理事务,spring 声明式事务
    -->
    <!-- 创建出 SqlSessionFactory 对象 -->
    <bean id="sqlSessionFactoryBean" class="org.mybatis.spring.SqlSessionFactoryBean">
        <property name="dataSource" ref="dataSource"></property>
        <!-- configLocation 指定全局配置文件的位置 -->
        <property name="configLocation" value="classpath:mybatis-config.xml"></property>
        <!-- mapperLocations:指定 mapper 文件的位置 -->
        <property name="mapperLocations" value="classpath:mybatis/mapper/*.xml"></property>
    </bean>

    <!-- 扫描所有的 mapper 接口的实现,让这些 mapper 能够自动注入
        base-package:指定 mapper 接口的包名
    -->
    <!-- 方式一 :-->
    <mybatis-spring:scan base-package="com.mycode.mybatis.dao"/>

    <!-- 方式二 :-->
    <!--<bean class="org.mybatis.spring.mapper.MapperScannerConfigurer">
        <property name="basePackage" value="com.mycode.mybatis.dao"></property>
    </bean>-->
</beans>
mybatis-config.xml
<?xml version="1.0" encoding="UTF-8" ?>
<!DOCTYPE configuration
        PUBLIC "-//mybatis.org//DTD Config 3.0//EN"
        "http://mybatis.org/dtd/mybatis-3-config.dtd">
<configuration>

    <settings>
        <setting name="mapUnderscoreToCamelCase" value="true"/>
        <setting name="jdbcTypeForNull" value="NULL"/>

        <!-- 显式的指定每个我们需要更改的配置的值,即使他是默认的,防止版本更新带来的问题 -->
        <!-- 开启延迟加载和属性按需加载 -->
        <setting name="cacheEnabled" value="true"/>
        <setting name="lazyLoadingEnabled" value="true"/>
        <setting name="aggressiveLazyLoading" value="false"/>
    </settings>

    <databaseIdProvider type="DB_VENDOR">
        <!-- 为不同的数据库厂商起别名 -->
        <property name="MySQL" value="mysql"/>
        <property name="Oracle" value="oracle"/>
        <property name="SQL Server" value="sqlserver"/>
    </databaseIdProvider>

</configuration>