目录
一、实验目的及要求
使用java语言从MySQL数据库中查询其中一个表的数据。
二、实验环境
Windows 10环境
java version: 11.0.10
IDE工具:IntelliJ IDEA 2020.3
MySQL: 5.7.26
三、实验内容
下载tomcat
先在Windows中下载Tomcat 步骤如下:
-
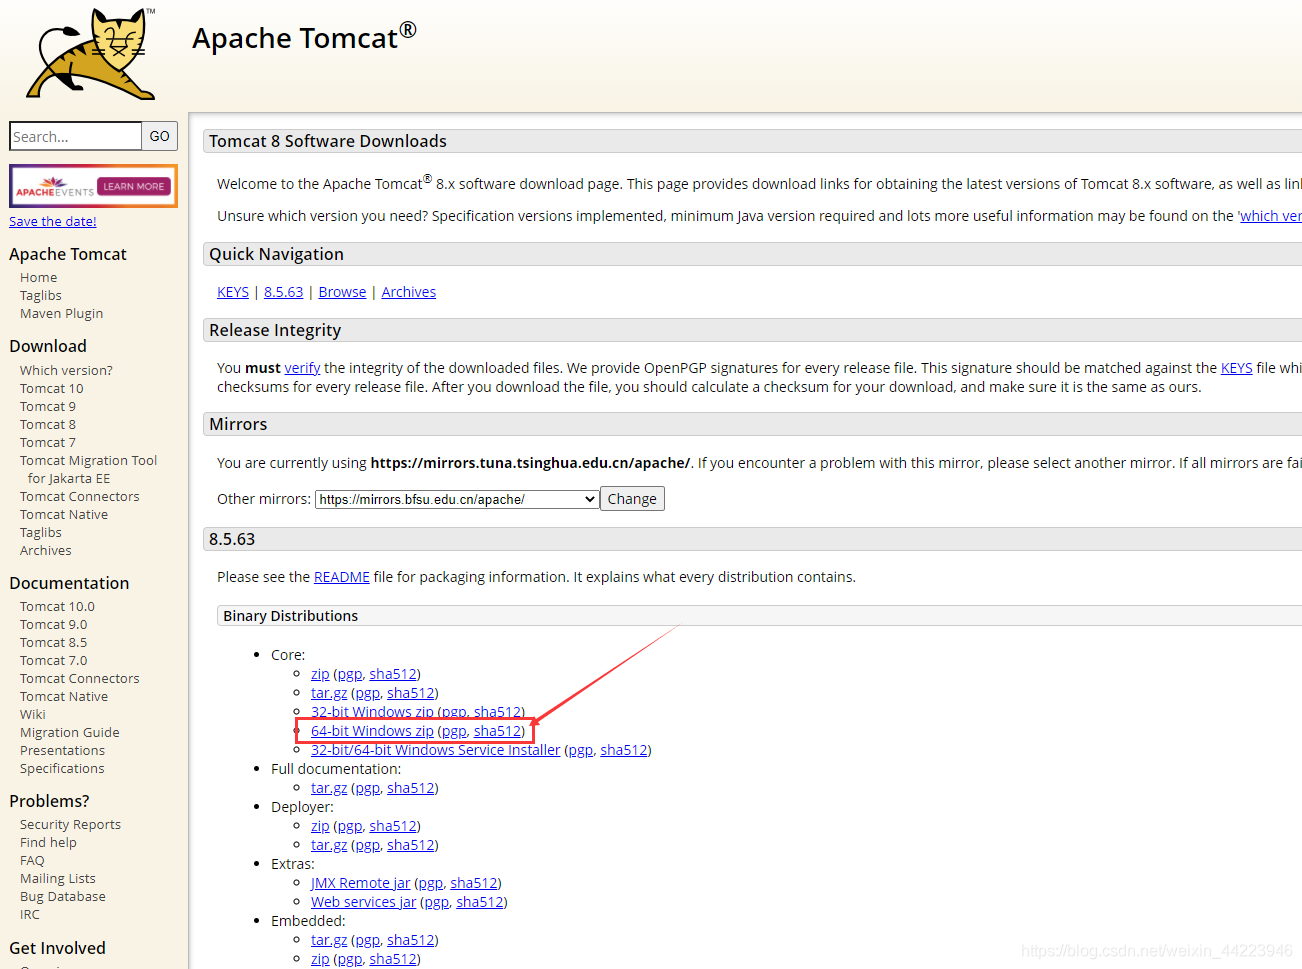
进入官网下载,我这里下载的是tomcat 8。
-
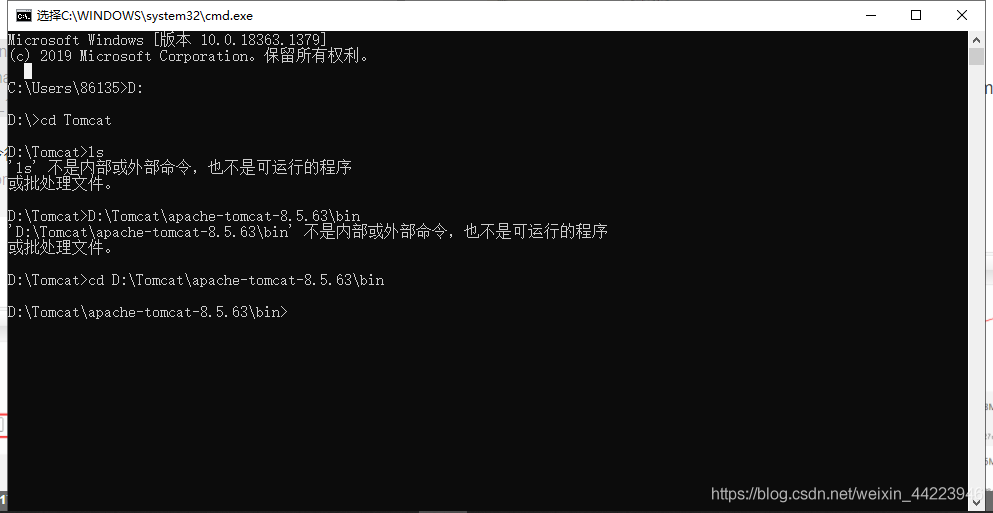
下载解压到自己想放置的目录下,然后打开命令行(win+R,cmd),进入文件所在盘,cd 复制粘贴bin文件夹路径。
-
进入bin中输入service.bat install安装。提示:The service ‘Tomcat8’ has been installed. 表示安装成功。
-
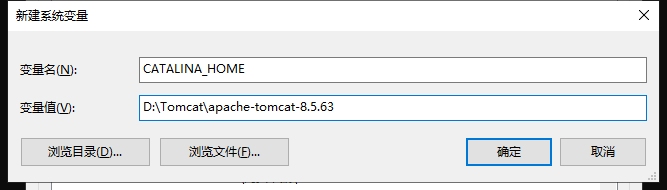
安装完成后配置系统环境变量(在我的电脑右键属性中)
-
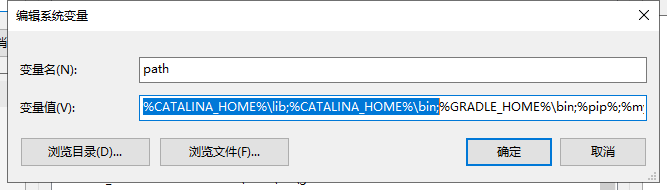
bin路径和lib路径添加到path系统变量中。
-
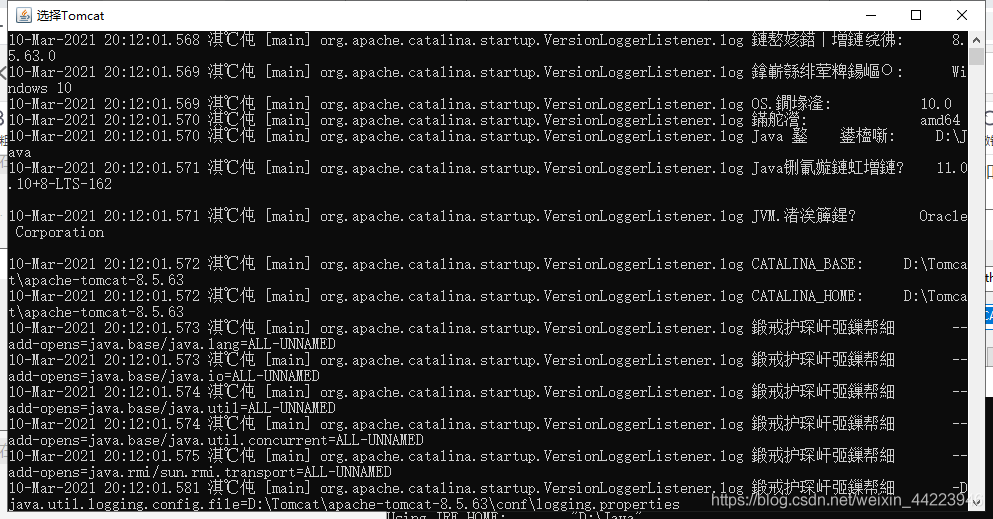
运行 startup.bat,乱码(乱码解决看下面的实验总结)
-
至此Tomcat成功

下载mysql驱动
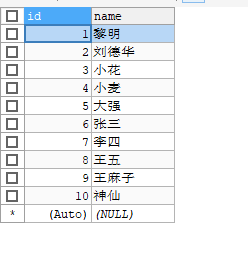
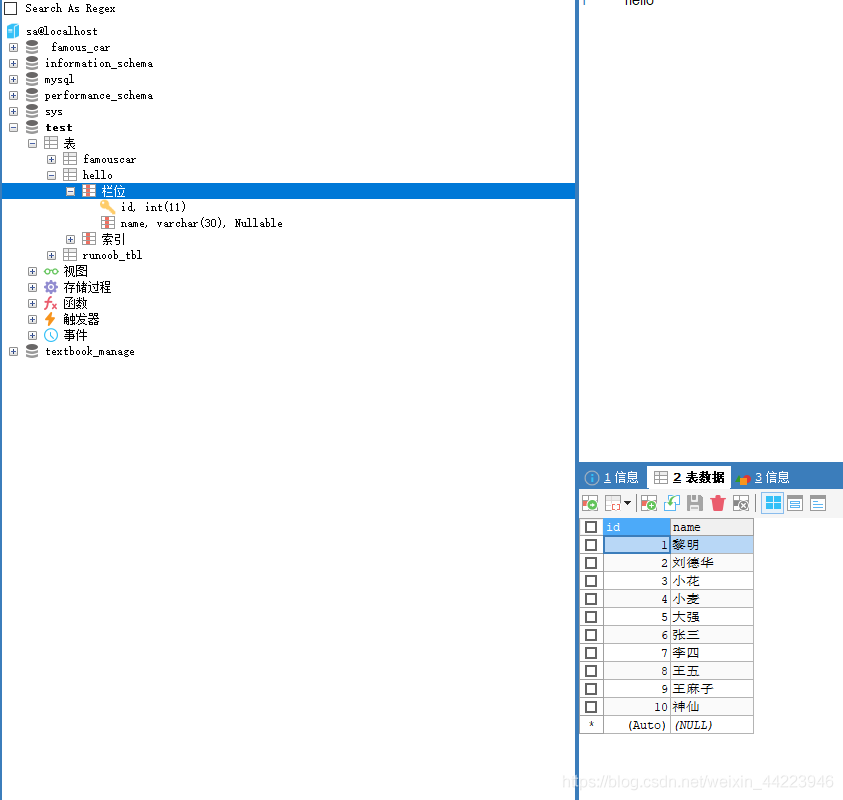
在mysql数据库中创建一个sa用户密码设置为123456 并且请提前建立一个test数据库,其中建立一个hello表如下:id为主键自增的。
-
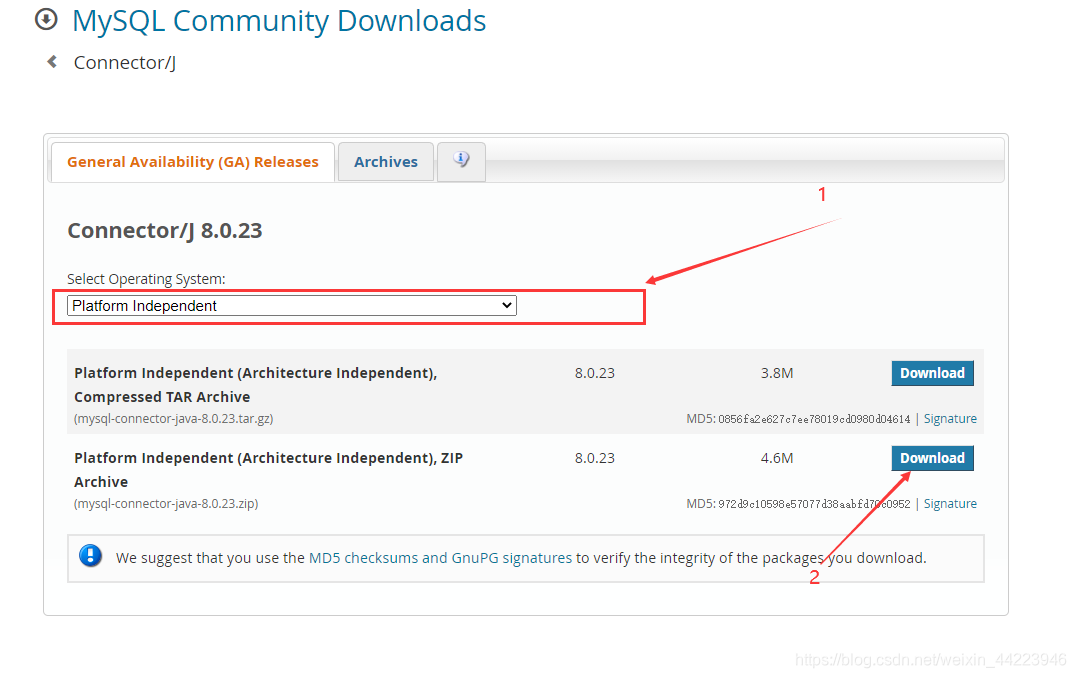
进入管网,选择操作系统后进入下载页。
-
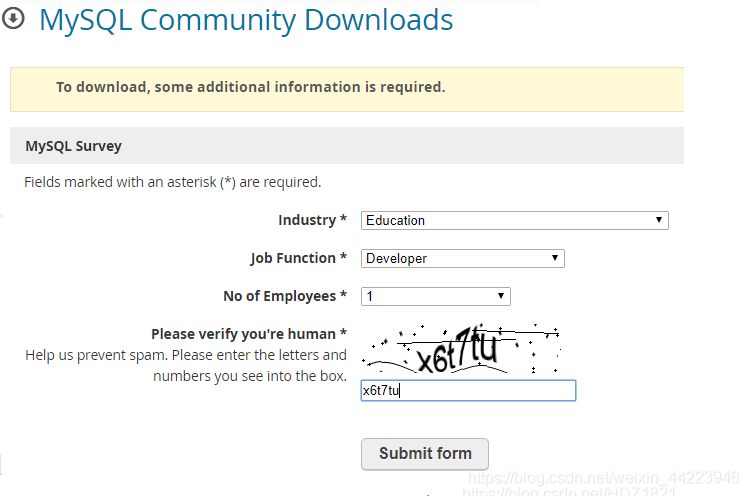
然后会让你登录(如果没有账户,申请一个就好了),登录账户后填写一些information就好了。提交后下载。
-
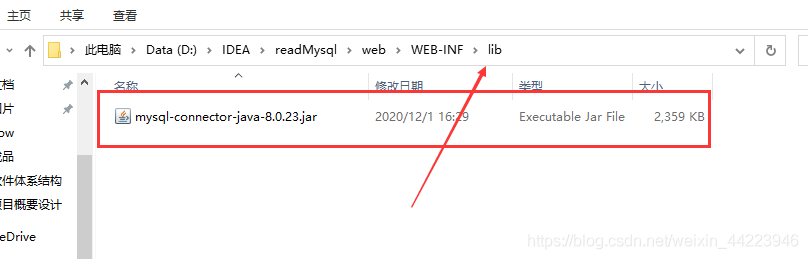
这个压缩包里面就含有mysql-connector-java-8.0.23.jar文件 (这个驱动是向下兼容各版本的)
配置IDEA
-
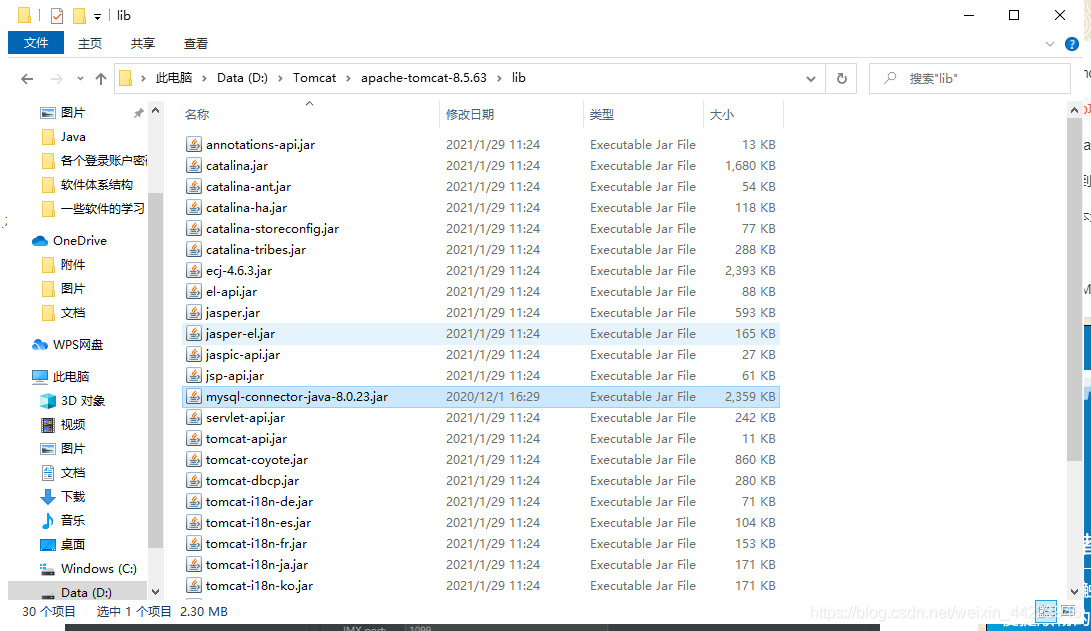
将下载好的mysql驱动的jar文件复制到tomcat的lib库文件夹中。(这次不必要,以后可能会用)
-
创建java web项目(不能直接创建的查看实验总结)
-
配置Tomcat。
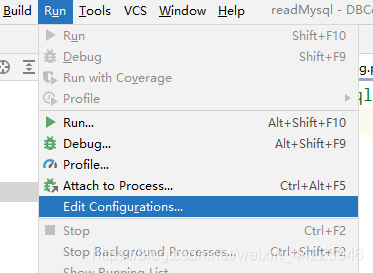
点击Run—EDit Configurations…
点击左侧“+”号,找到Tomcat Server—Local点击,然后如图配置(若是没有找到,点击Templates配置如图,然后点击上面的警告!Create configuration)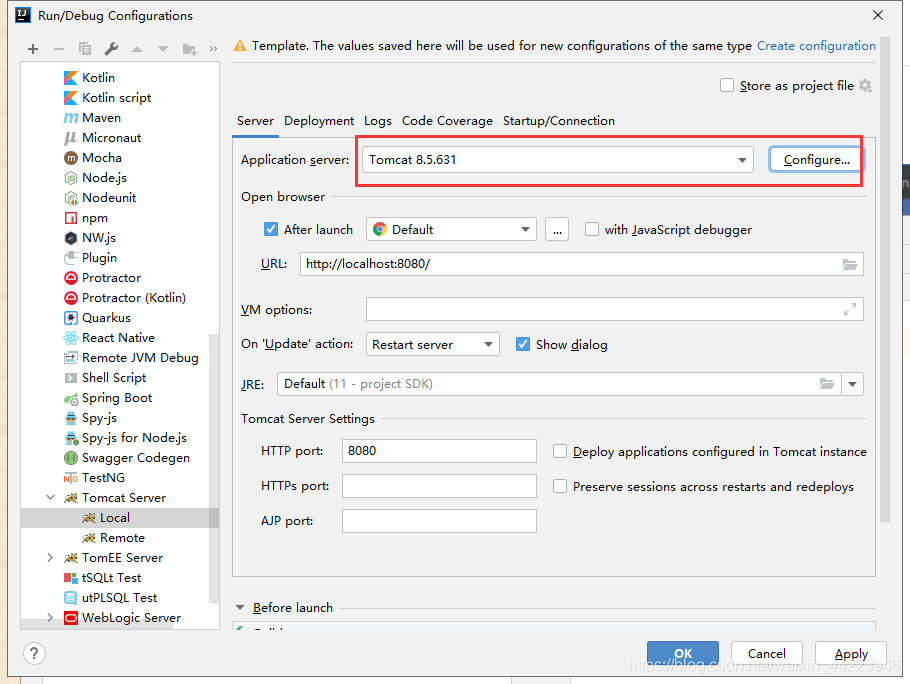
-
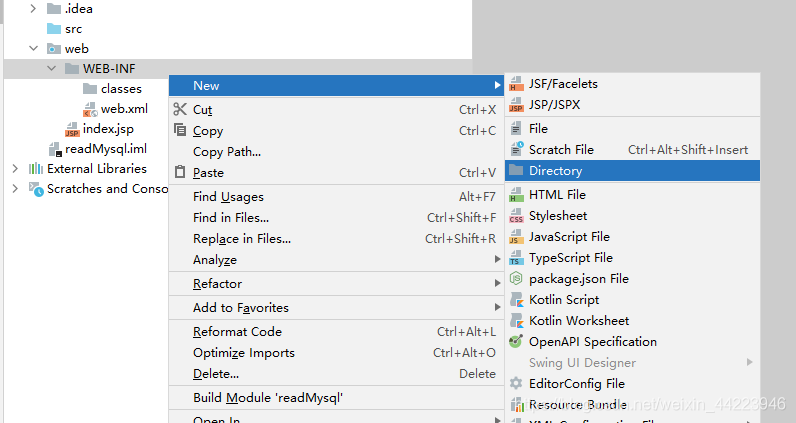
在工程项目的web目录下的WEB-INF下建立两个文件夹,一个是classes,用于保存程序运行时编译的文件。另一个是lib文件夹,用于存放程序运行时所要存放的外部类。
-
接下来配置项目结构以及tomcat。
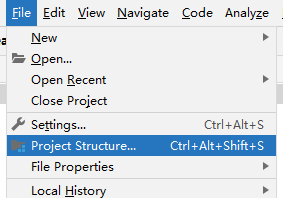
在file菜单中点击Project Structure…
out路径选择刚才的classes文件夹
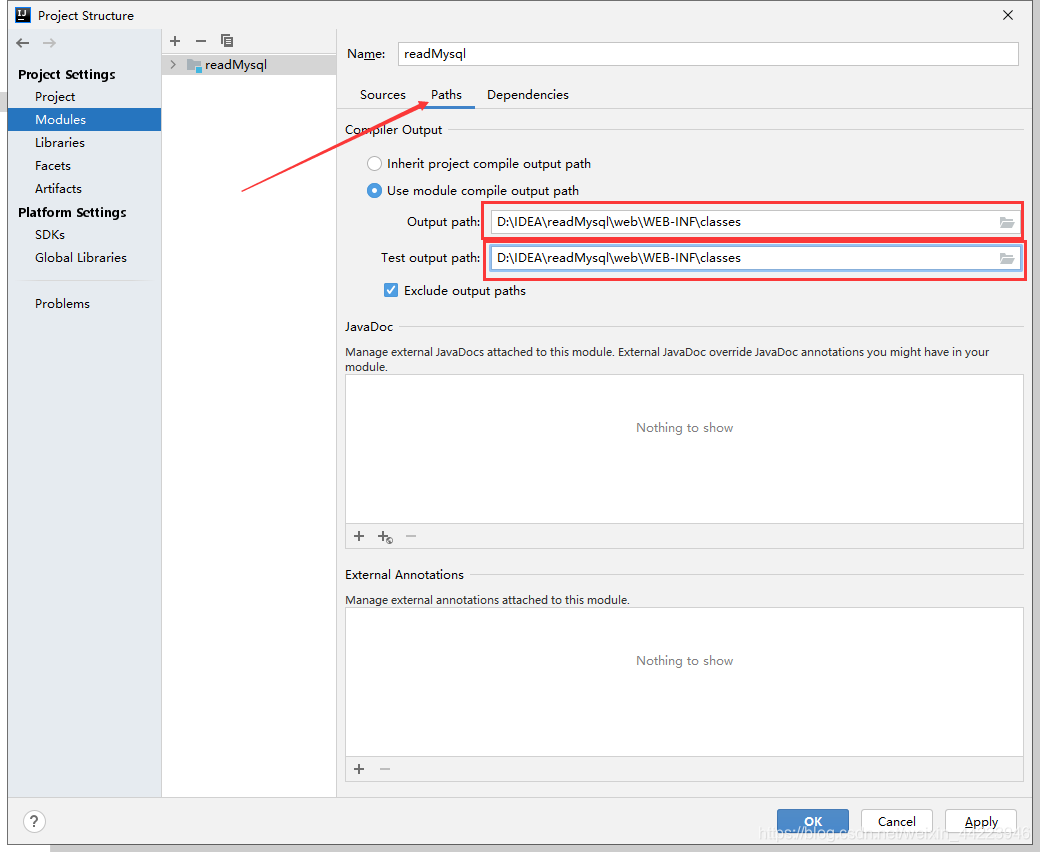
外部类的引用路径选择刚才建的lib文件夹。(选择完弹出的的选择框选择Jar directory)
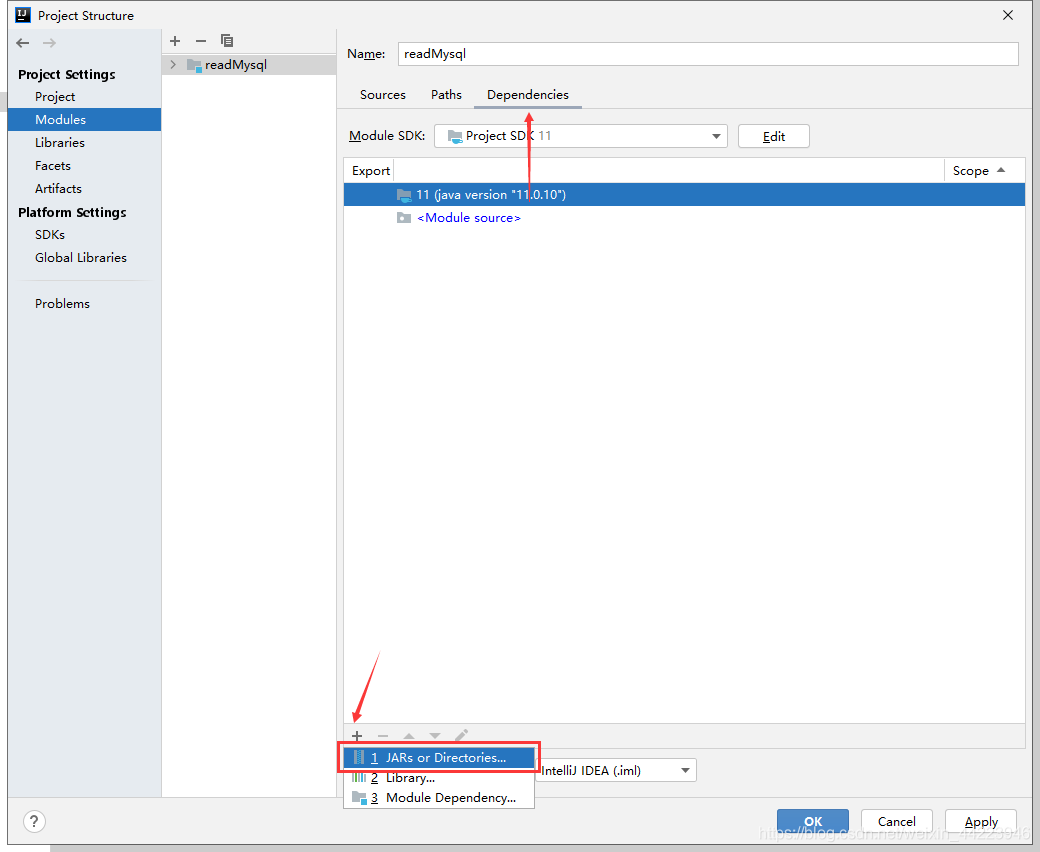
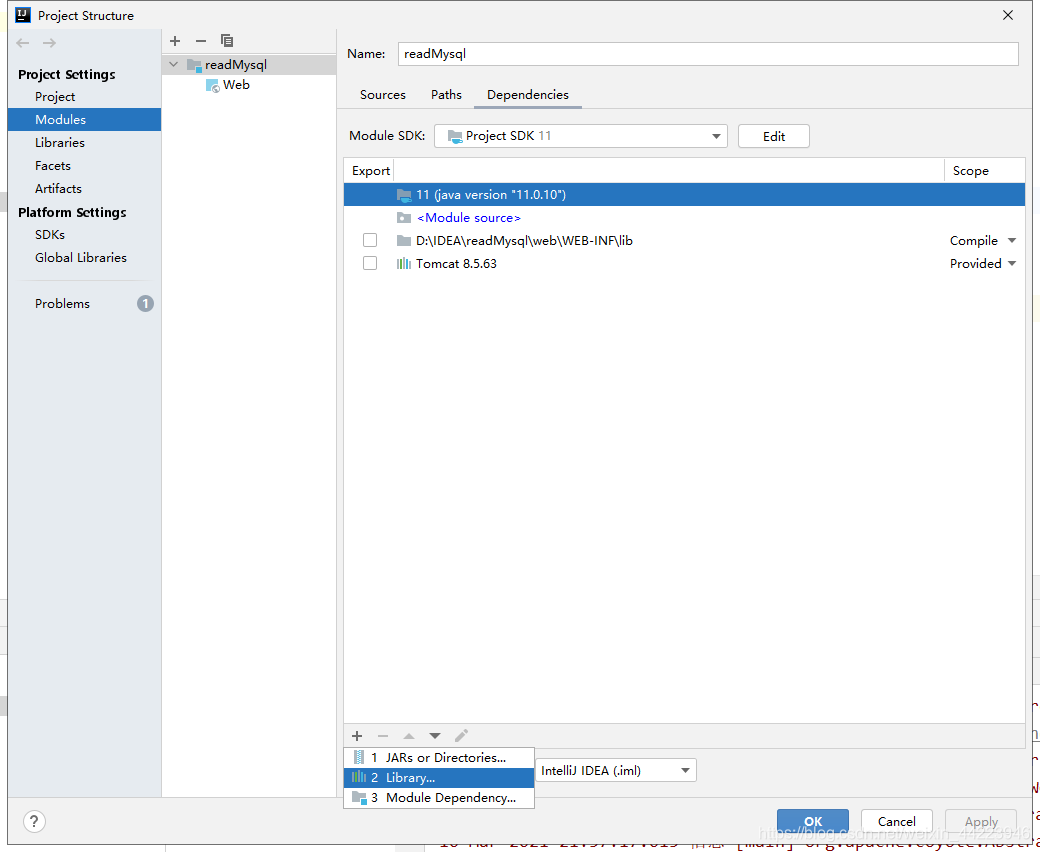
Library中选中Tomcat实验需要用到
-
将下载的jdbc驱动包放到刚才建的lib文件夹下。
-
在src文件夹下建立自己的包和类。(和java se一样)
-
在src文件夹下建立File文件 命名为DBConfig.properties,文件中的信息如图。(这不是必要的。你也可以将文件中的信息放在类中。但这样做的好处就在于你即使更改了数据库,只要修改配置文件中的信息就可以了,而不必再改动类。)
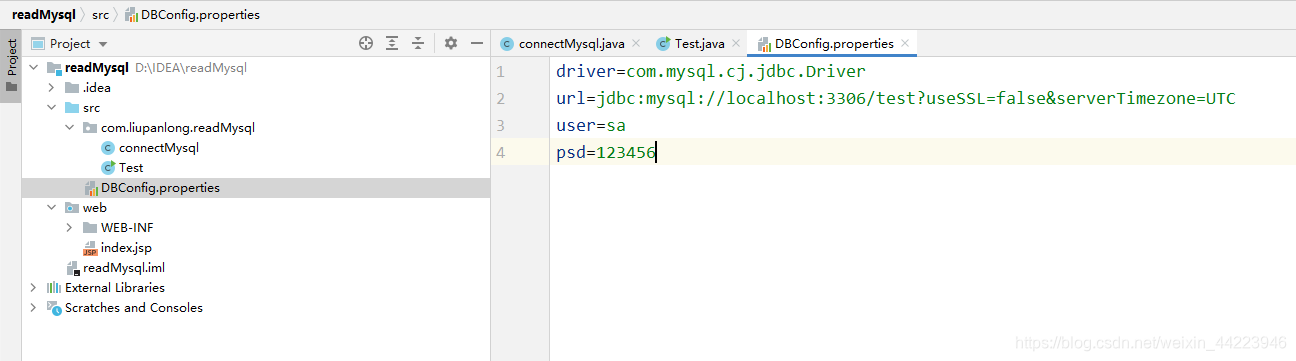
driver=com.mysql.cj.jdbc.Driver
url=jdbc:mysql://localhost:3306/test?useSSL=false&serverTimezone=UTC
user=sa
psd=123456
//旧版本的连接
//driver=com.mysql.jdbc.Driver
//url=jdbc:mysql//localhost:3306/test
//user=sa
//psd=123456
- 编辑获取数据库连接函数
package com.liupanlong.readMysql;

import java.io.IOException;
import java.sql.Connection;
import java.sql.DriverManager;
import java.sql.SQLException;
import java.util.Properties;

public class connectMysql {


    public Connection getConnection(){


        String driver = null;
        String url = null;
        String user = null;
        String psd = null;
        Connection conn = null;

        Properties pro = new Properties();    //新建一个properties实例,用于从DBConfig中拿到连接参数。
        try {


            pro.load(this.getClass().getClassLoader().getResourceAsStream("DBConfig.properties")); //加载DBConfig文件。
            driver = pro.getProperty("driver");
            url = pro.getProperty("url");
            user = pro.getProperty("user");
            psd = pro.getProperty("psd");
        } catch (IOException e) {


            e.printStackTrace();
        }

        try {


            Class.forName(driver);   //加载jdbc驱动
        } catch (ClassNotFoundException e) {


            e.printStackTrace();
        }

        try {


            conn = DriverManager.getConnection(url,user,psd);  //获取数据库连接
            conn.setAutoCommit(false);
            return conn;       //返回一个数据库连接。
        } catch (SQLException e) {


            e.printStackTrace();
        }

        return null;
    }
}
- 创建测试类,测试能否拿到连接。
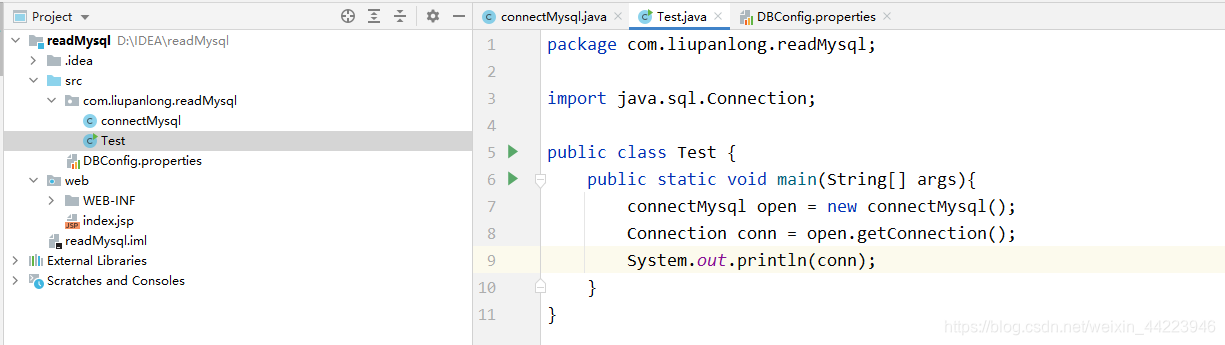
package com.liupanlong.readMysql;

import java.sql.Connection;

public class Test {


    public static void main(String[] args){


        connectMysql open = new connectMysql();
        Connection conn = open.getConnection();
        System.out.println(conn);
    }
}
在空白处右击运行。

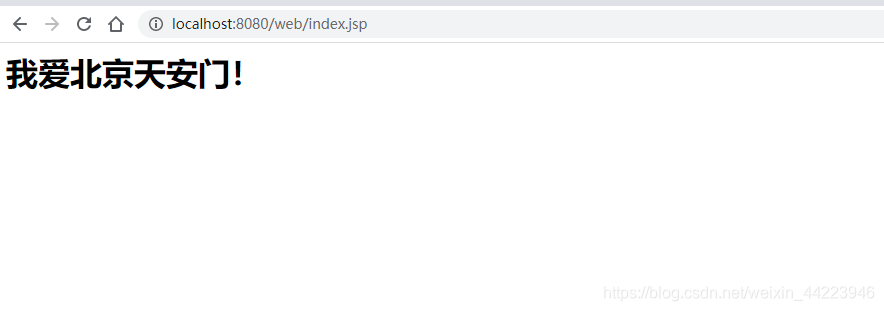
11. 在web文件夹下创建index.jsp文件 ,在标签中添加<h1>我爱北京天安门!<h1>代码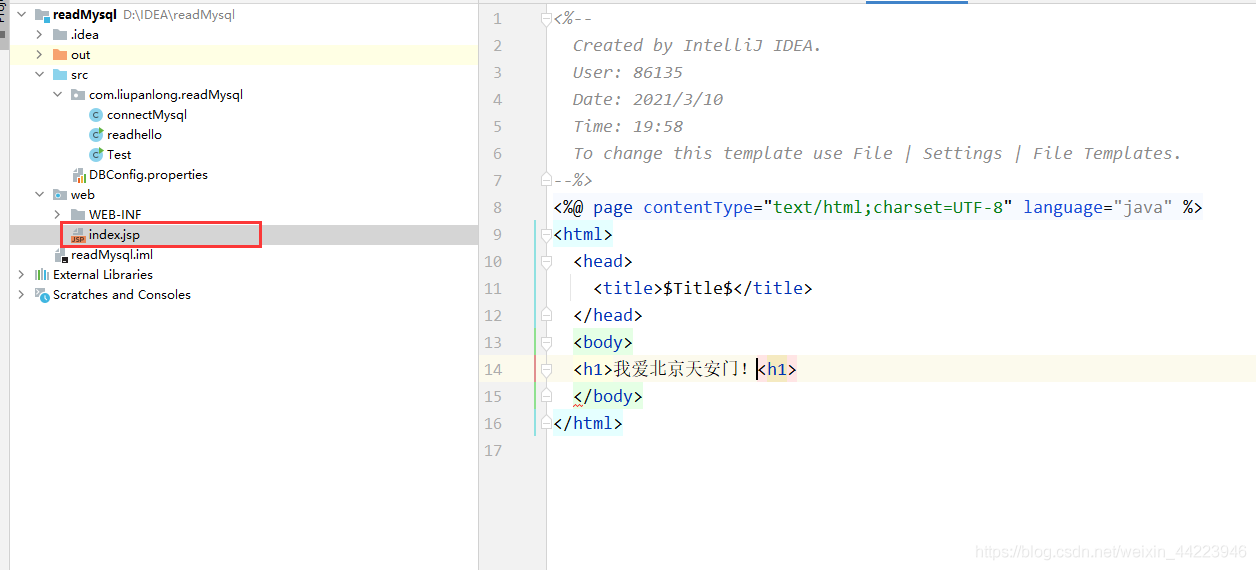
12. 然后选中上面配置好的run点击三角运行 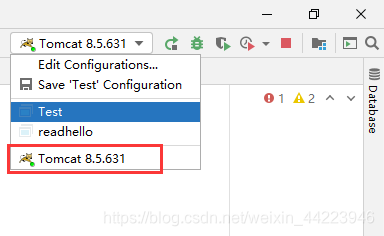
13. 在浏览其中登录http://localhost:8080/web/index.jsp可以看到我爱北京天安门即可
开始实验
完成上面步骤,恭喜你环境终于搭建好了,可以开始实验了。
如果有追求,你可以实现一下最简单的前后端分离(我认为可行但是我也没学会,你做出来可以私信或评论区留言)
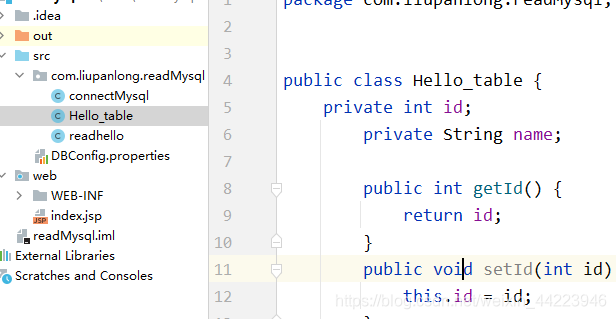
- 在包中添加一个类 Hello_table
package com.liupanlong.readMysql;


public class Hello_table {


    private int id;
        private String name;

        public int getId() {


            return id;
        }
        public void setId(int id) {


            this.id = id;
        }
        public String getName() {


            return name;
        }
        public void setName(String name) {


            this.name = name;
        }
        public Hello_table(int id, String name) {


            this.id = id;
            this.name = name;
        }
}
2. 将readhello的代码修改一下
package com.liupanlong.readMysql;

import java.sql.Connection;
import java.sql.ResultSet;
import java.sql.SQLException;
import java.sql.Statement;
import java.util.ArrayList;
import java.util.List;

public class readhello {


    public List readFirstHello() throws SQLException {


        List<Hello_table> list =new ArrayList<Hello_table>();
        connectMysql open = new connectMysql();
        Connection con = open.getConnection();      //连接类
        //然后创建statement类对象,用来执行SQL语句
        Statement statement=con.createStatement();          //Statement实现增删改查
        //你要执行的Sql语句
        String sql="select id,name from hello";
        //最后设置Resultset类,用来存放获取的 结果集
        ResultSet rs=statement.executeQuery(sql);           //结果集

        int Id=0;
        String name=null;
        while(rs.next()) {


            Id = rs.getInt("id");
            name=rs.getString("name");
            Hello_table tl=new Hello_table(Id, name);
            list.add(tl);
        }

        //最后关闭
        rs.close();
        con.close();
        return list;
    }
}
- 将下面的代码复制到index.jsp中执行就可以了。
<%--
  Created by IntelliJ IDEA.
  User: 86135
  Date: 2021/3/10
  Time: 19:58
  To change this template use File | Settings | File Templates.
--%>

<%@ page language="java" contentType="text/html; charset=UTF-8"
         pageEncoding="UTF-8"%>
<%@ page import="com.liupanlong.readMysql.Hello_table" %>
<%@ page import="com.liupanlong.readMysql.readhello" %>
<%@ page import="java.util.List" %>
<%
  String path = request.getContextPath();
  String basePath = request.getScheme()+"://"+request.getServerName()+":"+request.getServerPort()+path+"/";
%>

<html>
<head>
  <title>查询hello表格</title>
</head>

<body>
<style>
  body,table {text-align: center;} table {margin: auto;}
</style>
<table border="1">
  <tr>
    <td width="100">id</td>
    <td width="100">name</td>
  </tr>
  <%
    readhello dao=new readhello();
    List<Hello_table> list = dao.readFirstHello();
    for(Hello_table tl:list)
    {%>
  <tr>
    <td width="100"><%=tl.getId() %></td>
    <td width="100"><%=tl.getName() %></td>
  </tr>
  <%}
  %>
</table>
</body>
</html>
使用Tomcat运行,打开浏览器localhost:8080/web/index.jsp最后就是这样了。
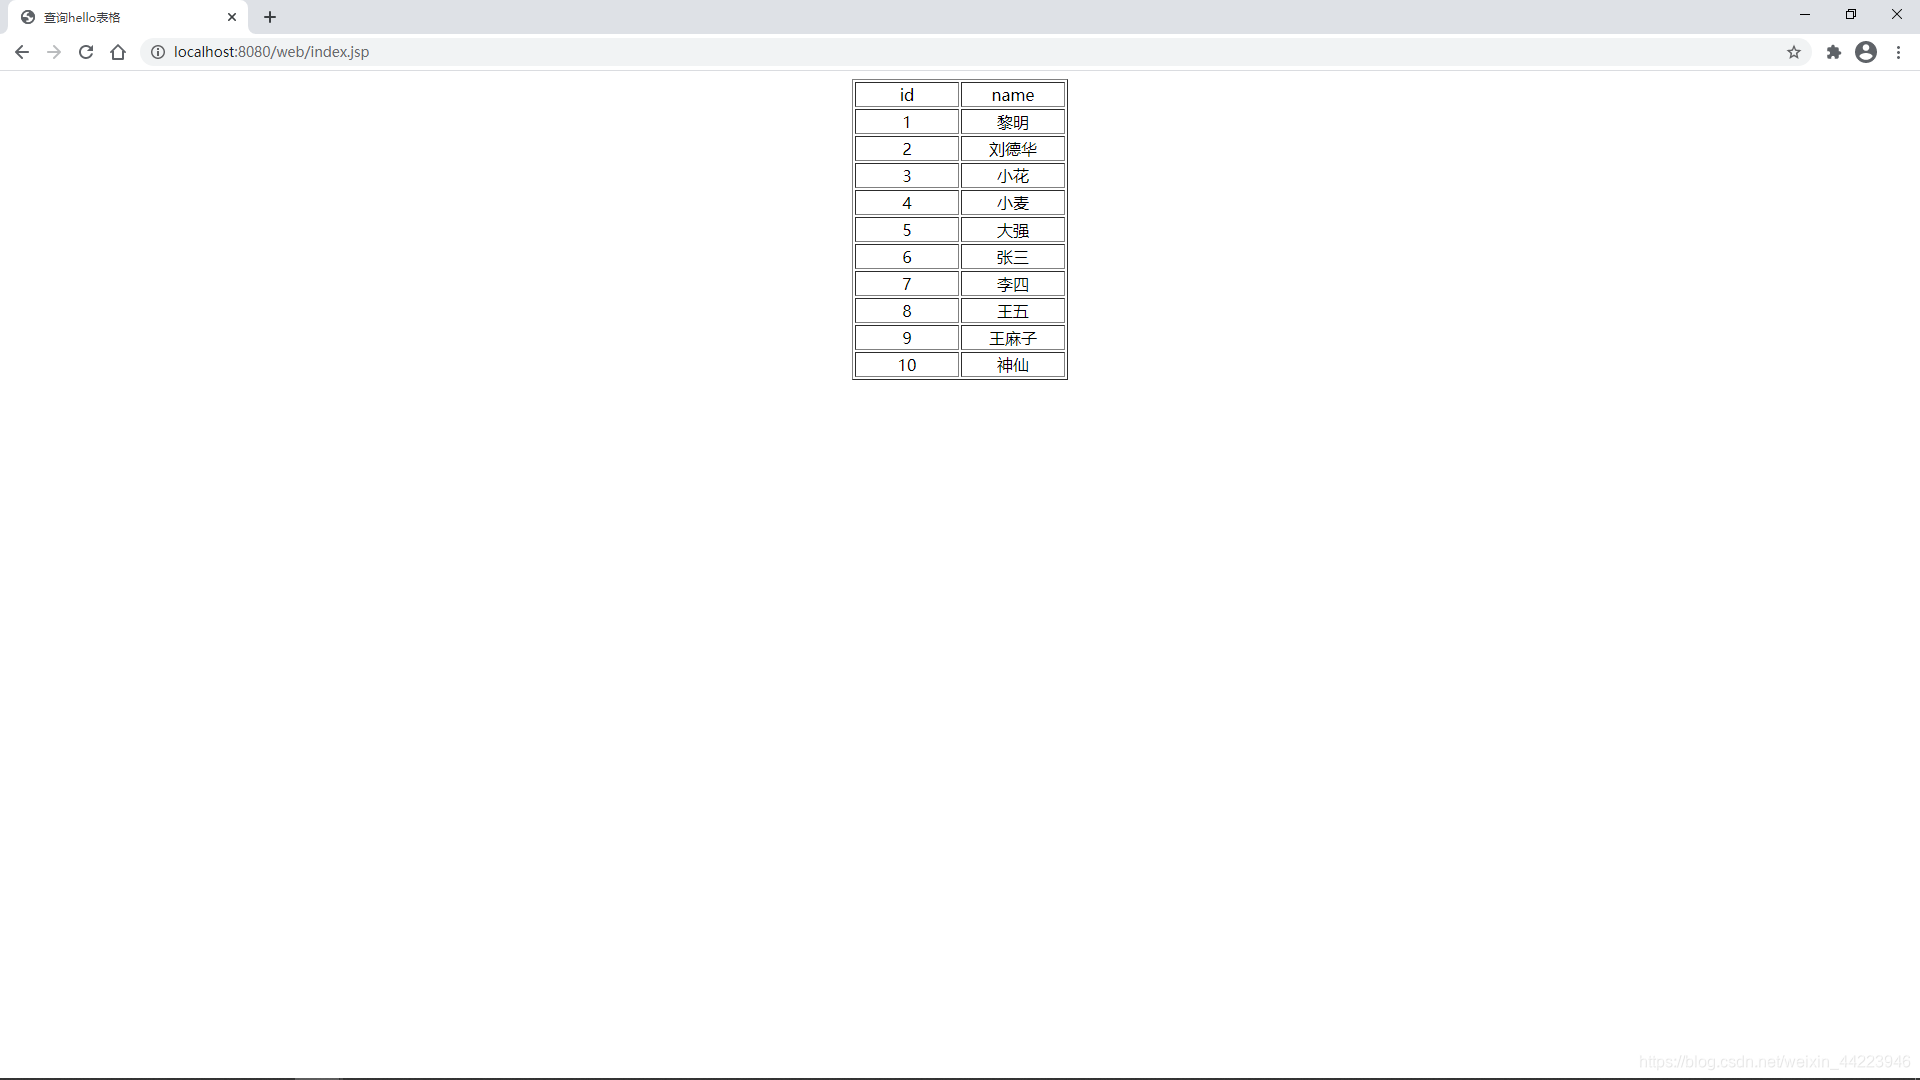
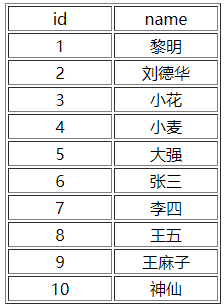
在mysql表中是这样的
四、实验总结
遇到问题:
1. IDEA中没有Java Enterprise 选项不能创建java web项目。
据说这是IDEA新版导致的,先创建一个普通的java项目,然后升级为web项目即可。(这里我创建的名称为readMysql)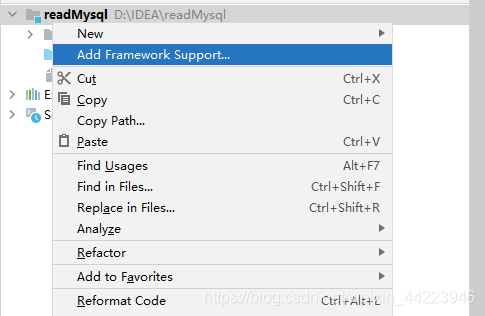
右键点击添加框架支持
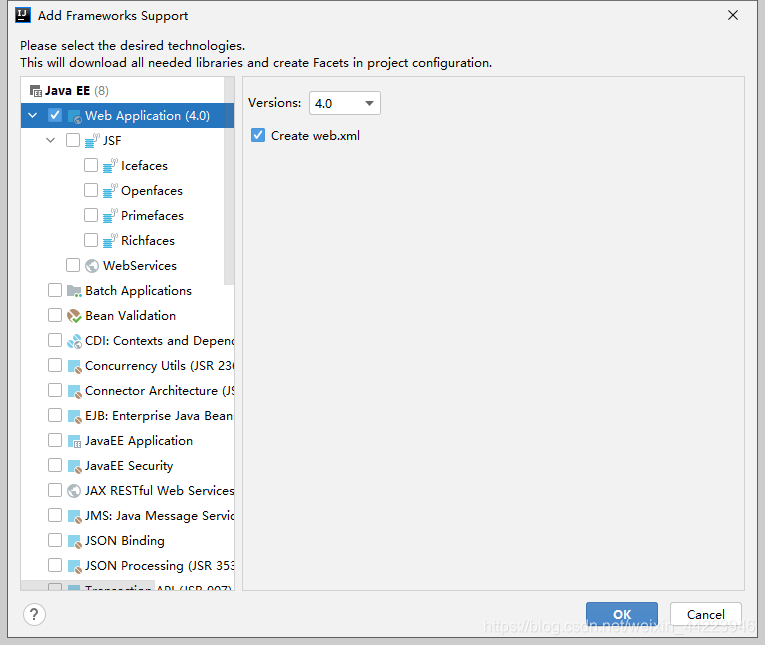
然后就有了,如图点击OK即可。
2. Tomcat乱码
在conf文件夹下,找到logging.properties文件,打开。使用Ctrl + F键找到“ConsoleHandler.encoding”
将
java.util.logging.ConsoleHandler.encoding = UTF-8
中的UTF-8改为GBK 编码
java.util.logging.ConsoleHandler.encoding = GBK

然后重启 tomcat