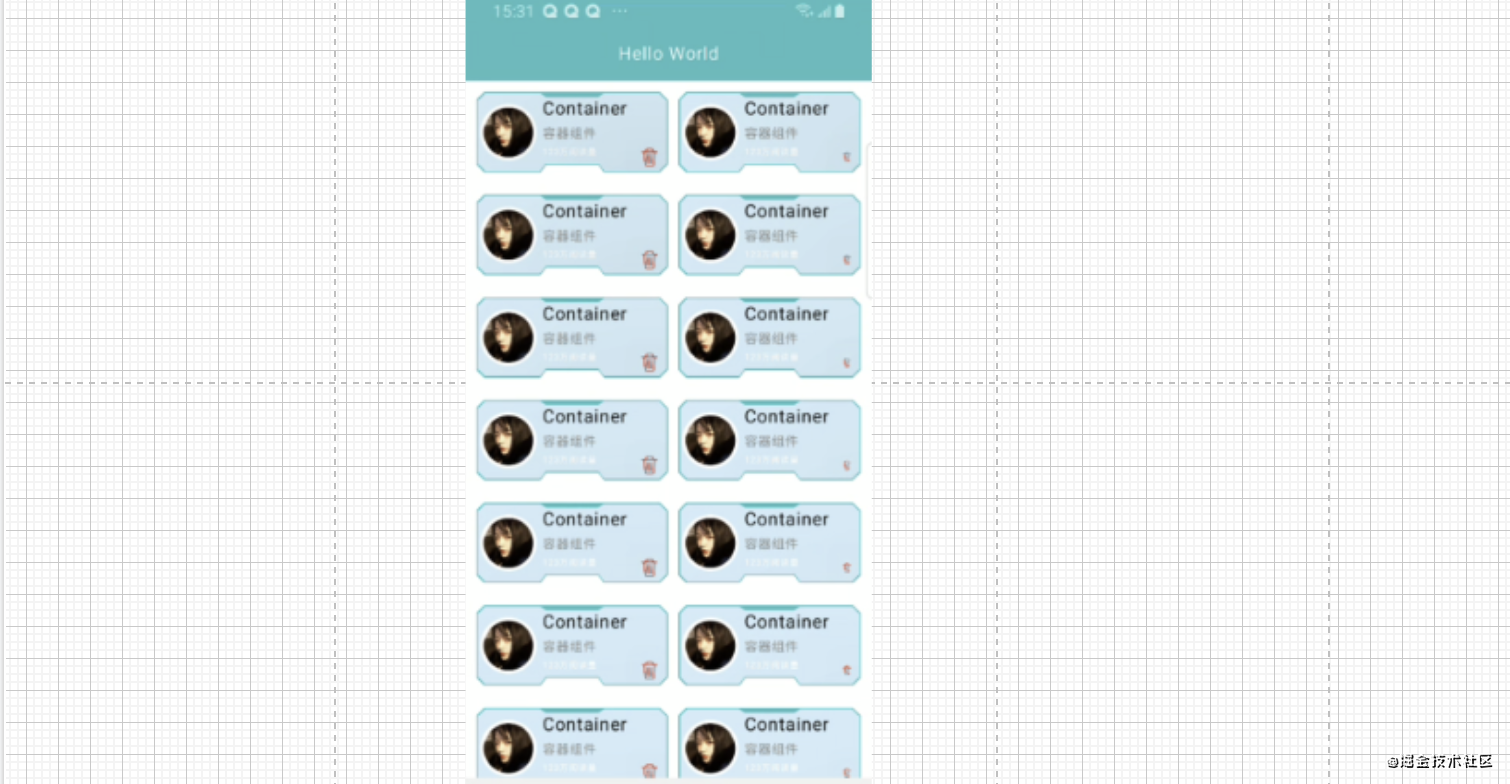
- 上节课我们简单的利用了一下
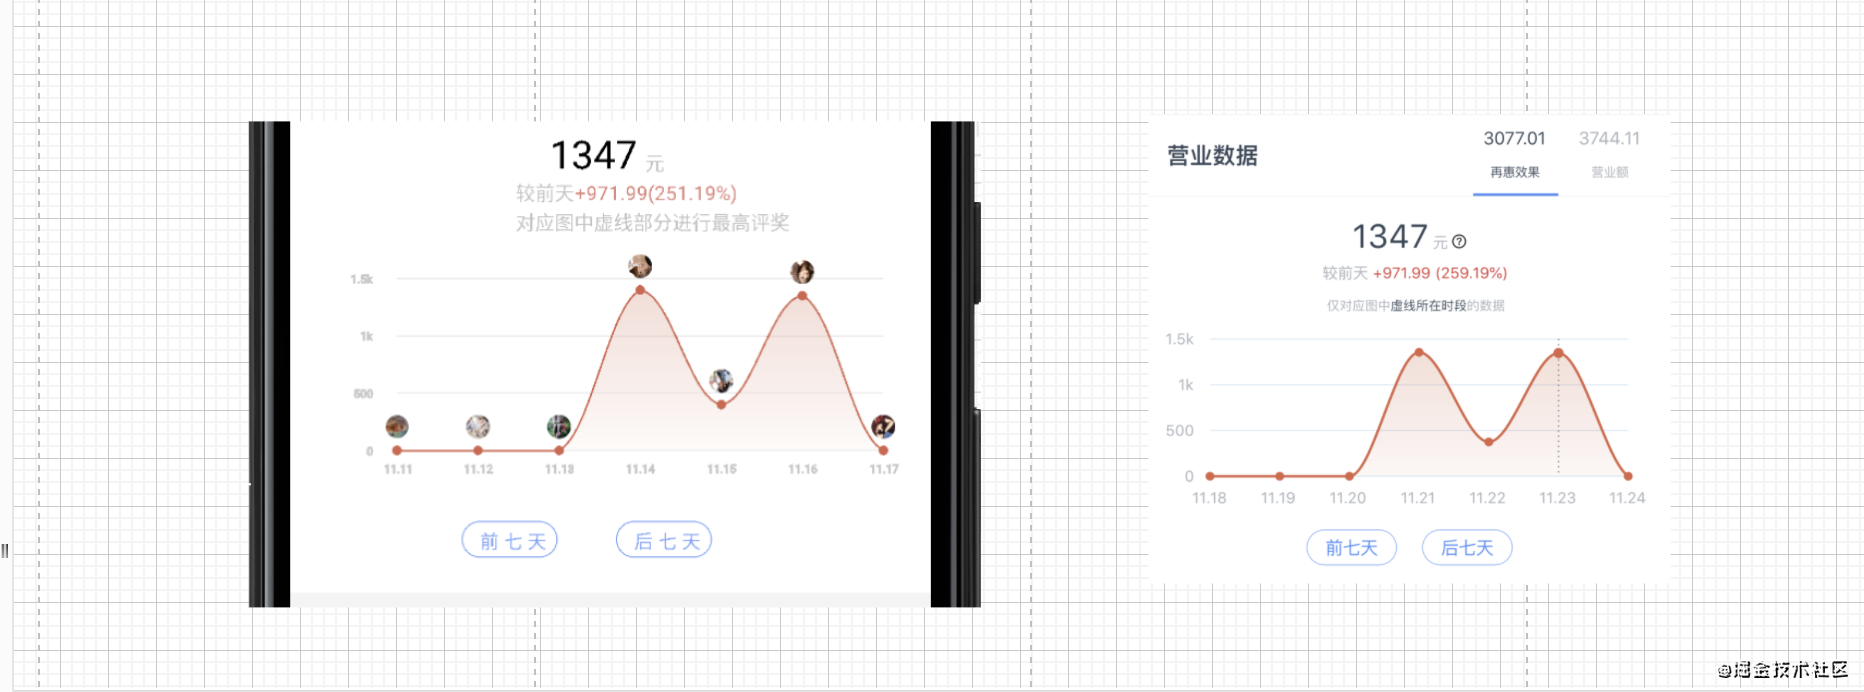
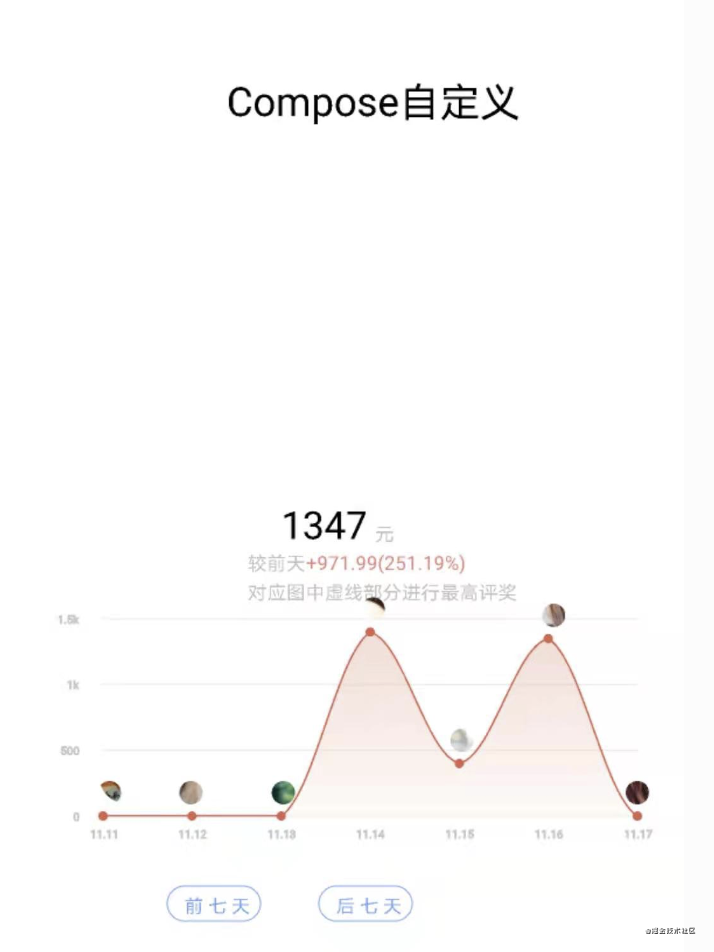
自定义裁剪和自定义就能玩出如下简单案例,效果不错。这节课咋们来看看Compose自定义绘制能不能花里胡哨。

一、Compose自定义
- 自定义,一个应用的可创造性往往离不开人们的千奇百怪想象和用户变化万千的需求。自定义就是提供了移动端的可创造性。如果Compose没有了自定义那就没有了创造性。自定义不熟悉的看我之前的博客。
1.Android自定义-曲线渐变填充
2.Android自定义-手势缩放折线图
3.Android自定义-手势滑动缩放渐变填充曲线折线图表
4.艺术在于绘制
5.绘制相关API…


二、绘制开始
- 在原生中写过的内容,曲线和的渐变填充其实很简单了,简单的数学加减乘除计算加个塞贝尔曲线而已。接下来咋们看看Compose中如何搞定它。
1.Compose中绘制组件
Compose中Canvas作为绘制组件。基本的结构如下,上节课也讲过:
 Canvas(
        modifier = Modifier
            .fillMaxWidth()
            .fillMaxHeight(),
    ) {
    drawIntoCanvas { canvas ->
       //内部提供size来获取自身宽高
    }
2.摆正坐标系
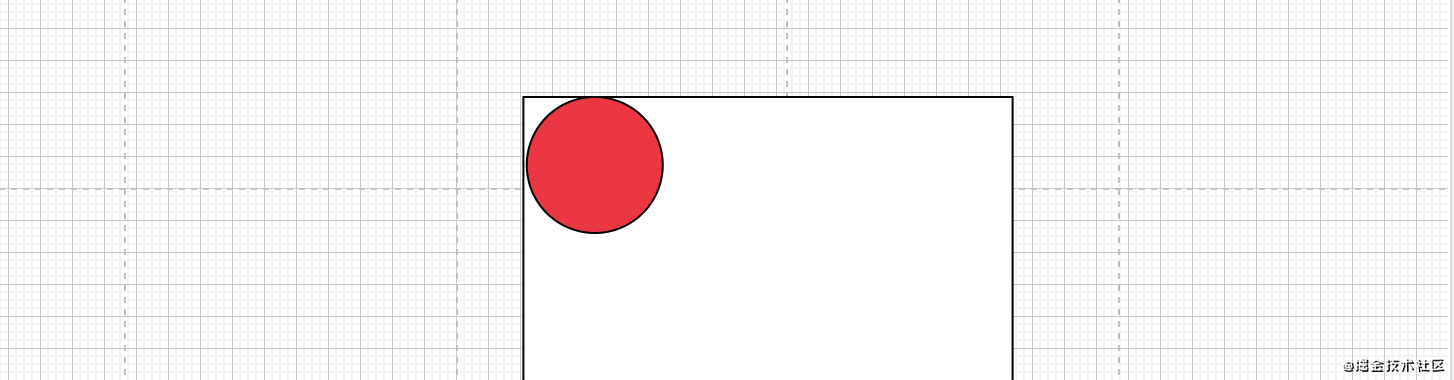
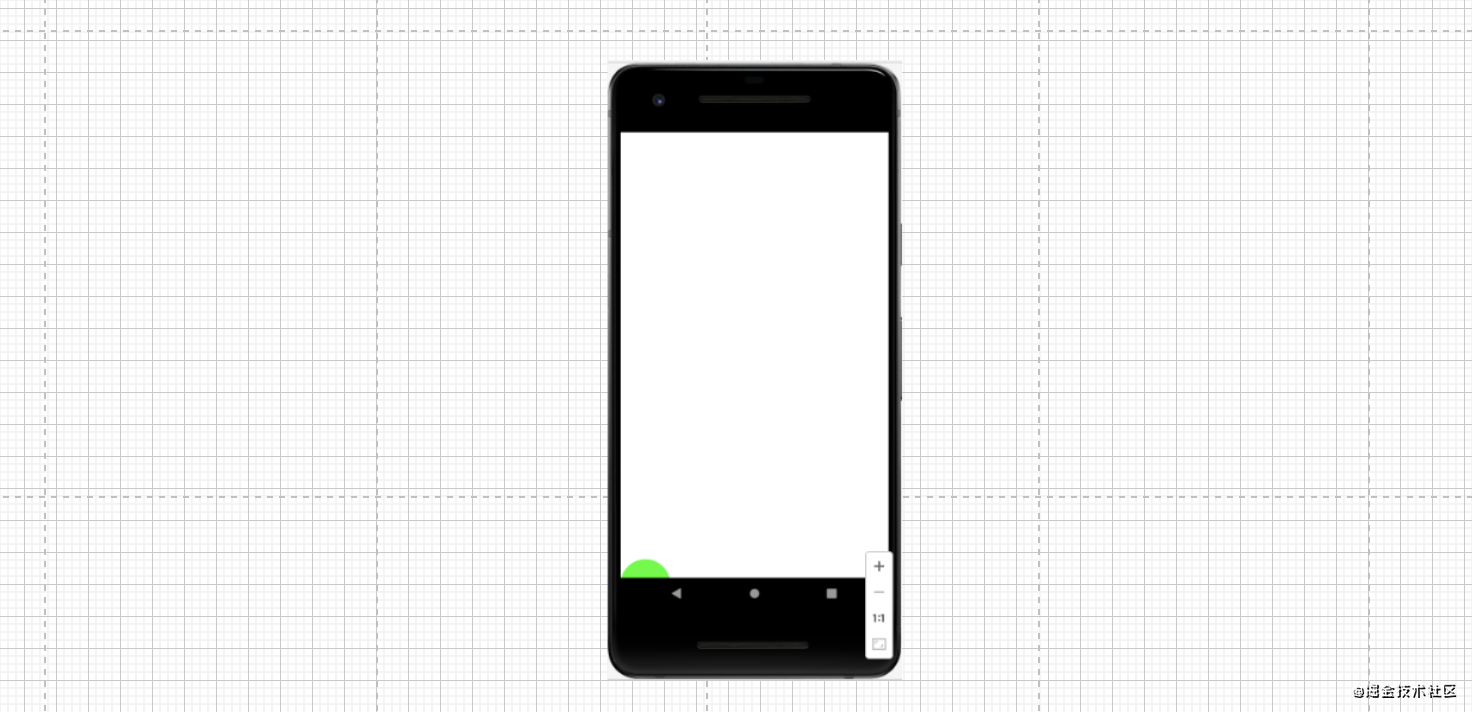
- 默认的坐标系Android,Flutter,SwiftUI都在左上角咋们试一试Compose坐标系。我们在(100,100)处绘制一个半径为100的红色圆圈,如果出现在屏幕的左上方和下面一致就说明一致。
 Canvas(
        modifier = Modifier
            .fillMaxWidth()
            .fillMaxHeight(),
    ) {


        drawIntoCanvas {

     canvas ->
          //
          val paint=Paint()
          paint.style=PaintingStyle.Fill
          paint.color=Color.Green
          canvas.drawCircle(Offset(100f,100f),100f,paint)

        }

    }
效果如下ok坐标系一致,我们绘制开始。

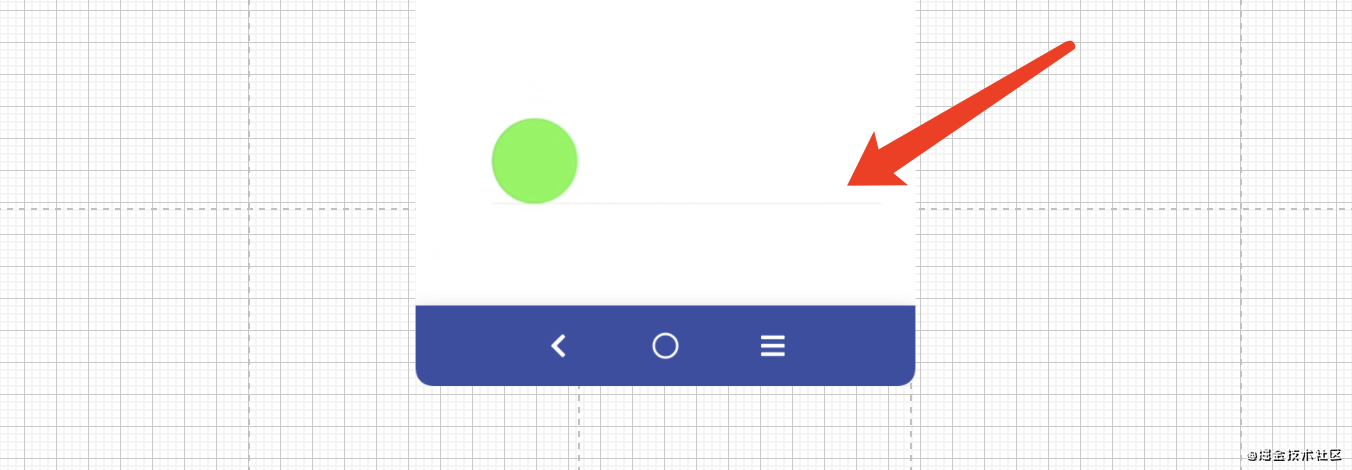
- 首先摆正坐标系位置目前位置是前面的变为后面的。
canvas.scale(1f,-1f)+canvas.translate(0f,-height)或者canvas.translate(0f,-height)+canvas.scale(1f,-1f)搞定。不懂的看我自定义的博客

下面代码如果正确那么圆圈应该在左下角
Canvas(
        modifier = Modifier
            .fillMaxWidth()
            .fillMaxHeight(),
    ) {


        drawIntoCanvas {

     canvas ->
            //
            val paint = Paint()
            paint.style = PaintingStyle.Fill
            paint.color = Color.Green
            //变坐标轴
            canvas.translate(1f, -1f)
            canvas.drawCircle(Offset(100f, 100f), 100f, paint)

        }

    }
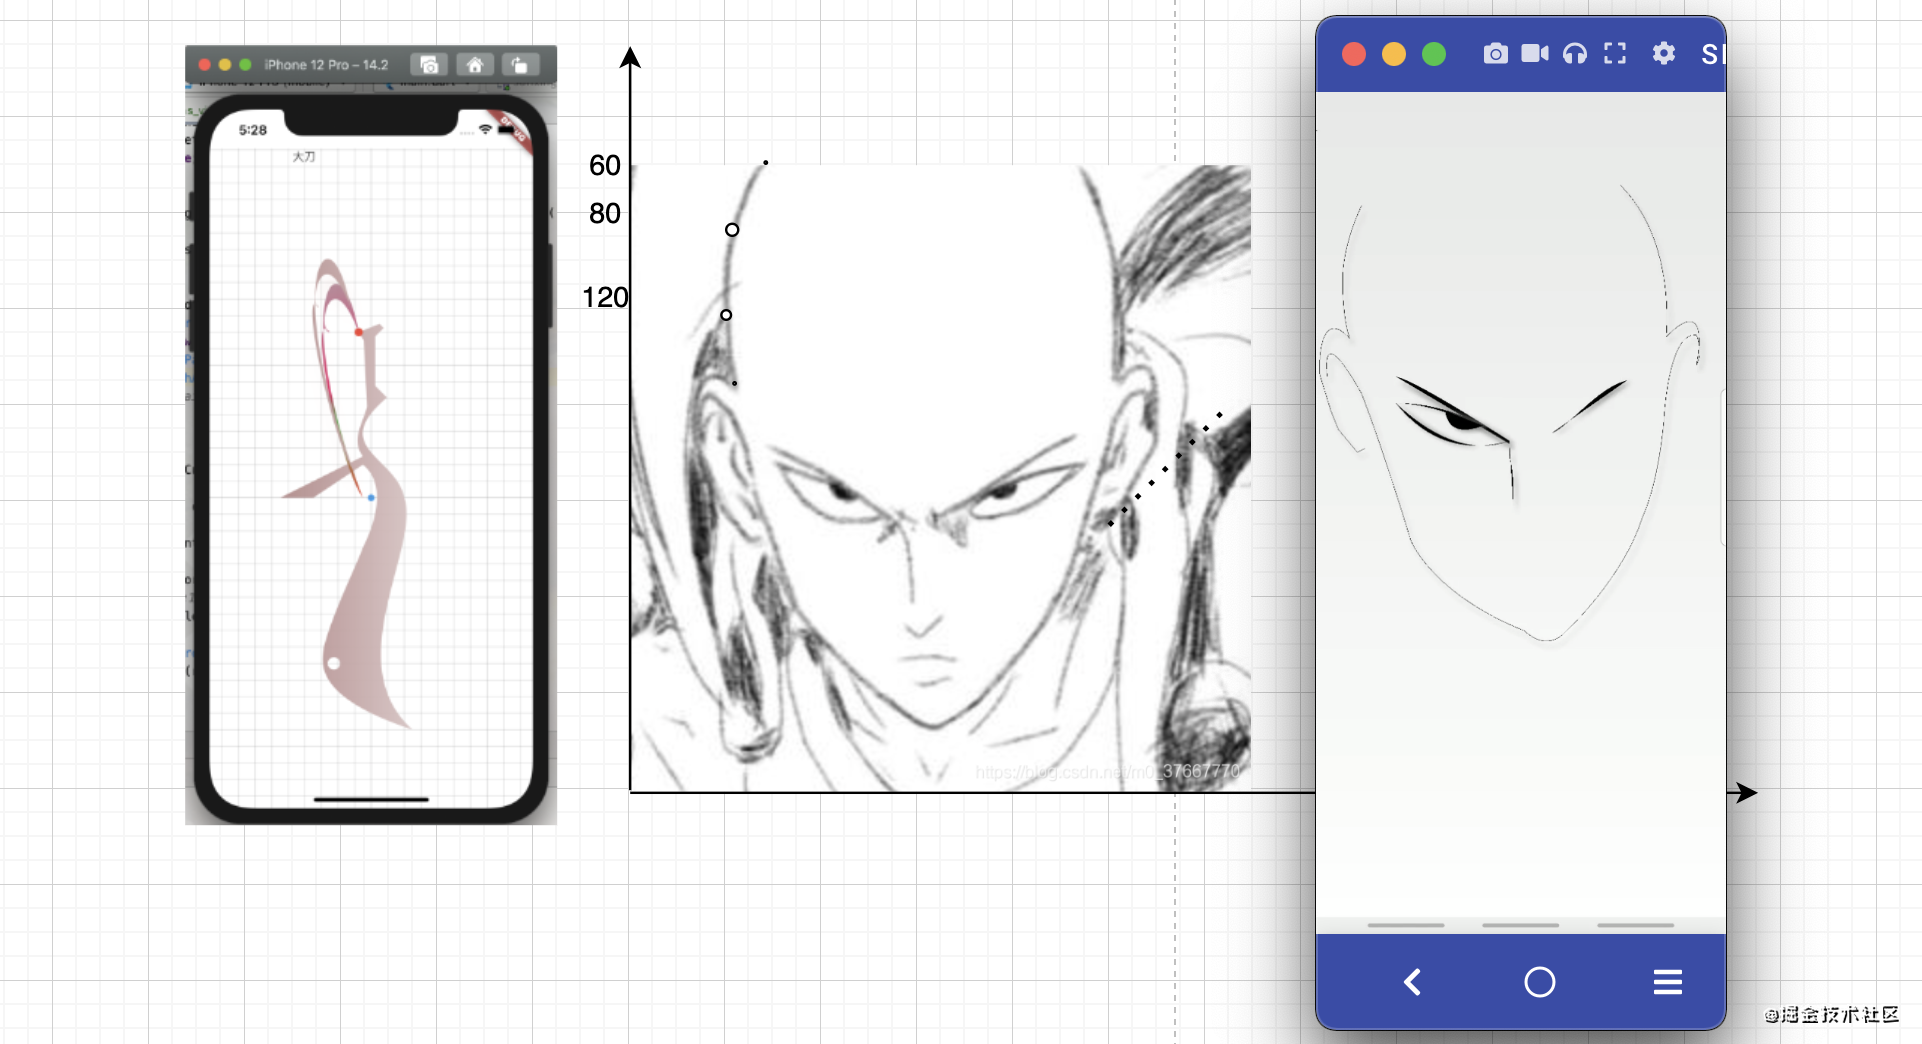
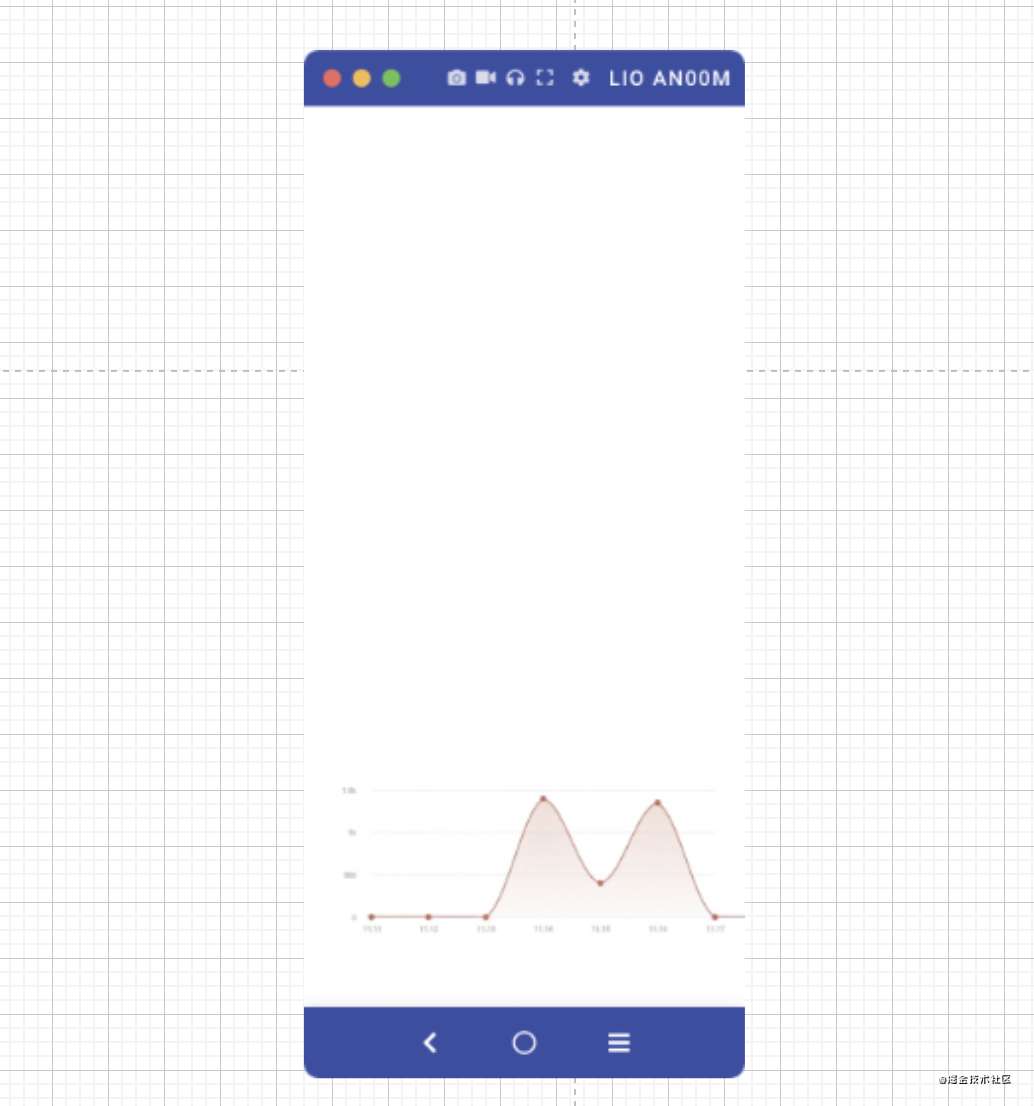
看完效果是不是略显尴尬,刚看到其实我是怀疑模拟器有问题…我们来看真机器华为mate30 pro。完全正确有没有。所以坑挺多的,一不小心就怀疑人生了。

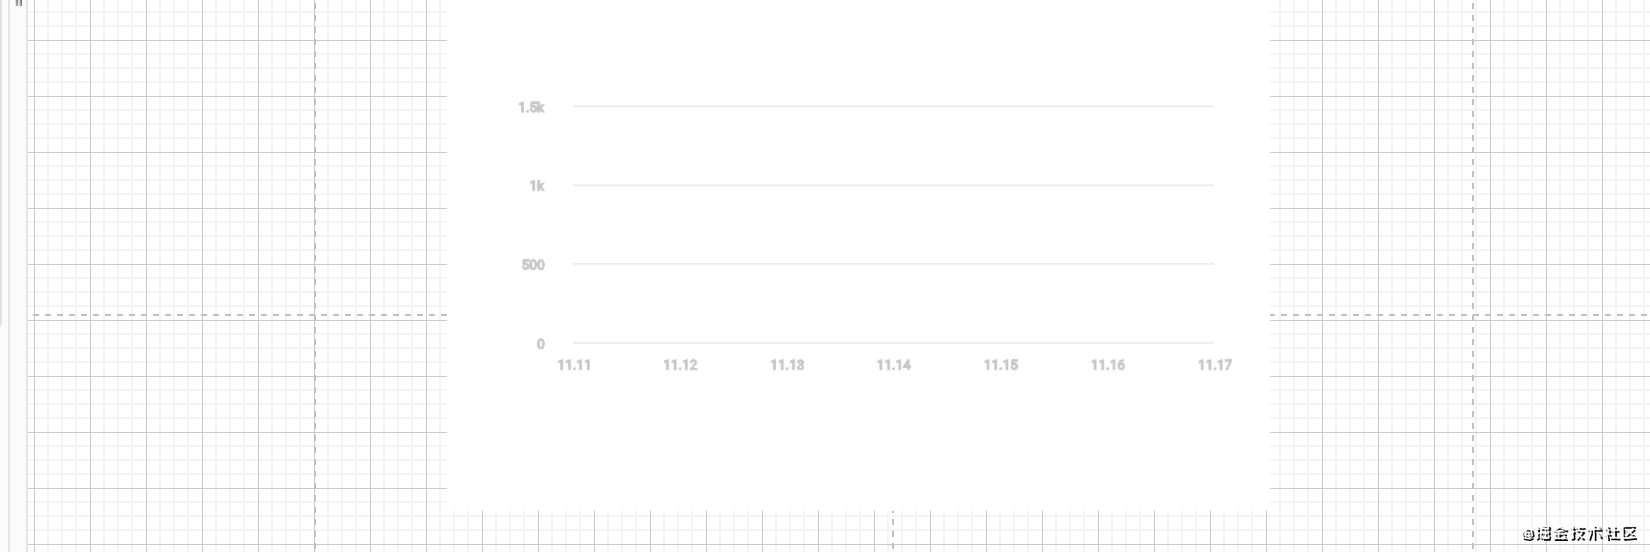
3、绘制平行X轴的横线

- 首先看原图左右两边都有空格,且坐标系为了方便可以底部和左边留有余地。
@Preview(name = "canvas")
@Composable
fun MyCureView(mainActions: MainActions) {


    //距离左边屏幕距离
    val marginToLeft = 180f
    //距离屏幕下边距离
    val marginToBootom = 240f


    Canvas(
        modifier = Modifier
            .fillMaxWidth()
            .fillMaxHeight(),
    ) {


        drawIntoCanvas {

     canvas ->
            val paint = Paint()
            paint.style = PaintingStyle.Fill
            paint.color = Color.Green
            canvas.translate(0f,size.height)
            canvas.scale(1f, -1f)

            canvas.translate(marginToLeft,marginToBootom)
            canvas.drawCircle(Offset(100f, 100f), 100f, paint)

        }

    }

}

后面如果不够再做调整。我们来绘制一条横线。
 //2.平行x轴线
            val line_paint = Paint()
            line_paint.strokeWidth = 2f
            line_paint.style = PaintingStyle.Stroke
            line_paint.color = Color( 188, 188, 188,100)
            //x轴距离右边也留80距离
            x_scaleWidth = (size.width - marginToLeft - 80f)
            val onePath=Path()
            onePath.lineTo(x_scaleWidth,0f)
            canvas.drawPath(onePath,line_paint)
我们看到总共四条线循环遍历了。
private fun DrawScope.drawXLine(
    x_scaleWidth: Float,
    marginToLeft: Float,
    grid_width: Float,
    canvas: androidx.compose.ui.graphics.Canvas
) {


    var x_scaleWidth1 = x_scaleWidth
    var grid_width1 = grid_width
    val line_paint = Paint()
    line_paint.strokeWidth = 2f
    line_paint.style = PaintingStyle.Stroke
    line_paint.color = Color(188, 188, 188, 100)
    //x轴距离右边也留80距离
    x_scaleWidth1 = (size.width - marginToLeft - 80f)
    grid_width1 = x_scaleWidth1 / 6

    val onePath = Path()
    onePath.lineTo(x_scaleWidth1, 0f)
    canvas.drawPath(onePath, line_paint)

    canvas.save()
    //通过平移画布绘制剩余的平行x轴线
    (0 until 3).forEach {

     index ->
        canvas.translate(0f, grid_width1 - 40f)
        canvas.drawPath(onePath, line_paint)
    }
    canvas.restore()
}
当然了手机看着很清晰,图片模糊体谅一下太大了不好处理。

4、绘制文字
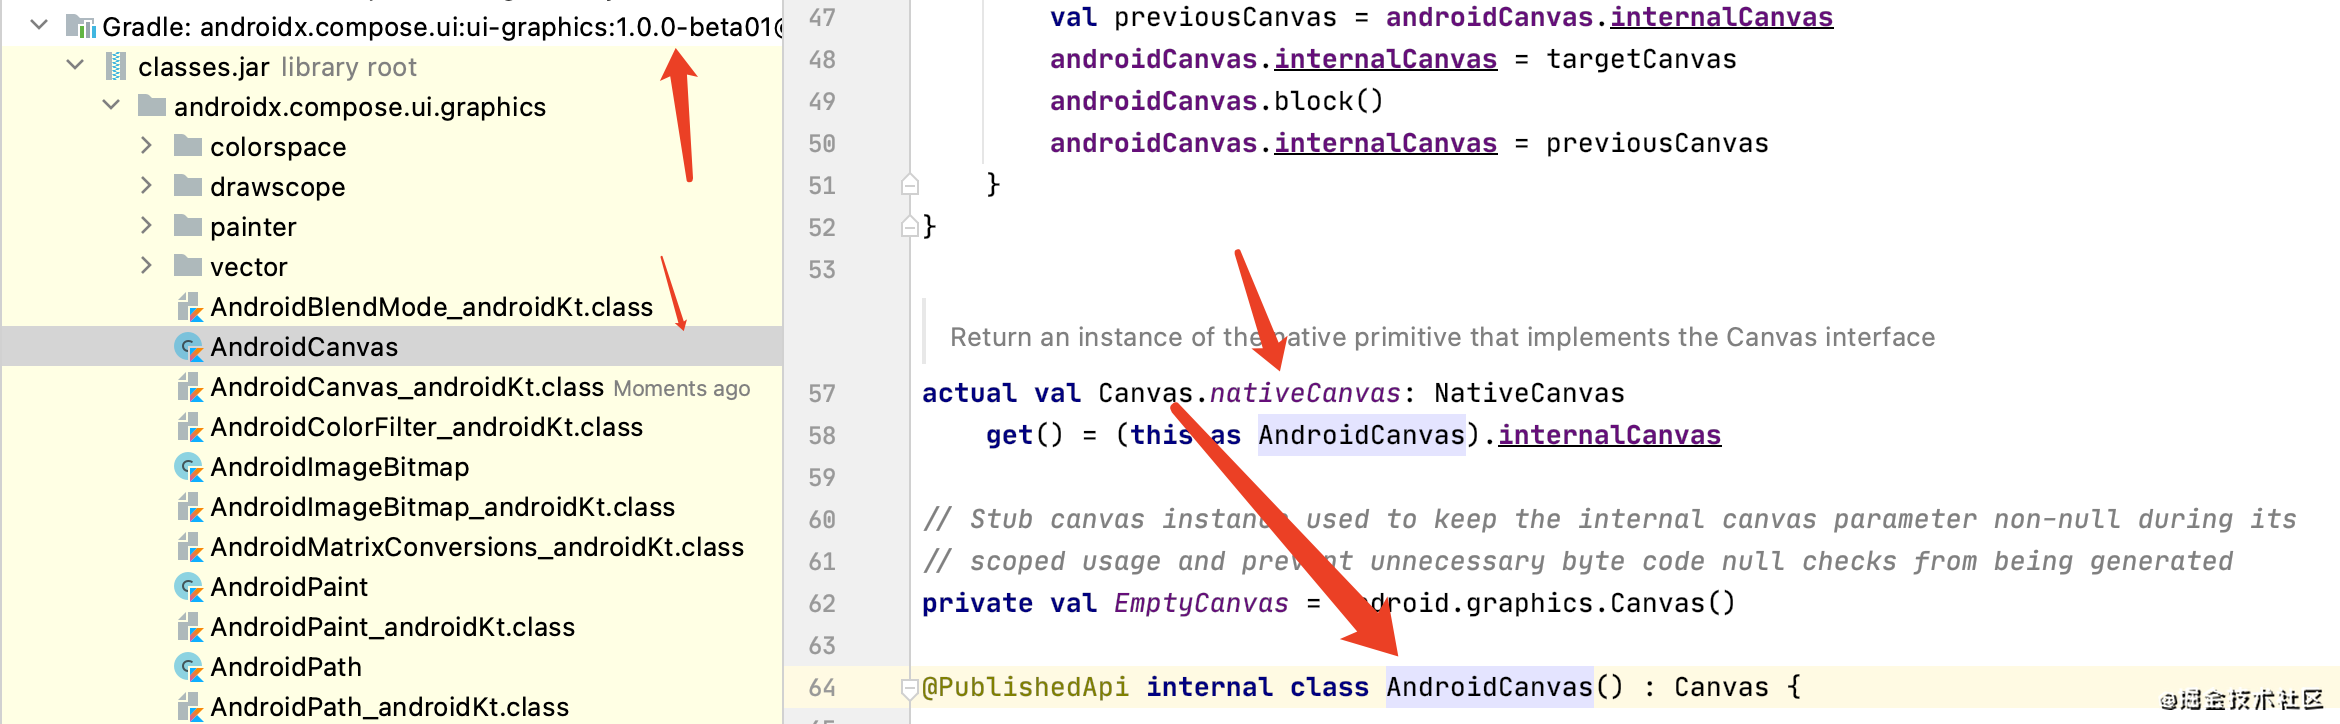
- 绘制文字让我费尽了脑汁。首先是在
import androidx.compose.ui.graphics.*一类库下面找了好久好久。由于太天真放弃了一个类一个类的寻找。40多个类让我一个个看么,最后放弃这个法子,然后一顿操作在Google官网各种姿势各种无语呀。上一篇博客半夜有哥们回我万事有google搜索引擎,给我截图发在了评论区,好家伙今早一顿Google搜索有切只有一个Google专家写过一个案例。前无古人后无来者那种。就那一篇,我开心的像个孩子,拿起一顿CV,我特么的傻了,我编译器提示不能解析到nativeCanvas,接下来静下来分析了一波的却在import androidx.compose.ui.graphics.*找到了所在地如下截图。nativaCanvas就是graphics转为原生Canvas。但是我的项目为嘛引用不了呢?而且Google专家没有提供相关的项目。最后我询问了几个大佬未果,最终我怀疑到gradle版本头上,是不是这个常出问题的东西搞的。相信很多写Flutter又没接触过Android的伙伴们深受其害,苦不堪言。将Gradle版本跟新到最新版本即可解决。
Gradle没问题版本gradle-7.0-milestone-2-bin.zip
⭐️⭐️⭐️⭐️⭐️⭐️⭐️⭐️⭐️⭐️⭐️⭐️⭐️⭐️
之前用的6.8版本出问题。
最新
distributionUrl=https\://services.gradle.org/distributions/gradle-7.0-milestone-2-bin.zip
⭐️⭐️⭐️⭐️⭐️⭐️⭐️⭐️⭐️⭐️⭐️⭐️⭐️⭐️
canvas.nativeCanvas来进行原生Canvas获取
接着绘制文字即可
1.文字绘制通过paint.getTextBundl不知道的看我之前的自定义文章。
2.x轴的长度和个数知道那么一个的宽度也就能知道x_scaleWidth / 6
3.
fun DrawScope.drawTextDownX(
    x_scaleWidth: Float,
    marginToLeft: Float,
    grid_width: Float,
    canvas: androidx.compose.ui.graphics.Canvas,
    paint: Paint
) {


    var x_scaleWidth1 = x_scaleWidth
    var grid_width1 = grid_width
    x_scaleWidth1 = (size.width - marginToLeft - 80f)
    grid_width1 = x_scaleWidth1 / 6
    val text_paint = android.graphics.Paint()
    text_paint.strokeWidth = 2f
    text_paint.style = android.graphics.Paint.Style.STROKE
    text_paint.color = android.graphics.Color.argb(100, 111, 111, 111)
    text_paint.textSize = 19f

    val rectText = Rect()
    canvas.save()
    //将文字旋转摆正,此时坐标系y向下是正
    canvas.scale(1f, -1f)
    (0 until 7).forEach {

     index ->
        if (index > 0) {


            Log.e("weima?", "MyCureView: " + grid_width1)
            canvas.nativeCanvas.translate(grid_width1, 0f)
        }
        val strTx = "11.${

      11 + index}"
        text_paint.getTextBounds(strTx, 0, strTx.length, rectText)
        canvas.nativeCanvas.drawText(
            strTx,
            -rectText.width().toFloat() / 2,
            rectText.height().toFloat() * 2.5f,
            text_paint
        )
    }
    canvas.restore()
}

同样的绘制Y轴左边的文字。
private fun DrawScope.drawTextOfYLeft(
    x_scaleWidth: Float,
    marginToLeft: Float,
    grid_width: Float,
    canvas: androidx.compose.ui.graphics.Canvas
) {


    var x_scaleWidth1 = x_scaleWidth
    var grid_width1 = grid_width
    val text_paint = android.graphics.Paint()
    text_paint.strokeWidth = 2f
    text_paint.style = android.graphics.Paint.Style.STROKE
    text_paint.color = android.graphics.Color.argb(100, 111, 111, 111)
    text_paint.textSize = 19f

    x_scaleWidth1 = (size.width - marginToLeft - 80f)
    grid_width1 = x_scaleWidth1 / 6

    val rectText = Rect()
    canvas.save()
    //将文字旋转摆正,此时坐标系y向下是正
    (0 until 4).forEach {

     index ->
        if (index > 0) {


            canvas.translate(0f, grid_width1 - 40f)
        }
        var strTx = ""
        if (index == 0) {


            strTx = "${

      index}"
        } else if (index == 1) {


            strTx = "${

      500}"
        } else if (index == 2) {


            strTx = "1k"
        } else {


            strTx = "1.5k"
        }

        canvas.save()
        canvas.scale(1f, -1f)
        text_paint.getTextBounds(strTx, 0, strTx.length, rectText)
        canvas.nativeCanvas.drawText(
            strTx,
            -rectText.width().toFloat() - 42f,
            rectText.height().toFloat() / 2,
            text_paint
        )
        canvas.restore()
    }
    canvas.restore()
}
5、绘制曲线

当 y 1 y_1 y1< y 2 y_2 y2如上图1.求出中点坐标x轴下部分控制点x+40px,上部分x-40px,y轴也可以调整来搞搞平滑度下部分控制点y-40x,上部分y+40。
1.获取中点的坐标( X 中 X_中 X中、 Y 中 Y_中 Y中)= (( x 1 x_1 x1+ x 2 x_2 x2)/2、( y 1 y_1 y1+ y 2 y_2 y2)/2)
2. x 1 x_1 x1到 X 中 X_中 X中之间的坐标=(( x 1 x_1 x1+ x 中 x_中 x中)/2、( y 1 y_1 y1+ y 中 y_中 y中)/2)
3. x 中 x_中 x中到 X 2 X_2 X2之间的坐标=(( x 中 x_中 x中+ x 2 x_2 x2)/2、( y 中 y_中 y中+ y 2 y_2 y2)/2)
当 y 1 y_1 y1> y 2 y_2 y2如上图2.求出中点坐标x轴上部分+40px,下部分x-40px,y轴也可以调整,y轴也可以调整来搞搞平滑度上部分控制点y+40x,下部分y-40。
1.获取中点的坐标( X 中 X_中 X中、 Y 中 Y_中 Y中)= (( x 1 x_1 x1+ x 2 x_2 x2)/2、( y 1 y_1 y1+ y 2 y_2 y2)/2)
2. x 1 x_1 x1到 X 中 X_中 X中之间的坐标=(( x 1 x_1 x1+ x 中 x_中 x中)/2、( y 1 y_1 y1+ y 中 y_中 y中)/2)
3. x 中 x_中 x中到 X 2 X_2 X2之间的坐标=(( x 中 x_中 x中+ x 2 x_2 x2)/2、( y 中 y_中 y中+ y 2 y_2 y2)/2)
private fun DrawScope.drawCubtoCircle(
    x_scaleWidth: Float,
    marginToLeft: Float,
    grid_width: Float,
    dataList: ArrayList<Int>,
    canvas: androidx.compose.ui.graphics.Canvas
) {


    var x_scaleWidth1 = x_scaleWidth
    var grid_width1 = grid_width
    x_scaleWidth1 = (size.width - marginToLeft - 80f)
    grid_width1 = x_scaleWidth1 / 6
    val text_paint = android.graphics.Paint()
    text_paint.strokeWidth = 2f
    text_paint.style = android.graphics.Paint.Style.FILL
    text_paint.color = android.graphics.Color.argb(100, 111, 111, 111)

    val caves_path = android.graphics.Path()
    //500=grid_width-40 每个单位的长度的=像素长度
    val danweiY = (grid_width1 - 40) / 500
    val danweiX = (grid_width1)
    val linearGradient = LinearGradient(
        0f, 1500 * danweiY,
        0f,
        0f,
        android.graphics.Color.argb(255, 229, 160, 144),
        android.graphics.Color.argb(255, 251, 244, 240),
        Shader.TileMode.CLAMP
    )
    text_paint.shader = linearGradient
    for (index in 0 until dataList.size - 1) {


        val xMoveDistance = 20
        val yMoveDistance = 40

        if (dataList[index] == dataList[index + 1]) {


            caves_path.lineTo(danweiX * (index + 1), 0f)
        } else if (dataList[index] < dataList[index + 1]) {

    //y1<y2情况
            val centerX = (grid_width1 * index + grid_width1 * (1 + index)) / 2
            val centerY =
                (dataList[index].toFloat() * danweiY + dataList[index + 1].toFloat() * danweiY) / 2
            val controX0 = (grid_width1 * index + centerX) / 2
            val controY0 = (dataList[index].toFloat() * danweiY + centerY) / 2
            val controX1 = (centerX + grid_width1 * (1 + index)) / 2
            val controY1 = (centerY + dataList[index + 1].toFloat() * danweiY) / 2
            caves_path.cubicTo(
                controX0 + xMoveDistance,
                controY0 - yMoveDistance,
                controX1 - xMoveDistance,
                controY1 + yMoveDistance,
                grid_width1 * (1 + index),
                dataList[index + 1].toFloat() * danweiY
            )
        } else {


            val centerX = (grid_width1 * index + grid_width1 * (1 + index)) / 2
            val centerY =
                (dataList[index].toFloat() * danweiY + dataList[index + 1].toFloat() * danweiY) / 2
            val controX0 = (grid_width1 * index + centerX) / 2
            val controY0 = (dataList[index].toFloat() * danweiY + centerY) / 2
            val controX1 = (centerX + grid_width1 * (1 + index)) / 2
            val controY1 = (centerY + dataList[index + 1].toFloat() * danweiY) / 2
            caves_path.cubicTo(
                controX0 + xMoveDistance,
                controY0 + yMoveDistance,
                controX1 - xMoveDistance,
                controY1 - yMoveDistance,
                grid_width1 * (1 + index),
                dataList[index + 1].toFloat() * danweiY
            )

        }
    }
    canvas.nativeCanvas.drawCircle(0f, 0f, 10f, text_paint)
    //绘制闭合渐变曲线
    canvas.nativeCanvas.drawPath(caves_path, text_paint)
    val line_paint = android.graphics.Paint()
    line_paint.strokeWidth = 3f
    line_paint.style = android.graphics.Paint.Style.STROKE
    line_paint.color = android.graphics.Color.argb(255, 212, 100, 77)
    //绘制外环红色线
    canvas.nativeCanvas.drawPath(caves_path, line_paint)
    line_paint.style = android.graphics.Paint.Style.FILL
    //画圈。
    for (index in 0 until dataList.size) {


        canvas.nativeCanvas.drawCircle(
            grid_width1 * index,
            danweiY * dataList[index],
            8f,
            line_paint
        )
    }
}
到这里我们最大的困难也简单的解决了吧?无非简单的加减乘除是不是?接下来我们进行装饰美丽的曲线,学过之前的文章对于这几点技能我想我们都熟能生巧的创作了吧?渐变填充、动画、点击、`
6、曲线美化
- ⭐️⭐️⭐️⭐️⭐️在自定义绘制中如果你对Compose的Api使用蹩脚,那完全可以通过
canvas.nativeCanvas将Canvas转换为原生这样你可以任意切换在两个canvas之间操作⭐️⭐️⭐️⭐️⭐️⭐️⭐️⭐️
private fun DrawScope.drawResultBitifull(canvas: androidx.compose.ui.graphics.Canvas) {


    val text_paint = android.graphics.Paint()
    text_paint.strokeWidth = 2f
    text_paint.style = android.graphics.Paint.Style.FILL
    text_paint.color = android.graphics.Color.argb(255, 0, 0, 0)
    text_paint.textSize = 66f
    val rectText = Rect()
    val rectTextYuan = Rect()

    canvas.save()
    canvas.scale(1f, -1f)
    canvas.translate((size.width / 2).toFloat() - 100, -500f)
    val text = "1347"
    val textyu = "元"

    text_paint.getTextBounds(text, 0, text.length, rectText)

    canvas.nativeCanvas.drawText(
        text,
        -rectText.width().toFloat() - 42f,
        rectText.height().toFloat() / 2,
        text_paint
    )
    text_paint.color = android.graphics.Color.argb(111, 111, 111, 111)
    text_paint.getTextBounds(textyu, 0, textyu.length, rectTextYuan)
    text_paint.textSize = 33f
    canvas.nativeCanvas.drawText(
        textyu,
        80 + -rectTextYuan.width().toFloat() - 42f,
        rectTextYuan.height().toFloat() / 2,
        text_paint
    )

    canvas.translate(0f, 50f)
    canvas.nativeCanvas.drawText(
        "较前天",
        -rectTextYuan.width().toFloat() - 180f,
        rectTextYuan.height().toFloat() / 2,
        text_paint
    )
    canvas.translate(100f, 0f)
    text_paint.color = android.graphics.Color.argb(255, 223, 129, 120)
    canvas.nativeCanvas.drawText(
        "+971.99(251.19%)",
        -rectTextYuan.width().toFloat() - 180f,
        rectTextYuan.height().toFloat() / 2,
        text_paint
    )
    canvas.translate(-100f, 50f)
    text_paint.color = android.graphics.Color.argb(111, 111, 111, 111)
    canvas.nativeCanvas.drawText(
        "对应图中虚线部分进行最高评奖",
        -rectTextYuan.width().toFloat() - 180f,
        rectTextYuan.height().toFloat() / 2,
        text_paint
    )
    //暂时没找到canvas绘制富文本的方法。只能一个个测量绘制文字了。别学我,好好测量测量有待提高自己的小学计算。

    canvas.restore()
}

//8.绘制每天最高获得者的头像...纯虚构故事对不对..
private fun drawHeaderToCanvas(canvas: Canvas,width:Float,marginToLeft:Float,dataList:List<Int>,imgList:ArrayList<ImageBitmap>) {


    val bitmap_paint = android.graphics.Paint()
    bitmap_paint.strokeWidth = 2f
    bitmap_paint.style = android.graphics.Paint.Style.STROKE
    bitmap_paint.xfermode = PorterDuffXfermode(PorterDuff.Mode.SRC_IN)
    bitmap_paint.isAntiAlias =true
    canvas.save()
    val srcRect1=Rect(0, 0, 80, 80)
    val dstRect1=Rect(0, 0, 40, 40)
    val x_scaleWidth = (width - marginToLeft - 80f)
    val grid_width = x_scaleWidth / 6
    val danweiY = (grid_width - 40) / 500
    for (index in 0 until dataList.size) {


        val bitmap = imgList[index].asAndroidBitmap()
        canvas.save()
        canvas.translate(
            grid_width * index - bitmap.width /20,
            danweiY * dataList[index] + 20
        )
        //这里绘制图片到画布上
        val circlePath = Path()
        circlePath.addCircle(20f,20f, 20f, Path.Direction.CCW)
        canvas.clipPath(circlePath)
        canvas.drawBitmap(bitmap, srcRect1, dstRect1, bitmap_paint)
        canvas.restore()
    }
    canvas.restore()


}

@SuppressLint("ObsoleteSdkInt")
fun drawTextButton(canvas: Canvas) {


    val line_paint = android.graphics.Paint()
    line_paint.strokeWidth = 2f
    line_paint.style = android.graphics.Paint.Style.STROKE
    line_paint.color = android.graphics.Color.argb(188, 76, 126, 245)
    line_paint.textSize=32f
    val buttonPath = android.graphics.Path()
    if (android.os.Build.VERSION.SDK_INT >= android.os.Build.VERSION_CODES.LOLLIPOP) {


        buttonPath.addRoundRect(110f, -120f, 270f, -180f, 80f, 80f, android.graphics.Path.Direction.CCW)
    }
    canvas.drawPath(buttonPath, line_paint)
    canvas.save()
    canvas.scale(1f, -1f)
    line_paint.style = android.graphics.Paint.Style.FILL
    canvas.drawText("前 七 天", 140f, 165f, line_paint)
    canvas.restore()

    canvas.save()
    canvas.translate(260f, 0f)
    line_paint.style = android.graphics.Paint.Style.STROKE
    canvas.drawPath(buttonPath, line_paint)
    canvas.scale(1f, -1f)
    line_paint.style = android.graphics.Paint.Style.FILL
    canvas.drawText("后 七 天", 140f, 165f, line_paint)
    canvas.restore()

}

三、总结
自定义不仅提供了更方便的API,而且可以完全使用原来的API,所以原生Android开发还是很香的,Compose里面自定义完全没想到再次分装的点,但是对于我们来说不就多了一些选择么。所以自定义完全没问题。而且创造性完全不输任何端,只是顶层的API定义有所不同罢了。