
1, 面包屑导航:

 <el-breadcrumb separator-class="el-icon-arrow-right">
            <el-breadcrumb-item :to="{ path: '/admin' }">首页</el-breadcrumb-item>
            <el-breadcrumb-item>用户管理</el-breadcrumb-item>
            <el-breadcrumb-item>用户列表</el-breadcrumb-item>
        </el-breadcrumb>
当然 element 一些组件都还要注册,不注册没法使用
import Vue from 'vue'
import {
    Button,
    Form,
    FormItem,
    Input,
    Message,
    Header,
    Main,
    Aside,
    Container,
    Menu,
    Submenu,
    MenuItem,
    Breadcrumb,
    BreadcrumbItem,
    Card,
    Row,
    Col,
    Table,
    TableColumn,
    Switch
} from 'element-ui'

Vue.use(Button)
Vue.use(Form)
Vue.use(FormItem)
Vue.use(Input)
Vue.use(Header)
Vue.use(Main)
Vue.use(Aside)
Vue.use(Container)
Vue.use(Menu)
Vue.use(Submenu)
Vue.use(MenuItem)
Vue.use(Breadcrumb)
Vue.use(BreadcrumbItem)
Vue.use(Card)
Vue.use(Row)
Vue.use(Col)
Vue.use(Table)
Vue.use(TableColumn)
Vue.use(Switch)
Vue.prototype.$message = Message
2, el-card 这个真没啥,就一包裹器,就不写了!
3, 
el-row el-col input el-button 的使用
       <el-card class="box-card">
            <el-row>
                        <el-col :span="10">
                            <!-- input -->
                            <el-input placeholder="请输入内容"
                             v-model="queryinfo.query"
                             >
                                <el-button slot="append" icon="el-icon-search"></el-button>
                            </el-input>
                        </el-col>
                        <el-col :span="5" >
                            <el-button type="primary">添加用户</el-button>
                        </el-col>
                          <el-col :span="6" class="fix">
                              <span>111</span>
                        </el-col>
            </el-row>
这些也没啥,在这里我要重点说的是,结构绑定的参数的命名要和和向后台请求时携带的参数命名一致,这样的话,
发送请求是,数据不需要重新命名,直接用data 里数据!
比如我们上面为啥命名为;


是因为后台api 携带参数要求

4

这一块用到了el-table 你先把数据获取回来放到data 中,然后再写结构,将数据绑定上去就行了!

数据结构:

行,再数据绑定:
 <el-table
      :data="userList"
      style="width: 100%"
      stripe
      border
      >
      <el-table-column
      type="index"
        >
      </el-table-column>
          <el-table-column
      prop="username"
      label="姓名"
      >
    </el-table-column>
          <el-table-column
      prop="email"
      label="邮箱"
      >
    </el-table-column>

     <el-table-column
      prop="mobile"
      label="电话"
      >
    </el-table-column>

     <el-table-column
      prop="role_name"
      label="角色"
      >
    </el-table-column>
    <el-table-column
      prop="mg_state"
      label="状态"
      >
    <template slot-scope="scope">
        <!-- {

   {scope.row.mg_state}} -->
        <!--  我知道为啥不显示了,因为我没有在element中注册Switch -->
        <el-switch
            v-model="scope.row.mg_state"
            active-color="#13ce66"
            inactive-color="#ff4949"
            @change="saveState(scope.row)"
            >
        </el-switch>
    </template>
    </el-table-column>


        <el-table-column
      label="操作"
      width="180px"
      >
          <template slot-scope="scope">
                <el-button type="primary" icon="el-icon-edit"
                    @click="editUser(scope.row)"
                size="mini"></el-button>
                <el-button type="danger" icon="el-icon-delete"  size="mini"></el-button>
                 <el-button type="warning" icon="el-icon-setting"  size="mini" ></el-button>
    </template>
    </el-table-column>
    </el-table>
这个我们一列列剖析:

    <el-table-column
      type="index"
        >
      </el-table-column>
姓名邮箱我们就不看了,我们重点看自定义模板那那块!
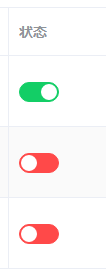
  <el-table-column
      prop="mg_state"
      label="状态"
      >
    <template slot-scope="scope">
        <!-- {

   {scope.row.mg_state}} -->
        <!--  我知道为啥不显示了,因为我没有在element中注册Switch -->
        <el-switch
            v-model="scope.row.mg_state"
            active-color="#13ce66"
            inactive-color="#ff4949"
            @change="saveState(scope.row)"
            >
        </el-switch>
    </template>
    </el-table-column>
这里面用到了作用域插槽的概念。理解起来很简单,就是回调说白了
a b ,a 给 b 一个篮子, b 将苹果放篮子里面!
![]()
这 slot-scope 就是篮子, scope 就是![]()
给我们的苹果!
——————————————————————
这个状态展示就搞定了,但是状态的真正维护没有搞定了,所以有了上面的方法:
现在的问题是,当我们 切换状态时,发现,
一刷新,又回到了最初状态
也就是说,vue 内存中的状态,没有同步到后台,我们下面我们
要监听状态的改变,同步到后台中
实际上,你会发现 vue 中data 的数据,都只是在内存中,
有时确实需要同步到后台(数据库中)
![]()

我给大家贴俩链接

https://gitee.com/mzzy8/app/commit/936565aa59142bcc3f3421352942552d578f3d6e
https://gitee.com/mzzy8/app/commit/e64be6ab51a065ee4c4e83da3547a631467b2af4
大家可以看下就明白了
好,还有一列:

   <el-table-column
      label="操作"
      width="180px"
      >
          <template slot-scope="scope">
                <el-button type="primary" icon="el-icon-edit"
                    @click="editUser(scope.row)"
                size="mini"></el-button>
                <el-button type="danger" icon="el-icon-delete"  size="mini"></el-button>
                 <el-button type="warning" icon="el-icon-setting"  size="mini" ></el-button>
    </template>
    </el-table-column>
行,界面就搞定了,下面就开始写业务了
我们看下我们的data 里面的数据:

下面是分页条:和上面有很大关系:
   <el-pagination
      @size-change="handleSizeChange"
      @current-change="handleCurrentChange"
      :current-page="queryinfo.pagenum"
      :page-sizes="[ 1,2, 3, 4]"
      :page-size="queryinfo.pagesize"
      layout="total, sizes, prev, pager, next, jumper"
      :total="total">
    </el-pagination>
俩方法也拿过来:
 methods:{
            // 分页条:
            handleSizeChange(pagesize){
                this.queryinfo.pagesize = pagesize;
                this.getUserList()
            },
            handleCurrentChange(pagenum){
                  this.queryinfo.pagenum = pagenum;
                   this.getUserList();
            },
这样分页逻辑就写完了,是不是很快!
