使用nexus3.19搭建自己的maven私服
怎么安装参见CentOS6.9安装Nexus3.19 ,接下来就是如何配置。打开我们安装后的nexus界面,用admin账号登陆,点击Server administration and configuration按钮:

点击Repository

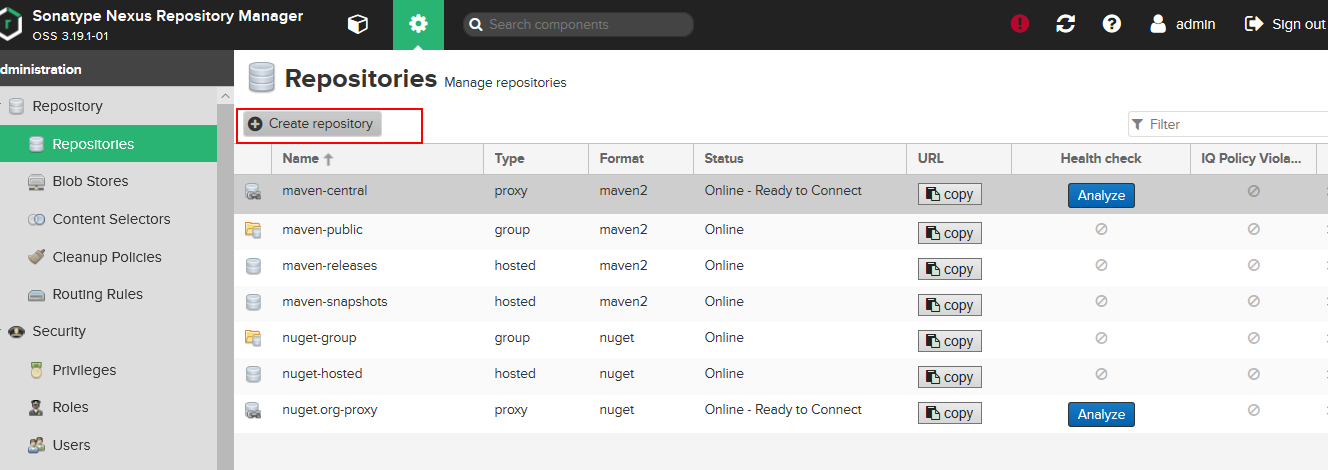
我们可以看到nexus默认给我建好了一些仓库,其中包括3类:代理proxy,仓库组group和宿主host。
代理用来指向远程仓库的,如中央仓库,但毕竟国内的阿里云仓库比国外要快许多,所以我们自己建一个新的代理仓库。点击Create Repository:
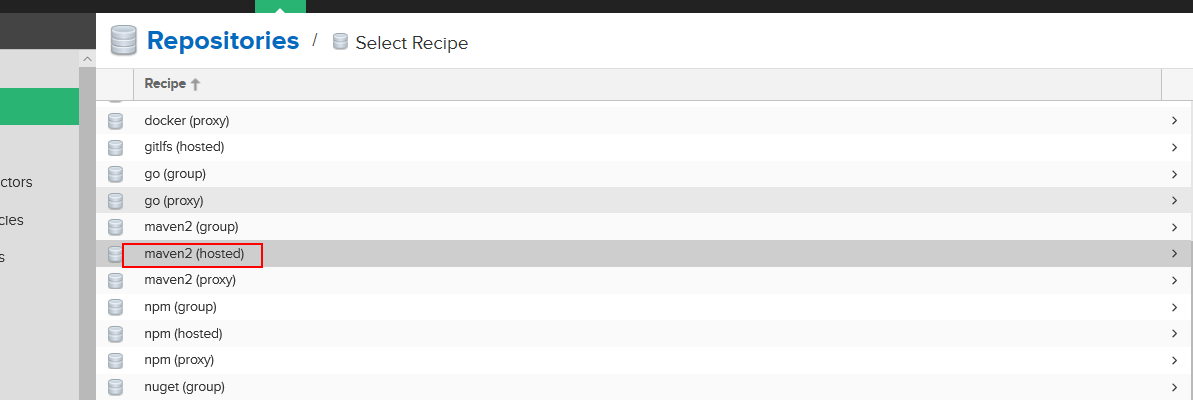
选择maven2(proxy):

输入仓库名和阿里云的远程仓库地址(http://maven.aliyun.com/nexus/content/groups/public):

拉到最下面点击Create Repository,返回上一层界面: 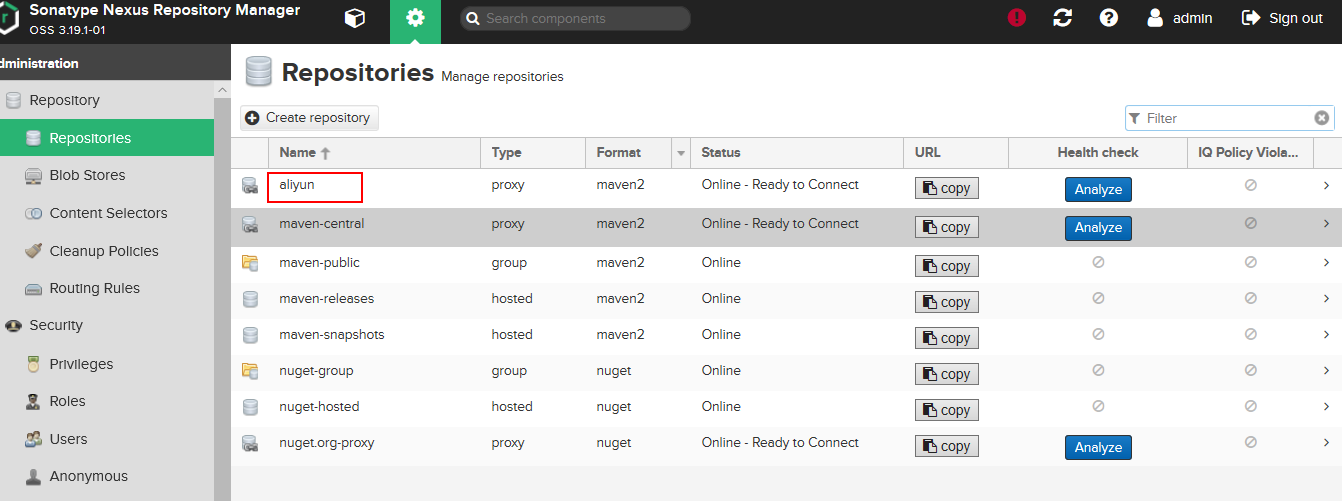
接着我们创建宿主仓库,宿主仓库跟我们的项目相关,用于上传我们打出来的包,分发布Release和快照Snapshot两种,所以我们就建两个宿主仓库,过程同上:


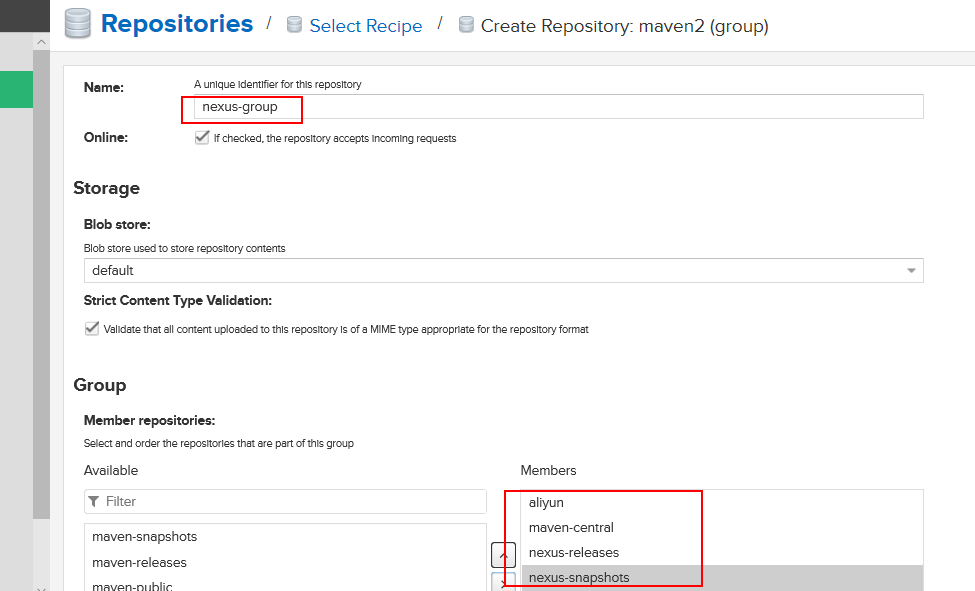
最后我们再创建一个仓库组,仓库组就像数据库的视图一样,能把多个仓库聚合起来用,记得把aliyun放在maven-central上面,这样才能优先找阿里云的构件:

ok,现在我要的仓库都弄好了,接着配置maven的全局设置setting.xml文件。在这之前,还得新建一个用户给开发用。nexus3.19的默认用户有两种:admin(能配置仓库、查询和上传构件)和anonymous(只能查构件):

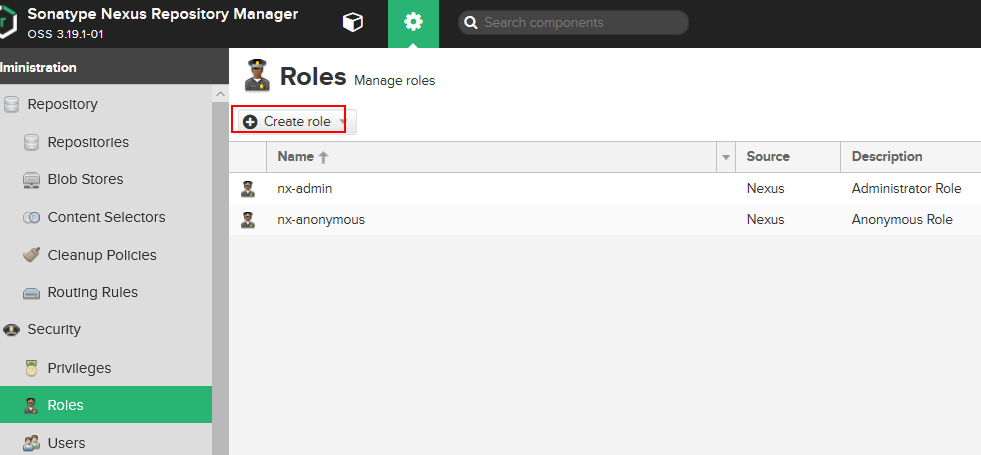
我们新增一个角色deployment用于构建查询和上传,剥离admin的仓库管理能力,免得开发人员瞎搞。先新增角色:


再回去用户那里新增一个deployment用户:


最后,我们在setting中添加我们新加的宿主仓库的认证(我设置deployment用户的密码就是deployment123),配置镜像,让所有maven构建都走到镜像,经由镜像去请求仓库组,最后请求到我们配置的宿主仓库和代理仓库,大概脉络如下:
+---------------aliyun(proxy) :下载开源jar包
maven -> nexus(group) -> |---------------nexus-releases(host) :项目上传release的jar包,下载本地上传的jar包
+---------------nexus-snapshots(host):项目上传snapshot的jar包,下载本地上传的jar包
新建一个setting文件setting_nexus.xml文件:

<?xml version="1.0" encoding="UTF-8"?>
<settings xmlns="http://maven.apache.org/SETTINGS/1.0.0"
          xmlns:xsi="http://www.w3.org/2001/XMLSchema-instance"
          xsi:schemaLocation="http://maven.apache.org/SETTINGS/1.0.0 http://maven.apache.org/xsd/settings-1.0.0.xsd">
    <localRepository>E:/Users/wulf/.m2/repository</localRepository>

    <mirrors>
        <mirror>
            <id>nexus</id>
            <name>nexus repository</name>
            <url>http://111.11.11.11/repository/nexus-group</url>
            <mirrorOf>*</mirrorOf>
        </mirror>
    </mirrors>

    <!-- 激活配置 -->
    <activeProfiles>
        <activeProfile>nexus</activeProfile>
    </activeProfiles>
    <profiles>
        <profile>
            <id>nexus</id>
            <repositories>
                <repository>
                    <id>central</id>
                    <url>http://111.11.11.11:17407/repository/aliyun</url>
                    <releases><enabled>true</enabled></releases>
                    <snapshots><enabled>true</enabled></snapshots>
                </repository>
            </repositories>
            <pluginRepositories>
                <pluginRepository>
                    <id>central</id>
                    <url>http://111.11.11.11:17407/repository/aliyun</url>
                    <releases><enabled>true</enabled></releases>
                    <snapshots><enabled>true</enabled></snapshots>
                </pluginRepository>
            </pluginRepositories>
        </profile>
    </profiles>


    <servers>
        <server>
            <id>nexus-releases</id>
            <username>deployment</username>
            <password>deployment123</password>
        </server>
        <server>
            <id>nexus-snapshots</id>
            <username>deployment</username>
            <password>deployment123</password>
        </server>
    </servers>

</settings>
新建一个maven项目(spring boot项目),指定我们新增setting文件:

只需要往按默认生成的pom文件中加入上传jar包的宿主仓库即可:
<?xml version="1.0" encoding="UTF-8"?>
<project xmlns="http://maven.apache.org/POM/4.0.0" xmlns:xsi="http://www.w3.org/2001/XMLSchema-instance"
         xsi:schemaLocation="http://maven.apache.org/POM/4.0.0 https://maven.apache.org/xsd/maven-4.0.0.xsd">
    <modelVersion>4.0.0</modelVersion>
    <parent>
        <groupId>org.springframework.boot</groupId>
        <artifactId>spring-boot-starter-parent</artifactId>
        <version>2.3.4.RELEASE</version>
        <relativePath/> <!-- lookup parent from repository -->
    </parent>
    <groupId>com.wlf</groupId>
    <artifactId>spring-cloud-plugin</artifactId>
    <version>0.0.1-SNAPSHOT</version>
    <name>spring-cloud-plugin</name>
    <description>Demo project for Spring Boot</description>

    <properties>
        <java.version>1.8</java.version>
    </properties>

    <dependencies>
        <dependency>
            <groupId>org.springframework.boot</groupId>
            <artifactId>spring-boot-starter</artifactId>
        </dependency>

        <dependency>
            <groupId>org.springframework.boot</groupId>
            <artifactId>spring-boot-starter-test</artifactId>
            <scope>test</scope>
            <exclusions>
                <exclusion>
                    <groupId>org.junit.vintage</groupId>
                    <artifactId>junit-vintage-engine</artifactId>
                </exclusion>
            </exclusions>
        </dependency>
    </dependencies>

    <distributionManagement>
        <repository>
            <id>nexus-releases</id>
            <url>http://111.11.11.11:17407/repository/nexus-releases/</url>
        </repository>
        <snapshotRepository>
            <id>nexus-snapshots</id>
            <url>http://111.11.11.11:17407/repository/nexus-snapshots/</url>
        </snapshotRepository>
    </distributionManagement>

    <build>
        <plugins>
            <plugin>
                <groupId>org.springframework.boot</groupId>
                <artifactId>spring-boot-maven-plugin</artifactId>
            </plugin>
        </plugins>
    </build>

</project>
跑一个deploy,看下maven执行日志:
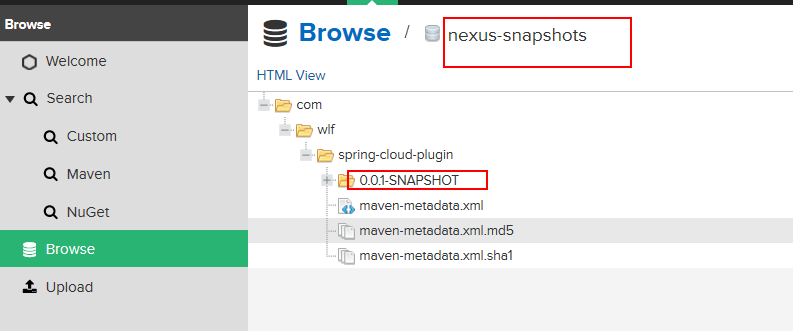
Downloading: http://111.11.11.11:17407/repository/nexus-snapshots/com/wlf/spring-cloud-plugin/0.0.1-SNAPSHOT/maven-metadata.xml
Uploading: http://111.11.11.11:17407/repository/nexus-snapshots/com/wlf/spring-cloud-plugin/0.0.1-SNAPSHOT/spring-cloud-plugin-0.0.1-20201017.010507-1.jar
Uploaded: http://111.11.11.11:17407/repository/nexus-snapshots/com/wlf/spring-cloud-plugin/0.0.1-SNAPSHOT/spring-cloud-plugin-0.0.1-20201017.010507-1.jar (8033 KB at 1523.3 KB/sec)
Uploading: http://111.11.11.11:17407/repository/nexus-snapshots/com/wlf/spring-cloud-plugin/0.0.1-SNAPSHOT/spring-cloud-plugin-0.0.1-20201017.010507-1.pom
Uploaded: http://111.11.11.11:17407/repository/nexus-snapshots/com/wlf/spring-cloud-plugin/0.0.1-SNAPSHOT/spring-cloud-plugin-0.0.1-20201017.010507-1.pom (3 KB at 4.9 KB/sec)
Downloading: http://111.11.11.11:17407/repository/nexus-snapshots/com/wlf/spring-cloud-plugin/maven-metadata.xml
Uploading: http://111.11.11.11:17407/repository/nexus-snapshots/com/wlf/spring-cloud-plugin/0.0.1-SNAPSHOT/maven-metadata.xml
Uploaded: http://111.11.11.11:17407/repository/nexus-snapshots/com/wlf/spring-cloud-plugin/0.0.1-SNAPSHOT/maven-metadata.xml (776 B at 2.9 KB/sec)
Uploading: http://111.11.11.11:17407/repository/nexus-snapshots/com/wlf/spring-cloud-plugin/maven-metadata.xml
Uploaded: http://111.11.11.11:17407/repository/nexus-snapshots/com/wlf/spring-cloud-plugin/maven-metadata.xml (286 B at 1.4 KB/sec)
[INFO] ------------------------------------------------------------------------
[INFO] BUILD SUCCESS
[INFO] ------------------------------------------------------------------------
[INFO] Total time: 27.136 s
[INFO] Finished at: 2020-10-17T09:05:13+08:00
[INFO] Final Memory: 25M/210M
[INFO] ------------------------------------------------------------------------
去看一眼nexus的界面,nexus-snapshots的包成功打上去了: