我个人是比较喜欢这种方式安装的.搭建多个网站的时候方便快捷,还能方便查看日志
- 服务器安装宝塔环境
- 服务器安装Docker和Docker Compose
- Docker安装Portainer
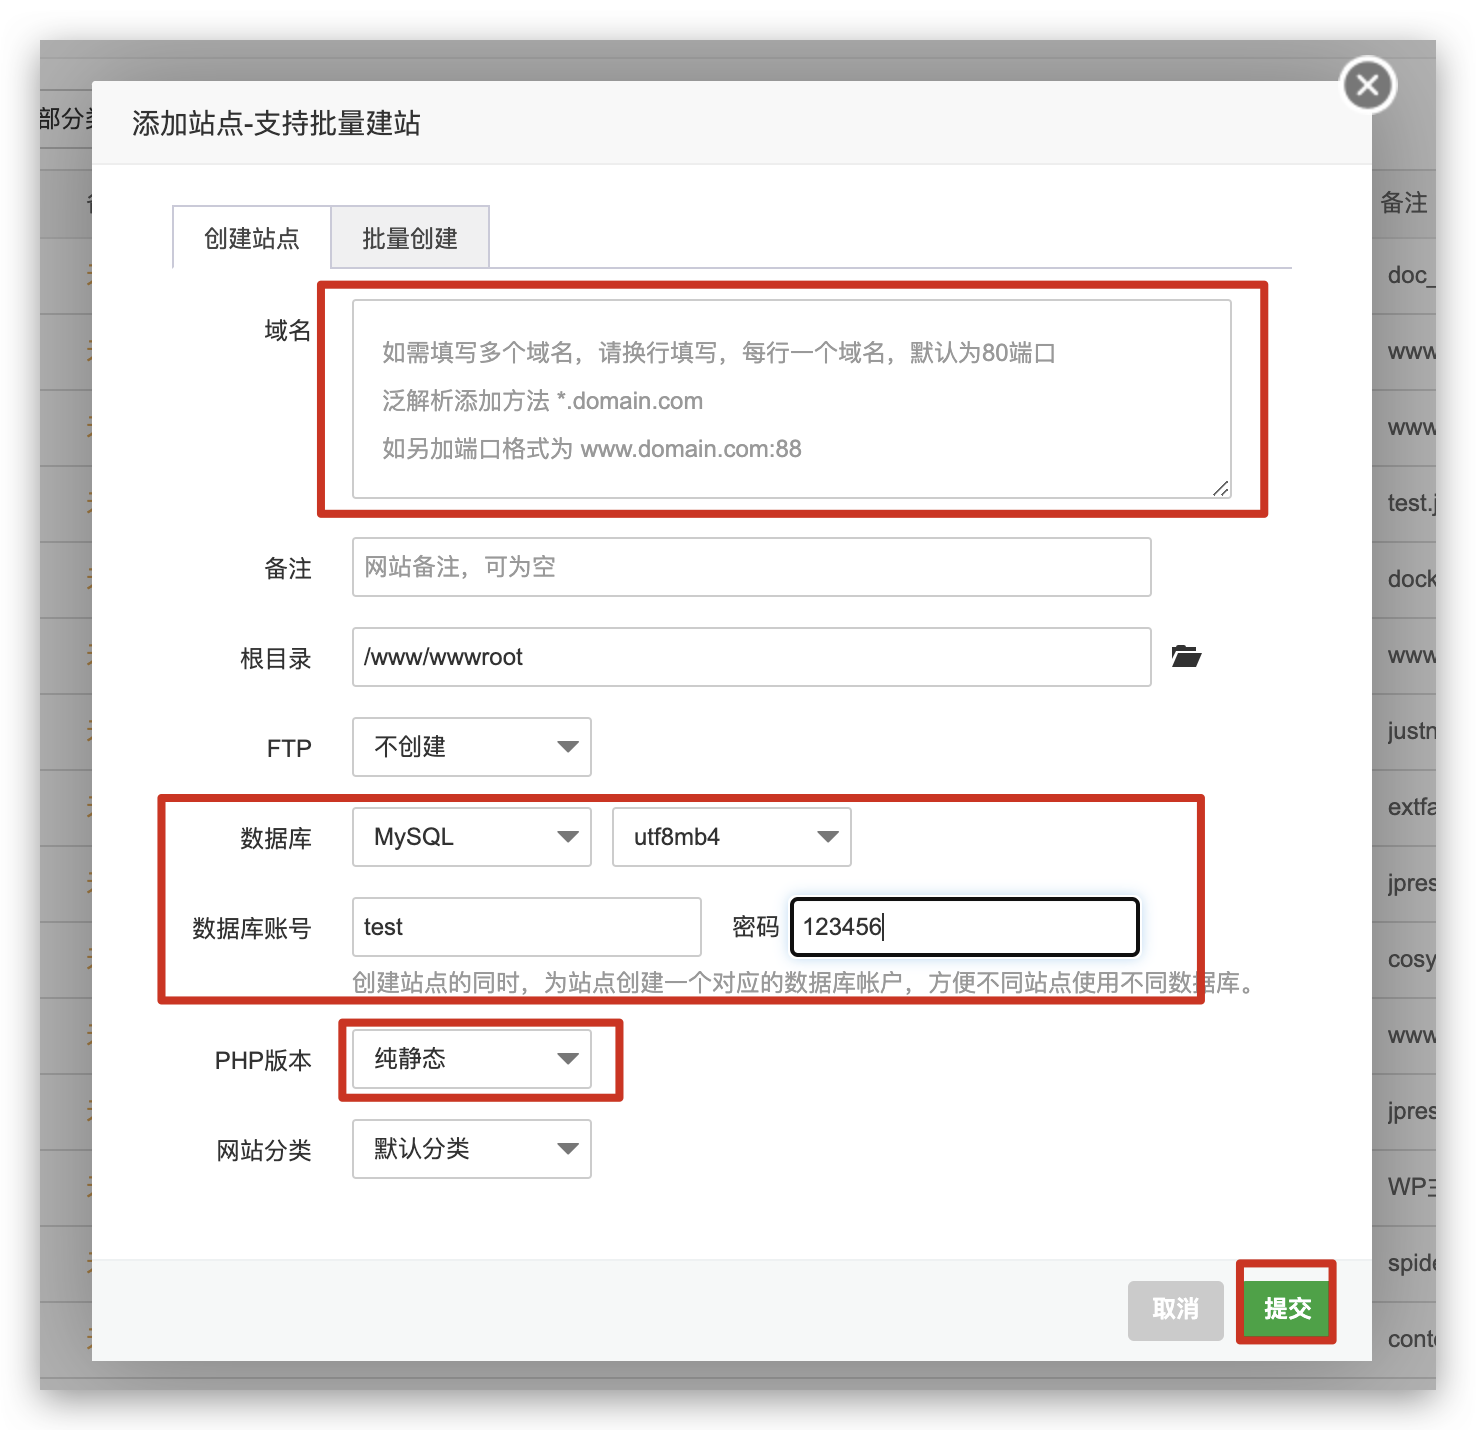
宝塔添加一个网站
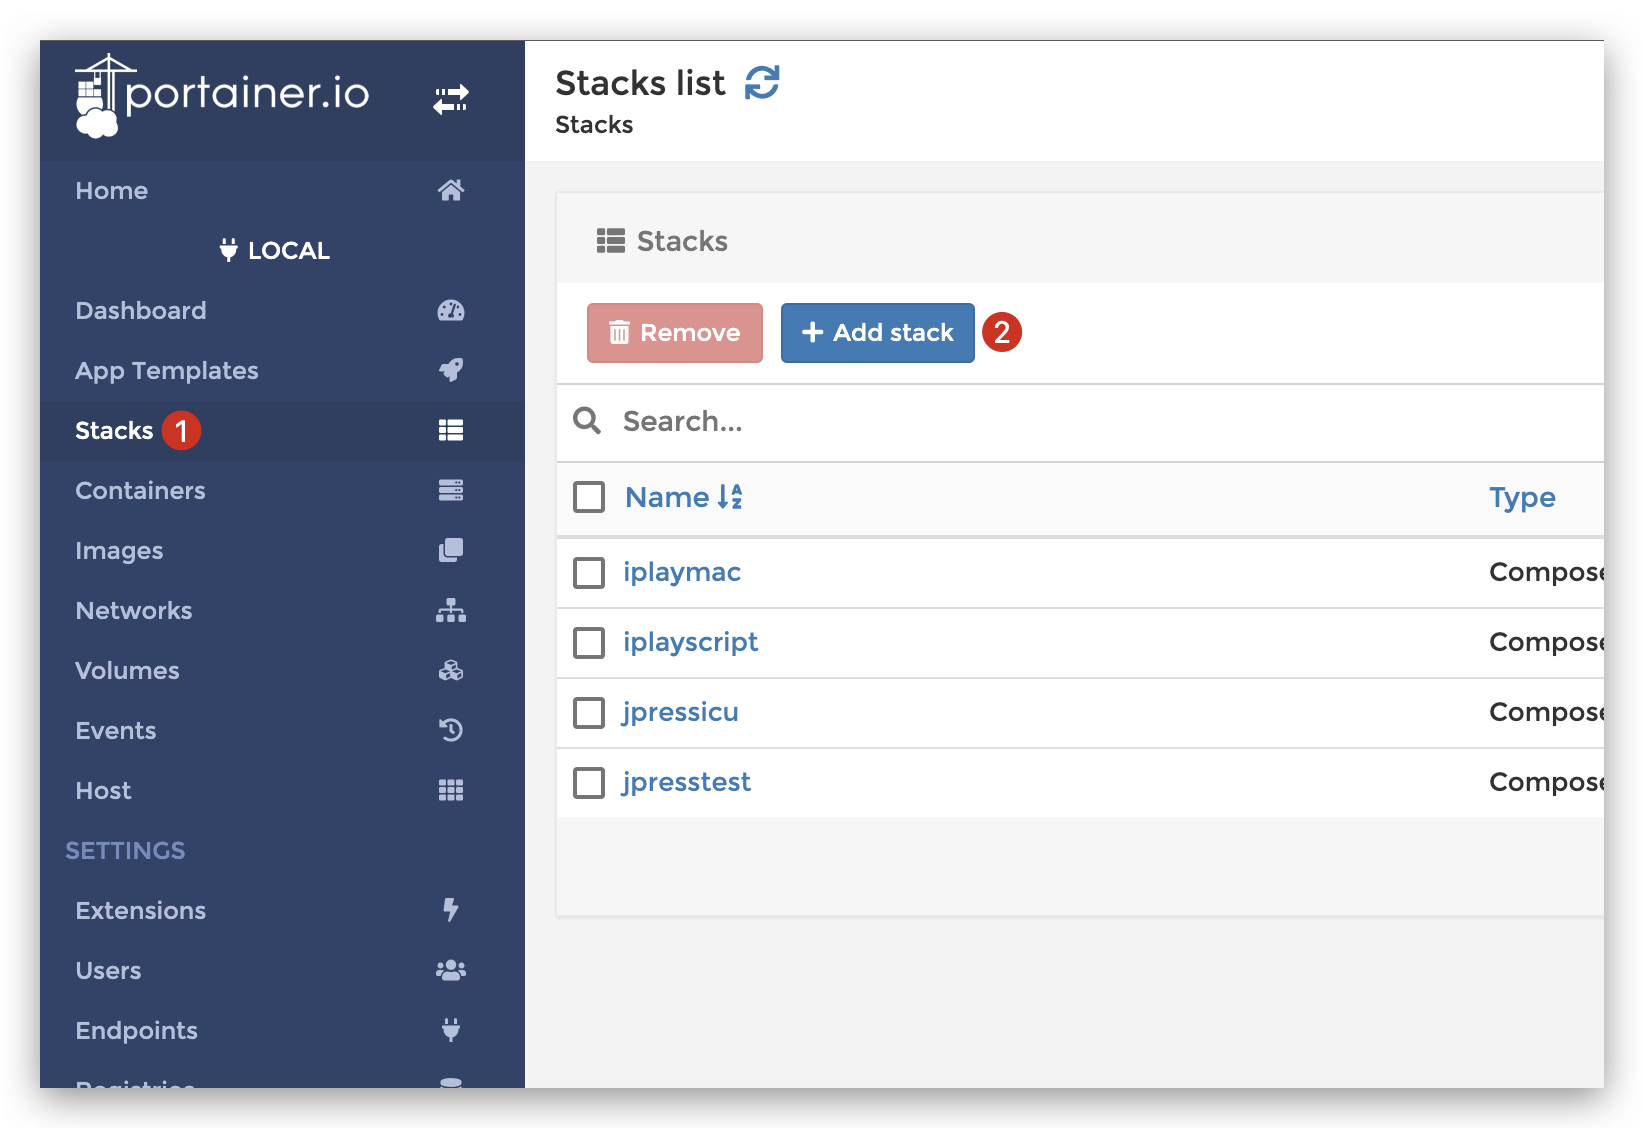
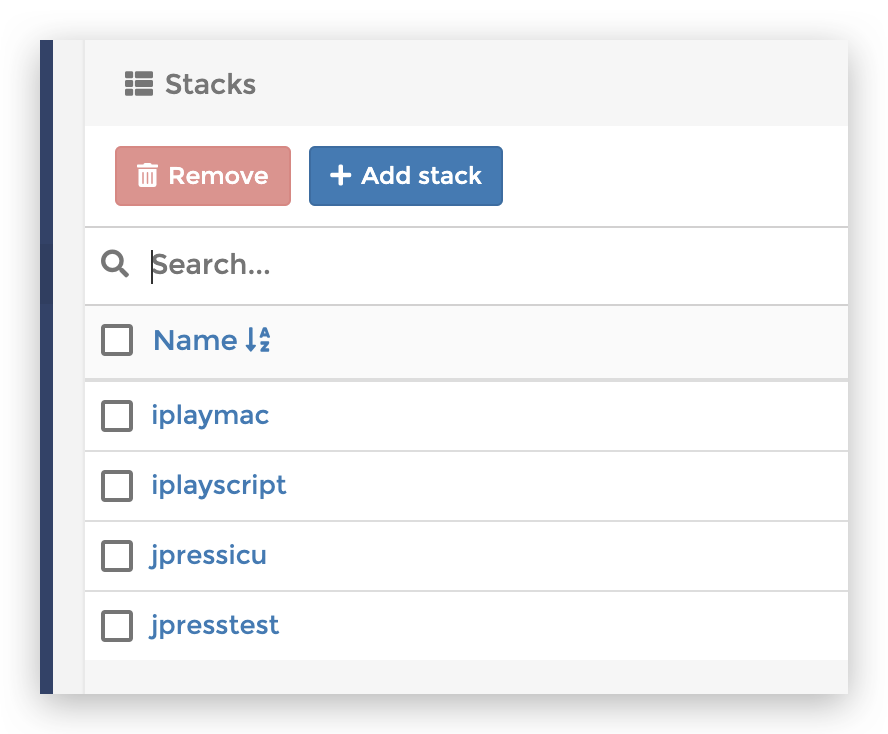
Portainer添加一个stack
然后点击“Deploy the stack”
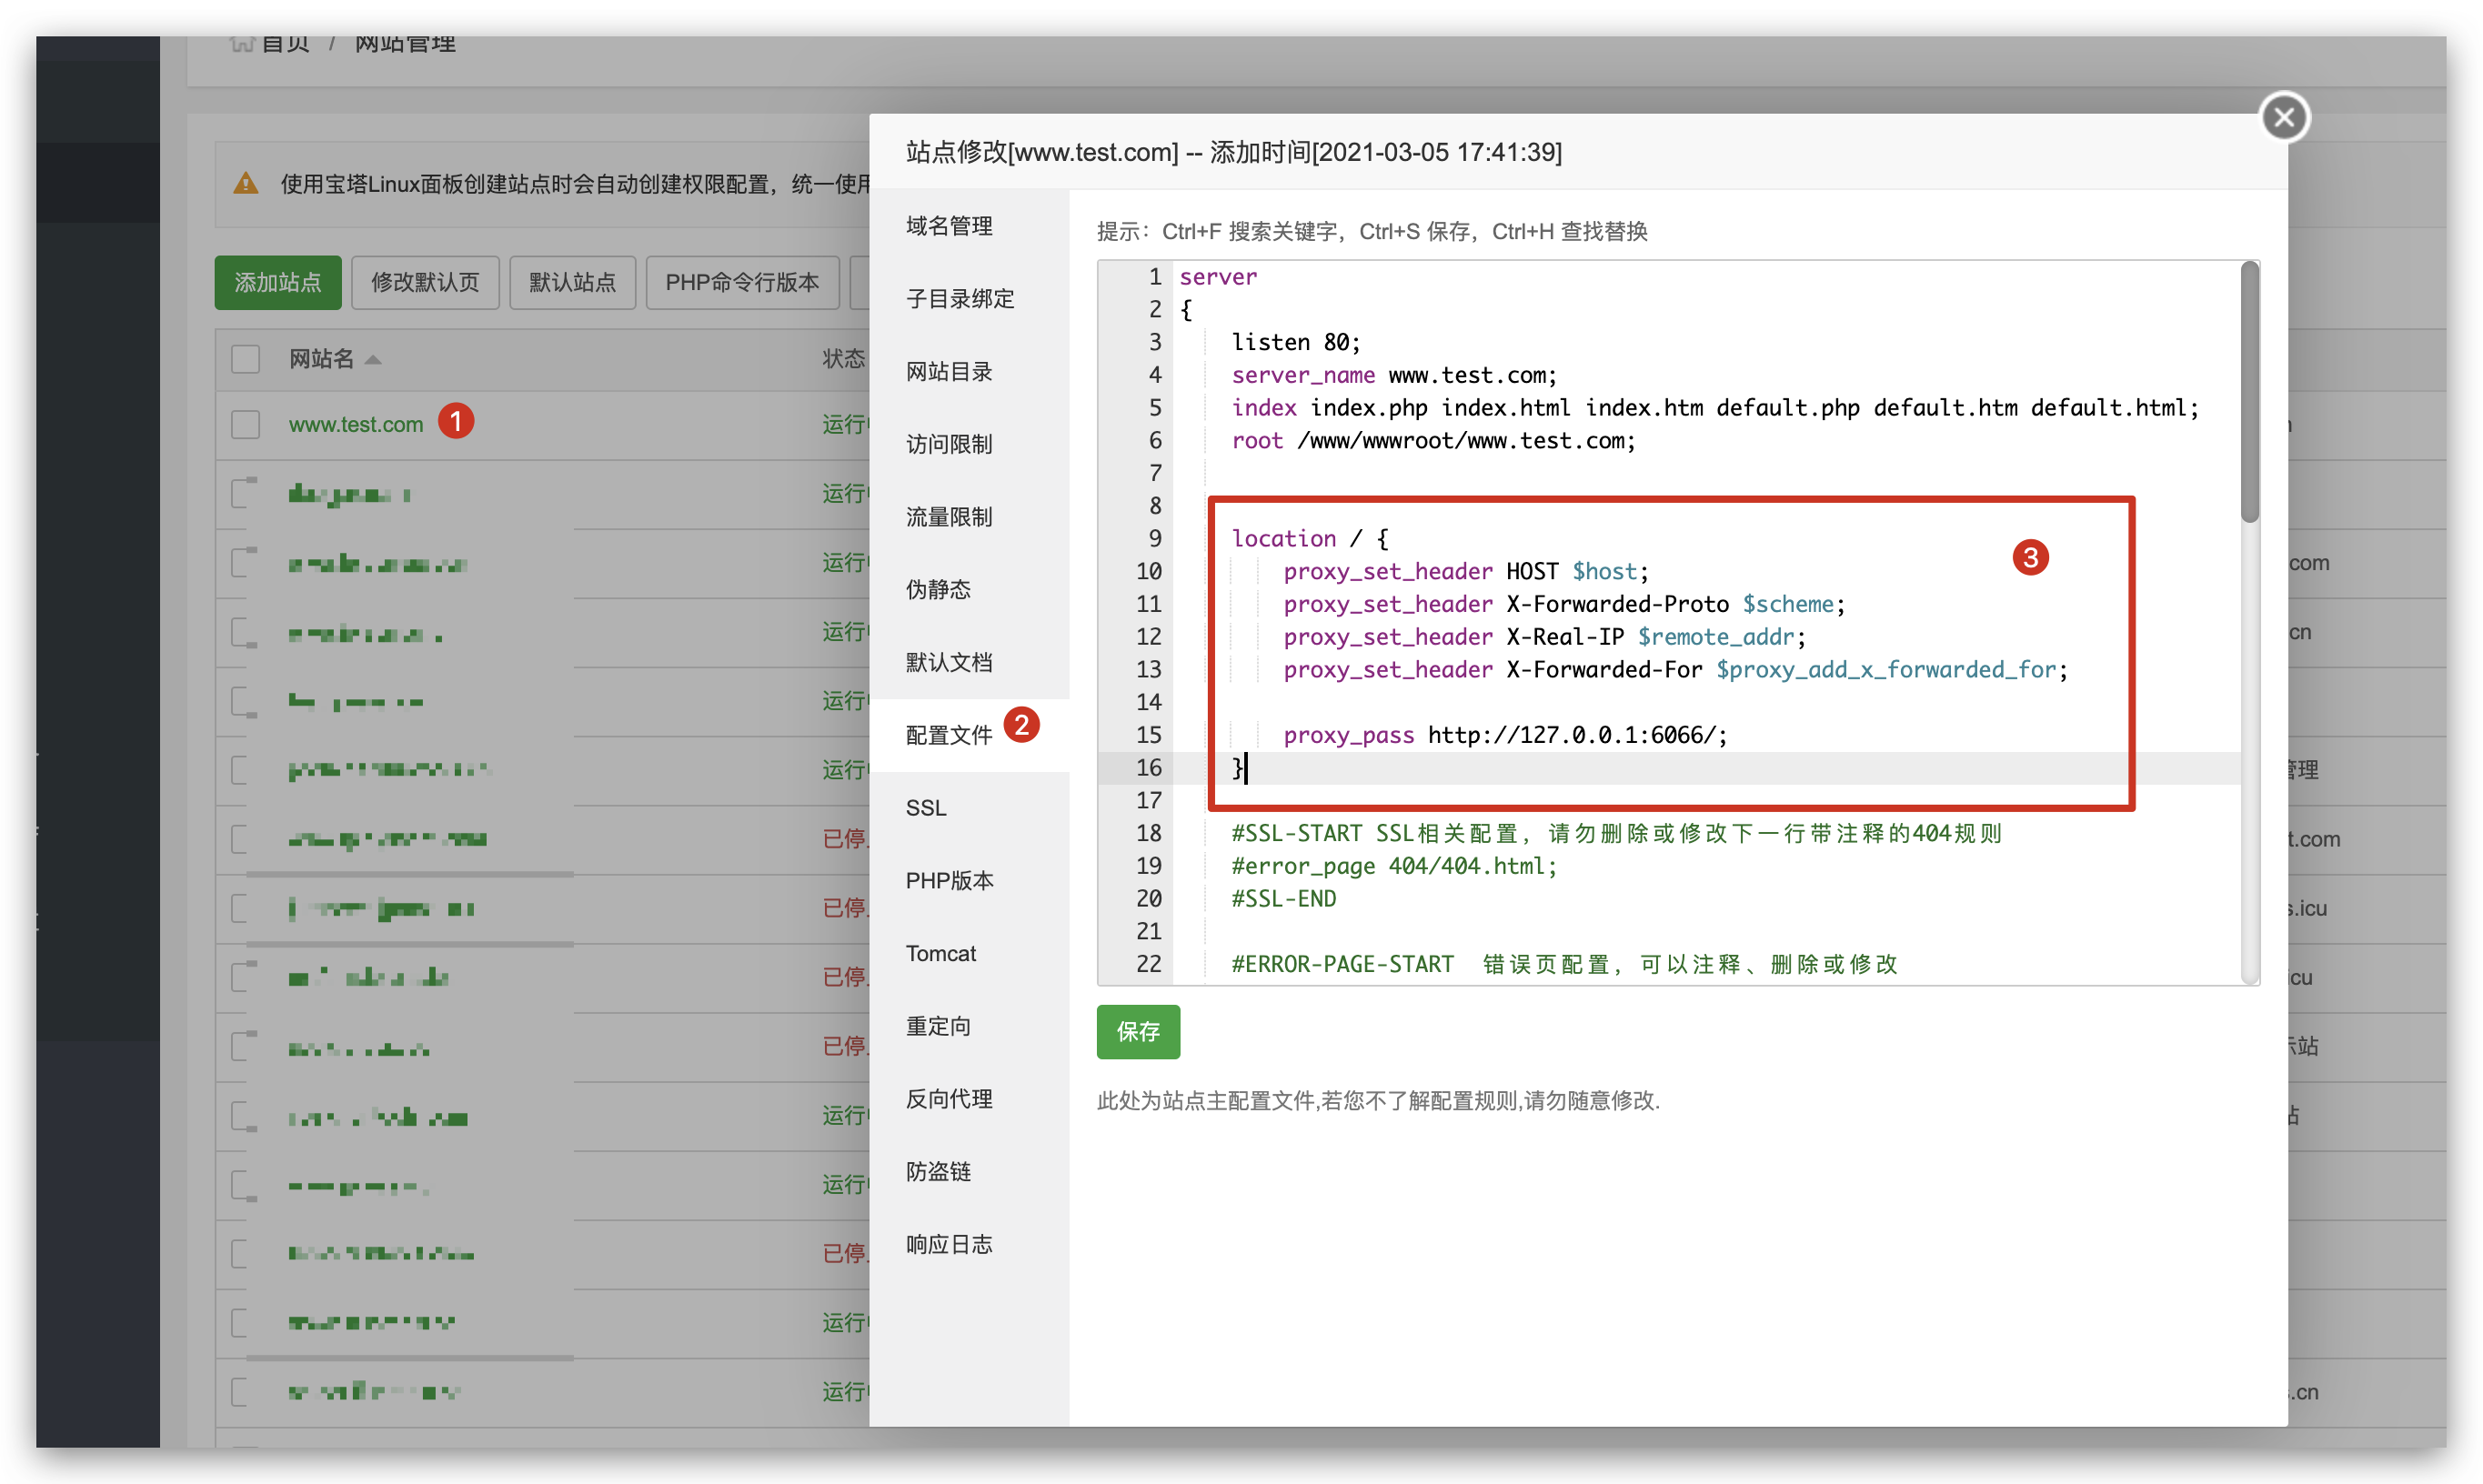
配置网站Nginx
访问网站走jpress自动安装过程
访问你的域名,JPress自动引导进行安装,在JPress安装向导的过程中,只需要填写宝塔创建完毕的数据库账号和密码即可。
PS:上面我所填写的数据库IP是为了不暴露我的真实IP,请填写服务器的实际IP或者域名,外网能访问的
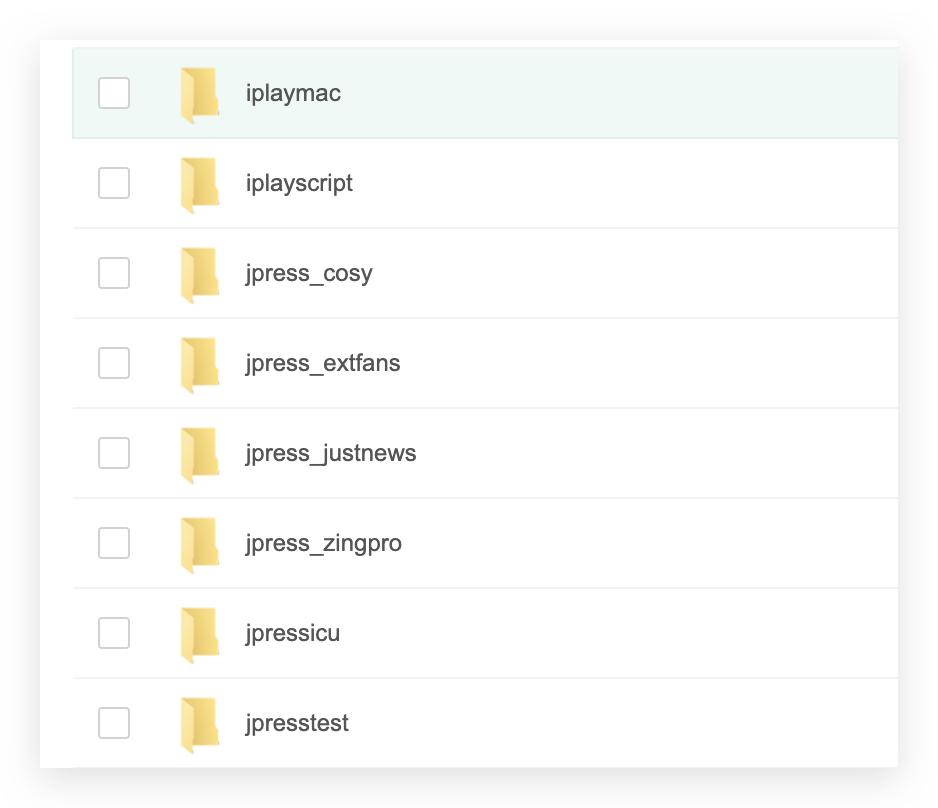
创建多个网站
重复上面的步骤,更改一下目录和IP即可
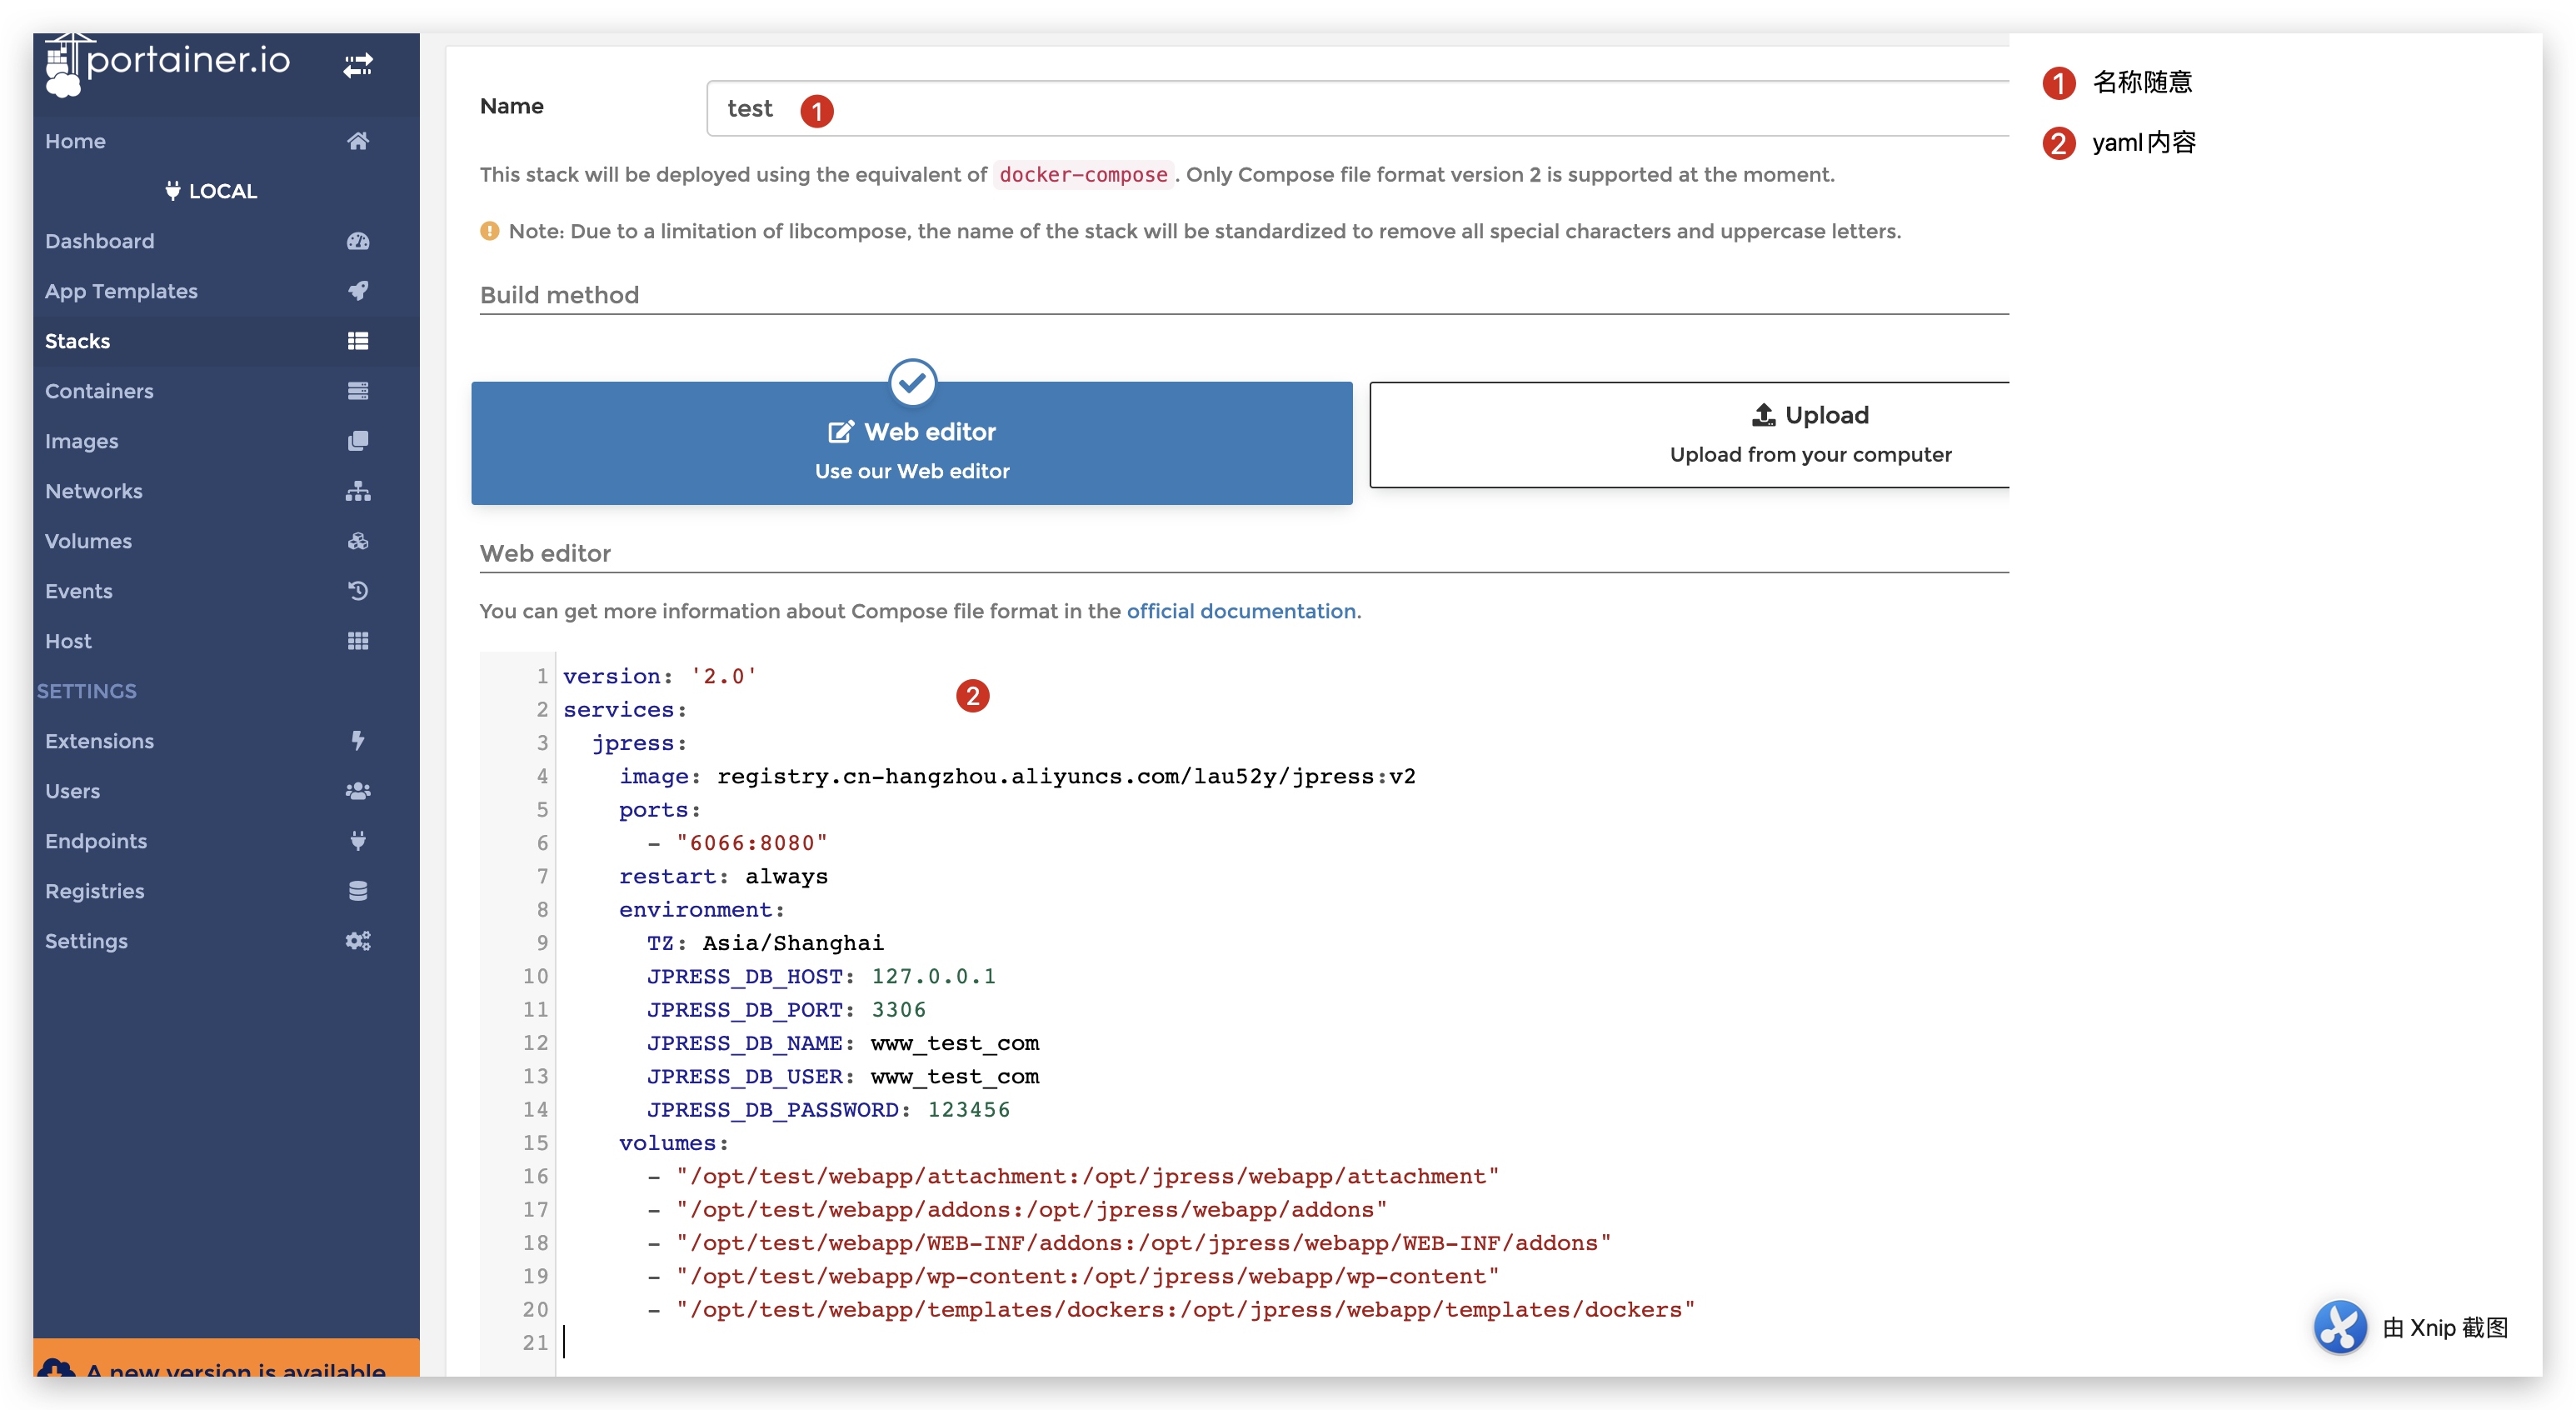
Docker Compose 配置
6066为外部的IP,唯一不冲突即可
"/opt/iplaymac/"为挂载到本地的目录路径,一般用域名区分不同的网站,确保删除容器的时候,文件还在
version: '2.0'
services:
  jpress:
    image: registry.cn-hangzhou.aliyuncs.com/lau52y/jpress:v2
    ports:
      - "6066:8080"
    restart: always
    environment:
      TZ: Asia/Shanghai
      JPRESS_DB_HOST: 填写IP
      JPRESS_DB_PORT: 端口
      JPRESS_DB_NAME: 数据库名称
      JPRESS_DB_USER: 数据库用户名
      JPRESS_DB_PASSWORD: 数据库密码
    volumes:
      - "/opt/iplaymac/webapp/attachment:/opt/jpress/webapp/attachment"
      - "/opt/iplaymac/webapp/addons:/opt/jpress/webapp/addons"
      - "/opt/iplaymac/webapp/WEB-INF/addons:/opt/jpress/webapp/WEB-INF/addons"
      - "/opt/iplaymac/webapp/wp-content:/opt/jpress/webapp/wp-content"
      - "/opt/iplaymac/webapp/templates/dockers:/opt/jpress/webapp/templates/dockers"
Nginx配置文件
location / {
        proxy_set_header HOST $host;
        proxy_set_header X-Forwarded-Proto $scheme;
        proxy_set_header X-Real-IP $remote_addr;
        proxy_set_header X-Forwarded-For $proxy_add_x_forwarded_for;

        proxy_pass http://127.0.0.1:6066/;#这里的端口对应上面
    }
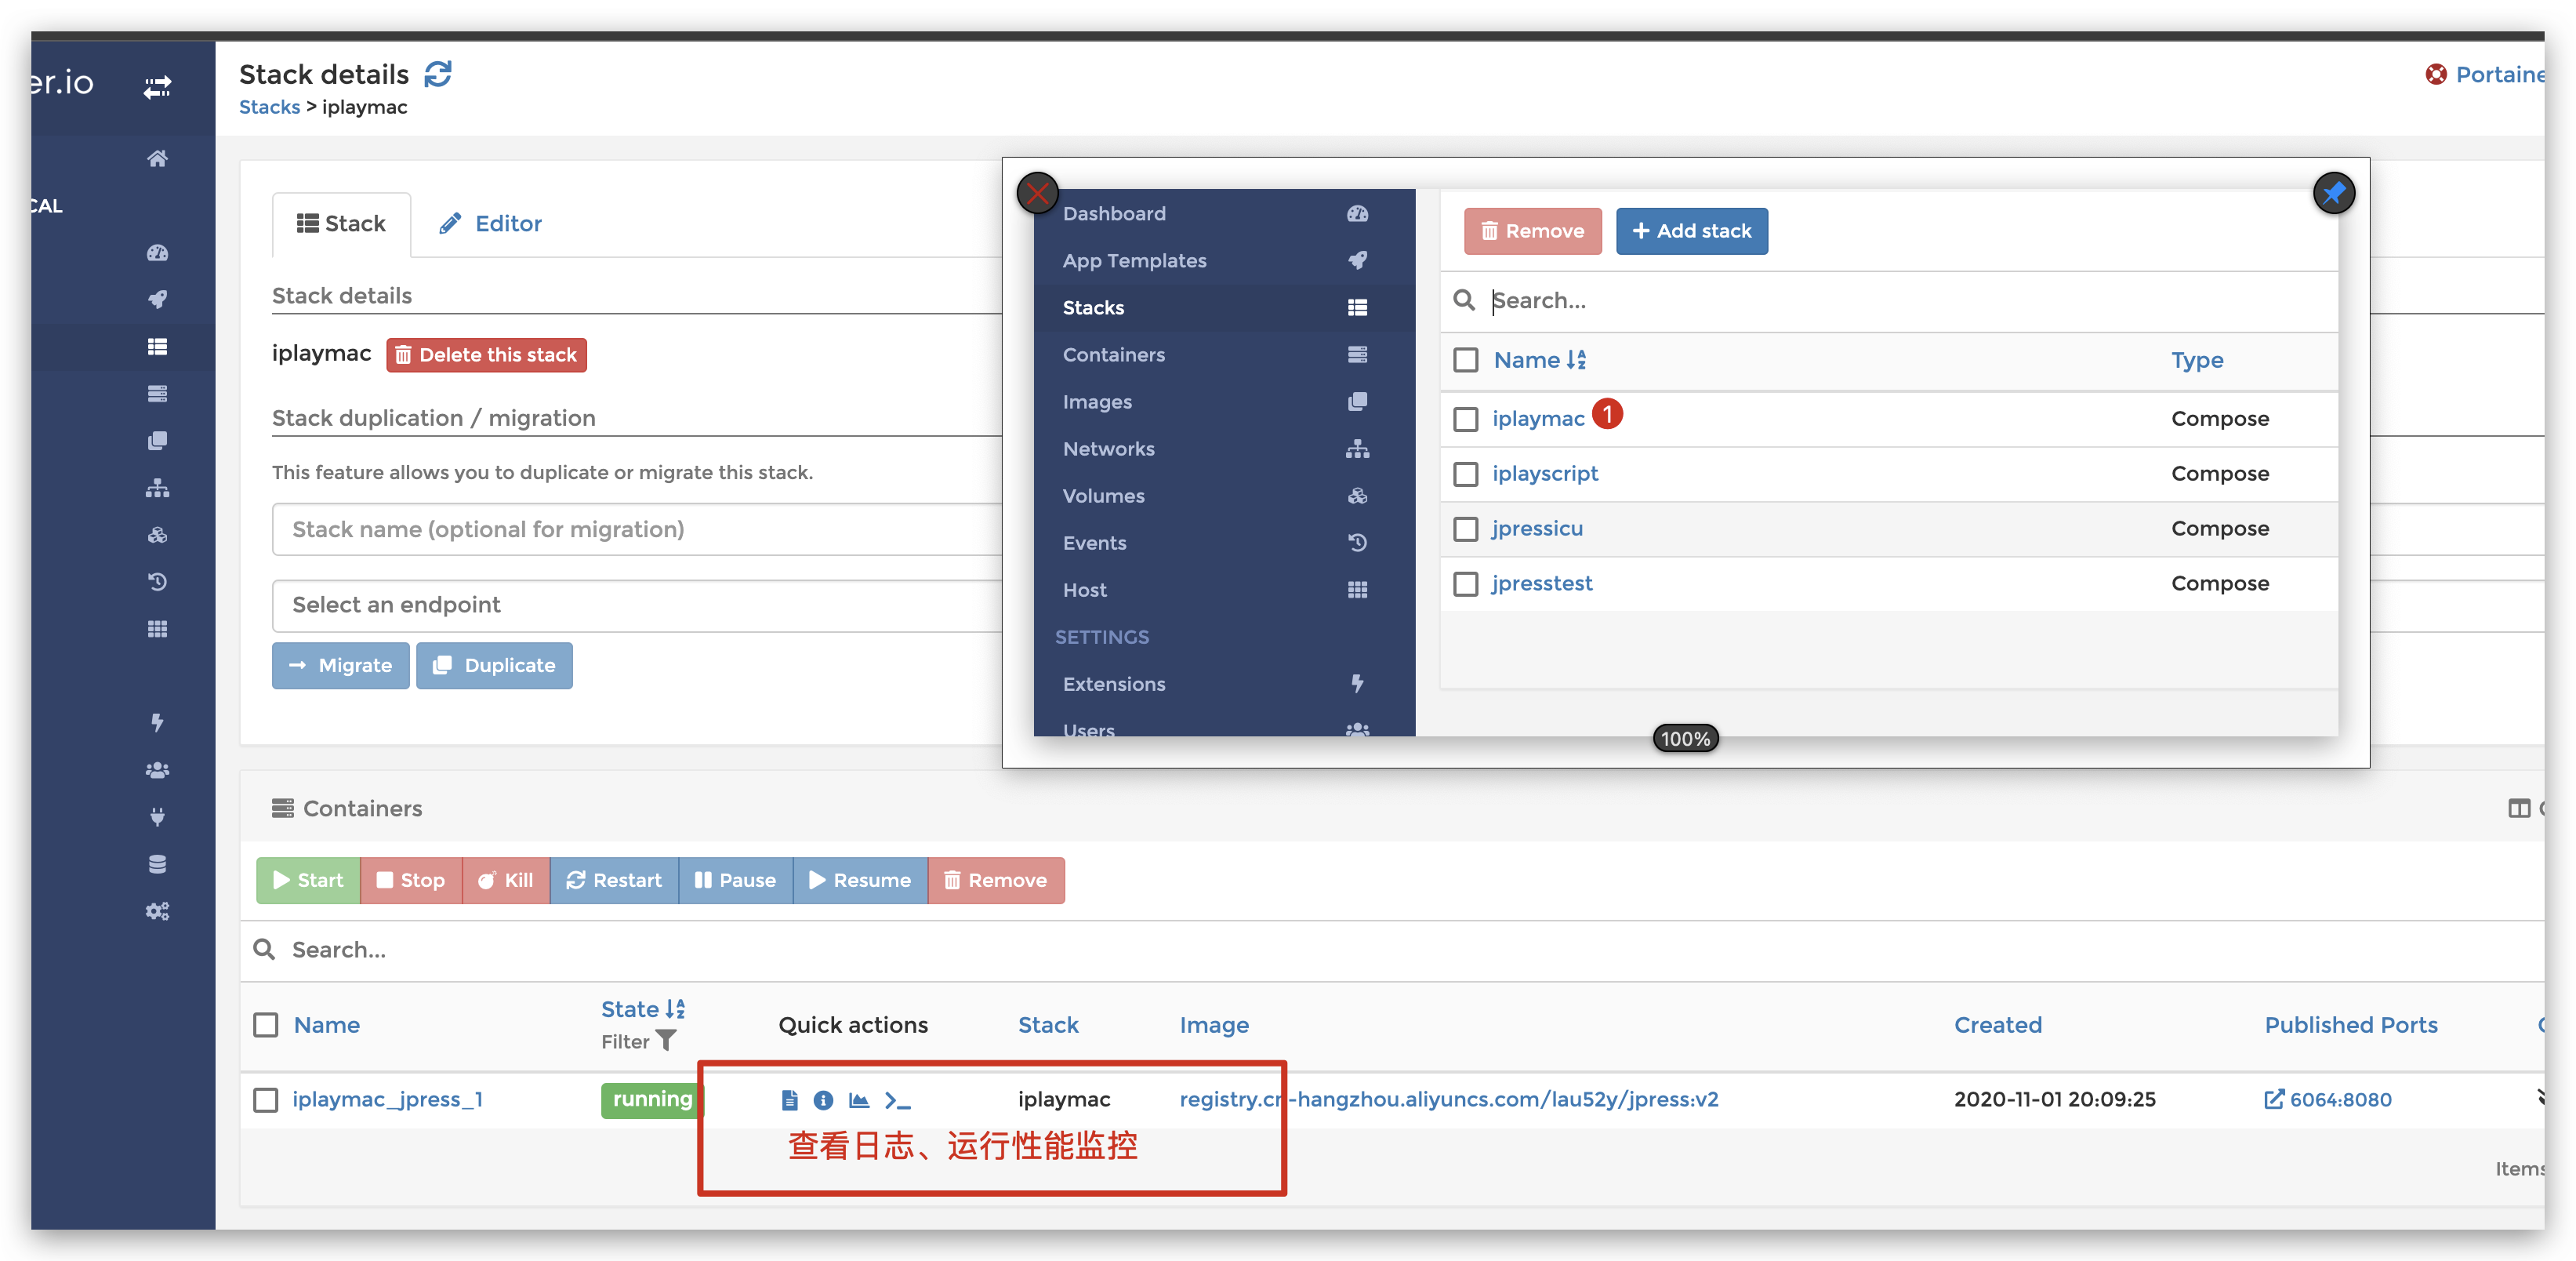
查看日志和性能监控