SpringIOC
1、IOC(Invervion Of Control):控制反转
1.1控制:资源的获取方式
1、主动式:(每次需要资源的时候就自己new一个对象,然后用对象去调用)
Person{
Animal cat = new Animal();//简单对象可以这样去创建
Car car = new Car();//这样new出来的car是没有任何功能的,car是一个比较复杂的对象,由很多零件构成,对于这样的对象,再用new对象的方法,就不合适了
}
**2、被动式:**资源的获取不是我们自己创建,交给容器(IOC)创建即可
Person{
Animal cat;
Public void test{
cat.eat;
}
}
1.2、容器:
管理所有组件(有功能的类),如果Person和Animal都受容器的管理,容器可以自动探查出哪些组件(类)需要另一些组件(类),容器会创建好需要的对象(Animal),并把对象赋值过去
控制反转:从以前的new对象到现在的接收对象
婚介所:只需要把你需要什么条件的对象告诉婚介所人员,他们就会帮你找到符合的。
1.3、DI(Dependency Injection):依赖注入
容器能知道哪些组件(类)运行的时候需要另外哪些组件,容器通过反射的形式,将容器中准备好的对象注入(反射赋值)到需要这个对象的类中。
以前是自己new对象,现在交给容器
2、框架编写流程:
1、导包
核心容器:
spring-expression-4.0.0.RELEASE.jar
spring-core-4.0.0.RELEASE.jar
spring-context-4.0.0.RELEASE.jar
spring-beans-4.0.0.RELEASE.jar
Spring运行的时候还依赖一个日志包,没有就会报错
commons-logging-1.1.3.jar
2、写配置
Spring的配置文件中,集合了所有Spring的IOC容器管理的所有组件
3、测试
3.1、测试person类
1、创建一个简单的person类,并生成get,set,tostring方法

2、创建一个xml文件,要注意是Spring的xml
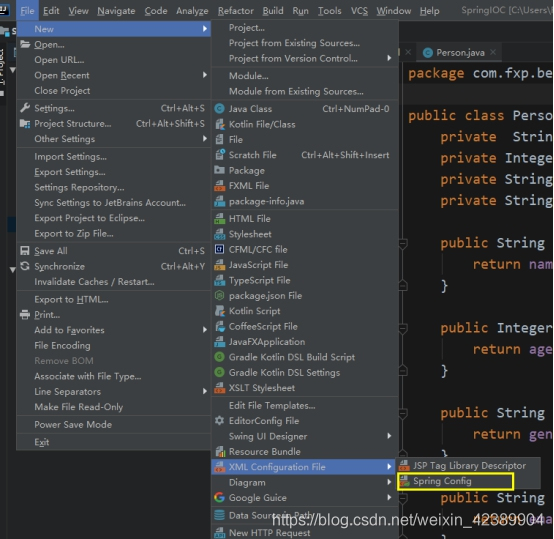
3、在xml文件里开始配置
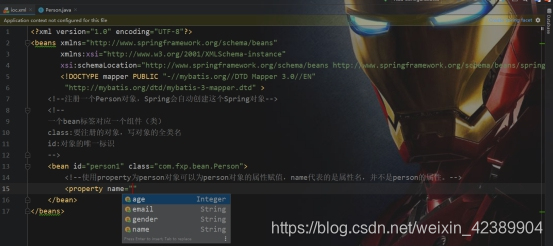
4、配置好的person类
<?xml version="1.0" encoding="UTF-8"?>
<beans xmlns="http://www.springframework.org/schema/beans"
   xmlns:xsi="http://www.w3.org/2001/XMLSchema-instance"
   xsi:schemaLocation="http://www.springframework.org/schema/beans http://www.springframework.org/schema/beans/spring-beans.xsd">
   <!DOCTYPE mapper PUBLIC "-//mybatis.org//DTD Mapper 3.0//EN"
    "http://mybatis.org/dtd/mybatis-3-mapper.dtd" >
<!--注册一个Person对象,Spring会自动创建这个Spring对象-->
<!--
一个bean标签对应一个组件(类)
class:要注册的对象,写对象的全类名
id:对象的唯一标识
-->
<bean id="person1" class="com.fxp.bean.Person">
    <!--使用property为person对象可以为person对象的属性赋值,name代表的是属性名,并不是person的属性。
    name="name":这是指定属性名
    value="zhangsan":为属性赋值
    -->
    <property name="name" value="zhangsan"></property>
    <property name="age" value="23"></property>
    <property name="email" value="[email protected]"></property>
    <property name="gender" value="男"></property>

</bean>
5、创建一个测试类,IOCtest,使用junit测试
遇到的问题:
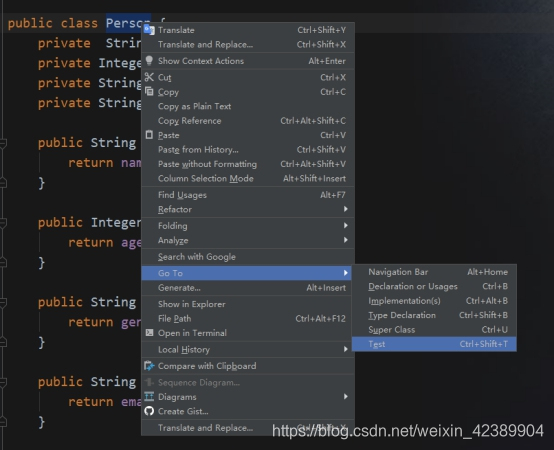
1、idea如何创建junit类
选中要创建的那个类的类名,右键选中GO TO ,选中TEST,然后添加@test注解
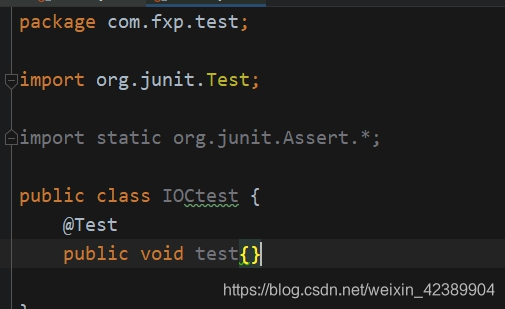
2、注解无效可能是junit的版本太低
选中file–setting–搜索javacompiler–将版本设置到较新的即可
6、源码:
Person类:
package com.fxp.bean;

public class Person {
private  String name;
private Integer age;
private String gender;
private String email;

public String getName() {
    return name;
}

public Integer getAge() {
    return age;
}

public String getGender() {
    return gender;
}

public String getEmail() {
    return email;
}

public void setName(String name) {
    this.name = name;
}

public void setAge(Integer age) {
    this.age = age;
}

public void setGender(String gender) {
    this.gender = gender;
}

public void setEmail(String email) {
    this.email = email;

}

@Override
public String toString() {
    return "Person{" +
            "name='" + name + '\'' +
            ", age=" + age +
            ", gender='" + gender + '\'' +
            ", email='" + email + '\'' +
            '}';
}
}
IOCtest类:
package com.fxp.test;
import com.fxp.bean.Person;
import org.junit.Test;
import org.springframework.context.ApplicationContext;
import org.springframework.context.support.ClassPathXmlApplicationContext;

import static org.junit.Assert.*;

/**
 *
 * 从容器中拿到这个组件
 */
public class IOCtest {
@Test
public void test() {
    // ApplicationContext:代表IOC容器
    //ClassPathXmlApplicationContext:代表当前应用的xml配置文件在classpath(类路径)下
    //根据Spring的xml文件得到ioc容器对象
    ApplicationContext ioc = new ClassPathXmlApplicationContext("11.xml");
            //根据xml配置的person的id拿到person对象
   Person bean = (Person) ioc.getBean("person1");
    System.out.println(bean);
}

}
Xml配置文件:
<?xml version="1.0" encoding="UTF-8"?>
<beans xmlns="http://www.springframework.org/schema/beans"
   xmlns:xsi="http://www.w3.org/2001/XMLSchema-instance"
   xsi:schemaLocation="http://www.springframework.org/schema/beans http://www.springframework.org/schema/beans/spring-beans.xsd">

<!--注册一个Person对象,Spring会自动创建这个Spring对象-->
<!--
一个bean标签对应一个组件(类)
class:要注册的对象,写对象的全类名
id:对象的唯一标识
-->
<bean id="person1" class="com.fxp.bean.Person">
    <!--使用property为person对象可以为person对象的属性赋值,name代表的是属性名,并不是person的属性。
    name="name":这是指定属性名
    value="zhangsan:为属性赋值
    -->
    <property name="name" value="zhangsan"></property>
    <property name="age" value="23"></property>
    <property name="email" value="[email protected]"></property>
    <property name="gender" value="男"></property>

</bean>
</beans>
3.2、要注意的问题:
1、xml文件要放在src目录下,src是源码包开始的路径,称为类路径的开始
所有源码包里的东西都会被合并放在类路径里面。
普通java文件:/bin/文件夹下
Web项目:/WEB-INF/classes
2、先导包,再创建配置文件
3.3、person对象什么时候被创建
1、问题
查看person到底是什么时候被创建的?
创建ioc容器的时候还是获取person对象的时候?
2、证明:
先把获取person对象注释掉,这样就只剩下了创建ioc容器,再运行test方法
public class IOCtest {
@Test
public void test() {
    // ApplicationContext:代表IOC容器
    //ClassPathXmlApplicationContext:代表当前应用的xml配置文件在classpath(类路径)下
    //根据Spring的xml文件得到ioc容器对象
    ApplicationContext ioc = new ClassPathXmlApplicationContext("11.xml");
            //根据xml配置的person的id拿到person对象

   //Person bean = (Person) ioc.getBean("person1");
    //System.out.println(bean);
}
Person的无参构造器里的内容已经输出到控制台了,说明person类是在创建ioc容器的时候就已经被创建好了
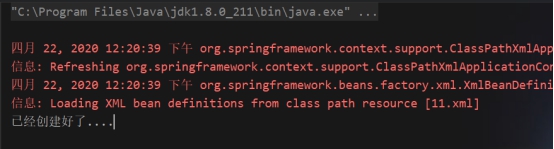
结论:容器中的对象,是在创建ioc容器的时候就已经创建好了。
3.4、对象在容器里是单例还是多例
1、在xml文件里再创建一个对象
2、再次运行test方法,看看无参构造器会被打印几次

很明显,无参构造器被调用了2次。
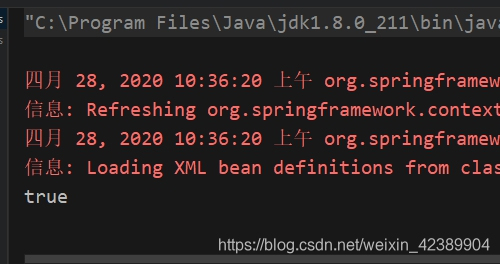
3、再获取一次person1,判断他们是否是同一个对象
输出的是true,说明是同一个对象
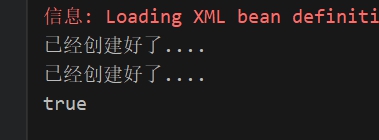
4、结论:同一个组件在ioc容器中是单例的
3.5、Property标签的赋值:
1、Property是通过set方法进行赋值的,例如setName就是先把set去掉,然后将N改成n即可。
由此可知,javabean的属性名是由set方法所决定的,就是将set去掉,然后把前面的大写字母改成小写字母
2、证明:
将setName改为setAame
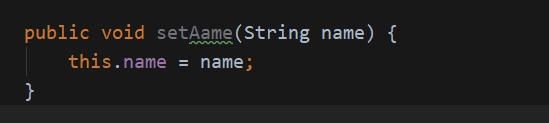
3、查看xml文件,这里的name属性已经报错了
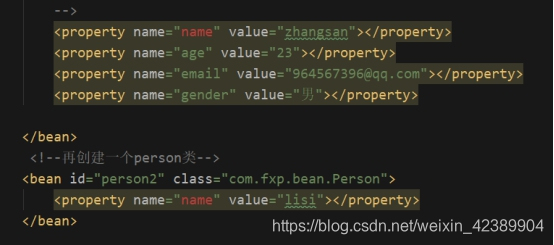
4、当把name属性改为aame的时候,又显示正确了
5、建议:所有的get,set方法都自动生成,不要乱改
6、结论:javabean的属性名是由set方法决定的
3.6、通过类的类型获取bean的实例
1、源码:
Xml:
<?xml version="1.0" encoding="UTF-8"?>
<beans xmlns="http://www.springframework.org/schema/beans"
   xmlns:xsi="http://www.w3.org/2001/XMLSchema-instance"
   xsi:schemaLocation="http://www.springframework.org/schema/beans http://www.springframework.org/schema/beans/spring-beans.xsd">

<!--注册一个Person对象,Spring会自动创建这个Spring对象-->
<!--
  通过类型获取bean的实例对象
-->
<bean  class="com.fxp.bean.Person">

    <property name="name" value="zhangsan"></property>
    <property name="age" value="23"></property>
    <property name="email" value="[email protected]"></property>
    <property name="gender" value="男"></property>

</bean>

</beans>
IOCtest:
@Test
public void test2(){
ApplicationContext ioc = new ClassPathXmlApplicationContext("22.xml");
//ioc的getBean方法有很多种,其中一种就是参数为class的,里面输入要获取的那个//类的类型即可
Object bean = ioc.getBean(Person.class);
System.out.println(bean);
}
2、问题:如果ioc容器中有两个person类
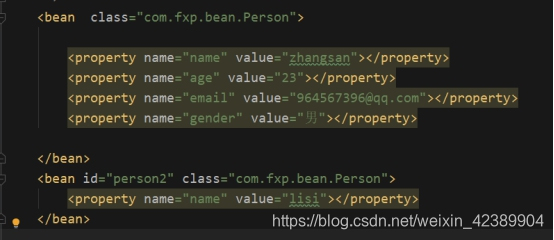
3、再次运行test2方法,报如下错误
org.springframework.beans.factory.NoUniqueBeanDefinitionException: No qualifying bean of type [com.fxp.bean.Person] is defined: expected single matching bean but found 2: com.fxp.bean.Person#0,person2
意思是:person这个类不是唯一的类,找到了两个person类
结论:如果ioc容器中,这个类型的bean有多个,根据类型去创建就会报错。
3.7、通过构造器为bean的属性赋值
1、先给person多加一个有参构造器
Person源码:
package com.fxp.bean;

public class Person {
private  String name;
private Integer age;
private String gender;
private String email;

   //创建一个有参构造器,根据有参构造器为bean的属性赋值
public Person(String name, Integer age, String gender, String email) {
    this.name = name;
    this.age = age;
    this.gender = gender;
    this.email = email;
System.out.println("有参构造器被调用.....");

}

//创建一个无参构造器,看看Person类是什么时候创建的
public Person() {
    //创建person对象时,输出这句话
    System.out.println("已经创建好了....");

}

public String getName() {
    return name;
}

public Integer getAge() {
    return age;
}

public String getGender() {
    return gender;
}

public String getEmail() {
    return email;
}

public void setName(String name) {
    this.name = name;
}

public void setAge(Integer age) {
    this.age = age;
}

public void setGender(String gender) {
    this.gender = gender;
}

public void setEmail(String email) {
    this.email = email;

}

@Override
public String toString() {
    return "Person{" +
            "name='" + name + '\'' +
            ", age=" + age +
            ", gender='" + gender + '\'' +
            ", email='" + email + '\'' +
            '}';
}

}
Xml源码:
<?xml version="1.0" encoding="UTF-8"?>
<beans xmlns="http://www.springframework.org/schema/beans"
   xmlns:xsi="http://www.w3.org/2001/XMLSchema-instance"
   xsi:schemaLocation="http://www.springframework.org/schema/beans http://www.springframework.org/schema/beans/spring-beans.xsd">

<!--注册一个Person对象,Spring会自动创建这个Spring对象-->
<!--
调用有参构造器进行创建对象
如果name和value的值都写的话,参数的顺序可以随便写,如果name的值不写,那value的值就要严格按照有参构造器	里的顺序进行填写
扩展:如果name不写,value的位置也没有按照有参构造函数的来写,则可以在value的后面加一个index的属性,index类似于数组的角标,也是从0开始,有参构造器里的第一个参数的角标为0,依次类推。

-->
<bean  id="person1" class="com.fxp.bean.Person">
    <!--Person(String name, Integer age, String gender, String email)
    写4个constructor-arg就代表是4个参数的有参构造器
    -->
    <constructor-arg name="name" value="ouyang"></constructor-arg>
    <constructor-arg name="age" value="23"></constructor-arg>
    <constructor-arg name="email" value="[email protected]"></constructor-arg>
    <constructor-arg name="gender" value="女"></constructor-arg>
</bean>

</beans>
IOCtest源码:
/**
 * 通过有参构造器为javabean赋值,拿到对象
 *
 */
@Test
public void test3(){
ApplicationContext ioc = new ClassPathXmlApplicationContext("33.xml" );
Object bean = ioc.getBean("person1");
System.out.println(bean);

}
运行结果:
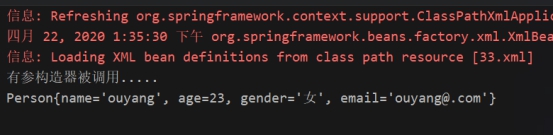
3.8、通过P名称空间为bean赋值
1、IDEA中想引入spring的标签,要先在xml文件的首部添加:
xmlns:context="http://www.springframework.org/schema/context"
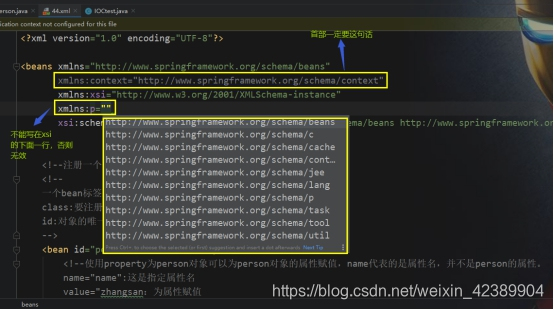
引入p标签后,可以当成一个属性使用
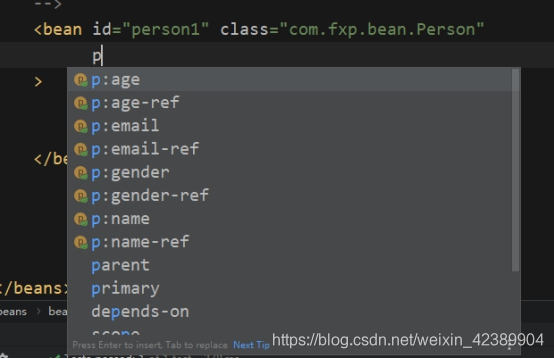
Xml源码:
<?xml version="1.0" encoding="UTF-8"?>

<beans xmlns="http://www.springframework.org/schema/beans"
   xmlns:context="http://www.springframework.org/schema/context"
   xmlns:xsi="http://www.w3.org/2001/XMLSchema-instance"
   xmlns:p="http://www.springframework.org/schema/p"
   xsi:schemaLocation="http://www.springframework.org/schema/beans http://www.springframework.org/schema/beans/spring-beans.xsd">

<!--
  通过p名称空间为bean赋值,p名称空间需要导入
  名称空间是为了防止标签重复
  例如:这里的name标签就重复了,有书名和作者名,这个时候就用到了p标签,可以在name的前面加个标签,书名叫b:name
  作者名叫a:name
  <book>
        <b:name>西游记</b:name>
        <price></price>
        <author
                <a:name>吴承恩</a:name>
                <gender>男</gender>
        </author>
  </book>
-->
<bean id="person1" class="com.fxp.bean.Person"
      p:age="23" p:email="ouyang......" p:gender="nv" p:name="ooooooo">
</bean>

</beans>
Ioctest源码:
/**
 * 通过P名称空间为bean赋值
 */
@Test
public void test4(){
ApplicationContext ioc = new ClassPathXmlApplicationContext("44.xml");
Object bean = ioc.getBean("person1");
System.out.println(bean);

}
运行结果:
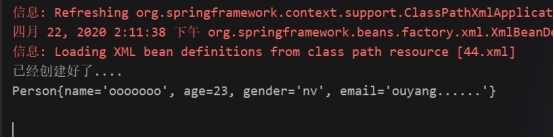
4、复杂属性赋值
之前都是为基本数据类型赋值,可以直接用property标签进行赋值,现在把对象作为属性进行赋值
4.1、为自定义对象类型进行赋值
1、源码:
Person源码:
package com.fxp.bean;

import java.awt.*;
import java.util.List;
import java.util.Map;
import java.util.Properties;

public class Person {
private  String name;
private Integer age;
private String gender;
private String email;

//添加一些比较复杂的类型
private Car car;
private List<Book> books;
private Map<String,Object> map;
private Properties properties;

   //创建一个有参构造器,根据有参构造器为bean的属性赋值
public Person(String name, Integer age, String gender, String email) {
    this.name = name;
    this.age = age;
    this.gender = gender;
    this.email = email;
    System.out.println("有参构造器被调用.....");
}

//创建一个无参构造器,看看Person类是什么时候创建的
public Person() {
    //创建person对象时,输出这句话
    System.out.println("已经创建好了....");

}


public String getName() {
    return name;
}

public Integer getAge() {
    return age;
}

public String getGender() {
    return gender;
}

public String getEmail() {
    return email;
}

public void setName(String name) {
    this.name = name;
}
public void setAge(Integer age) {
    this.age = age;
}
public void setGender(String gender) {
    this.gender = gender;
}
public void setEmail(String email) {
    this.email = email;
}
public Car getCar() {
    return car;
}

public List<Book> getBooks() {
    return books;
}
public Map<String, Object> getMap() {
    return map;
}
public Properties getProperties() {
    return properties;
}
public void setCar(Car car) {
    this.car = car;
}
public void setBooks(List<Book> books) {
    this.books = books;
}
public void setMap(Map<String, Object> map) {
    this.map = map;
}
public void setProperties(Properties properties) {
    this.properties = properties;
}
@Override
public String toString() {
    return "Person{" +
            "name='" + name + '\'' +
            ", age=" + age +
            ", gender='" + gender + '\'' +
            ", email='" + email + '\'' +
            ", car=" + car +
            ", books=" + books +
            ", map=" + map +
            ", properties=" + properties +
            '}';
}
}
Xml源码:
<?xml version="1.0" encoding="UTF-8"?>
<beans xmlns="http://www.springframework.org/schema/beans"
xmlns:xsi="http://www.w3.org/2001/XMLSchema-instance"
xsi:schemaLocation="http://www.springframework.org/schema/beans http://www.springframework.org/schema/beans/spring-beans.xsd">
<!--为各种属性赋值,复杂类型的赋值-->
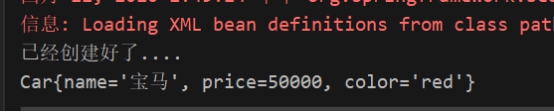
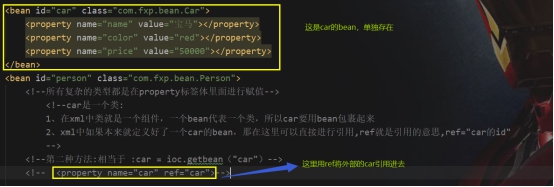
<bean id="car" class="com.fxp.bean.Car">
<property name="name" value="宝马"></property>
<property name="color" value="red"></property>
<property name="price" value="50000"></property>
</bean>
<bean id="person" class="com.fxp.bean.Person">
<!--所有复杂的类型都是在property标签体里面进行赋值-->
<property name="car" ref="car">
<!--car是一个类:
1、在xml中类就是一个组件,一个bean代表一个类,所以car要用bean包裹起来
2、xml中如果本来就定义好了一个car的bean,那在这里可以直接进行引用,ref就是引用的意思,ref="car的id"
-->
</property>
</bean>
</beans>
Ioctest源码:
@Test
public void  test5(){
ApplicationContext ioc = new ClassPathXmlApplicationContext("55.xml");
Person bean = (Person) ioc.getBean("person");
System.out.println(bean.getCar());
}
运行结果
2、为一个对象赋值有两种方式:
第一种:
因为在xml里面,一个bean就代表一个对象,为对象赋值的时候就可以使用bean标签来实现,例如:在person里面再定义个car的bean,然后为car的属性赋值。
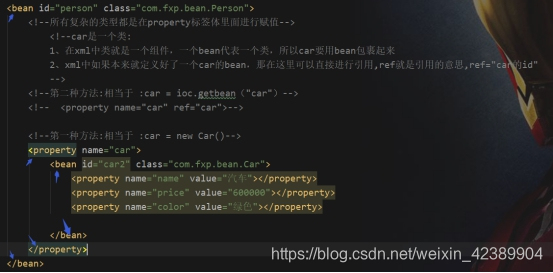
第二种:
在xml文件中单独写一个car的bean,在person里就可以直接使用ref来将car引用进去
4.2、为List进行赋值
1、源码:
Xml:
<?xml version="1.0" encoding="UTF-8"?>
<beans xmlns="http://www.springframework.org/schema/beans"
   xmlns:xsi="http://www.w3.org/2001/XMLSchema-instance"
   xsi:schemaLocation="http://www.springframework.org/schema/beans 							http://www.springframework.org/schema/beans/spring-beans.xsd">
    <!--为List属性赋值-->
<!--这是外部的book类的bean-->
    <bean id="book2" class="com.fxp.bean.Book">
    <property name="authonr" value="夫斯基"></property>
    <property name="bookname" value="炼钢"></property>
</bean>
<bean id="person" class="com.fxp.bean.Person">
    <!--如何为List属性赋值-->
    <property name="books">
        <!--相当于books = new Arraylist<Book>();-->
        <list>
            <!--在List标签体中添加每一个list
            注意:内部bean的id不能被获取到,只能内部使用
            -->
            <bean id="book1" class="com.fxp.bean.Book">
                <!--第一本书,正常赋值-->
                <property name="bookname" value="西游记"></property>
                <property name="authonr" value="吴承恩"></property>
            </bean>
            <!--第二本书,使用ref引用外部的book-->
            <ref bean="book2"/>
        </list>
    </property>

</bean>
</beans>
Ioctest:
@Test
public void test6(){
ApplicationContext ioc = new ClassPathXmlApplicationContext("66.xml");
Person bean = (Person) ioc.getBean("person");
System.out.println(bean.getBooks());
}
4.3、为Map赋值
1、源码:
Xml:
<?xml version="1.0" encoding="UTF-8"?>
<beans xmlns="http://www.springframework.org/schema/beans"
   xmlns:xsi="http://www.w3.org/2001/XMLSchema-instance"
   xsi:schemaLocation="http://www.springframework.org/schema/beans http://www.springframework.org/schema/beans/spring-beans.xsd">

  <!--Map赋值-->
<bean id="book1" class="com.fxp.bean.Book">
    <property name="bookname" value="西游记"></property>
    <property name="authonr" value="吴承恩"></property>
</bean>

<bean id="car" class="com.fxp.bean.Car">
    <property name="color" value="blue"></property>
    <property name="price" value="8000000"></property>
    <property name="name" value="aaa"></property>
</bean>

<bean id="person" class="com.fxp.bean.Person">
   <property name="map">
       <!--相当于map = new LinkedHashMap<>();-->
       <map>
           <!--map里面存的是键值对,一个entry就代表一个键值对-->
           <entry key="key1" value="zhangsan"></entry>
           <entry key="key2" value="lisi"></entry>
           <!--引用外部的book-->
           <entry key="key3" value-ref="book1"></entry>
           <!--引用外部的car-->
           <entry key="key4" value-ref="car"></entry>
           <!--内部的car-->
           <entry key="key5">
               <bean class="com.fxp.bean.Book">
                   <property name="bookname" value="东游记"></property>
                   <property name="authonr" value="55555"></property>
               </bean>
           </entry>
       </map>
   </property>
</bean>

</beans>
Ioctest:
@Test
public void test7(){
ApplicationContext ioc = new ClassPathXmlApplicationContext("77.xml");
Person bean = (Person) ioc.getBean("person");
System.out.println(bean.getMap());
}
3、结论:其实各种类型赋值的时候,是可以相互嵌套的,只要记住各种类型的赋值方式即可
4.4、为properties赋值
1、源码:
Xml:
<?xml version="1.0" encoding="UTF-8"?>
<beans xmlns="http://www.springframework.org/schema/beans"
   xmlns:xsi="http://www.w3.org/2001/XMLSchema-instance"
   xsi:schemaLocation="http://www.springframework.org/schema/beans http://www.springframework.org/schema/beans/spring-beans.xsd">

<bean id="person" class="com.fxp.bean.Person">
    <property name="properties">
        <!--pro = new Properties();properties全部都是kv,而且都是String类型-->
        <props>
            <!--因为kv都是字符串,所以值可以直接写在标签体中-->
            <prop key="username">root</prop>
            <prop key="password">123456</prop>
            <prop key="utils">jdbc</prop>
        </props>
    </property>
</bean>
</beans>
Ioctest:
@Test
public void test8(){
ApplicationContext ioc = new ClassPathXmlApplicationContext("88.xml");
Person bean = (Person) ioc.getBean("person");
System.out.println(bean.getProperties());

}
4.5、Util名称空间创建集合类型的bean方便引用
1、源码:
Xml:
<?xml version="1.0" encoding="UTF-8"?>

<beans xmlns="http://www.springframework.org/schema/beans"
   xmlns:context="http://www.springframework.org/schema/context"
   xmlns:xsi="http://www.w3.org/2001/XMLSchema-instance"
   xmlns:util="http://www.springframework.org/schema/util"
   xsi:schemaLocation="http://www.springframework.org/schema/beans
   http://www.springframework.org/schema/beans/spring-beans.xsd
   http://www.springframework.org/schema/util
   http://www.springframework.org/schema/util/spring-util-4.0.xsd
">

<!--util名称空间创建集合类型的bean,方便使用-->
<bean id="person" class="com.fxp.bean.Person">
    <property name="map" ref="mymap"></property>
    <property name="name" value="zhangsan13"></property>
    <property name="age" value="45"></property>

</bean>
<util:map id="mymap">
    <!--注意:这里不能再加map标签,因为util:map已经等于new了一个map,只要在添加元素即可。
    如果再加一个map标签,就以为着这个map集合里,有一个元素是map集合
    -->
    <entry key="key1" value="zhangsan"></entry>
    <entry key="key2" value="lisi"></entry>
</util:map>
</beans>
Ioctest:
@Test
public void test9(){
ApplicationContext ioc = new ClassPathXmlApplicationContext("9util.xml");
Person bean = (Person) ioc.getBean("person");
System.out.println(bean);
}
运行结果

小结:map或者list这种类型不是自定义的类型,它没有id这个选项,所以当别人想从外部引用他们的时候,就无法引用,很麻烦,所以这个时候用一个util名称空间,就可以让它有id这个选项,引用起来就方便很多。
4.6、级联属性
(属性的属性:person类里的car里的价格)
1、源码:
Xml:
<?xml version="1.0" encoding="UTF-8"?>
<beans xmlns="http://www.springframework.org/schema/beans"
   xmlns:xsi="http://www.w3.org/2001/XMLSchema-instance"
   xsi:schemaLocation="http://www.springframework.org/schema/beans http://www.springframework.org/schema/beans/spring-beans.xsd">


<!--级联属性,属性的属性(person类的里的car里的价格)-->

<bean id="car" class="com.fxp.bean.Car">
    <property name="name" value="宝马"></property>
    <property name="color" value="red"></property>
    <property name="price" value="50000"></property>
</bean>

<bean id="person" class="com.fxp.bean.Person">
    <property name="car" ref="car"></property>
    <!--直接用car.price进行赋值-->
    <property name="car.price" value="100000"></property>

</bean>

</beans>
Ioctest:
@Test
public void test10(){
ApplicationContext ioc = new ClassPathXmlApplicationContext("union.xml");
Person bean = (Person) ioc.getBean("person");
System.out.println(bean.getCar());
}
2、注意:级联属性用的是ref引用,引用和原来的是同一个对象,如果改了某个属性,那原来的那个属性的值也会改变。
5、其他
5.1、通过继承实现bean配置信息的重用
1、源码:
Xml:
<?xml version="1.0" encoding="UTF-8"?>
<beans xmlns="http://www.springframework.org/schema/beans"
xmlns:xsi="http://www.w3.org/2001/XMLSchema-instance"
xsi:schemaLocation="http://www.springframework.org/schema/beans http://www.springframework.org/schema/beans/spring-beans.xsd">
<bean id="person1" class="com.fxp.bean.Person">
<property name="name" value="zhangsan"></property>
<property name="age" value="23"></property>
<property name="email" value="[email protected]"></property>
<property name="gender" value="男"></property>
</bean>
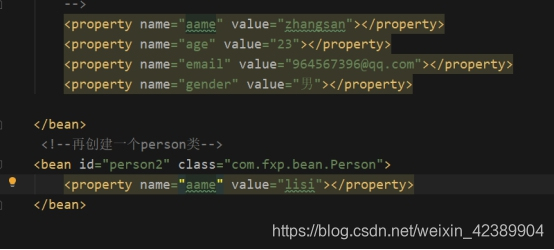
<!--这个人除了名字不一样,其他属性都一样-->
<!--parent:指定当前bean继承于哪个,仅仅只是配置信息的继承,他们并不是父类与子类的关系,而且他们都是person类,不可能存在子父关系-->
<!--在property中,只需要修改不同的属性即可,其他会直接继承过来,parent里面填写的是要继承的那个bean的id值-->
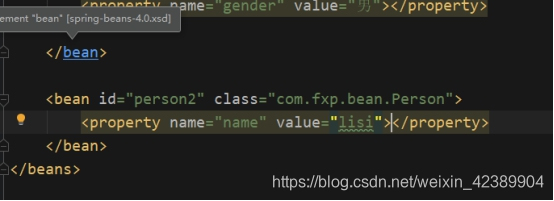
<bean id="person2" class="com.fxp.bean.Person" parent="person1">
<property name="name" value="lisi"></property>
</bean>
</beans>
Ioctest:
@Test
public void test11(){
ApplicationContext ioc = new ClassPathXmlApplicationContext("jicheng.xml");
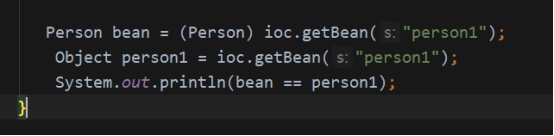
Object bean = ioc.getBean("person1");
Object bean1 = ioc.getBean("person2");
System.out.println(bean);
System.out.println(bean1);
}
运行结果:

5.2、通过abstract创建一个模板bean
1、源码:
Xml:
<?xml version="1.0" encoding="UTF-8"?>
<beans xmlns="http://www.springframework.org/schema/beans"
   xmlns:xsi="http://www.w3.org/2001/XMLSchema-instance"
   xsi:schemaLocation="http://www.springframework.org/schema/beans http://www.springframework.org/schema/beans/spring-beans.xsd">

<!--abstract创建一个bean模板,abstract="true":这个bean不能用来创建实例,只能用来继承-->
<bean id="person1" class="com.fxp.bean.Person" abstract="true">

    <property name="name" value="zhangsan"></property>
    <property name="age" value="23"></property>
    <property name="email" value="[email protected]"></property>
    <property name="gender" value="男"></property>

</bean>

<bean id="person2" class="com.fxp.bean.Person" parent="person1">
<property name="name" value="aaaaa0"></property>

</bean>
</beans>
2、因为id为person1的bean是abstrac修饰的,不能实例化,所以当我们在ioctest获取person1的时候,会报错,如下
@Test
public void test12(){
ApplicationContext ioc = new ClassPathXmlApplicationContext("abstract.xml");
Object bean = ioc.getBean("person1");
System.out.println(bean);
}
运行结果:

3、现在换成person2,如下
@Test
public void test12(){
ApplicationContext ioc = new ClassPathXmlApplicationContext("abstract.xml");
Object bean = ioc.getBean("person2");
System.out.println(bean);
}
运行结果:

5.3、Bean之间的依赖
1、源码:
Xml:
<?xml version="1.0" encoding="UTF-8"?>
<beans xmlns="http://www.springframework.org/schema/beans"
xmlns:xsi="http://www.w3.org/2001/XMLSchema-instance"
xsi:schemaLocation="http://www.springframework.org/schema/beans http://www.springframework.org/schema/beans/spring-beans.xsd">
<!--bean之间的依赖-->
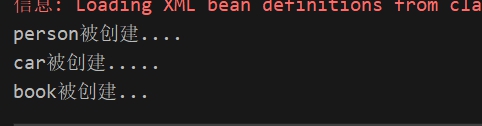
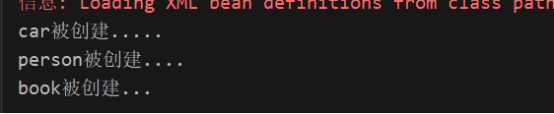
<!--这三者之间的创建有无先后顺序?在car和book的无参构造器里都输入一句话-->
<!--bean的先后顺序决定了对象的创建顺序-->
<!--bean之间的依赖:depends-on:(只是改变创建的先后顺序)-->
<!-- depends-on="person:意思就是car对象会在person对象之后创建-->
<bean id="car" class="com.fxp.bean.Car" depends-on="person"></bean>
<bean id="person" class="com.fxp.bean.Person"></bean>
<bean id="book" class="com.fxp.bean.Book"></bean>
</beans>
Ioctest:
@Test
public void test13(){
    //什么都不做,就只是创建一个ioc容器,因为在容器里的类会在ioc容器被创建的时候就会被创建,这样就可以知道他们创建的先后顺序
    ApplicationContext ioc =new ClassPathXmlApplicationContext("dependency.xml");
}
运行结果:
然后把xml里的person和car的位置换一下
<bean id="car" class="com.fxp.bean.Car"></bean>
<bean id="person" class="com.fxp.bean.Person"></bean>
<bean id="book" class="com.fxp.bean.Book"></bean>
再看结果
也可以不用手动换顺序,加一个depends-on即可,car会在person创建之后创建
<bean id="car" class="com.fxp.bean.Car" depends-on="person"></bean>
结论:由此可见对象被创建的顺序跟xml里面bean的配置顺序有关。
5.4、创建单例和多例的bean
1、Scope属性
2、源码:
Xml:
<?xml version="1.0" encoding="UTF-8"?>
<beans xmlns="http://www.springframework.org/schema/beans"
xmlns:xsi="http://www.w3.org/2001/XMLSchema-instance"
xsi:schemaLocation="http://www.springframework.org/schema/beans http://www.springframework.org/schema/beans/spring-beans.xsd">
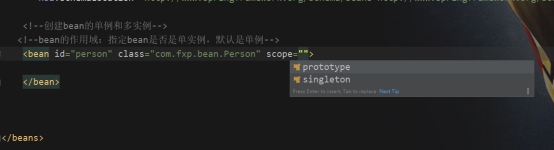
<!--创建bean的单例和多实例-->
<!--bean的作用域:指定bean是否是单实例,默认是单例-->
<!--scope属性:代表作用域
prototype:多实例
1、容器启动默认不会去创建多实例bean
2、获取的时候才创建bean实例
3、每次获取都会创建一个的对象
singleton:单实例,默认
1、单实例bean在容器启动完成之前就已经创建好了
2、任何时候获取的同一个组件都是同一个对象
-->
<bean id="book" class="com.fxp.bean.Book" scope="prototype">
</bean>
</beans>
Ioctest:
@Test
public void test14(){
ApplicationContext ioc = new ClassPathXmlApplicationContext("singlemany.xml");
//获取两次book
Object bean = ioc.getBean("book");
Object bean1 = ioc.getBean("book");
System.out.println(bean==bean1);

}
运行结果:
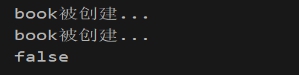
3、Book的构造函数被调用了两次,bean和bean1不是同一个对象,证明是多实例的
5.5、静态工厂和实例工厂
5.5.1、静态工厂
1、源码:
飞机源码:
package com.fxp.bean;
public class Airplane {
private String head;
private String body;
private String tail;
private Integer num;//载客量
private String jzName;//机长名字
public String getHead() {
    return head;
}

public String getBody() {
    return body;
}

public String getTail() {
    return tail;
}

public Integer getNum() {
    return num;
}

public String getJzName() {
    return jzName;
}

public void setHead(String head) {
    this.head = head;
}

public void setBody(String body) {
    this.body = body;
}

public void setTail(String tail) {
    this.tail = tail;
}

public void setNum(Integer num) {
    this.num = num;
}
public void setJzName(String jzName) {
    this.jzName = jzName;
}
@Override
public String toString() {
return "Airplane{" +
        "head='" + head + '\'' +
        ", body='" + body + '\'' +
        ", tail='" + tail + '\'' +
        ", num=" + num +
        ", jzName='" + jzName + '\'' +
        '}';
}
}
静态工厂源码:
package com.fxp.Factory;
import com.fxp.bean.Airplane;
import javax.xml.stream.XMLOutputFactory;
/**
 * 静态工厂
 * 静态工厂其实就是,不创建工厂本身的类,写一个静态方法用静态工厂名.工厂方法名,去调用这个工厂
 * 具体的创建airplane的类的工作都放在静态方法里面
 */
public class staticFactory {

//staticFactory.getAirPlane()
public static Airplane getAirPlane(String jzName){
    System.out.println("静态工厂造飞机......");

    Airplane airplane = new Airplane();
    airplane.setBody("机身");
    airplane.setHead("机首");
    airplane.setNum(100);
    airplane.setTail("机尾");
    airplane.setJzName(jzName);
    return airplane;
}
}
Xml:
<?xml version="1.0" encoding="UTF-8"?>
<beans xmlns="http://www.springframework.org/schema/beans"
   xmlns:xsi="http://www.w3.org/2001/XMLSchema-instance"
   xsi:schemaLocation="http://www.springframework.org/schema/beans http://www.springframework.org/schema/beans/spring-beans.xsd">

<!--静态工厂方法和实例工厂方法创建bean,FactoryBean-->
<!--bean的创建默认就是框架利用反射new出来的bean实例-->
<!--有一个飞机的类,假设每架飞机除了机长的名字不一样,其他都一样

以前我们可以用继承,只需要修改机长的名字即可,把其他一样的属性都继承过来即可
现在可以用工厂模式,工厂会帮我们创建对象
AirPlane ap = AirPlaneFactory.getAirPlane(String jzName);
AirPlaneFactory这个类会帮我们创建对象,这个类就是工厂。

静态工厂:工厂本身不用创建对象,通过静态的方法调用,对象 = 工厂类.工厂方法名();
实例工厂:工厂本身需要创建对象,工厂类 工厂对象 = new 工厂类();
         工厂对象.工厂方法():工厂对象.getAirPlane("张三");
-->
   <!-- <bean id="airplane1" class="com.fxp.bean.Airplane">

</bean>-->

<!--第一种:静态工厂配置(不需要创建工厂对象)-->
<bean id="airplane1" class="com.fxp.Factory.staticFactory"
      factory-method="getAirPlane">
    <!--如果没有指定factorymethod,就会为staticFactory创建对象,factorymethod的作用就是指定哪个方法是工厂方法-->
    <!--getAirPlane(String jzName),这个方法需要传入一个参数,可以用constructor进行传参-->
    <constructor-arg name="jzName" value="张三"></constructor-arg>
</bean>

</beans>
Ioctest:
@Test
public void test15(){
ApplicationContext ioc = new ClassPathXmlApplicationContext("Factorybean.xml");
//测试静态工厂
Object bean = ioc.getBean("airplane1");
System.out.println(bean);
运行结果:

2、总结:配置静态工厂:
1、先创建一个需要创建对象的类(airplane),写入一些基本信息
2、创建一个静态工厂类,创建一个静态方法,在静态方法里面new一个需要创建的那个对象的类,然后调用目标类的set方法,为其赋值,最后返回目标类的类型
3、Xml的配置:以前bean里面的class配置的都是目标类的全类名,现在class里需要写的是静态工厂的全类名,然后指定一个工厂方法,如果需要传参,就在标签体里面选择传参的constractor属性即可。
5.5.2、实例工厂:
1、源码:
实例工厂源码:
package com.fxp.Factory;
import com.fxp.bean.Airplane;
/**
 * 实例工厂
 */
public class instanceFactory {

   // new  instanceFactory().getAirPlane
    public Airplane getAirPlane(String jzName){
    System.out.println("实例工厂造飞机.....");

    Airplane airplane = new Airplane();
    airplane.setBody("机身");
    airplane.setHead("机首");
    airplane.setNum(100);
    airplane.setTail("机尾");
    airplane.setJzName(jzName);
    return airplane;
}
}
Xml:
<!--第二种,实例工厂配置(工厂本身需要创建对象)-->
<bean id="insair" class="com.fxp.Factory.instanceFactory"></bean>
<!--实例工厂配置:需要配置两个bean,一个是实例工厂的bean,一个是airplane本身的bean,
但是不是airplane本身new自己创建的对象,而是通过实例工厂创建的对象,所以需要让实例工厂和airplane类
产生联系,这个联系就是factory-bean,这个属性是指定当前对象创建使用哪个工厂
-->

<!--注意:
实例工厂配置,
1、都是先配置出实例工厂对象
2、配置我们要创建的对象使用哪个工厂创建
1、factory-bean指定哪个工厂
2.factory-method指定工厂方法
-->
<bean id="airplane2" class="com.fxp.bean.Airplane"
factory-bean="insair" factory-method="getAirPlane">
<constructor-arg name="jzName" value="zhangsan"></constructor-arg>
</bean>
Ioctest:
@Test
public void test15(){
ApplicationContext ioc = new ClassPathXmlApplicationContext("Factorybean.xml");
//测试静态工厂
Object bean = ioc.getBean("airplane1");
System.out.println(bean);

//测试实例工厂
Object bean1 = ioc.getBean("airplane2");
System.out.println(bean1);
}
运行结果:

5.6、FactoryBean
1、源码:
MyFactoryBeanImpl:
package com.fxp.Factory;
import com.fxp.bean.Book;
import org.springframework.beans.factory.FactoryBean;

import java.util.UUID;

/**
 * implements Factory<?>这里最好添加泛型,这个泛型也就是需要创建实例的类
 * 实现了FactoryBean接口的类都是spring认识的工厂类
 * spring会自动调用工厂方法创建实例
 *步骤:
 * 1、编写一个FactoryBean的实现类
 * 2、在spring配置文件中进行注册
 */
public class MyFactoryBeanImpl implements FactoryBean<Book> {

/**
 * getObject:工厂方法,spring会自动调用
 * 返回创建的对象
 * @return
 * @throws Exception
 */
@Override
public Book getObject() throws Exception {
    System.out.println("MyFactoryBeanImpl创建了对象....");
    Book book = new Book();
    book.setAuthonr("夫斯基");
    book.setBookname(UUID.randomUUID().toString());
    return book;
}

/**
 * 返回创建的对象的类型,spring会自动调用这个方法来确认要确认的对象是什么类型
 * @return
 */
@Override
public Class<?> getObjectType() {
    return Book.class;
}

/**
 * 这是判断是单例吗
 * false:不是单例
 * true:是单例
 * @return
 */
@Override
public boolean isSingleton() {
    return false;
}
}
Xml:
<?xml version="1.0" encoding="UTF-8"?>
<beans xmlns="http://www.springframework.org/schema/beans"
   xmlns:xsi="http://www.w3.org/2001/XMLSchema-instance"
   xsi:schemaLocation="http://www.springframework.org/schema/beans http://www.springframework.org/schema/beans/spring-beans.xsd">

  <!--FactoryBean是Spring规定的一个接口,只要是这个接口的实现类,spring都认为是一个工厂-->
<!--FactoryBean不管是单实例还是多实例,都不是在ioc容器创建的时候创建实例,都是在获取的时候才创建实例-->

<bean id="myFactoryBean" class="com.fxp.Factory.MyFactoryBeanImpl"></bean>

</beans>
Ioctest:
@Test
public void test16(){
ApplicationContext ioc = new ClassPathXmlApplicationContext("FactoryBean.xml");
Object bean = ioc.getBean("myFactoryBean");
System.out.println(bean);
}
运行结果:

5.7、Bean后置处理器(不重要)
1、源码:
Xml:
<?xml version="1.0" encoding="UTF-8"?>
<beans xmlns="http://www.springframework.org/schema/beans"
   xmlns:xsi="http://www.w3.org/2001/XMLSchema-instance"
   xsi:schemaLocation="http://www.springframework.org/schema/beans http://www.springframework.org/schema/beans/spring-beans.xsd">

<!--创建带有生命周期的bean-->
<!--在book类里面创建一个init-method,用于下面测试后置处理器-->
<bean id="book" class="com.fxp.bean.Book" init-method="Myinitial"></bean>


<!--后置处理器:BeanPostProcessor-->
<!--Spring有一个接口,后置处理器,可以在bean初始化前后调用方法-->
<bean id="myBeanPostProcessor" class="com.fxp.bean.MyBeanPostProcessor">

</bean>
</beans>
MyBeanProcessor:
package com.fxp.bean;

import org.springframework.beans.BeansException;
import org.springframework.beans.factory.config.BeanPostProcessor;

public class MyBeanPostProcessor implements BeanPostProcessor {
/**
 * postProcessBeforeInitialization:初始化之前调用
 * Object bean:将要初始化的bean
 * String beanName:xml里面bean的id
 */
@Override
public Object postProcessBeforeInitialization(Object bean, String beanName) throws BeansException {
    System.out.println("【"+beanName+"】bean将要调用初始化方法.....,这个bean是这样的"+bean);
    return bean;
}

/**
 * postProcessAfterInitialization:初始化方法之后调用
 */

@Override
public Object postProcessAfterInitialization(Object bean, String beanName) throws BeansException {
    System.out.println("【"+beanName+"】bean初始化方法结束..."+bean);
    return bean;
}
}
Ioctest:
@Test
public void test17(){
//ConfigurableApplicationContext这个是ApplicationContext的子接口
ConfigurableApplicationContext ioc = new ClassPathXmlApplicationContext("houzhi.xml");

}
运行结果:

5.8、Spring管理数据库连接池
1、添加jar包
c3p0-0.9.5.2.jar
mchange-commons-java-0.2.12.jar
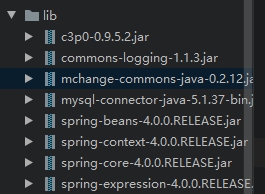
不同的c3p0版本对应不同的mchange-commons,要注意版本问题
2、源码:
Xml:
<?xml version="1.0" encoding="UTF-8"?>
<beans xmlns="http://www.springframework.org/schema/beans"
   xmlns:xsi="http://www.w3.org/2001/XMLSchema-instance"
   xsi:schemaLocation="http://www.springframework.org/schema/beans http://www.springframework.org/schema/beans/spring-beans.xsd">

<!--数据库的连接池是单例的,一个项目就一个连接池,正好可以用Spring来管理连接池-->

<bean id="dataSource" class="com.mchange.v2.c3p0.ComboPooledDataSource">
    <!--我们需要配置用户名,密码等,但是在连接池中这些属性已经存在,所以直接用property配置即可-->

    <property name="user" value="root"></property>

    <property name="password" value="fxp123456"></property>

    <property name="jdbcUrl" value="jdbc:mysql://localhost:3306/test"></property>

    <property name="driverClass" value="com.mysql.jdbc.Driver"></property>
</bean>
</beans>
Ioctest:
@Test
public void test18() throws SQLException {
ApplicationContext ioc = new ClassPathXmlApplicationContext("linkpool.xml");
//1、按照ID获取,还需要进行强转,注意:这里的Datasouce是java.sql包下的
DataSource bean = (DataSource) ioc.getBean("dataSource");
System.out.println(bean.getConnection());

//2、按照类型获取
//DataSource bean1 = ioc.getBean(DataSource.class);
//获取连接
//System.out.println(bean.getConnection());

}
运行结果:

从连接池里 拿到了连接。
5.9、引入外部配置文件
(以5.8的数据库为例,需要依赖context名称空间)
1、源码:
Properties配置文件(普通的file)
username=root
password=fxp123456
jdbcUrl=jdbc:mysql://localhost:3306/test
driverClass=com.mysql.jdbc.Driver
Dbconf.xml
<?xml version="1.0" encoding="UTF-8"?>
<beans xmlns="http://www.springframework.org/schema/beans"
   xmlns:context="http://www.springframework.org/schema/context"
   xmlns:xsi="http://www.w3.org/2001/XMLSchema-instance"
   xsi:schemaLocation="http://www.springframework.org/schema/beans
   http://www.springframework.org/schema/beans/spring-beans.xsd
   http://www.springframework.org/schema/context
   http://www.springframework.org/schema/context/spring-context.xsd
">

   <!--引入外部配置文件,依赖context名称空间,以dbconf.properties为例-->
<!-- <context:property-placeholder:加载外部配置文件-->
<!--classpath:固定写法,提示里就有,表示引用类路径下的一个资源-->
<context:property-placeholder location="classpath:dbconf.properties"></context:property-placeholder>

<bean id="dataSource" class="com.mchange.v2.c3p0.ComboPooledDataSource">
    <!--${外部配置文件里的key}:表示动态取出配置文件里的value-->
    <property name="user" value="${username}"></property>

    <property name="password" value="${password}"></property>

    <property name="jdbcUrl" value="${jdbcUrl}"></property>

    <property name="driverClass" value="${driverClass}"></property>
</bean>
注意:当我们引入名称空间的时候,必须引入这个名称空间的xsd解析文件。
参考:https://blog.csdn.net/MarkusZhang/article/details/104460748
例如:context名称空间:(这三个都是必不可少的)
xmlns:context="http://www.springframework.org/schema/context"
http://www.springframework.org/schema/context
http://www.springframework.org/schema/context/spring-context.xsd
Ioctest:
@Test
public void test19() throws SQLException {
ApplicationContext ioc = new ClassPathXmlApplicationContext("dbconf.xml");
DataSource bean = ioc.getBean(DataSource.class);
System.out.println(bean.getConnection());
}
运行结果:

没有拿到连接,运行停止了
2、原因:
我们在dbconf.xml里配置的文件里有一个选项
<property name="user" value="${username}"></property>
Username是spring里的关键字,所以当我们用这个进行获取的时候,并不能获取到我们配置文件里的username,而是获取到了关键字username里面的内容。
3、将dbconf.properties和dbconf.xml的username都改为username1

拿到了连接
4、username到底是什么
Username就是系统的用户名
5.10、基于XML的自动装配
5.10.1、autowire:byname
1、自动装配:为自定义类型自动赋值(重点在思想)
如果一个类里面自定义的类太多,每一个都要手动进行赋值的话,是很麻烦的,所以就用到了自动赋值。Autowire这个属性可以帮助自动赋值。

2、源码:
Xml:
<?xml version="1.0" encoding="UTF-8"?>
<beans xmlns="http://www.springframework.org/schema/beans"
   xmlns:xsi="http://www.w3.org/2001/XMLSchema-instance"
   xsi:schemaLocation="http://www.springframework.org/schema/beans http://www.springframework.org/schema/beans/spring-beans.xsd">

<bean id="car" class="com.fxp.bean.Car">
    <property name="name" value="汽车"></property>
    <property name="color" value="红色"></property>
    <property name="price" value="6000000"></property>
</bean>

<!--为person里面的自定义类型属性赋值(手动赋值)-->
   <!-- <bean id="person" class="com.fxp.bean.Person">
    <property name="car" ref="car"></property>
</bean>-->

<!--自动赋值-->
<!--autowire:自动赋值,默认是default/no,不自动装配
autowire="byName":按照名字自动装配
    	private Car car:将属性名作为id去容器中找到这个组件,给他赋值
autowire="byType":按照类型自动装配
autowire="constructor":按照构造器自动装配

-->
<bean id="person" class="com.fxp.bean.Person" autowire="byName">
</bean>
</beans>
Ioctest:
@Test
public void test20(){

ConfigurableApplicationContext ioc = new ClassPathXmlApplicationContext("auto.xml");
Object bean = ioc.getBean("person");
System.out.println(bean);
}
运行结果

3、结论
自动装配的时候,在同一个xml文件里,必须有自定义类的bean,比如car,然后person中的autowire:byname才能在这个xml文件里找到。
注意:autowire:byname是用属性名作为id去寻找的,所以属性名和id必须是一样的,否则会找不到。
5.10.2、autowire:bytype
1、源码
Xml:
<?xml version="1.0" encoding="UTF-8"?>
<beans xmlns="http://www.springframework.org/schema/beans"
   xmlns:xsi="http://www.w3.org/2001/XMLSchema-instance"
   xsi:schemaLocation="http://www.springframework.org/schema/beans http://www.springframework.org/schema/beans/spring-beans.xsd">

<bean id="car" class="com.fxp.bean.Car">
    <property name="name" value="汽车"></property>
    <property name="color" value="红色"></property>
    <property name="price" value="6000000"></property>
</bean>

<!--为person里面的自定义类型属性赋值(手动赋值)-->
   <!-- <bean id="person" class="com.fxp.bean.Person">
    <property name="car" ref="car"></property>
</bean>-->

<!--自动赋值-->
<!--autowire:自动赋值,默认是default/no,不自动装配
autowire="byName":按照名字自动装配
    private Car car:将属性名作为id去容器中找到这个组件,给他赋值;如果属性名和id不一样,就会找不到,找不到就赋值为null

autowire="byType":按照类型自动装配,以属性的类型为依据去容器中查找到这个组件
    car = ioc.getBean(Car.class);

autowire="constructor":按照构造器自动装配

-->
<bean id="person" class="com.fxp.bean.Person" autowire="byType">
</bean>


</beans>
Ioctest:
@Test
public void test20(){

ConfigurableApplicationContext ioc = new ClassPathXmlApplicationContext("auto.xml");
Object bean = ioc.getBean("person");
System.out.println(bean);
}
运行结果:

注意:如果按照类型进行自动装配,在同一个容器中(iocxml配置文件中),不能同时有两个相同的类,与之前的ioc.getBean(XXX.Class)同理,不然就会报错。
5.10.3、autowire:constructor
在person类加一个只有一个car参数的构造器
//autowire-constructor使用
public Person(Car car) {
this.car = car;
System.out.println("我是autowire的只有car参数的构造器....");
}
为了不影响效果,注释掉其他有参构造器
1、源码
Xml:
<?xml version="1.0" encoding="UTF-8"?>
<beans xmlns="http://www.springframework.org/schema/beans"
   xmlns:xsi="http://www.w3.org/2001/XMLSchema-instance"
   xsi:schemaLocation="http://www.springframework.org/schema/beans http://www.springframework.org/schema/beans/spring-beans.xsd">

<bean id="car" class="com.fxp.bean.Car">
    <property name="name" value="汽车"></property>
    <property name="color" value="红色"></property>
    <property name="price" value="6000000"></property>
</bean>

<!--为person里面的自定义类型属性赋值(手动赋值)-->
   <!-- <bean id="person" class="com.fxp.bean.Person">
    <property name="car" ref="car"></property>
</bean>-->

<!--自动赋值-->
<!--autowire:自动赋值,默认是default/no,不自动装配
autowire="byName":按照名字自动装配
    private Car car:将属性名作为id去容器中找到这个组件,给他赋值;如果属性名和id不一样,就会找不到,找不到就赋值为null

autowire="byType":按照类型自动装配,以属性的类型为依据去容器中查找到这个组件
    car = ioc.getBean(Car.class);

autowire="constructor":按照构造器自动装配

-->
<bean id="person" class="com.fxp.bean.Person" autowire="constructor">
</bean>

</beans>
Ioctest:
@Test
public void test20(){

ConfigurableApplicationContext ioc = new ClassPathXmlApplicationContext("auto.xml");
Object bean = ioc.getBean("person");
System.out.println(bean);
}
运行结果:

2、有参构造器赋值:
1、先按照有参构造器的参数类型进行赋值(找到就赋值),如果没有就装配null
2、如果类型找到了多个,那就以参数的名作为id继续匹配,找到就赋值,找不到就null
3、按照构造器,无论怎样不会报错(找到就赋值,找不到就null)
注意:自动装配仅限于自定义类型,基本类型无法进行自动装配,例如int类型,无法装配具体的数字,自定义类型,可以在容器中找,找到就装配,找不到就null
5.12、通过注解创建DAO,Service,controller
1、源码
Xml:
<?xml version="1.0" encoding="UTF-8"?>
<beans xmlns="http://www.springframework.org/schema/beans"
   xmlns:xsi="http://www.w3.org/2001/XMLSchema-instance"
   xmlns:context="http://www.springframework.org/schema/context"
   xsi:schemaLocation="http://www.springframework.org/schema/beans http://www.springframework.org/schema/beans/spring-beans.xsd
   http://www.springframework.org/schema/context
   http://www.springframework.org/schema/context/spring-context.xsd
">

<!--通过注解分别创建Dao。Service、controller
通过给bean上添加某些注解,可以快速的将bean加入到ioc容器中
某个类上添加任何一个注解,都可以将这个组件快速加入到ioc容器中
spring有四个注解:
@controller:推荐给控制器层(servlet)的注解
@Service:推荐给业务逻辑层的注解
@Repository:推荐给数据库层(持久化层,Dao层)的注解
@component:推荐给除上面三层以外的注解

注解可以随便加,推荐加的只是给程序员看的

使用注解加入到ioc容器的步骤:
1、给要添加的组件上标注解
2、告诉spring自动扫描加了注解的组件,依赖context名称空间
3、一定要导入aop的jar包,支持注解模式

-->
<!--context:component-scan:自动组件扫描
base-package="":扫描的基础包,把基础包及它下面的所有包的所有加了注解的类,自动扫描进ioc容器中
-->
<context:component-scan base-package="com.fxp"></context:component-scan>

</beans>
BookServlet:
package com.fxp.servelet;

import org.springframework.stereotype.Controller;

@Controller
public class BookServlet {
}
BookDao:
package com.fxp.Dao;

import org.springframework.stereotype.Repository;

@Repository
public class BookDao {
}
BookService:
package com.fxp.Service;

import org.springframework.stereotype.Service;

@Service
public class BookService {
}
Ioctest:
@Test
public void test22(){
ApplicationContext ioc = new ClassPathXmlApplicationContext("DaoService.xml");
Object bean = ioc.getBean("bookDao");
Object bean1 = ioc.getBean("bookDao");
System.out.println(bean==bean1);
}
运行结果
结论:使用注解和使用bean生成的类都是单例的
**注意:
1、一定要加入aop的jar包,不然会报错,aop的jar包支持注解模式
2、一定要使用context名称空间,前面有讲怎么加入
3、以前bean里面可以加id,现在的id就是类名首字母小写
4、注解的id也可以手动改变,只要在注解的后面加上自己想要的名字即可

5、如果想让某个组件变成多实例的,只需要加一个@scope注解即可

5.13、context:include-filter
指定扫描包需要包含的类
1、源码:
Xml:
<?xml version="1.0" encoding="UTF-8"?>
<beans xmlns="http://www.springframework.org/schema/beans"
   xmlns:xsi="http://www.w3.org/2001/XMLSchema-instance"
   xmlns:context="http://www.springframework.org/schema/context"
   xsi:schemaLocation="http://www.springframework.org/schema/beans http://www.springframework.org/schema/beans/spring-beans.xsd
   http://www.springframework.org/schema/context
   http://www.springframework.org/schema/context/spring-context.xsd
">

  <!--使用context:include-filter指定扫描包时要包含的类,默认是全部扫描进容器-->
  <!--use-default-filters="":使用默认的过滤器规则
        true:使用默认的,也就是全部扫描进来,跟没写这个参数一样的效果
        false:禁用默认的规则,使用自己的规则
  -->
<context:component-scan base-package="com.fxp" use-default-filters="false">
    <!--指定只扫描哪些组件
    参数与exclude-filter一样
    如果想多几个,就多写几遍
    -->
    <context:include-filter type="annotation" expression="org.springframework.stereotype.Controller"/>
    <context:include-filter type="annotation" expression="org.springframework.stereotype.Service"/>
</context:component-scan>

</beans>
5.14、context:exclude-filter
指定扫描包时不包含的类
1、源码:
Xml:
<?xml version="1.0" encoding="UTF-8"?>
<beans xmlns="http://www.springframework.org/schema/beans"
   xmlns:xsi="http://www.w3.org/2001/XMLSchema-instance"
   xmlns:context="http://www.springframework.org/schema/context"
   xsi:schemaLocation="http://www.springframework.org/schema/beans http://www.springframework.org/schema/beans/spring-beans.xsd
   http://www.springframework.org/schema/context
   http://www.springframework.org/schema/context/spring-context.xsd
">

  <!--使用context:exclude-filter指定扫描包时不包含的类-->
<!--扫描时可以排除一些不要的组件-->
<context:component-scan base-package="com.fxp">
    <!--type="":指定排除规则
    例如:一般只用前面两种
    type="annotation":按照注解进行排除,标注了指定注解的组件不要
        type="":指定排除规则
        expression="":注解的全类名
    type="assignable":指定排除某个具体的类
        expression="":类的全类名

    ***不常用:
    type="aspectj":aspectj表达式
    type="custom":自定义一个TypeFilter接口,此接口只有一个match方法,返回true就排除,返回false就不排除
    type="regex":正则表达式

    -->
    <context:exclude-filter type="annotation" expression="org.springframework.stereotype.Repository"/>
</context:component-scan>

</beans>
5.11、Spel
Spring Expression language spring的表达式语言
1、源码
Xml:
<?xml version="1.0" encoding="UTF-8"?>
<beans xmlns="http://www.springframework.org/schema/beans"
   xmlns:xsi="http://www.w3.org/2001/XMLSchema-instance"
   xsi:schemaLocation="http://www.springframework.org/schema/beans http://www.springframework.org/schema/beans/spring-beans.xsd">

<bean id="car" class="com.fxp.bean.Car">
    <property name="name" value="car"></property>
</bean>
   <!--spel测试:#{}

   -->
<bean id="person" class="com.fxp.bean.Person">
    <!--假设每个月工资是6000,可以直接在{}里写上表达式-->
    <property name="salary" value="#{6000*12}"></property>
    <!--引用其他bean的某个属性值-->
    <!--假设person的名字就是Car类的名字-->
    <property name="name" value="#{car.name}"></property>
    <!--引用其他bean-->
    <property name="car" value="#{car}"></property>
    <!--调用静态方法
    #{T(全类名).静态方法名(参数1,参数....)}
    -->
    <property name="email" value="#{T(java.util.UUID).randomUUID().toString().substring(0,5)}"></property>

    <!--非静态方法调用:对象.方法名-->
    <property name="gender" value="#{car.getName()}"></property>

</bean>
</beans>
Ioctest:
public void test21(){
ConfigurableApplicationContext ioc = new ClassPathXmlApplicationContext("spel.xml");
Object bean = ioc.getBean("person");
System.out.println(bean);
}
运行结果:

6、DI(依赖注入)
6.1、使用@Autowired注解
1、源码:
Bookservlet:
package com.fxp.servelet;

import com.fxp.Service.BookService;
import org.springframework.beans.factory.annotation.Autowired;
import org.springframework.stereotype.Controller;

/**
 * 在以前,如果想实现自动赋值,可以用autowire属性进行自动装配
 * 如果用xml配置,还需要有get和set方法
 * 但是现在只需要在属性上添加一个@Autowired注解即可
 */
@Controller
public class BookServlet {
//自动为这个属性赋值
@Autowired
private BookService bookService;
public void doGet(){
    bookService.save();
}
}
Bookservice:
package com.fxp.Service;
import com.fxp.Dao.BookDao;
import org.springframework.beans.factory.annotation.Autowired;
import org.springframework.stereotype.Service;
@Service
public class BookService {
//自动装配
@Autowired
private BookDao bookDao;
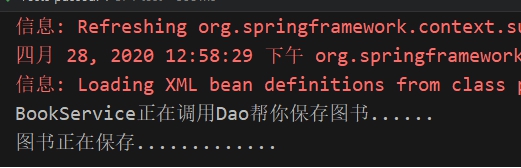
public void save(){
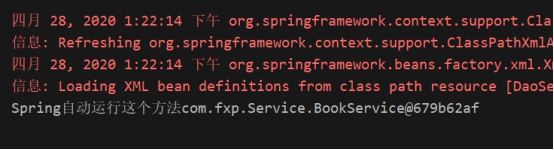
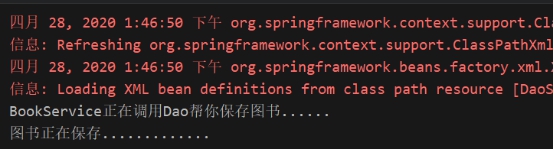
System.out.println("BookService正在调用Dao帮你保存图书......");
bookDao.save();
}
}
BookDao:
package com.fxp.Dao;

import org.springframework.context.annotation.Scope;
import org.springframework.stereotype.Repository;

@Repository
//@Scope(value = "prototype")
public class BookDao {
public void save(){
    System.out.println("图书正在保存.............");
}
}
6.2、Autowired原理
例子:@Autowired
private BookService bookService;
1、先按照类型去容器中找对应的组件:bookservice = ioc.getBean(BookService.class)
1.1、找到一个,直接赋值
1.2、没找到,抛异常
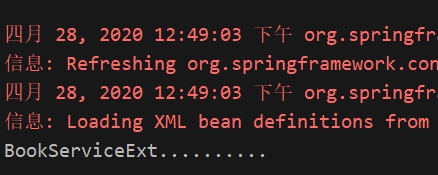
1.3、找到多个BookService(默认id:bookService)、BookServiceExt(默认id:bookServiceExt)
(1)按照变量名作为id继续匹配
创建一个BookService类的子类:BookServiceExt
import com.fxp.Dao.BookDao;
import org.springframework.beans.factory.annotation.Autowired;
import org.springframework.stereotype.Service;

@Service
public class BookServiceExt extends BookService{
@Autowired
private BookDao bookDao;

public void save(){
    System.out.println("BookServiceExt..........");
}
}
(2)验证找到多个相同类的组件时,会按照id去找
将servlet代码改变
@Controller
public class BookServlet {
//自动为这个属性赋值
@Autowired
private BookService bookServiceExt;
public void doGet(){
    bookServiceExt.save();
}
}
运行结果:
按照变量名作为ID去找又分为两种情况:
1、匹配到了:赋值
2、没有匹配到:报错
①解决:使用@Qualifier注解可以指定按照什么进行匹配,让spring别使用变量名去查找
@Controller
public class BookServlet {
//自动为这个属性赋值
@Autowired
@Qualifier("bookService")
private BookService bookServiceExt2;//bookServiceExt2这个是不存在的,//如果直接找会找不到而报错,所以这时候可以用Qualifier注解指定自己想要的来查找
public void doGet(){
    bookServiceExt2.save();
}
}
运行结果:
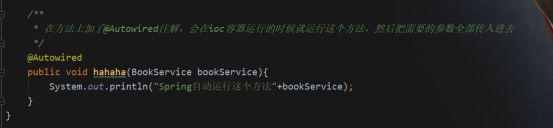
6.3、在方法上使用@Autowired注解
运行结果:
Ioctest:
@Test
public void test24(){
ApplicationContext ioc = new ClassPathXmlApplicationContext("DaoService.xml");
}
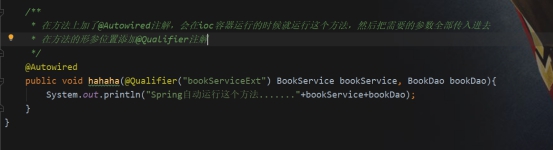
6.4、在方法的形参位置标@Qualifier注解
运行结果:

6.5、autowired和resource的区别
1、将BookService的@Autowired注解改为@Resource注解
@Service
public class BookService {
//自动装配
//@Autowired
@Resource
private BookDao bookDao;
public void save(){
    System.out.println("BookService正在调用Dao帮你保存图书......");
    bookDao.save();
}
}
2、运行程序,可以看到结果是一样的
3、@Autowired,@Resource,@Inject都是自动装配的注解
区别:
@Autowired注解,有一个参数@Autowired(require=false)意思是找到组件就装配,找不到就装配null,不会报错。Autowired最强大,是Spring规定的
@Resource没有这个参数,是j2ee规定的,java的标准
Resource的扩展性更强,如果切换成另外一个容器框架,也可以用,Autowired就不行了
6.7、泛型依赖注入
6.7.1、没有使用泛型
1.源码:
Xml:
<?xml version="1.0" encoding="UTF-8"?>
<beans xmlns="http://www.springframework.org/schema/beans"
   xmlns:xsi="http://www.w3.org/2001/XMLSchema-instance"
   xmlns:context="http://www.springframework.org/schema/context"
   xsi:schemaLocation="http://www.springframework.org/schema/beans http://www.springframework.org/schema/beans/spring-beans.xsd
   http://www.springframework.org/schema/context
   http://www.springframework.org/schema/context/spring-context.xsd
">

<!--泛型依赖注入-->
<context:component-scan base-package="com.fxp"></context:component-scan>

</beans>
BookService:
package com.fxp.Service;

import com.fxp.Dao.BaseDao;
import com.fxp.Dao.BookDao;
import com.fxp.bean.Book;
import org.springframework.beans.factory.annotation.Autowired;
import org.springframework.stereotype.Service;

@Service
public class BookService {
@Autowired
//BookDao bookDao;
BookDao bookDao;
public void save(){
    bookDao.save();

}
}
BookDao:
package com.fxp.Dao;
import com.fxp.bean.Book;
import org.springframework.stereotype.Repository;

/**
 * 定义了基本的增删改查方法
 */
@Repository
public class BookDao extends BaseDao<Book> {
@Override
public void save() {

    System.out.println("保存图书......");
}
}
UserService:
package com.fxp.Service;

import com.fxp.Dao.UserDao;
import org.springframework.beans.factory.annotation.Autowired;
import org.springframework.stereotype.Service;

@Service
public class UserService {
@Autowired
UserDao userDao;
public void save(){
    userDao.save();
}
}
userDao:
package com.fxp.Dao;

import com.fxp.bean.User;
import org.springframework.stereotype.Repository;

@Repository
public class UserDao extends BaseDao<User> {
@Override
public void save() {
    System.out.println("保存用户......");
}
}
BaseDao:
package com.fxp.Dao;
public abstract class BaseDao<T> {
public abstract void save();
}
Ioctest:
package com.fxp.test;
import com.fxp.Service.BookService;
import com.fxp.Service.UserService;
import org.junit.jupiter.api.Test;
import org.springframework.context.ApplicationContext;
import org.springframework.context.support.ClassPathXmlApplicationContext;

import static org.junit.jupiter.api.Assertions.*;

class IOCTest {
ApplicationContext ioc = new ClassPathXmlApplicationContext("DI.xml");

@Test
public void test(){
    BookService bookService = ioc.getBean(BookService.class);
    UserService userService = ioc.getBean(UserService.class);
    bookService.save();
    userService.save();
}
}
运行结果

6.7.2、使用泛型之后
1、源码
Xml:
<?xml version="1.0" encoding="UTF-8"?>
<beans xmlns="http://www.springframework.org/schema/beans"
   xmlns:xsi="http://www.w3.org/2001/XMLSchema-instance"
   xmlns:context="http://www.springframework.org/schema/context"
   xsi:schemaLocation="http://www.springframework.org/schema/beans http://www.springframework.org/schema/beans/spring-beans.xsd
   http://www.springframework.org/schema/context
   http://www.springframework.org/schema/context/spring-context.xsd
">

<!--泛型依赖注入-->
<!--扫描所有组件加载进ioc容器-->
<context:component-scan base-package="com.fxp"></context:component-scan>

</beans>
BookService:继承了BaseService
package com.fxp.Service;

import com.fxp.Dao.BaseDao;
import com.fxp.Dao.BookDao;
import com.fxp.bean.Book;
import org.springframework.beans.factory.annotation.Autowired;
import org.springframework.stereotype.Service;
@Service
public class BookService extends BaseService<Book>{

}
UserService:继承了BaseService
package com.fxp.Service;
import com.fxp.Dao.UserDao;
import com.fxp.bean.User;
import org.springframework.beans.factory.annotation.Autowired;
import org.springframework.stereotype.Service;

@Service
public class UserService extends BaseService<User>{

}
BaseService:
package com.fxp.Service;

import com.fxp.Dao.BaseDao;
import com.fxp.Dao.UserDao;
import org.springframework.beans.factory.annotation.Autowired;

/**
 * 我们并没有把BaseService也加进容器中,按照以前说这个类没有加进容器中,方法中的@Autowired注解是没用的
 * 但是,BookService和UserService继承了BaseService,而BookService和UserService都被加进了容器中,
 * 这就相当于把BaseService中的内容复制到了BookService和UserService中,所以相当于也被加进了容器里面
 * @Autowire就起作用了
 * @param <T>
 */
public class BaseService <T>{
@Autowired
BaseDao<T> baseDao;
public void save(){
    System.out.println("自动注入的Dao"+baseDao);
    baseDao.save();
}
}
运行结果:
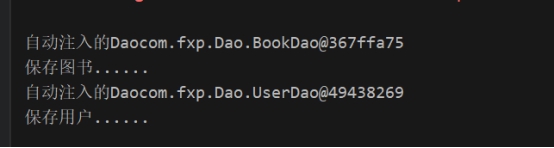
小结:Servlet层调用Service层,Service层调用Dao层。
1、创建一个抽象的BaseDao,让BookDao和UserDao都继承于它,在BaseDao里写一个抽象方法,BookDao和UserDao分别去实现这个方法。
2、创建一个BaseService层,让BookService和UserService继承于它,因为BookService和UserService都要调用他们的Dao层,所以就可以把调用的方法放在他们的父类BaseService类里面去调用。
6.7.3、泛型依赖注入原理

6.7.4、带泛型的父类类型
//检测带泛型的父类类型
System.out.println(bookService.getClass().getGenericSuperclass());
运行结果
