API规范管理Springfox-swagger
首先了解下OAS
OAS是OpenAPI Specification的简称,可以翻译为OpenAPI规范,它是定义API的一种规范,它的前身是Swagger规范。
Springfox-swagger 结合和Spring 和 swagger的优势,对API进行规范化管理。
详细了解OAS详见:添加链接描述
不废话了,直接上配置了代码,看看怎样将自己的API在Spring boot中进行规范化管理:
- 引依赖文件 ;
		<!-- swagger核心组件,在代码配置swagger时会依赖到它 -->
		<dependency>
			<groupId>io.springfox</groupId>
			<artifactId>springfox-swagger2</artifactId>
			<version>2.9.2</version>
		</dependency>
		<!-- swagger的用户界面,用于展示api接口文档 -->
		<dependency>
			<groupId>io.springfox</groupId>
			<artifactId>springfox-swagger-ui</artifactId>
			<version>2.9.2</version>
		</dependency>
- 编写Swwager 配置类 ;
package com.zteauto.etm.ass.config;

import com.google.common.base.Predicate;
import org.springframework.context.annotation.Bean;
import org.springframework.context.annotation.ComponentScan;
import org.springframework.context.annotation.Configuration;
import springfox.documentation.builders.ApiInfoBuilder;
import springfox.documentation.service.ApiInfo;
import springfox.documentation.service.Contact;
import springfox.documentation.spi.DocumentationType;
import springfox.documentation.spring.web.plugins.Docket;
import springfox.documentation.swagger2.annotations.EnableSwagger2;
import static com.google.common.base.Predicates.*;
import static springfox.documentation.builders.RequestHandlerSelectors.*;
import static springfox.documentation.builders.PathSelectors.*;

/**
 * @Description Swagger配置文件
 * @Author boby
 * @Date 2020/06/02
 **/
//该类依赖了google的guava组件和springfox.documentation组件
@Configuration
@EnableSwagger2
//包扫描,在此包下的Controler都会被纳入swagger接口文档生成的范围,这里也可以配置类扫描,同时也可以在这个配置类里面细化过滤规则
@ComponentScan(basePackages = "com.zteauto.etm.ass.base")
public class SpringfoxSwagger2Config {


    //组织Docket对象,翻译过来就是摘要的意思,它是生成API文档的核心对象,里面配置一些必要的信息
    @Bean
    public Docket swaggerSpringMvcPlugin(){


        //指定规范,这里是SWAGGER_2
        return new Docket(DocumentationType.SWAGGER_2)
                //设定Api文档头信息,这个信息会展示在文档UI的头部位置
                .apiInfo(swaggerDemoApiInfo())
                .select()
//                //添加过滤条件,谓词过滤predicate,这里是自定义注解进行过滤
//                .apis(not(withMethodAnnotation(SwaggerCustomIgnore.class)))
                //这里配合@ComponentScan一起使用,又再次细化了匹配规则(当然,我们也可以只选择@ComponentScan、paths()方法当中的一中)
//                .paths(allowPaths())
                .build();
    }

    /**
     * 自定义API文档基本信息实体
     * @return
     */
    private ApiInfo swaggerDemoApiInfo(){


        //构建联系实体,在UI界面会显示
        Contact contact = new Contact("OAS(OpenAPI Specification)", "http://www.baidu.com", "495186029.com");
        return new ApiInfoBuilder()
                .contact(contact)
                //文档标题
                .title("Swagger2构建RESTful API文档")
                //文档描述
                .description("SpringBoot集成Springbox开源项目,实现OAS,构建成RESTful API文档")
                //文档版本
                .version("1.0.0")
                .build();
    }

//    /**
//     * path匹配规则
//     * @return
//     */
//    private Predicate<String> allowPaths(){


//        return or(
//                regex("/user.*"),
//                regex("/role.*")
//        );
//    }
}
- 增加 忽略显示的API类
package com.zteauto.etm.ass.config;

import java.lang.annotation.ElementType;
import java.lang.annotation.Retention;
import java.lang.annotation.RetentionPolicy;
import java.lang.annotation.Target;

/**
 * 忽略接口注解
 */
@Target({

    ElementType.METHOD})
@Retention(RetentionPolicy.RUNTIME)
public @interface SwaggerCustomIgnore {


}
- 启动项目,找到Tomcat启动的port 如下图所示;

- 打开链接地址:http://172.16.21.244:8250/swagger-ui.html;
- API接口如下图所示

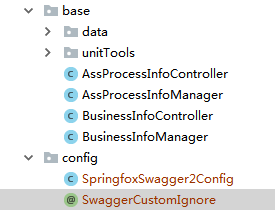
- 目录结构如下
- **以上操作只是最入门的能规范化显示和管理API接口的实例,其他的各种配置自行百度,也非常简单,根据自己的业务要求和配置文档在配置类SpringfoxSwagger2Config中定义即可 **;