搭建windows 10驱动开发双机调试环境。
一、禁用驱动签名
启用开机界面F8菜单,默认停留10秒,确保有时间按下F8
bcdedit /set {bootmgr} displaybootmenu yes
bcdedit /set {default} bootmenupolicy legacy
bcdedit /timeout 10
重启,按F8,再按7,进入系统就可以测试未经签名的驱动了。但是每次都要这样操作才可以正确加载驱动。
二、打开测试签名
(1)打开测试签名
Bcdedit.exe -set TESTSIGNING ON
(2)制作一个证书
MakeCert –r –pe –ss PrivateCertStore –n CN=www.test.com(test) test.cer
(3)把证书加进本机信任根CA中去
CertMgr -add test.cer -s -r localMachine root
(4)给驱动签名
Signtool sign /v /s PrivateCertStore /n www.test.com(test) /t http://timestamp.verisign.com/scripts/timestamp.dll Driver1.sys
在其他机器上安装,需要导入证书: test.cer,即:在其他目标安装机器上运行:CertMgr -add test.cer -s -r localMachine root
三、虚拟机配置
基于vmware安装一台windows 10虚拟机,安装系统后,移除打印机(建议),增加串口配置如下: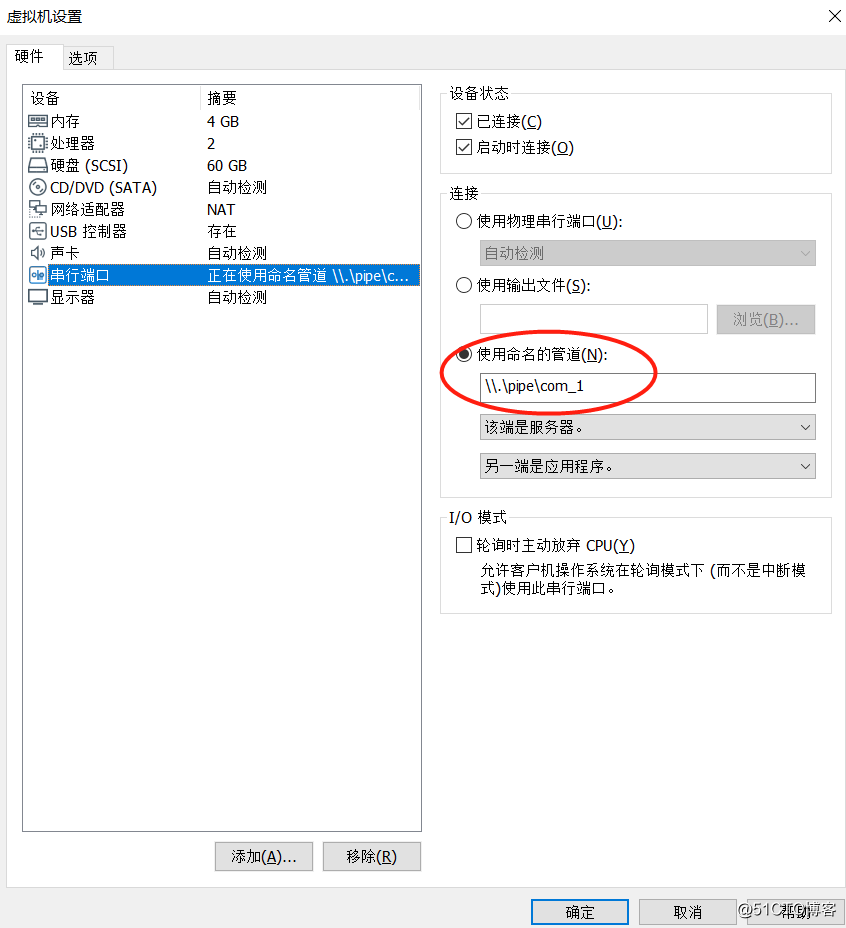
开机,进入系统,运行powershell:
PS C:\WINDOWS\system32> bcdedit /enum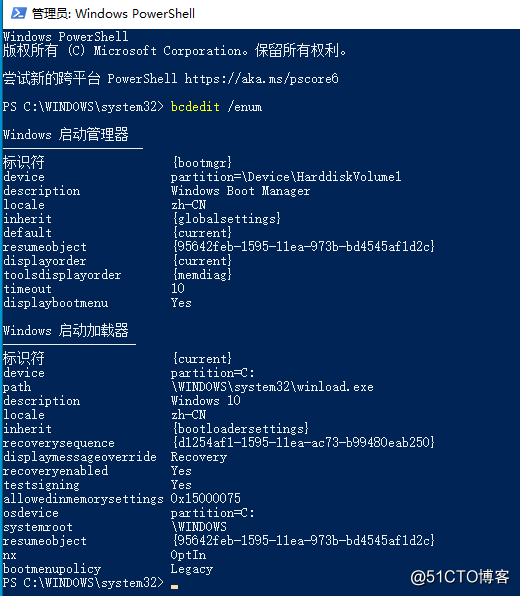
依次执行以下命令:
bcdedit  /set  "{current}"  bootmenupolicy  Legacy   //修改启动方式为Legacy
bcdedit  /dbgsettings  SERIAL  DEBUGPORT:1  BAUDRATE:115200  //设置串口1为调试端口
bcdedit  /copy  "{current}"   /d  “Debug”  //将当前配置复制到 Debug 启动配置(新建了Debug启动配置)
再次查看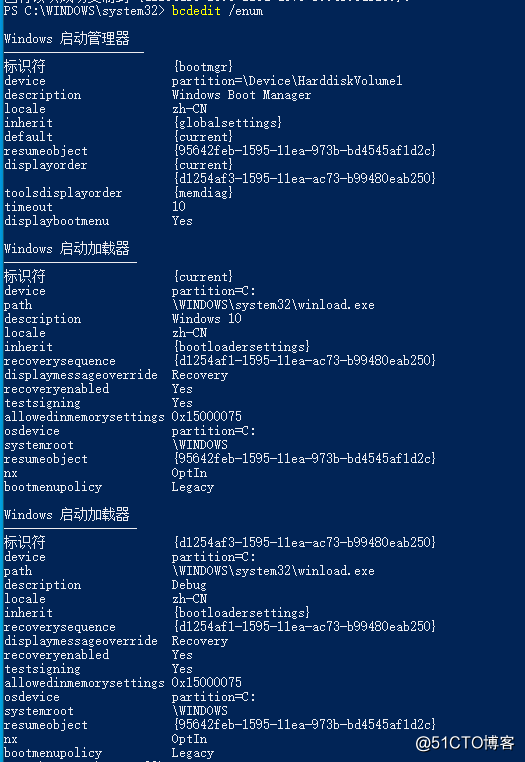
记录一下新建的启动配置的标识符,然后执行下面的命令:
bcdedit  /debug  “{<新建的启动配置的标识符>}”   on        //打开调试开关
bcdedit  /enum      //查看配置
即:
bcdedit  /debug  "{d1254af3-1595-11ea-ac73-b99480eab250}"   on
配置完成,再次查看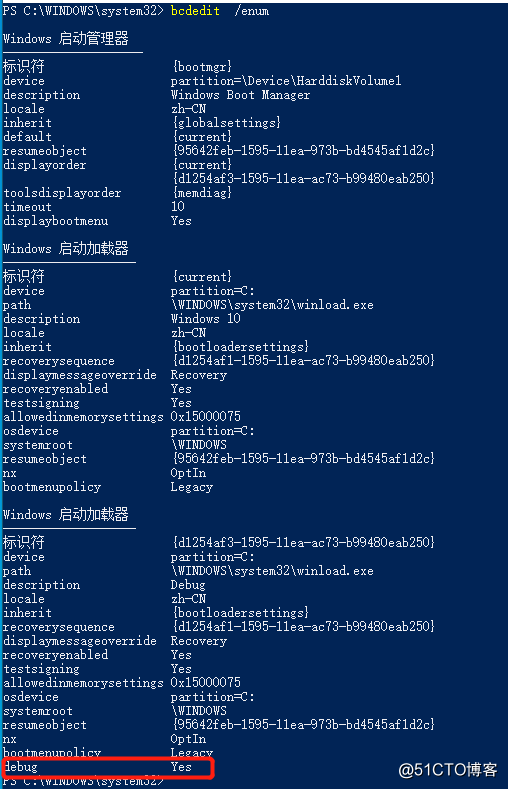
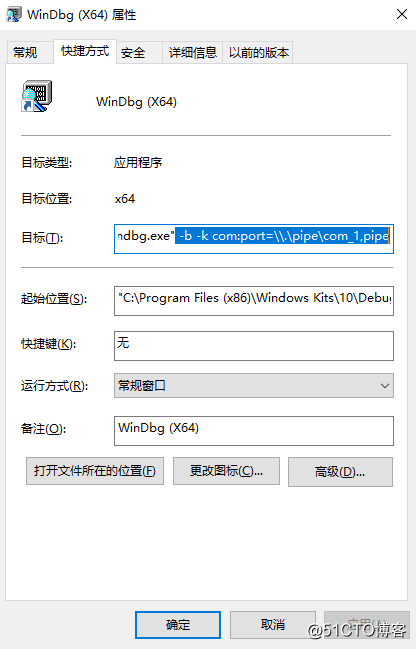
四、本机WinDbg配置
创建windbg64桌面快捷方式,添加启动参数: -b -k com:port=\.\pipe\com_1,pipe