之前也说过spring框架对于每一层都有解决方案,对于持久层也提供了解决方案:ORM模块和JDBC的模板。接下来通过一个小案例先了解一下JDBC模板的简单使用。
准备工作:因为持久层是对数据库操作,我们要先创建一个数据库表,自己可以随意创建一个数据库表,我创建的是account数据表:
CREATE TABLE `account` (
  `id` int(11) NOT NULL AUTO_INCREMENT COMMENT '主键',
  `name` varchar(255) NOT NULL COMMENT '用户名',
  `money` float NOT NULL COMMENT '金额',
  PRIMARY KEY (`id`)
) ENGINE=InnoDB AUTO_INCREMENT=8 DEFAULT CHARSET=utf8;
创建一个maven工程,在pom文件中添加以下坐标:
 <dependencies>
        <dependency>
            <groupId>org.springframework</groupId>
            <artifactId>spring-context</artifactId>
            <version>5.2.8.RELEASE</version>
        </dependency>
        <dependency>
            <groupId>org.springframework</groupId>
            <artifactId>spring-tx</artifactId>
            <version>5.2.6.RELEASE</version>
        </dependency>
        <dependency>
            <groupId>org.springframework</groupId>
            <artifactId>spring-jdbc</artifactId>
            <version>5.2.6.RELEASE</version>
        </dependency>
        <dependency>
            <groupId>mysql</groupId>
            <artifactId>mysql-connector-java</artifactId>
            <version>5.1.47</version>
        </dependency>
 </dependencies>
根据自己的习惯在maven工程中创建一个包,再创建一个类,写一个main函数。我写的具体如下:
public class JdbcTemplateDemo {


    public static void main(String[] args) {


        //创建数据源
        DriverManagerDataSource dm = new DriverManagerDataSource();
        //设置数据库连接信息
        dm.setDriverClassName("com.mysql.jdbc.Driver");
        dm.setUrl("jdbc:mysql://localhost:3306/stu");
        dm.setUsername("root");
        dm.setPassword("123456");
        //创建JdbcTemplate对象
        JdbcTemplate jt = new JdbcTemplate(dm);
        //执行sql语句
        jt.update("insert into account(name,money) value (?,?)","小八","1000");
        //jt.execute("insert into account(name,money) value ('小五',1000)");
    }
}
执行结果就是往我们创建的数据库中添加一条数据。以上就是spring中的JDBC模板的简单使用。上面代码还是有问题的,我们既然学习了springIoc容器通过观察上面的代码发现创建数据源和JdbcTemplate模板的创建都是通过new出来的,数据库连接信息是通过set方法设置的,这些都是可以通过springIoc容器来解决。接下来我改造上面代码。
创建一个bean.xml文件,配置如下:
<?xml version="1.0" encoding="UTF-8"?>
<beans xmlns="http://www.springframework.org/schema/beans"
       xmlns:xsi="http://www.w3.org/2001/XMLSchema-instance"
       xsi:schemaLocation="http://www.springframework.org/schema/beans
       http://www.springframework.org/schema/beans/spring-beans.xsd">

    <!--配置数据源,我在这使用的是spring框架中的内置的数据源,其实也可以使用c3p0,dbcp,durid数据库连接池-->
    <bean id="dataSource" class="org.springframework.jdbc.datasource.DriverManagerDataSource">
        <property name="driverClassName" value="com.mysql.jdbc.Driver"></property>
        <property name="url" value="jdbc:mysql://localhost:3306/stu"></property>
        <property name="username" value="root"></property>
        <property name="password" value="123456"></property>
    </bean>

    <!--配置jdbcTemplate模板-->
    <bean id="jdbcTemplate" class="org.springframework.jdbc.core.JdbcTemplate">
        <constructor-arg name="dataSource" ref="dataSource"></constructor-arg>
    </bean>
</beans>
我们再写一个main方法:
public class JdbcTemplateDemo2 {


    public static void main(String[] args) {


        //加载bean.xml文件
        ApplicationContext context = new ClassPathXmlApplicationContext("bean.xml");
        //获取jdbcTemplate模板的bean对象
        JdbcTemplate jt = (JdbcTemplate) context.getBean("jdbcTemplate");
        //执行sql语句
        jt.update("insert into account(name,money) value (?,?)", "小九", "1000");
    }
}
以上就是我们改造完后的代码,接下来我在dao中具体使用JdbcTemplate写几个方法运行看看结果。
Account实体类:
public class Account implements Serializable {


    private Integer id;
    private String name;
    private Float money;
    //get/set方法别忘记生成
    //toString方法也别忘记生成
}
AccountDao接口:
public interface AccountDao {


    /**
    * 查询所有用户
    */
    List<Account> findAll();

    /**
     * 根据id查询用户
     */
    Account findAccountById(Integer accountId);

    /**
     * 根据用户名查询用户
     */
    Account findAccountByName(String accountName);

    /**
     * 更新账户
     */
    void updateAccount(Account account);

    /**
     * 删除账户
     */
    void deleteAccountById(Integer accountId);
}
AccountDaoImpl接口实现类:
public class AccountDaoImpl implements AccountDao {


    private JdbcTemplate jdbcTemplate;

    public void setJdbcTemplate(JdbcTemplate jdbcTemplate) {


        this.jdbcTemplate = jdbcTemplate;
    }

    public List<Account> findAll() {


        List<Account> list = jdbcTemplate.query("select * from account",new BeanPropertyRowMapper<Account>(Account.class));
        return list;
    }

    public Account findAccountById(Integer accountId) {


        List<Account> list = jdbcTemplate.query("select * from account where id = ?",new BeanPropertyRowMapper<Account>(Account.class),accountId);
        return list.isEmpty() ? null : list.get(0);
    }

    public Account findAccountByName(String accountName) {


        List<Account> list = jdbcTemplate.query("select * from account where name = ?", new BeanPropertyRowMapper<Account>(Account.class), accountName);
        if (list.isEmpty()){


            return null;
        }else if (list.size() > 1){


            throw new RuntimeException("结果集不唯一");
        }
        return list.get(0);
    }

    public void updateAccount(Account account) {


        jdbcTemplate.update("update account set name = ? , money = ? where id = ?", account.getName(),account.getMoney(),account.getId());

    }

    public void deleteAccountById(Integer accountId) {


        jdbcTemplate.update("delete from account where id = ?" , accountId);
    }
}
main方法运行看结果:
public class JdbcTemplateDemo3 {
public static void main(String[] args) {
ApplicationContext context = new ClassPathXmlApplicationContext("bean.xml");
AccountDao jt = (AccountDao) context.getBean("accountDao");
//查询所用账户信息
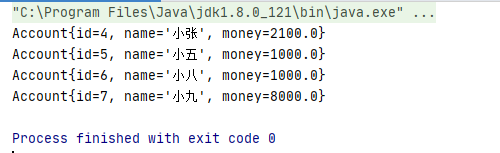
List<Account> lists = jt.findAll();
for (Account list : lists){
System.out.println(list);
}
}
}
查询结果:
根据id查询一个账户:
Account account = jt.findAccountById(4);
System.out.println(account);
运行结果:

其他几个方法我就不演示了,如有不懂的可以给我留言。
在AccountDaoImpl 实现类中都有这几行代码,不同的持久层都要写下面的代码显的比较麻烦:
private JdbcTemplate jdbcTemplate;
public void setJdbcTemplate(JdbcTemplate jdbcTemplate) {
    this.jdbcTemplate = jdbcTemplate;
}
//可以通过继承JdbcDaoSupport类来解决这个问题
public class AccountDaoImpl extends JdbcDaoSupport implements AccountDao {


    /*private JdbcTemplate jdbcTemplate;

    public void setJdbcTemplate(JdbcTemplate jdbcTemplate) {
        this.jdbcTemplate = jdbcTemplate;
    }*/

    public List<Account> findAll() {


        List<Account> list = super.getJdbcTemplate().query("select * from account",new BeanPropertyRowMapper<Account>(Account.class));
        return list;
    }
    //其他几个方法我就不写了,也就改了super.getJdbcTemplate()这个代码
}
关于继承JdbcDaoSupport 和自己在dao写JdbcTemplate 模板两者具体有什么区别?区别在于我们通过继承的话就不能通过注解来开发了,因为这些代码在spring框架中我们不可以修改的,只能使用xml方式。在dao中定义JdbcTemplate的方式,xml和注解方式都可以使用。
当然我们在这只是使用xml方式,注解方式也是可以的。我们要在bean.xml中开启注解扫描
<!--开启注解扫描-->
<context:component-scan base-package="com.zy.jdbcTemplate.dao"></context:component-scan>
修改AccountDaoImpl实现类,添加注解:
@Repository("accountDao")
public class AccountDaoImpl /*extends JdbcDaoSupport*/ implements AccountDao {


    @Autowired
    private JdbcTemplate jdbcTemplate;
    //......
}
加油吧!!!