简介
- 本教程基于
ElasticSearch7.6.1, 注意ES7的语法与ES6的API调用差别很大, 教程发布时最新版本为ES7.6.2(20200401更新); - ES是用于全文搜索的工具:
- SQL: 使用
like %关键词%来进行模糊搜索在大数据情况下是非常慢的, 即便设置索引提升也有限; - ElasticSearch: 搜索引擎(baidu, github, taobao)
- 一些ES涉及的概念:
- 分词器 ik
- Restful操作ES
- CRUD
- SpringBoot集成ES
Lucene库创始人 Doug Cutting
- Lucene: java写成的为各种中小型应用软件加入全文检索功能;
- Nutch: 一个建立在Lucene核心之上的网页搜索应用程序, Nutch的应用比Lucene要更加广泛
- 大数据解决存储与计算(MapReduce)两个问题:
- 2004年Doug Cutting基于GFS系统开发了分布式文件存储系统;
- 2005年Doug Cutting基于MapReduce在Nutch搜索引擎实现了这种算法;
- 加入Yahoo后, Doug Cutting将MapReduce和NDFS结合创建了Hadoop, 成为了Hadoop之父;
- Doug Cutting将BigTable集成到Hadoop中
- 回到主题:
- Lucene是一套信息检索工具包, jar包, 不包含搜索引擎系统;
- Lucene包含索引结构, 读写索引的工具, 排序, 搜索规则, 工具类;
- Lucene和ES的关系:
- ES是基于Lucene做了一些封装和增强, 上手是比较简单的, 比Redis要简单
Elastic概述
- 分布式的全文搜索引擎, 高扩展性;
- 接近实时更新的查询搜索;
- ES是基于Restful的(即用get, post, delete, put来访问);
- ES进行复杂的数据分析, ELK技术(elastic+logstash+kibana)
Elastic vs solr
- 当使用索引时, solr会发生io阻塞, 查询性较差, elastic则在索引情况下的优势明显;
- elastic的效率在传统项目下一般有50倍的提升;
- elastic解压即可用, solr需要配置
- solr用zookeeper进行分布式管理, elastic自带分布式
- solr支持更多格式的数据, json, xml, csv, elastic只支持json
- solr比elastic的功能更强大
- solr查询快, 但是更新索引时慢(如插入和删除慢), elastic查询慢, 但是实时性查询快, 用于facebook新浪等搜索
- solr是传统搜索应用的解决方案, elastic适用于新兴的实时搜索应用
- solr比较成熟, elastic目前更新换代快;
环境准备(版本对应)
- 本笔记参考狂神说,版本为7.6.X
- Lucene是一套信息检索工具包(jar包),不含搜索引擎系统
- ElasticSearch是基于Lucene做了一些封装和增强
入门操作
- JDK1.8以上,客户端,界面工具
- 版本对应。
下载
官网下载
windows下解压就可以使用
目录:
bin:启动文件
config:配置文件
	log4j2 日志文件
	jvm.options 虚拟机文件
	elasticsearch.yml 配置文件  比如默认9200端口
lib:相关jar包

modules:功能模块
plugins:插件:比如ik插件
启动,然后localhost:9200访问
可视化界面head
es head插件,github上面下载
https://github.com/mobz/elasticsearch-head
 npm install
 npm run start #启动插件:localhost:9100
解决跨域问题
修改elasticsearch.yml文件
 #解决跨域问题
 http.cors.enabled: true
 http.cors.allow-origin: "*"
kibana日志分析和命令输入
- ELK:日志分析架构栈
- 注意:下载版本与es一致;可以在配置文件中汉化
- 默认端口 localhost:5601
汉化
配置文件中XXX.yml
ES核心概念
[外链图片转存失败,源站可能有防盗链机制,建议将图片保存下来直接上传(img-SRzob1Aa-1610955877349)(C:\Users\王东梁\AppData\Roaming\Typora\typora-user-images\image-20210117195426957.png)]
-
es是面向文档的,一切都是JSON
-
对比
-
关系型数据库 Elasticsearch 数据库database 索引 indices(数据库) 表tables types (以后会被弃用) 行rows documents (文档) 字段columns fields
-
-
物理设计
- 在后台把每个索引划分为多个分片,每片可以再集群中的不同服务器间迁移;
-
逻辑设计
- 文档:索引和搜索数据的最小单位是文档;
- 自我包含:key:value
- 层次型:一个文档中包含文档(json对象)
- 类型:文档的逻辑容器
- 索引:数据库
- 文档:索引和搜索数据的最小单位是文档;
-
倒排索引
- es使用倒排索引的结构,采用Lucene倒排索引作为底层。用于快速全文检索。
[外链图片转存失败,源站可能有防盗链机制,建议将图片保存下来直接上传(img-jfXa0y38-1610955877351)(C:\Users\王东梁\AppData\Roaming\Typora\typora-user-images\image-20210117204515912.png)]
IK分词器插件
-
什么是IK分词器:
-
把一句话分词
-
如果使用中文:推荐IK分词器
-
两个分词算法:ik_smart(最少切分),ik_max_word(最细粒度划分)
-
4.1 下载安装
下载地址:https://github.com/medcl/elasticsearch-analysis-ik/releases
然后解压,放到elasticsearch的plugins中,建立“ik”文件夹,然后放入;
重启观察es:发现加载ik插件了
ik_smart
输入:
GET _analyze
{


  "analyzer": "ik_smart",
  "text": "我是社会主义接班人"
}
输出:
{


  "tokens" : [
    {


      "token" : "我",
      "start_offset" : 0,
      "end_offset" : 1,
      "type" : "CN_CHAR",
      "position" : 0
    },
    {


      "token" : "是",
      "start_offset" : 1,
      "end_offset" : 2,
      "type" : "CN_CHAR",
      "position" : 1
    },
    {


      "token" : "社会主义",
      "start_offset" : 2,
      "end_offset" : 6,
      "type" : "CN_WORD",
      "position" : 2
    },
    {


      "token" : "接班人",
      "start_offset" : 6,
      "end_offset" : 9,
      "type" : "CN_WORD",
      "position" : 3
    }
  ]
}
ik_max_word
输入:
GET _analyze
{


  "analyzer": "ik_max_word",
  "text": "我是社会主义接班人"
}
输入:
{


  "tokens" : [
    {


      "token" : "我",
      "start_offset" : 0,
      "end_offset" : 1,
      "type" : "CN_CHAR",
      "position" : 0
    },
    {


      "token" : "是",
      "start_offset" : 1,
      "end_offset" : 2,
      "type" : "CN_CHAR",
      "position" : 1
    },
    {


      "token" : "社会主义",
      "start_offset" : 2,
      "end_offset" : 6,
      "type" : "CN_WORD",
      "position" : 2
    },
    {


      "token" : "社会",
      "start_offset" : 2,
      "end_offset" : 4,
      "type" : "CN_WORD",
      "position" : 3
    },
    {


      "token" : "主义",
      "start_offset" : 4,
      "end_offset" : 6,
      "type" : "CN_WORD",
      "position" : 4
    },
    {


      "token" : "接班人",
      "start_offset" : 6,
      "end_offset" : 9,
      "type" : "CN_WORD",
      "position" : 5
    },
    {


      "token" : "接班",
      "start_offset" : 6,
      "end_offset" : 8,
      "type" : "CN_WORD",
      "position" : 6
    },
    {


      "token" : "人",
      "start_offset" : 8,
      "end_offset" : 9,
      "type" : "CN_CHAR",
      "position" : 7
    }
  ]
}
用户配置 字典
当一些特殊词(比如姓名)不能被识别切分时候,用户可以自定义字典:
重启es和kibana测试
Rest风格
5.1 简介
RESTful是一种架构的规范与约束、原则,符合这种规范的架构就是RESTful架构。
操作
| method | url地址 | 描述 |
|---|---|---|
| PUT | localhost:9100/索引名称/类型名称/文档id | 创建文档(指定id) |
| POST | localhost:9100/索引名称/类型名称 | 创建文档(随机id) |
| POST | localhost:9100/索引名称/文档类型/文档id/_update | 修改文档 |
| DELETE | localhost:9100/索引名称/文档类型/文档id | 删除文档 |
| GET | localhost:9100/索引名称/文档类型/文档id | 查询文档通过文档id |
| POST | localhost:9100/索引名称/文档类型/_search | 查询所有文档 |
5.2 测试
- 1、创建一个索引
PUT /索引名/类型名/id - 默认是_doc
数据类型
- 基本数据类型
- 字符串 text, keyword
- 数据类型 long, integer,short,byte,double,float,half_float,scaled_float
- 日期 date
- 布尔 boolean
- 二进制 binary
- 制定数据类型
创建规则
PUT /test2
{


  "mappings": {


    "properties": {


      "name": {


        "type": "text"
      },
      "age": {


        "type": "long"
      },
      "birthday": {


        "type": "date"
      }
    }
  }
}
输出:
{


  "acknowledged" : true,
  "shards_acknowledged" : true,
  "index" : "test2"
}
如果不指定具体类型,es会默认配置类型
查看索引
GET test2
-
查看es信息
get _cat/
修改
  1. 之前的办法:直接put
  2. 现在的办法:
 POST /test1/_doc/1/_update
  {


"doc": {


  "name": "庞世宗"
  }
  }
删除索引
DELETE test1
关于文档的基本操作(重点)
基本操作
添加数据
PUT /psz/user/1
{


  "name": "psz",
  "age": 22,
  "desc": "偶像派程序员",
  "tags": ["暖","帅"]
}
获取数据
GEt psz/user/1
===============输出===========
{


  "_index" : "psz",
  "_type" : "user",
  "_id" : "1",
  "_version" : 1,
  "_seq_no" : 0,
  "_primary_term" : 1,
  "found" : true,
  "_source" : {


    "name" : "psz",
    "age" : 22,
    "desc" : "偶像派程序员",
    "tags" : [
      "暖",
      "帅"
    ]
  }
}
更新数据PUT
更新数据,推荐POST _update
- 不推荐
POST psz/user/1
{


  "doc":{


    "name": "庞庞胖"    #后面信息会没有
  }
}
- 推荐!
POST psz/user/1/_update
{


  "doc":{


    "name": "庞庞胖"    #后面信息存在
  }
}
简单搜索 GET
GET psz/user/1
简答的条件查询:根据默认映射规则产生基本的查询
GET psz/user/_search?q=name:庞世宗
复杂查询
查询,参数使用JSON体
GET psz/user/_search
{


  "query": {


    "match": {


      "name": "庞世宗"   //根据name匹配
    }
  },
    "_source": ["name","age"],  //结果的过滤,只显示name和age
    "sort": [
    {


      "age": {


        "order": "desc" //根据年龄降序
    }
    }
  ],

  "from": 0, //分页:起始值,从0还是
  "size": 1  //返回多少条数据
}
- 之后只用java操作es时候,所有的对象和方法就是这里面的key
- 分页前端 /search/{current}/{pagesize}
布尔值查询
must(对应mysql中的and) ,所有条件都要符合
GET psz/user/_search
{


  "query": {


    "bool": {


      "must": [  //相当于and
        {


          "match": {


            "name": "庞世宗"
          }

        },
        {


          "match": {


            "age": 22
          }
        }

      ]
    }
  }
}
shoule(对应mysql中的or)
GET psz/user/_search
{


  "query": {


    "bool": {


      "should": [ //should相当于or
        {


          "match": {


            "name": "庞世宗"
          }

        },
        {


          "match": {


            "age": 22
          }
        }

      ]
    }
  }
}
must_not (对应mysql中的not)
过滤器
GET psz/user/_search
{


  "query": {


    "bool": {


      "should": [
        {


          "match": {


            "name": "庞世宗"
          }

        }
      ],
      "filter": [
        {


          "range": {


            "age": {


              "gt": 20   //过滤年龄大于20的
            }
          }
        }
      ]
    }
  }
}
多条件查询
[外链图片转存失败,源站可能有防盗链机制,建议将图片保存下来直接上传(img-1EZhNdoZ-1610955877352)(C:\Users\王东梁\AppData\Roaming\Typora\typora-user-images\image-20210117233812605.png)]
精确查询
- trem查询是直接通过倒排索引指定的词条进行精确的查找的。
关于分词:
trem,直接查询精确地
match,会使用分词器解析
关于类型:
text: 分词器会解析
keywords: 不会被拆分
[外链图片转存失败,源站可能有防盗链机制,建议将图片保存下来直接上传(img-pqsrOf4H-1610955877357)(C:\Users\王东梁\AppData\Roaming\Typora\typora-user-images\image-20210117234310173.png)]
[外链图片转存失败,源站可能有防盗链机制,建议将图片保存下来直接上传(img-WBP1qabF-1610955877361)(C:\Users\王东梁\AppData\Roaming\Typora\typora-user-images\image-20210117234442418.png)]
高亮查询
GET psz/user/_search
{


  "query": {


    "match": {


      "name": "庞世宗"
    }
  },
  "_source": ["name","age"],
  "sort": [
    {


      "age": {


        "order": "desc"
      }
    }
  ],
  "highlight": //高亮
  {


    "pre_tags": "<P>",   //自定义高亮
    "post_tags": "</P>",
    "fields": {


      "name":{

    }  //自定义高亮区域
    }
  }
}
集成Springboot
官方文档:https://www.elastic.co/guide/en/elasticsearch/client/java-rest/current/index.html
[外链图片转存失败,源站可能有防盗链机制,建议将图片保存下来直接上传(img-EtZuYbHs-1610955877362)(C:\Users\王东梁\AppData\Roaming\Typora\typora-user-images\image-20210117234918617.png)]
创建一个模块的办法(新)
[外链图片转存失败,源站可能有防盗链机制,建议将图片保存下来直接上传(img-96Z6UGhi-1610955877363)(C:\Users\王东梁\AppData\Roaming\Typora\typora-user-images\image-20210117235819775.png)]
[外链图片转存失败,源站可能有防盗链机制,建议将图片保存下来直接上传(img-bDRLboz4-1610955877364)(C:\Users\王东梁\AppData\Roaming\Typora\typora-user-images\image-20210118000624531.png)]
[外链图片转存失败,源站可能有防盗链机制,建议将图片保存下来直接上传(img-n5p04vql-1610955877365)(C:\Users\王东梁\AppData\Roaming\Typora\typora-user-images\image-20210118001126961.png)]
1、找到原生的依赖
<dependency>
    <groupId>org.elasticsearch.client</groupId>
    <artifactId>elasticsearch-rest-high-level-client</artifactId>
    <version>7.6.1</version>
</dependency>

    <properties>
        <java.version>1.8</java.version>
        <elasticsearch.version>7.6.1</elasticsearch.version>
    </properties>
2、找对象
Initialization
A RestHighLevelClient instance needs a REST low-level client builder to be built as follows:
package com.kuang.config;

import org.apache.http.HttpHost;
import org.elasticsearch.client.RestClient;
import org.elasticsearch.client.RestHighLevelClient;
import org.springframework.boot.context.properties.ConfigurationProperties;
import org.springframework.context.annotation.Bean;
import org.springframework.context.annotation.Configuration;

@Configuration
public class ElasticSearchClientConfig {


    @Bean
    public RestHighLevelClient restHighLevelClient(){


        RestHighLevelClient client = new RestHighLevelClient(
                RestClient.builder(
                        new HttpHost("localhost", 9200, "http"),
                        new HttpHost("localhost", 9201, "http")));
        return client;
    }
}
The high-level client will internally create the low-level client used to perform requests based on the provided builder. That low-level client maintains a pool of connections and starts some threads so you should close the high-level client when you are well and truly done with it and it will in turn close the internal low-level client to free those resources. This can be done through the close:
client.close();
In the rest of this documentation about the Java High Level Client, the RestHighLevelClient instance will be referenced as client.
3、分析类中的方法
一定要版本一致!默认es是6.8.1,要改成与本地一致的。
	<properties>
		<java.version>1.8</java.version>
		<elasticsearch.version>7.6.1</elasticsearch.version>
	</properties>
Java配置类
@Configuration  //xml
public class EsConfig {


    @Bean
    public RestHighLevelClient restHighLevelClient(){


        RestHighLevelClient client = new RestHighLevelClient(
                RestClient.builder(
                        new HttpHost("localhost", 9200, "http"))); //妈的被这个端口搞了
        return client;
    }
}
索引API操作
1、创建索引
@SpringBootTest
class EsApplicationTests {


	@Autowired
	@Qualifier("restHighLevelClient")
	private RestHighLevelClient restHighLevelClient;

	//创建索引的创建 Request
	@Test
	void testCreateIndex() throws IOException {


		//1.创建索引请求
		CreateIndexRequest request = new CreateIndexRequest("索引名");
		//2.执行创建请求 indices 请求后获得响应
		CreateIndexResponse createIndexResponse = restHighLevelClient.indices().create(request, RequestOptions.DEFAULT);

		System.out.println(createIndexResponse);
	}

}
2、获取索引
	@Test
	void testExistIndex() throws IOException {


		GetIndexRequest request = new GetIndexRequest("索引名");
		boolean exist =restHighLevelClient.indices().exists(request,RequestOptions.DEFAULT);
		System.out.println(exist);

	}
3、删除索引
	@Test
	void deleteIndex() throws IOException{


		DeleteIndexRequest request = new DeleteIndexRequest("索引名");
		AcknowledgedResponse delete = restHighLevelClient.indices().delete(request, RequestOptions.DEFAULT);
		System.out.println(delete.isAcknowledged());
	}
文档API操作
package com.kuang.pojo;

import lombok.AllArgsConstructor;
import lombok.Data;
import lombok.NoArgsConstructor;
import org.springframework.beans.factory.annotation.Autowired;
import org.springframework.stereotype.Component;

@Data
@AllArgsConstructor
@NoArgsConstructor
@Component
public class User {


    private String name;
    private int age;

}
1、测试添加文档
导入
<dependency>
   <groupId>com.alibaba</groupId>
   <artifactId>fastjson</artifactId>
   <version>1.2.16</version>
</dependency>
	//测试添加文档
	@Test
	void testAddDocument() throws IOException {


		//创建对象
		User user = new User("psz", 22);
		IndexRequest request = new IndexRequest("ppp");
		//规则 PUT /ppp/_doc/1
		request.id("1");
		request.timeout(timeValueSeconds(1));
		//数据放入请求
		IndexRequest source = request.source(JSON.toJSONString(user), XContentType.JSON);

		//客户端发送请求,获取响应结果
		IndexResponse indexResponse = restHighLevelClient.index(request, RequestOptions.DEFAULT);
		System.out.println(indexResponse.toString());
		System.out.println(indexResponse.status());
	}
2、获取文档
	//获取文档,判断是否存在 GET /index/doc/1
	@Test
	void testIsExists() throws IOException {


		GetRequest getRequest = new GetRequest("ppp", "1");
		//过滤,不放回_source上下文
		getRequest.fetchSourceContext(new FetchSourceContext(false));
		getRequest.storedFields("_none_");
		boolean exists = restHighLevelClient.exists(getRequest, RequestOptions.DEFAULT);
		System.out.println(exists);
	}
3、获取文档信息
	//获取文档信息
	@Test
	void getDocument() throws IOException {


		GetRequest getRequest = new GetRequest("ppp", "1");
		GetResponse getResponse = restHighLevelClient.get(getRequest, RequestOptions.DEFAULT);
		System.out.println(getResponse.getSourceAsString());
		System.out.println(getResponse);
	}
==============输出==========================
{

    "age":22,"name":"psz"}
{

    "_index":"ppp","_type":"_doc","_id":"1","_version":2,"_seq_no":1,"_primary_term":1,"found":true,"_source":{

    "age":22,"name":"psz"}}
4、更新文档信息
	//更新文档信息
	@Test
	void updateDocument() throws IOException {


		UpdateRequest updateRequest = new UpdateRequest("ppp","1");
		updateRequest.timeout("1s");

		//json格式传入对象
		User user=new User("新名字",21);
		updateRequest.doc(JSON.toJSONString(user),XContentType.JSON);
		//请求,得到响应
		UpdateResponse updateResponse = restHighLevelClient.update(updateRequest, RequestOptions.DEFAULT);
		System.out.println(updateResponse);
	}
5、删除文档信息
//删除文档信息
@Test
void deleteDocument() throws IOException {

   DeleteRequest deleteRequest = new DeleteRequest("ppp","1");
   deleteRequest.timeout("1s");
   DeleteResponse deleteResponse = restHighLevelClient.delete(deleteRequest, RequestOptions.DEFAULT);
   System.out.println(deleteResponse);
}
批量操作Bulk
- 真实项目中,肯定用到大批量查询
- 不写id会随机生成id
[外链图片转存失败,源站可能有防盗链机制,建议将图片保存下来直接上传(img-ppmPZo0L-1610955877367)(C:\Users\王东梁\AppData\Roaming\Typora\typora-user-images\image-20210118104900129.png)]
	@Test
	void testBulkRequest() throws IOException{


		BulkRequest bulkRequest = new BulkRequest();
		bulkRequest.timeout("10s");//数据量大的时候,秒数可以增加

		ArrayList<User> userList = new ArrayList<>();
		userList.add(new User("psz",11));
		userList.add(new User("psz2",12));
		userList.add(new User("psz3",13));
		userList.add(new User("psz4",14));
		userList.add(new User("psz5",15));

		for (int i = 0; i < userList.size(); i++) {


			bulkRequest.add(
					new IndexRequest("ppp")
					.id(""+(i+1))
					.source(JSON.toJSONString(userList.get(i)),XContentType.JSON));
		}
		//请求+获得响应
		BulkResponse bulkResponse = restHighLevelClient.bulk(bulkRequest, RequestOptions.DEFAULT);
		System.out.println(bulkResponse.hasFailures());//返回false:成功
	}
搜索
	/*
		查询:
		搜索请求:SearchRequest
		条件构造:SearchSourceBuilder
	 */
	@Test
	void testSearch() throws IOException {


		SearchRequest searchRequest = new SearchRequest("ppp");
		//构建搜索条件
		SearchSourceBuilder searchSourceBuilderBuilder = new SearchSourceBuilder();
		// 查询条件QueryBuilders工具
		// :比如:精确查询
		TermQueryBuilder termQueryBuilder = QueryBuilders.termQuery("name", "psz");
		searchSourceBuilderBuilder.query(termQueryBuilder);
		//设置查询时间
		searchSourceBuilderBuilder.timeout(new TimeValue(60, TimeUnit.SECONDS));
		//设置高亮
		//searchSourceBuilderBuilder.highlighter()

		searchRequest.source(searchSourceBuilderBuilder);
		SearchResponse searchResponse = restHighLevelClient.search(searchRequest, RequestOptions.DEFAULT);
		System.out.println(JSON.toJSONString(searchResponse.getHits()));
	}
项目搭建
1、启动ES,和head-master,用head-master建立索引
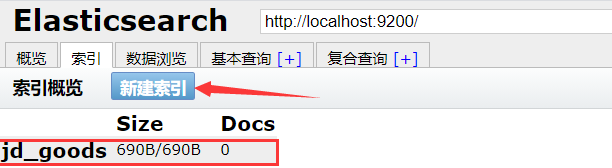
不建立也没事,添加数据的时候会自动创建
2、导入SpringBoot需要的依赖
注意:elasticsearch的版本要和自己本地的版本一致!所以还要在pom里面添加自定义版本

<!--解析网页需要的依赖Jsoup-->
<dependency>
    <groupId>org.jsoup</groupId>
    <artifactId>jsoup</artifactId>
    <version>1.10.2</version>
</dependency>
<!--阿里的JSon转换依赖-->
<dependency>
    <groupId>com.alibaba</groupId>
    <artifactId>fastjson</artifactId>
    <version>1.2.73</version>
</dependency>
<!--ES启动依赖-->
<dependency>
    <groupId>org.springframework.boot</groupId>
    <artifactId>spring-boot-starter-data-elasticsearch</artifactId>
</dependency>
<!--thymeleaf模板依赖-->
<dependency>
    <groupId>org.springframework.boot</groupId>
    <artifactId>spring-boot-starter-thymeleaf</artifactId>
</dependency>
<dependency>
    <groupId>org.springframework.boot</groupId>
    <artifactId>spring-boot-starter-web</artifactId>
</dependency>
<!--lombok依赖-->
<dependency>
    <groupId>org.projectlombok</groupId>
    <artifactId>lombok</artifactId>
    <optional>true</optional>
</dependency>
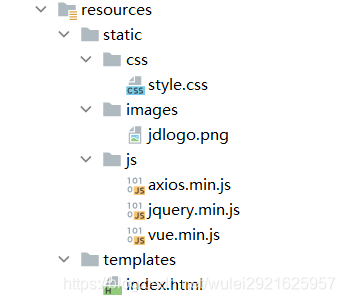
3、项目用到的静态资源(修改过的)
- 链接:https://pan.baidu.com/s/1X1kwMHsDvML-0rBEJnUOdA
- 提取码:qjqy
4、添加SpringBoot配置(application.yml)
#端口改为9090
server:
  port: 9090

# 关闭 thymeleaf 的缓存
spring:
  thymeleaf:
    cache: false
5、项目的整体结构
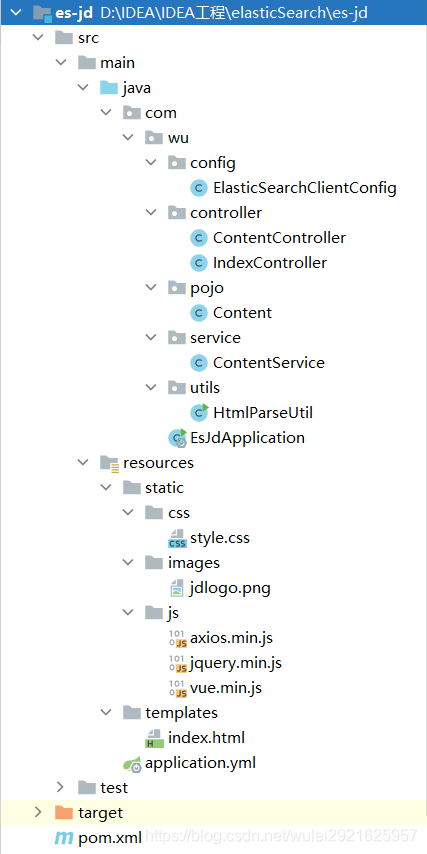
6、添加静态资源到项目中
7、SpringBoot中添加ES客户端配置类
ElasticSearchClientConfig.java
package com.wu.config;

@Configuration
public class ElasticSearchClientConfig {


    @Bean
    public RestHighLevelClient restHighLevelClient() {


        RestHighLevelClient client = new RestHighLevelClient(
                RestClient.builder(
                        new HttpHost("127.0.0.1", 9200, "http")));
        return client;
    }
}
Jsoup爬取京东数据
爬取数据
1、进入京东官网搜索java
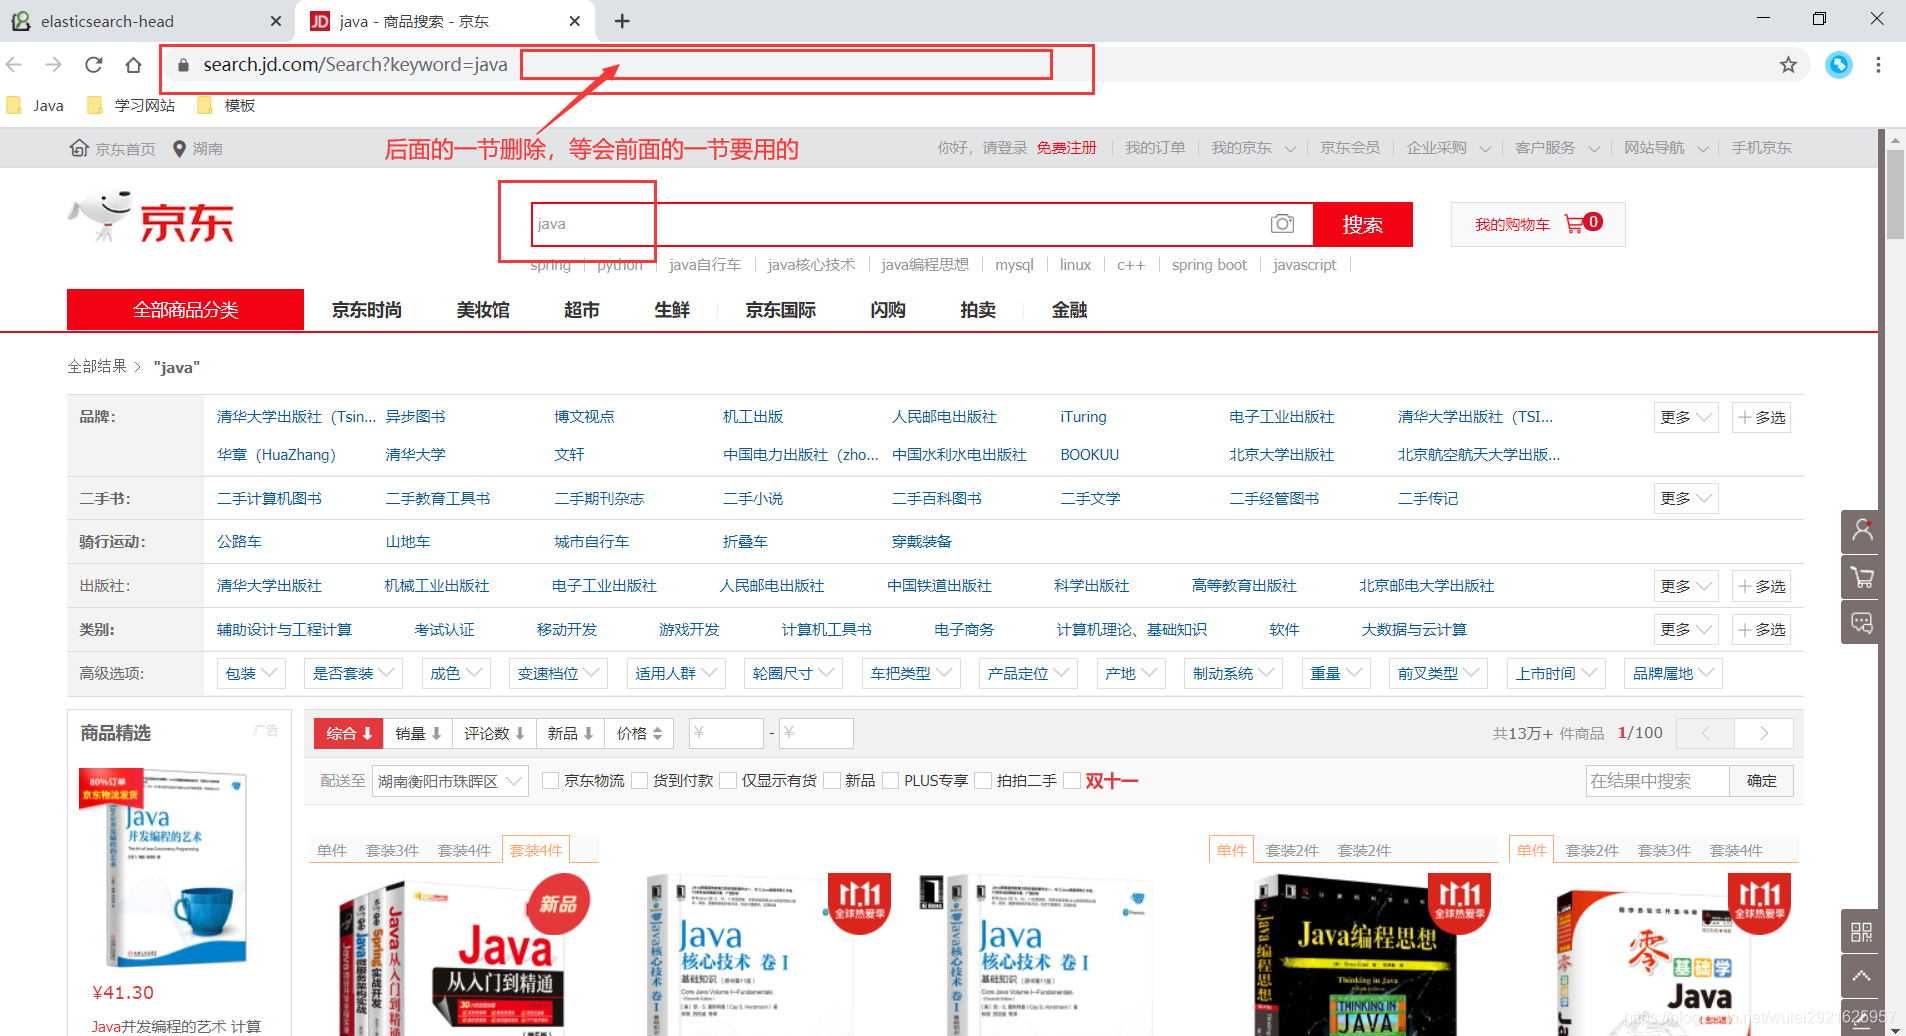
2、按F12审查元素,找到书籍所在位置
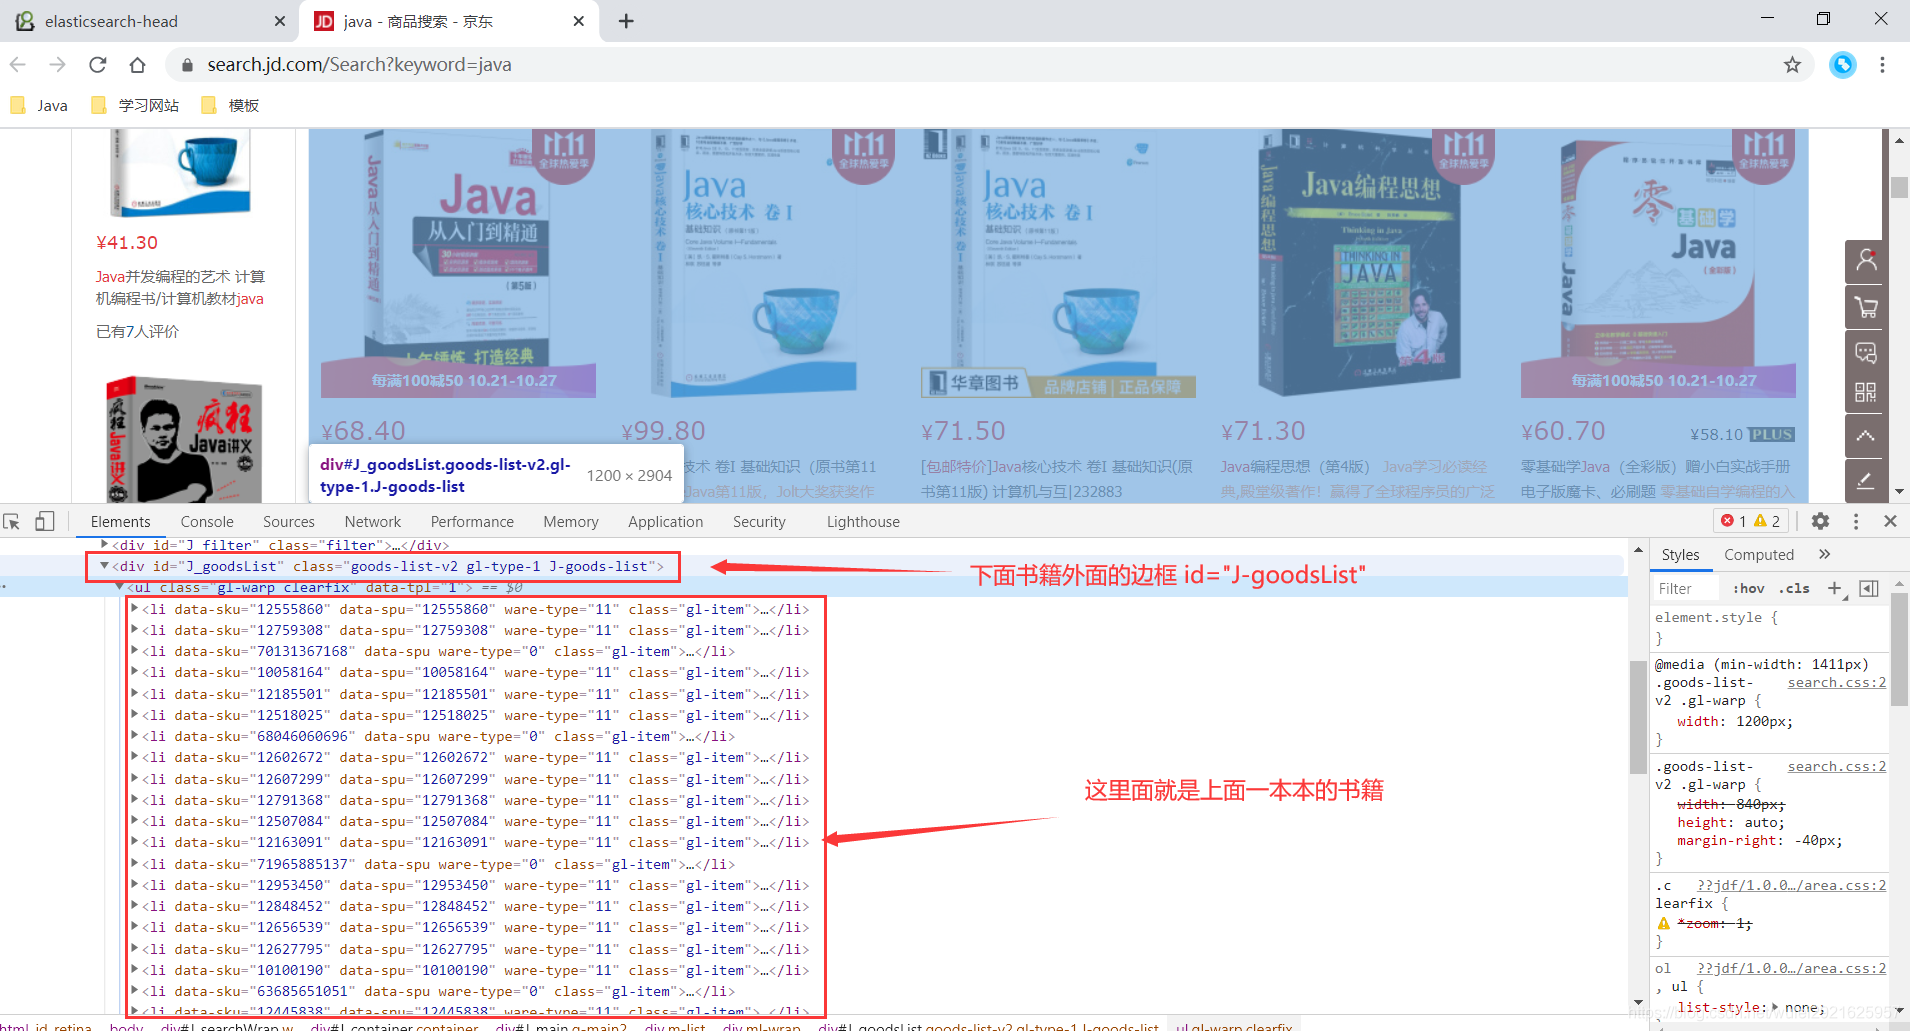
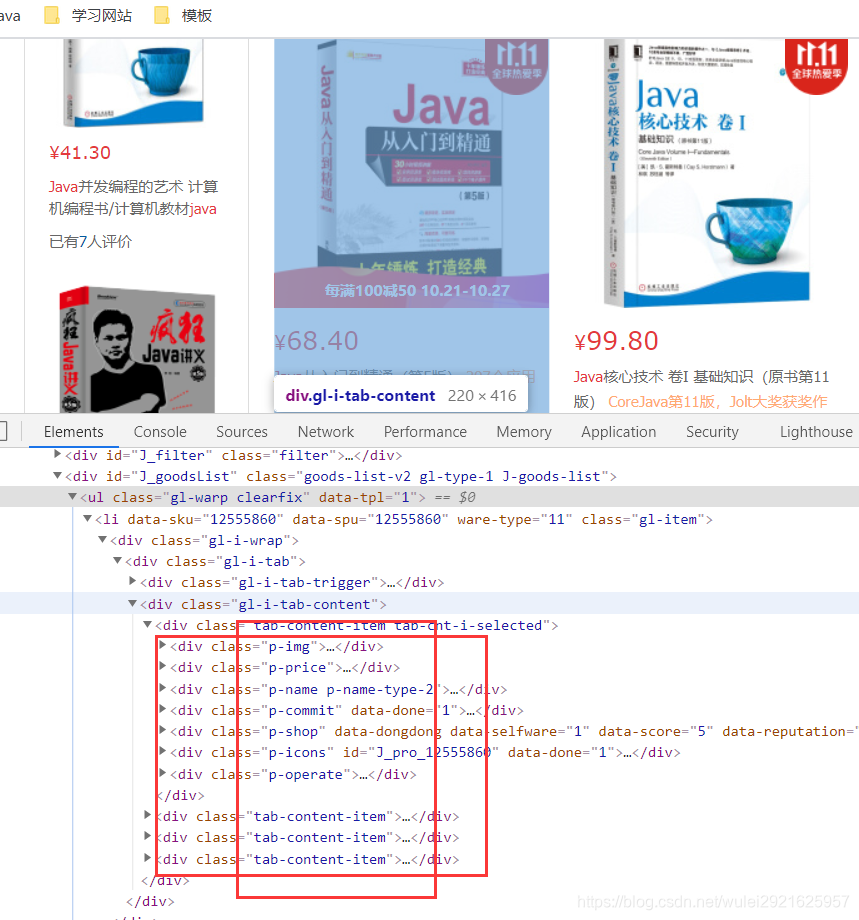
3、在utils包下建立HtmlParseUtil.java爬取测试
[外链图片转存失败,源站可能有防盗链机制,建议将图片保存下来直接上传(img-UiLd3GNL-1610955877368)(C:\Users\王东梁\AppData\Roaming\Typora\typora-user-images\image-20210118112732209.png)]
//测试数据
public static void main(String[] args) throws IOException, InterruptedException {


	//获取请求
    String url = "https://search.jd.com/Search?keyword=java";
	// 解析网页 (Jsou返回的Document就是浏览器的Docuement对象)
    Document document = Jsoup.parse(new URL(url), 30000);
    //获取id,所有在js里面使用的方法在这里都可以使用
    Element element = document.getElementById("J_goodsList");
    //获取所有的li元素
    Elements elements = element.getElementsByTag("li");
    //用来计数
    int c = 0;
    //获取元素中的内容  ,这里的el就是每一个li标签
    for (Element el : elements) {


        c++;
        //这里有一点要注意,直接attr使用src是爬不出来的,因为京东使用了img懒加载
        String img = el.getElementsByTag("img").eq(0).attr("data-lazy-img");
        //获取商品的价格,并且只获取第一个text文本内容
        String price = el.getElementsByClass("p-price").eq(0).text();
        String title = el.getElementsByClass("p-name").eq(0).text();
        String shopName = el.getElementsByClass("p-shop").eq(0).text();

        System.out.println("========================================");
        System.out.println(img);
        System.out.println(price);
        System.out.println(title);
        System.out.println(shopName);
    }
    System.out.println(c);
}
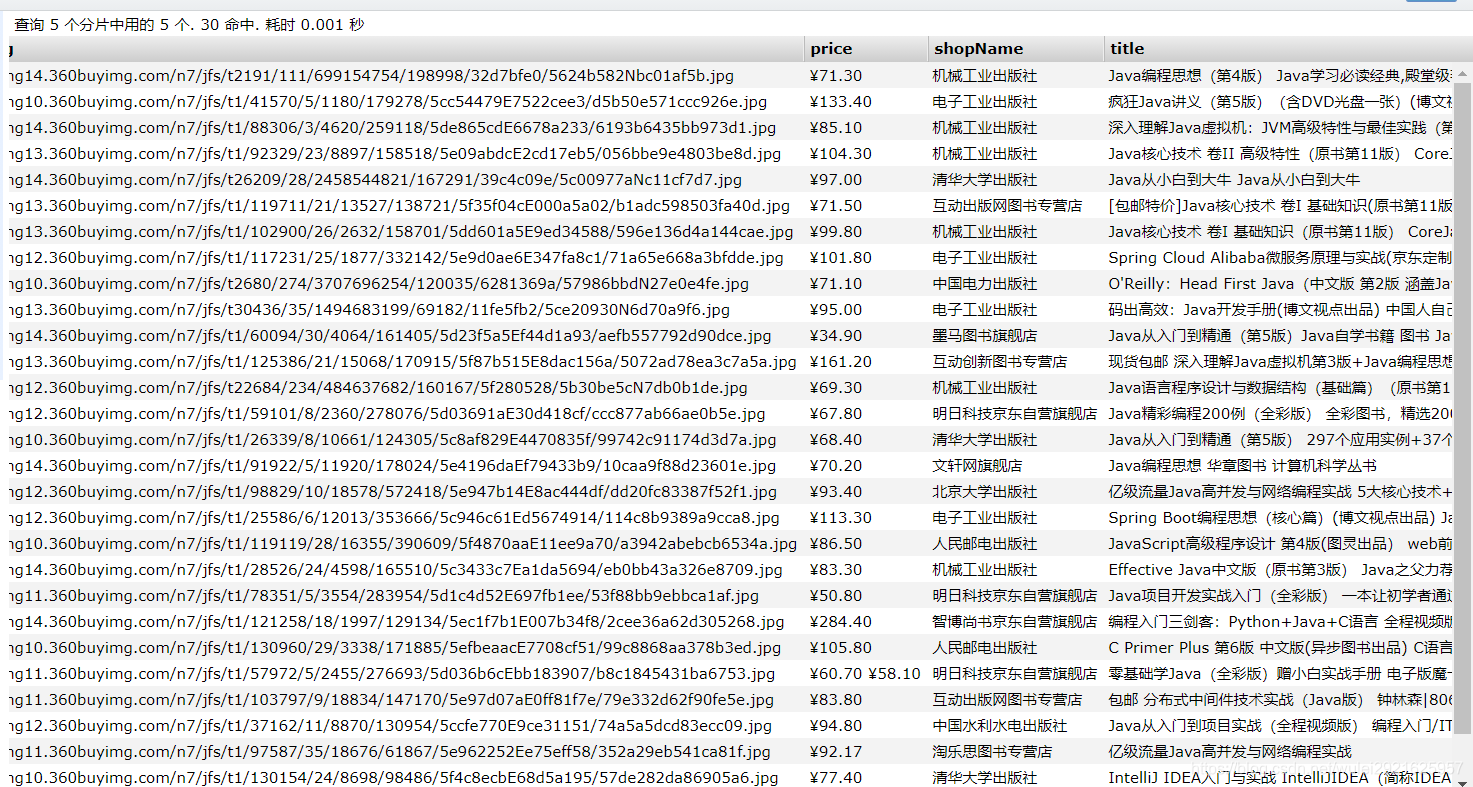
测试结果
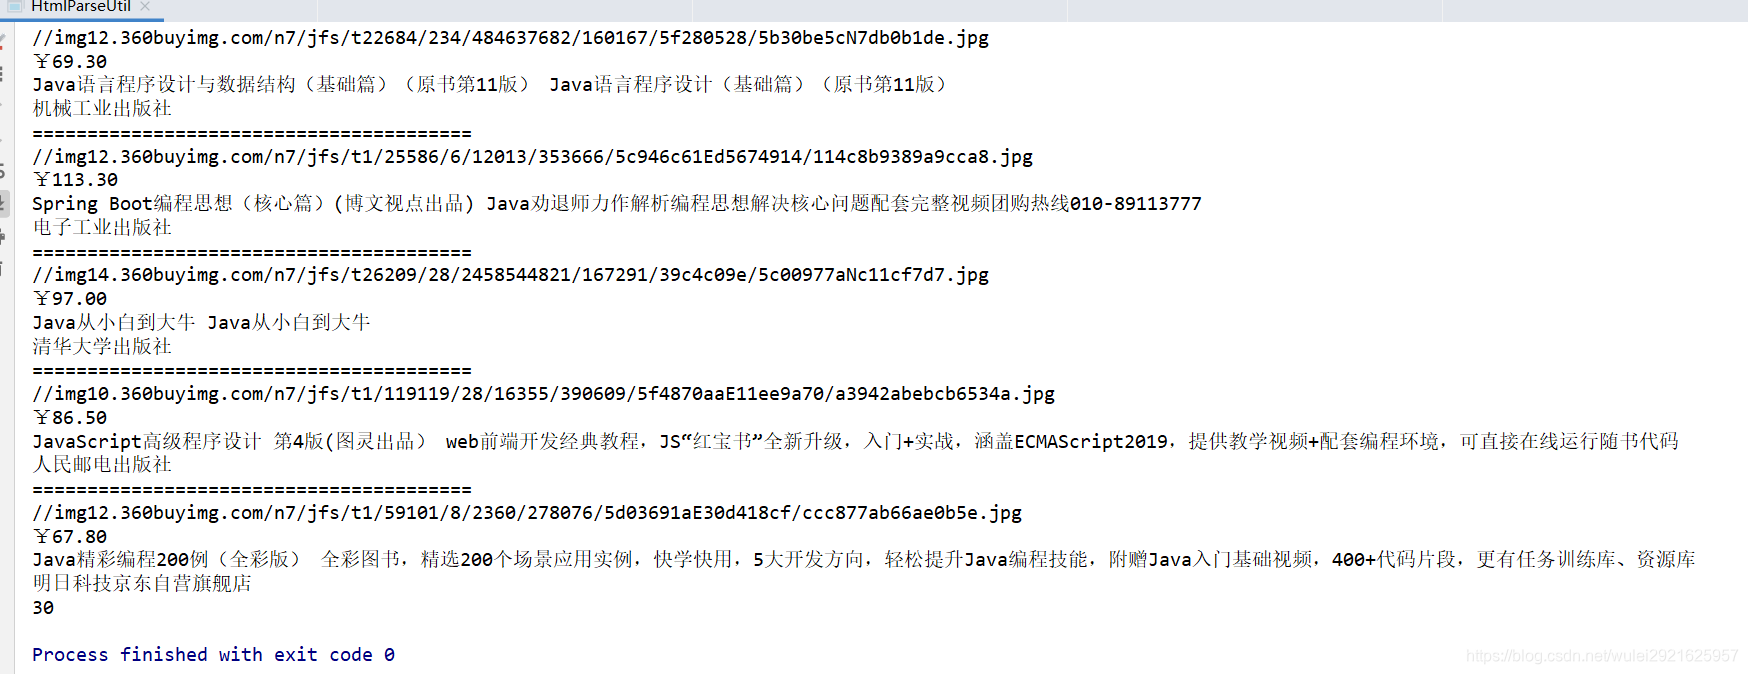
获取结果没问题,下面就把它封装成一个工具类
4、建立一个pojo实体类
实体类Content.java
package com.wu.pojo;

@Data
@AllArgsConstructor
@NoArgsConstructor
public class Content {


    private String img;
    private String price;
    private String title;
    private String shopName;
    //可以自己扩展属性
}
工具类HtmlParseUtil.java
package com.wu.utils;

@Component
public class HtmlParseUtil {


    public List<Content> parseJD(String keyword) throws IOException {


        List<Content> list = new ArrayList<>();
        String url = "https://search.jd.com/Search?keyword=" + keyword;
        Document document = Jsoup.parse(new URL(url), 30000);
        Element element = document.getElementById("J_goodsList");
        Elements elements = element.getElementsByTag("li");
        for (Element el : elements) {


            String img = el.getElementsByTag("img").eq(0).attr("data-lazy-img");
            String price = el.getElementsByClass("p-price").eq(0).text();
            String title = el.getElementsByClass("p-name").eq(0).text();
            String shopName = el.getElementsByClass("p-shopnum").eq(0).text();
            list.add(new Content(img, price, title, shopName));
        }
        return list;
    }
}
[外链图片转存失败,源站可能有防盗链机制,建议将图片保存下来直接上传(img-q05kRYi4-1610955877369)(C:\Users\王东梁\AppData\Roaming\Typora\typora-user-images\image-20210118115802010.png)]
5、业务层,这里就不写接口了
ContentService.java
先写一个方法让爬取的数据添加到ES中
package com.wu.service;

//业务编写
@Service
public class ContentService {


	//将客户端注入
    @Autowired
    @Qualifier("restHighLevelClient")
    private RestHighLevelClient client;

    //1、解析数据放到 es 中
    public boolean parseContent(String keyword) throws IOException {


        List<Content> contents = new HtmlParseUtil().parseJD(keyword);
        //把查询的数据放入 es 中
        BulkRequest request = new BulkRequest();
        request.timeout("2m");

        for (int i = 0; i < contents.size(); i++) {


            request.add(
                    new IndexRequest("jd_goods")
                            .source(JSON.toJSONString(contents.get(i)), XContentType.JSON));

        }
        BulkResponse bulk = client.bulk(request, RequestOptions.DEFAULT);
        return !bulk.hasFailures();
    }
}
6、在Controller包下建立
ContentController.java
package com.wu.controller;

//请求编写
@RestController
public class ContentController {


    @Autowired
    private ContentService contentService;

    @GetMapping("/parse/{keyword}")
    public Boolean parse(@PathVariable("keyword") String keyword) throws IOException {


        return contentService.parseContent(keyword);
    }
}
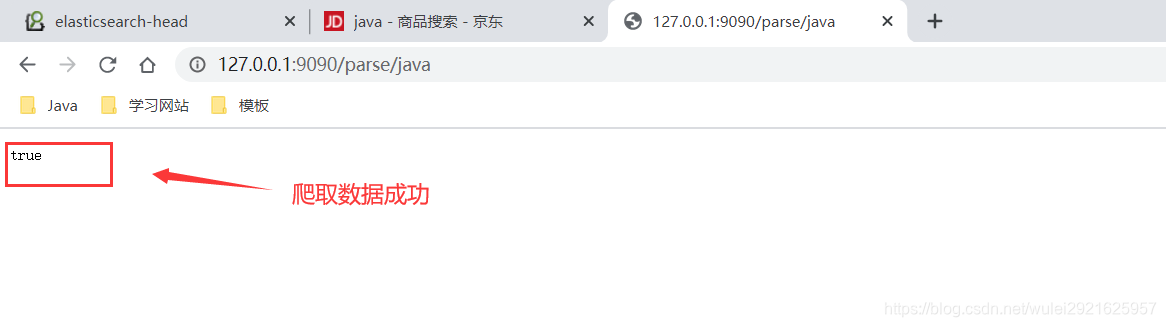
7、启动SpringBoot项目,访问它爬取数据添加到ES中
http://127.0.0.1:9090/parse/java
实现搜索功能
[外链图片转存失败,源站可能有防盗链机制,建议将图片保存下来直接上传(img-t3mspb23-1610955877370)(C:\Users\王东梁\AppData\Roaming\Typora\typora-user-images\image-20210118131856663.png)]
1、在ContentService.java添加
//2、获取这些数据实现基本的搜索功能
public List<Map<String, Object>> searchPage(String keyword, int pageNo, int pageSize) throws IOException {


    if (pageNo <= 1) {


        pageNo = 1;
    }
    if (pageSize <= 1) {


        pageSize = 1;
    }

    //条件搜索
    SearchRequest searchRequest = new SearchRequest("jd_goods");
    SearchSourceBuilder sourceBuilder = new SearchSourceBuilder();

    //分页
    sourceBuilder.from(pageNo).size(pageSize);

    //精准匹配
    TermQueryBuilder termQuery = QueryBuilders.termQuery("title", keyword);

    sourceBuilder.query(termQuery);
    sourceBuilder.timeout(new TimeValue(60, TimeUnit.SECONDS));
    //执行搜索
    SearchRequest source = searchRequest.source(sourceBuilder);
    SearchResponse searchResponse = client.search(searchRequest, RequestOptions.DEFAULT);
    //解析结果

    List<Map<String, Object>> list = new ArrayList<>();
    for (SearchHit documentFields : searchResponse.getHits().getHits()) {


        list.add(documentFields.getSourceAsMap());
    }
    return list;
}
2、在ContentController添加搜索请求
@GetMapping("/search/{keyword}/{pageNo}/{pageSize}")
public List<Map<String, Object>> search(@PathVariable("keyword") String keyword,
                                        @PathVariable("pageNo") int pageNo,
                                        @PathVariable("pageSize") int pageSize) throws IOException {


    List<Map<String, Object>> list = contentService.searchPage(keyword, pageNo, pageSize);
    return list;
}
3、访问http://127.0.0.1:9090/search/java/1/10

欧克,爬取和搜索都没问题,下面要做的就是和前端交互了
和前端交互
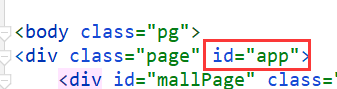
1、前端接收数据
index.html
1、用vue接收数据
<script>
    new Vue({


        el: '#app',
        data: {


            keyword: '',  //搜索的关键字
            results: []  //搜索的结果
        },
        methods: {


            searchKey() {


                var keyword = this.keyword
                axios.get('search/' + keyword + '/1/210').then(response => {


                    this.results = response.data;//绑定数据!
                })
            }
        }
    })
</script>
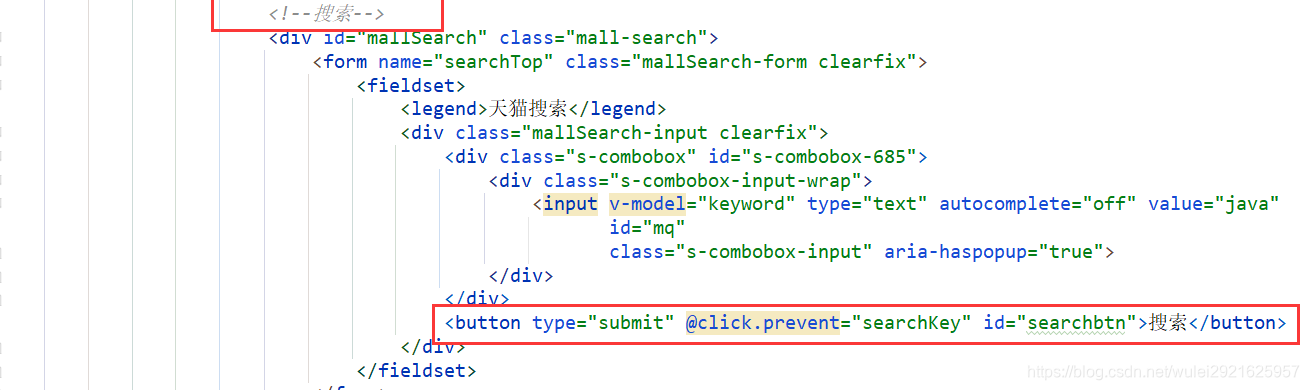
2、用vue给前端传递数据
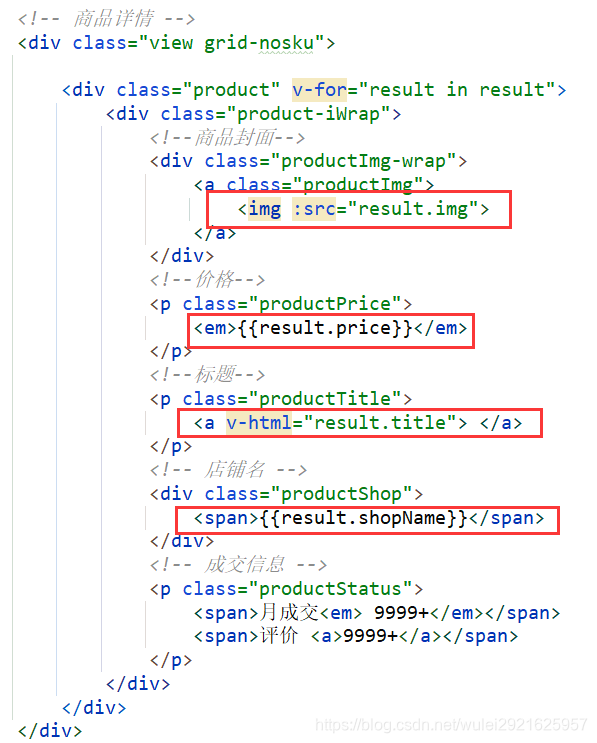
2、访问 127.0.0.1:9090 并且搜索java
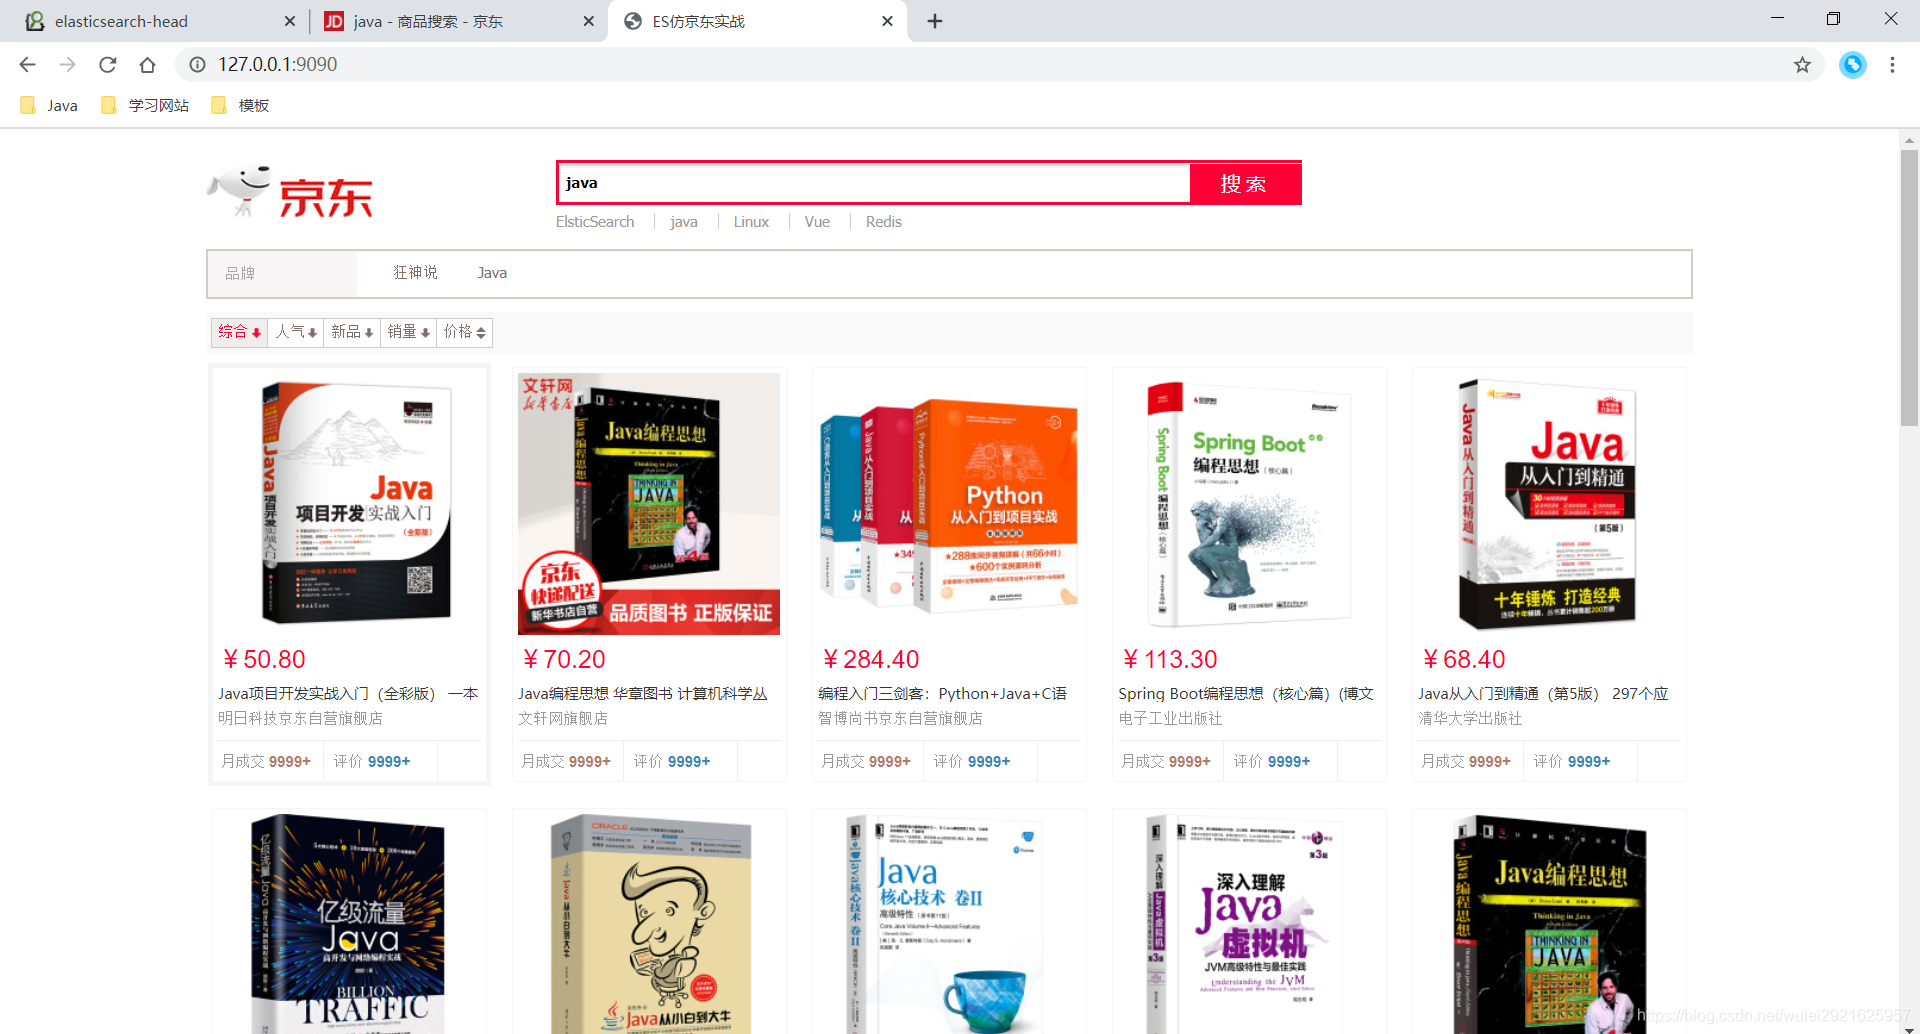
欧克,完美
实现关键字高亮
1、改ContentService.java里面的搜索功能就行
//3、获取这些数据实现基本的搜索高亮功能
public List<Map<String, Object>> searchPagehighlighter(String keyword, int pageNo, int pageSize) throws IOException {


    if (pageNo <= 1) {


        pageNo = 1;
    }
    if (pageSize <= 1) {


        pageSize = 1;
    }

    //条件搜索
    SearchRequest searchRequest = new SearchRequest("jd_goods");
    SearchSourceBuilder sourceBuilder = new SearchSourceBuilder();

    //分页
    sourceBuilder.from(pageNo).size(pageSize);

    //精准匹配
    TermQueryBuilder termQuery = QueryBuilders.termQuery("title", keyword);

    //====================================   高   亮   ==========================================
    HighlightBuilder highlightBuilder = new HighlightBuilder(); //获取高亮构造器
    highlightBuilder.field("title"); //需要高亮的字段
    highlightBuilder.requireFieldMatch(false);//不需要多个字段高亮
    highlightBuilder.preTags("<span style='color:red'>"); //前缀
    highlightBuilder.postTags("</span>"); //后缀
    sourceBuilder.highlighter(highlightBuilder); //把高亮构造器放入sourceBuilder中
    sourceBuilder.query(termQuery);
    sourceBuilder.timeout(new TimeValue(60, TimeUnit.SECONDS));
    //执行搜索
    SearchRequest source = searchRequest.source(sourceBuilder);
    SearchResponse searchResponse = client.search(searchRequest, RequestOptions.DEFAULT);

    //解析结果
    List<Map<String, Object>> list = new ArrayList<>();
    for (SearchHit hit : searchResponse.getHits().getHits()) {


        Map<String, HighlightField> highlightFields = hit.getHighlightFields();//获取高亮字段
        HighlightField title = highlightFields.get("title"); //得到我们需要高亮的字段
        Map<String, Object> sourceAsMap = hit.getSourceAsMap();//原来的返回的结果

        //解析高亮的字段
        if (title != null) {


            Text[] fragments = title.fragments();
            String new_title = "";
            for (Text text : fragments) {


                new_title += text;
            }
            sourceAsMap.put("title", new_title);  //高亮字段替换掉原来的内容即可
        }
        list.add(sourceAsMap);
    }
    return list;
}
2、改变Controller里面的搜索请求
@GetMapping("/search/{keyword}/{pageNo}/{pageSize}")
public List<Map<String, Object>> search(@PathVariable("keyword") String keyword,
                                        @PathVariable("pageNo") int pageNo,
                                        @PathVariable("pageSize") int pageSize) throws IOException {


    List<Map<String, Object>> list = contentService.searchPagehighlighter(keyword, pageNo, pageSize);
    return list;
}
3、发现问题
需要高亮的字段前缀和后缀都有了,但是这不是我们想要的结果
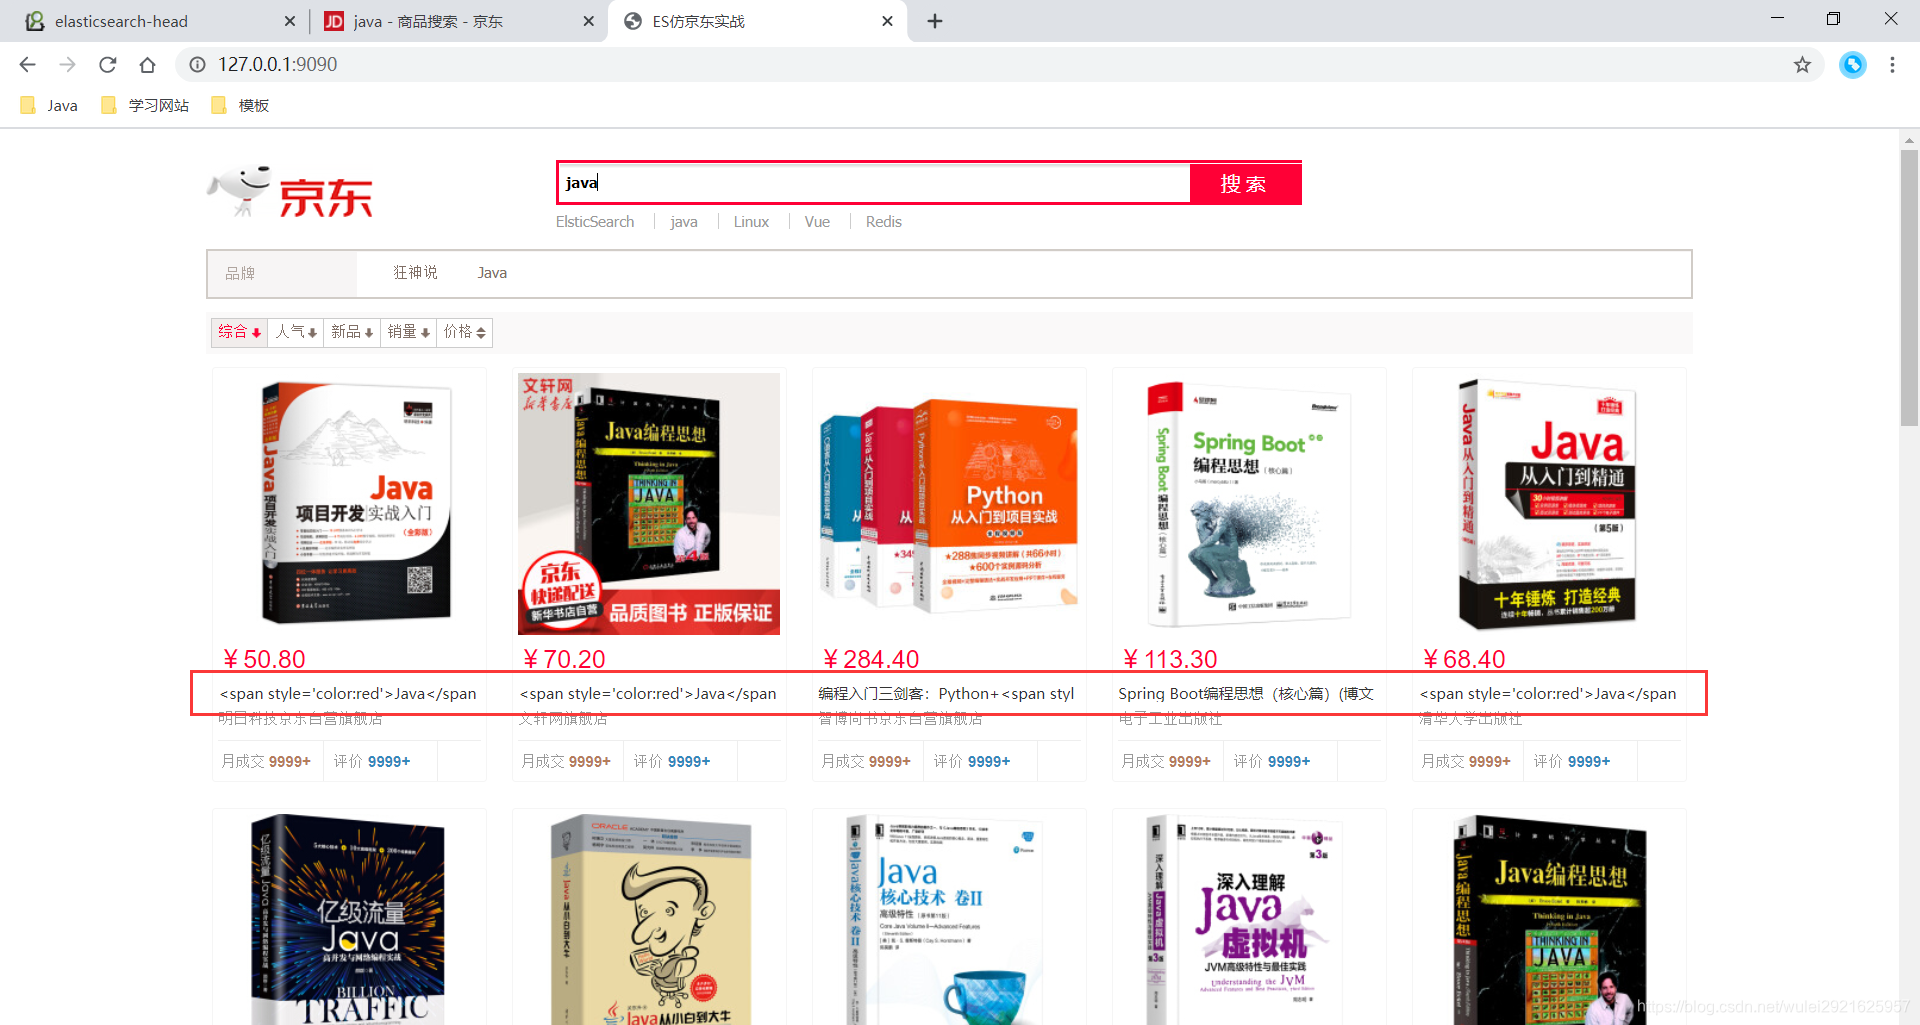
4、解决问题
这里Vue给了我们很方便的解决办法

5、完美
