文章目录
1. 环境
Windows10
Android studio 3.0
Android NDK : android-ndk-r16b
Opencv3.2.0
2. 准备工作
下载Android studio3.0, android-ndk-r16b,下载地址:http://www.androiddevtools.cn/index.html
下载opencv-3.2.0-android-sdk.zip包,并解压下载地址:https://opencv.org/releases.html
3. 开始构建示例项目
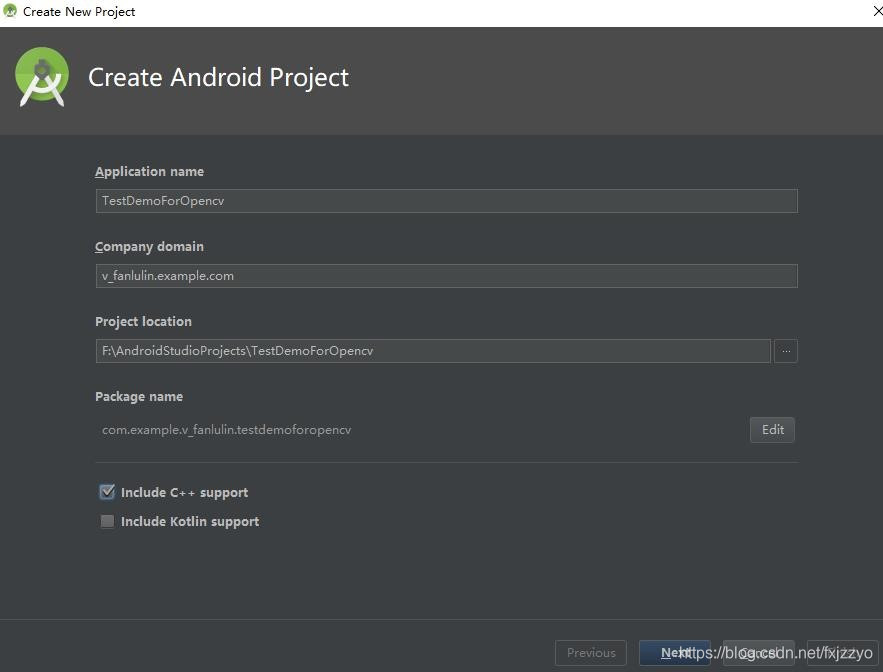
新建android 项目,勾选Include C++ support,然后一路next,直到finish。
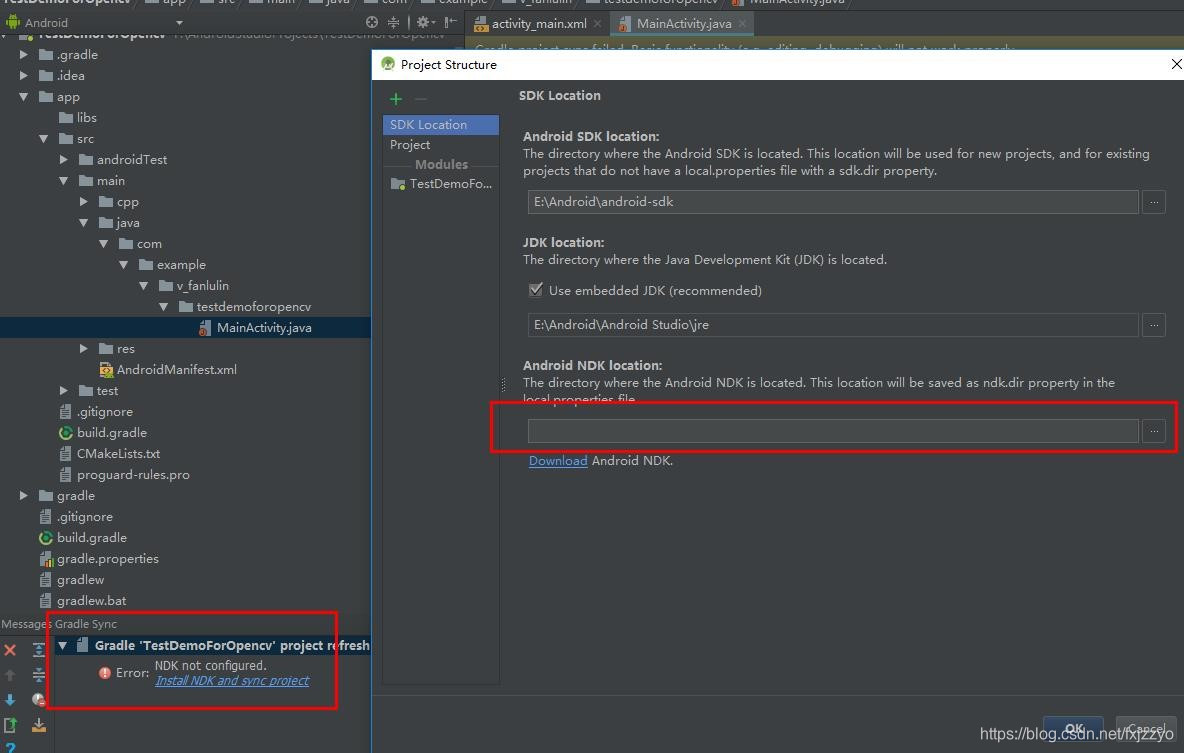
一开始可能会有错,很可能是ndk not found,解决方法是,添加ndk路径。
点击file->project structure

Android studio2.3之后支持了include C++ support选项,能自动创建NDK项目,节省了开发时间。
工程创建后可以看到,在src/main/下自动创建了cpp文件夹,并在其下面创建了native-lib.cpp文件:
#include <jni.h>
#include <string>

extern "C"
JNIEXPORT jstring

JNICALL
Java_com_example_v_1fanlulin_testdemoforopencv_MainActivity_stringFromJNI(
        JNIEnv *env,
        jobject /* this */) {
    std::string hello = "Hello from C++";
    return env->NewStringUTF(hello.c_str());
}
里面是示例函数,使用c++返回一个字符串”Hello from C++”。
这个方法可以被Android的java代码通过Jni的方式调用。
在Java代码里的做法是:
package com.example.v_fanlulin.testdemoforopencv;

import android.support.v7.app.AppCompatActivity;
import android.os.Bundle;
import android.widget.TextView;

public class MainActivity extends AppCompatActivity {

    // Used to load the 'native-lib' library on application startup.4000106090
    static {
        System.loadLibrary("native-lib");
    }

    @Override
    protected void onCreate(Bundle savedInstanceState) {
        super.onCreate(savedInstanceState);
        setContentView(R.layout.activity_main);

        // Example of a call to a native method
        TextView tv = (TextView) findViewById(R.id.sample_text);
        tv.setText(stringFromJNI());
    }

    /**
     * A native method that is implemented by the 'native-lib' native library,
     * which is packaged with this application.
     */
    public native String stringFromJNI();
}
通过
static {
    System.loadLibrary("native-lib");
}
加载native-lib库。
通过
/**
 * A native method that is implemented by the 'native-lib' native library,
 * which is packaged with this application.
 */
public native String stringFromJNI();
声明了一个本地方法,这个方法就是在native-lib.cpp里实现的。
有了c++代码和java代码,实现java调用c++还需要将c++编译成动态库,这就需要一个重要的文件CMakeLists.txt,它是用来将c++代码编译成可供java调用的动态库的。它里面声明了编译需要的库,路径,源文件等信息。
完整CMakeLists.txt内容如下:
   # For more information about using CMake with Android Studio, read the
    # documentation: https://d.android.com/studio/projects/add-native-code.html

    # Sets the minimum version of CMake required to build the native library.

    cmake_minimum_required(VERSION 3.4.1)

    # Creates and names a library, sets it as either STATIC
    # or SHARED, and provides the relative paths to its source code.
    # You can define multiple libraries, and CMake builds them for you.
    # Gradle automatically packages shared libraries with your APK.

    add_library( # Sets the name of the library.
                 native-lib

                 # Sets the library as a shared library.
                 SHARED

                 # Provides a relative path to your source file(s).
                 src/main/cpp/native-lib.cpp )

    # Searches for a specified prebuilt library and stores the path as a
    # variable. Because CMake includes system libraries in the search path by
    # default, you only need to specify the name of the public NDK library
    # you want to add. CMake verifies that the library exists before
    # completing its build.

    find_library( # Sets the name of the path variable.
                  log-lib

                  # Specifies the name of the NDK library that
                  # you want CMake to locate.
                  log )

    # Specifies libraries CMake should link to your target library. You
    # can link multiple libraries, such as libraries you define in this
    # build script, prebuilt third-party libraries, or system libraries.

    target_link_libraries( # Specifies the target library.
                           native-lib

                           # Links the target library to the log library
                           # included in the NDK.
                           ${log-lib} )
至此,Android里调用C++代码的全部组件都已完备。调用opencv代码也是同样的道理。
4. 集成opencv库
4.1 导入opencv库
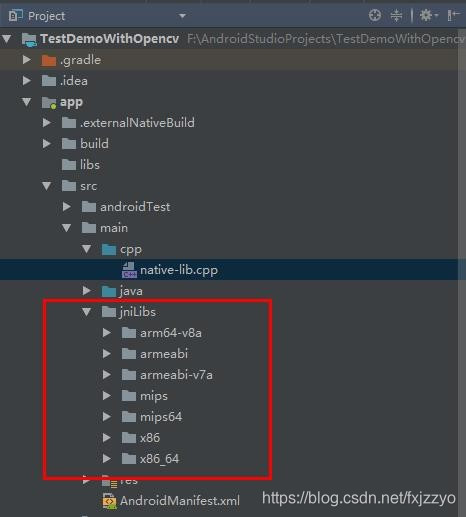
将opencv-3.2.0-android-sdk\OpenCV-android-sdk\sdk\native下的libs文件夹复制到项目的main目录下并重命名为jniLibs.
4.2 配置CMakeLists.txt
设置opencv的路径,配置native依赖,引入libopencv_java3.so文件,最后在target_link_libraries中链接lib_opencv。
完整CMakeLists.txt如下:
# For more information about using CMake with Android Studio, read the
# documentation: https://d.android.com/studio/projects/add-native-code.html

set(pathToOpenCv E:/Android/opencv-3.2.0-android-sdk/OpenCV-android-sdk)#设置OpenCv的路径变量
# Sets the minimum version of CMake required to build the native library.

cmake_minimum_required(VERSION 3.4.1)

#支持-std=gnu++11
set(CMAKE_VERBOSE_MAKEFILE on)
set(CMAKE_CXX_FLAGS "${CMAKE_CXX_FLAGS} -std=gnu++11")
#配置加载native依赖
include_directories(${pathToOpenCv}/sdk/native/jni/include)

set(CURRENT_DIR ${CMAKE_SOURCE_DIR})
# 在Gradle Console输出信息
# CMAKE_SOURCE_DIR:
message("CURRENT_DIR:" ${CMAKE_SOURCE_DIR})

#动态方式加载
add_library(lib_opencv STATIC IMPORTED ) #表示创建一个导入库,静态方式
#引入libopencv_java3.so文件
set_target_properties(lib_opencv
                       PROPERTIES
                       IMPORTED_LOCATION ${CURRENT_DIR}/src/main/jniLibs/${ANDROID_ABI}/libopencv_java3.so
                       )

# Creates and names a library, sets it as either STATIC
# or SHARED, and provides the relative paths to its source code.
# You can define multiple libraries, and CMake builds them for you.
# Gradle automatically packages shared libraries with your APK.

add_library( # Sets the name of the library.
             native-lib

             # Sets the library as a shared library.
             SHARED

             # Provides a relative path to your source file(s).
             src/main/cpp/native-lib.cpp )

# Searches for a specified prebuilt library and stores the path as a
# variable. Because CMake includes system libraries in the search path by
# default, you only need to specify the name of the public NDK library
# you want to add. CMake verifies that the library exists before
# completing its build.

find_library( # Sets the name of the path variable.
              log-lib

              # Specifies the name of the NDK library that
              # you want CMake to locate.
              log )

# Specifies libraries CMake should link to your target library. You
# can link multiple libraries, such as libraries you define in this
# build script, prebuilt third-party libraries, or system libraries.

target_link_libraries( # Specifies the target library.
                       native-lib

                       # Links the target library to the log library
                       # included in the NDK.
                       ${log-lib}
                       android -ljnigraphics lib_opencv)
4.3 代码声明及实现
在MainActivity中声明想调用的native方法,如想调用一个图像模糊的方法:
public native int[] imgBlur();
声明了之后需要在cpp中实现,利用代码提示alt+enter可直接在native-lib.cpp中直接生成该函数的jni声明以及函数体,很方便。
在函数里写相应的opencv代码去做图像处理就行了。
写完之后完整native-lib.cpp文件如下:
#include <jni.h>
#include <string>
#include <iostream>
#include <stdio.h>
#include <stdlib.h>
#include <opencv2/opencv.hpp>

using namespace cv;
using namespace std;

extern "C"
JNIEXPORT jstring

JNICALL
Java_com_example_v_1fanlulin_testdemoforopencv_MainActivity_stringFromJNI(
        JNIEnv *env,
        jobject /* this */) {
    std::string hello = "Hello from C++";
    return env->NewStringUTF(hello.c_str());
}

extern "C"
JNIEXPORT jintArray JNICALL
Java_com_example_v_1fanlulin_testdemoforopencv_MainActivity_imgBlur(JNIEnv *env, jobject instance,
                                                                    jintArray buf, jint w,
                                                                    jint h) {
    jint *cbuf = env->GetIntArrayElements(buf, JNI_FALSE );
    if (cbuf == NULL) {
        return 0;
    }

    Mat imgData(h, w, CV_8UC4, (unsigned char *) cbuf);
    /*图像处理开始*/
    cvtColor(imgData,imgData,CV_BGRA2BGR);
    blur(imgData,imgData,Size(20,20));
    cvtColor(imgData,imgData,CV_BGR2BGRA);
    /*图像处理结束*/
    uchar *ptr = imgData.data;
    int size = w * h;
    jintArray result = env->NewIntArray(size);
    env->SetIntArrayRegion(result, 0, size, (const jint *)ptr);
    env->ReleaseIntArrayElements(buf, cbuf, 0);
    return result;
}
在MainActivity中调用该native方法,完整代码如下:
package com.example.v_fanlulin.testdemoforopencv;

import android.graphics.Bitmap;
import android.graphics.BitmapFactory;
import android.net.Uri;
import android.support.v7.app.AppCompatActivity;
import android.os.Bundle;
import android.view.View;
import android.widget.ImageView;
import android.widget.TextView;

public class MainActivity extends AppCompatActivity {

    // Used to load the 'native-lib' library on application startup.4000106090
    static {
        System.loadLibrary("native-lib");
    }

    private ImageView mImageView;
    private Bitmap bitmapBack;//用于备份的bitmap

    @Override
    protected void onCreate(Bundle savedInstanceState) {
        super.onCreate(savedInstanceState);
        setContentView(R.layout.activity_main);
        mImageView =  (ImageView) findViewById(R.id.iv);
    }

    /**
     * 恢复为原图
     * @param view
     */
    public void converToOrig(View view) {
        //直接从备份的bitmapBack拿图片
        if(bitmapBack==null){
            bitmapBack = BitmapFactory.decodeResource(getResources(), R.mipmap.genie);

        }
        mImageView.setImageBitmap(bitmapBack);

    }

    /**
     * 模糊图像
     * @param view
     */
    public void converToBlur(View view) {
        //从imageview上获取bitmap图片
        mImageView.setDrawingCacheEnabled(true);
        Bitmap bitmap = mImageView.getDrawingCache();

        int w=bitmap.getWidth(),h=bitmap.getHeight();
        int[] pix = new int[w * h];
        bitmap.getPixels(pix, 0, w, 0, 0, w, h);
        //调用native函数,模糊图像
        int[] resultInt=imgBlur(pix, w, h);
        Bitmap resultImg=Bitmap.createBitmap(w, h, Bitmap.Config.RGB_565);
        resultImg.setPixels(resultInt, 0, w, 0, 0,w, h);
        mImageView.setDrawingCacheEnabled(false);
        mImageView.setImageBitmap(resultImg);
    }

    /**
     * A native method that is implemented by the 'native-lib' native library,
     * which is packaged with this application.
     */
    public native String stringFromJNI();

    public native int[] imgBlur(int[] buf,int w,int h);
}
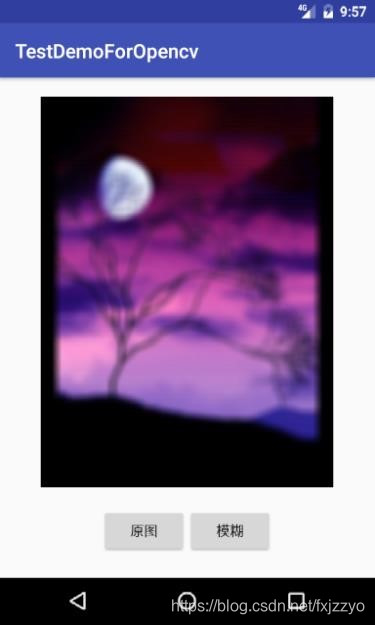
4.3 运行效果
原图:
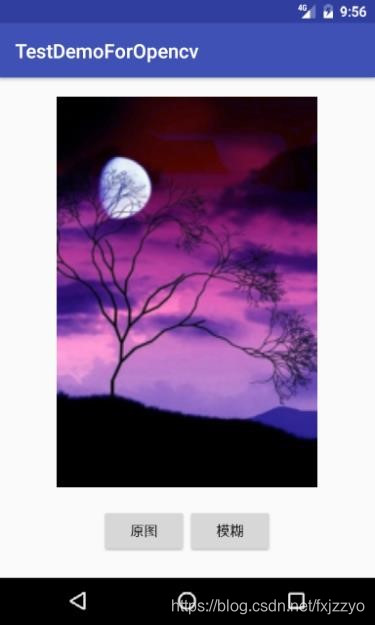
模糊后:
5. 可能遇到的其他错误及解决方法
5.1 包冲突
Error:Execution failed for task ':app:preDebugAndroidTestBuild'.
>Conflict with dependency 'com.android.support:support-annotations' in project ':app'. Resolved versions for app (26.1.0) and test app (27.1.1) differ. See https://d.android.com/r/tools/test-apk-dependency-conflicts.html for details.
解决方法:
在app 的build.gradle里的dependencies中添加:
  androidTestCompile('com.android.support:support-annotations:26.1.0'){
        force = true
 }