文章目录
- 前言
- 一、MyBatis注解
- 二、Spring注解
- 三、SpringMVC注解
- 四、SpringBoot注解
-
- 1、@SpringBootApplication
- 2、@Configuration & @Bean
- 3、@Import
- 4、@Conditional
- 5、@Component、@Controller、@Service、@Repository
- 6、@ImportResource
- 7、@ConfigurationProperties & @EnableConfigurationProperties
- 8、@SpringBootConfiguration
- 9、@ComponentScan
- 10、@EnableAutoConfiguration
- 11、@AutoConfigurationPackage
- 12、@Import(AutoConfigurationImportSelector.class)
前言
在学习框架过程中,会遇到非常多的注解,非常容易忘记混淆!这篇博客是关于我学习过程中遇到的各个框架注解的总结,该技术博客会持续在我们学习过程中持续更新。博客目前尚未完结,建议收藏。
一、MyBatis注解
1、@Alias
作用:给Java类设置一个别名,方便Mapper.xml映射文件中的属性(parameterType,resultType)调用,下列代码中user就是该类的别名。
@Alias("user")
public class User {


}
2、@select、@update、@delete、@insert
作用:这四个注解在接口上使用,实现注解开发实现简单的增删改查的操作(复杂的sql语句建议使用xml配置文件),不需要使用Mapper.xml映射文件,使用这四个注解需要在核心配置文件中绑定接口。
@Select("select * from user")
List<User> getUsers();

@Insert("insert into user(id,name,pwd) values (#{id},#{name},#{password})")
int addUser(User user);

@Update("update user set name=#{name},pwd=#{password} where id = #{id}")
int updateUser(User user);

@Delete("delete from user where id = #{id}")
int deleteUser(int id);
<!--绑定接口-->
<mappers>
    <mapper class="com.kuang.dao.UserMapper"/>
</mappers>
3、@Param
作用:映射文件开发和注解开发中的sql语句就是引用该注解中设定的属性名。 基本数据类型的参数和String类型的需要加上该注解,引用类型不需要加。如果只有一个基本类型,可以忽略(不建议忽略)。
// 方法存在多个参数,所有的参数前面必须加上 @Param("id")注解
@Select("select * from user where id = #{ID}")
User getUserByID(@Param("ID") int id);
4、Lombok注解
作用:方便我们创建实体类,省略我们实体类代码中getter/setter方法,有参构造/无参构造等方法。
使用步骤:
- 在Idea中安装Lombok插件
- 在maven项目中导入lombok依赖
<dependency>
    <groupId>org.projectlombok</groupId>
    <artifactId>lombok</artifactId>
    <version>1.18.10</version>
</dependency>
- 在实体类上添加注解:
@Data
@AllArgsConstructor
@NoArgsConstructor
public class User {


    private int id;
    private String name;
    private String pwd;
}
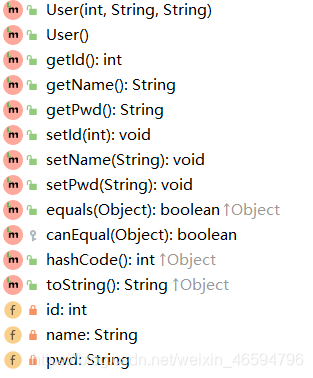
此时该类中结构如下:Lombok插件的注解让我们创建实体类更加方便。
二、Spring注解
1、@Autowired
作用:根据数据类型,将ioc容器中的bean自动装配,不需要手动注入。
@Autowired(required=false),如果允许对象为null,设置required = false,默认为true
//使用之前需要导入 spring-aop的依赖!
public class User {


	//不需要set方法!
   @Autowired
   private Cat cat;
   @Autowired
   private Dog dog;
}
2、@Qualiier
作用:@Autowired是根据类型自动装配的,加上@Qualifier则可以根据byName(id)自动装配。@Qualifier不能单独使用。
@Autowired
@Qualifier(value = "cat2")
private Cat cat;
@Autowired
@Qualifier(value = "dog2")
private Dog dog;
3、@Resource
作用:@Resource如有指定的name属性,先按该属性进行byName方式查找装配;不成功则按byType的方式自动装配。(与Autowired和Qualifier注解相反)
public class User {


   //如果允许对象为null,设置required = false,默认为true
   @Resource(name = "cat2")
   private Cat cat;
   @Resource
   private Dog dog;
}
4、@Component & @Value
作用:使实体类自动注册到ioc容器中管理装配。可以搭配 @Value 注解使用,使用该注解前需要扫描实体类的包。
<context:component-scan base-package="com.xu.pojo"/>
@Component("user") //将这个类标注为Spring的一个组件,放到容器中!
// 相当于配置文件中 <bean id="user" class="当前注解的类"/>
public class User {


   @Value("Coder Xu")//可以不提供set方法直接使用,也可以声明在set方法上
   // 相当于配置文件中 <property name="name" value="Coder Xu"/>
   private String name;
}
5、@Controller、@Service、@Repository
作用:@Component三个衍生注解, 为了更好的进行分层,可以使用这三个注解,功能和@Component一样。写上这些注解,就相当于将这个类交给Spring管理装配了!使用该注解前同样需要扫描实体类的包。
- @Controller:web层
- @Service:service层
- @Repository:dao层
@Controller("user")
public class User {


   @Value("徐志斌")
   private String name;
}
6、@Configuration & @Bean
作用:通过 Java 类的方式提供 Bean 的定义信息。
//新建一个config配置包,编写一个MyConfig配置类

@Configuration  //代表这是一个配置类
public class MyConfig {


   @Bean //通过方法注册一个bean,这里的返回值就Bean的类型,方法名就是bean的id!
   public Dog dog(){


       return new Dog();
  }
}
7、@Import
作用:声明在容器中组件的类上,为容器自动创建组件
@Configuration
@Import(MyConfig2.class)
public class MyConfig {


   @Bean
   public Dog dog(){


       return new Dog();
  }
}
三、SpringMVC注解
1、@Controller
作用:用于声明Spring类的实例是一个控制器(在讲IOC时还提到了另外3个注解),Spring可以使用扫描机制来找到应用程序中所有基于注解的控制器类。
为了保证Spring能找到你的控制器,需要在配置文件中声明组件扫描。
<!-- 自动扫描指定的包,下面所有注解类交给IOC容器管理 -->
<context:component-scan base-package="com.xu.controller"/>
//@Controller注解的类会自动添加到Spring上下文中
@Controller
public class ControllerTest2{


   //映射访问路径
   @RequestMapping("/t2")
   public String index(Model model){


       //Spring MVC会自动实例化一个Model对象用于向视图中传值
       model.addAttribute("msg", "ControllerTest2");
       //返回视图位置
       return "test";
  }
}
2、@RequestMapping
作用:映射请求路径,浏览器发送请求时该注解会响应
@Controller
@RequestMapping("/HelloController")
public class HelloController {


   //真实访问地址 : 项目名/HelloController/hello
   @RequestMapping("/hello")
   public String sayHello(Model model){


   }
}
3、@PathVariable
作用:让方法参数的值对应绑定到一个URI模板变量上。一般用于RestFul风格。
@Controller
public class RestFulController {


   //映射访问路径
   @RequestMapping("/commit/{p1}/{p2}")
   public String index(@PathVariable int p1, @PathVariable int p2, Model model){


       int result = p1+p2;
       //Spring MVC会自动实例化一个Model对象用于向视图中传值
       model.addAttribute("msg", "结果:"+result);
       //返回视图位置
       return "test";
  }
}

输入网址:http://localhost:8080/commit/1/2访问
页面显示: 结果:3
4、 @ResponseBody
作用:使用此注解就不会发生视图跳转(不经过视图解析器),直接返回字符串给页面。
@Controller
public class UserController {


   @RequestMapping("/test")
   @ResponseBody
   public String test(){


       return str;
  }
}
5、@RestController
作用:在类上直接使用 @RestController ,这样里面所有的方法都只会返回字符串了,不用再每一个都添加@ResponseBody !我们在前后端分离开发中,一般都使用 @RestController ,十分便捷!
@RestController
public class UserController {


   @RequestMapping("/test")
   public String test(){


       return str;
  }
}
四、SpringBoot注解
1、@SpringBootApplication
作用:表明这是一个springboot应用,一般声明在主程序类上
/**
 * 主程序类
 * @SpringBootApplication:这是一个SpringBoot应用
 */
@SpringBootApplication
public class MainApplication {


    public static void main(String[] args) {


        SpringApplication.run(MainApplication.class,args);
    }
}
//该注解等同于以下三个注解组合
@SpringBootApplication
public class SpringBootApplication{


}

等同于
//这三个注解后面后讲解
@SpringBootConfiguration
@EnableAutoConfiguration
@ComponentScan("com.xu.boot")
public class SpringBootApplication{


}
2、@Configuration & @Bean
作用:告诉SpringBoot这是一个配置类(不需要ioc容器中手动注册)
/**
 * 1、配置类里面使用@Bean标注在方法上给容器注册组件,默认也是单实例的
 * 2、@Configuration标注的配置类本身就是一个组件
 * 3、proxyBeanMethods:代理bean的方法
 *
 * Full(proxyBeanMethods = true)
 * 【保证每个@Bean方法被调用多少次返回的组件都是单实例的】
 *
 * Lite(proxyBeanMethods = false)
 * 【每个@Bean方法被调用多少次返回的组件都是新创建的】
 *
 * 组件依赖必须使用Full模式默认。其他默认是否Lite模式
 */
@Configuration(proxyBeanMethods = false) //告诉SpringBoot这是一个配置类
public class MyConfig {


    /**
     * Full:外部无论对配置类中的这个组件注册方法调用多少次获取的都是之前注	  册容器中的单实例对象
     */
    @Bean //给容器中添加组件。以方法名作为组件的id。返回类型就是组件类型。返回的值,就是组件在容器中的实例
    public User user01(){


        User zhangsan = new User("zhangsan", 18);
    }

    @Bean("tom") //自定义组件id名为tom
    public Pet tomcatPet(){


        return new Pet("tomcat");
    }
}
3、@Import
作用:声明在容器中组件的类上,为容器自动创建组件
//给容器中自动创建出这两个类型的组件,默认组件的名字就是全类名
@Import({

    User.class, DBHelper.class})
//告诉SpringBoot这是一个配置类 == 配置文件
@Configuration(proxyBeanMethods = false)
public class MyConfig {


}
4、@Conditional
作用:条件装配,满足Conditional指定的条件,则进行组件注入。这是一个根注解,派生了非常多的子注解,根据实际情况合理使用即可

@Configuration(proxyBeanMethods = true) //告诉Springboot这是一个配置类 == ioc配置文件
//@ConditionalOnBean(name = "tom")
@ConditionalOnMissingBean(name = "tom")
public class MyConfig {


    @Bean
    public User user01(){


        User zhangsan = new User("zhangsan",18);
        //user组件依赖Pet组件
        zhangsan.setPet(tomcatPet());
        return zhangsan;
    }

    @Bean("tom") //自定义组件id名为tom
    public Pet tomcatPet(){


        return new Pet("Tomcat");
    }
}
5、@Component、@Controller、@Service、@Repository
这几个注解在 Spring注解部分 提到过,这里不再过多叙述!
6、@ImportResource
作用:我们的SpringBoot程序时无法识别ioc配置文件的,该注解的作用是在SpringBoot项目中导入Spring的ioc配置文件。
@ImportResource("classpath:beans.xml")
public class MyConfig {


}
7、@ConfigurationProperties & @EnableConfigurationProperties
作用:与SpringBoot核心配置文件(application.properties)进行配置绑定 !
第一种方法:
@Component  //只有在容器中的组件,才会拥有SpringBoot提供的强大功能(比如注解)
@ConfigurationProperties(prefix = "mycar")
public class Car {


    private String brand;
    private Integer price;

    //getter + setter
}
SpringBoot配置文件application.properties中:
mycar.brand=BYD
mycar.price=100000
第二种方法:
@Configuration
@EnableConfigurationProperties(Car.class)
//1、开启Car配置绑定功能
//2、把这个Car这个组件自动注册到容器中
public class MyConfig {


}

//这时候,Car类中就不需要@Component注解
========================================================
@ConfigurationProperties(prefix = "mycar")
public class Car {


    private String brand;
    private Integer price;

    //getter + setter
}
注意:有些时候,我们会引用第三方类库中的类,进行配置绑定,这时我们不可以在类上加@Component注解,所以此时推荐第二种方式进行配置绑定!
8、@SpringBootConfiguration
作用:跟@Configuration作用和用法一样,就代表当前的类是一个配置类,说明我们的主程序也是一个配置类!
//这三个注解一般组合出现,等同于@SpringBootApplication
@SpringBootConfiguration
//@EnableAutoConfiguration
//@ComponentScan("com.xu.boot")
public class SpringBootApplication{


}
9、@ComponentScan
作用:指定我们要扫描那些包
//这三个注解一般组合出现,等同于@SpringBootApplication
//@SpringBootConfiguration
//@EnableAutoConfiguration
@ComponentScan("com.xu.boot")
public class SpringBootApplication{


}
10、@EnableAutoConfiguration
作用:自动导入配置
//这三个注解一般组合出现,等同于@SpringBootApplication
//@SpringBootConfiguration
@EnableAutoConfiguration
//@ComponentScan("com.xu.boot")
public class SpringBootApplication{


}
11、@AutoConfigurationPackage
作用:@EnableAutoConfiguration的子注解,将主程序所在包下的所有组件导入容器中,这就是为什么我们默认包路径是主程序所在的包
//利用Registrar给容器中导入一系列组件
//将指定的一个包下的所有组件导入进来?主程序类 所在包下。

//给容器中导入一个组件
@Import(AutoConfigurationPackages.Registrar.class)
public @interface AutoConfigurationPackage {


}
12、@Import(AutoConfigurationImportSelector.class)
作用:@EnableAutoConfiguration的子注解,给容器中批量导入一些组件(127个自动配置类),获取到所有需要导入到容器中的配置类,利用工厂加载得到所有组件
//@Target({ElementType.TYPE})
//@Retention(RetentionPolicy.RUNTIME)
//@Documented
//@Inherited
//@AutoConfigurationPackage
@Import({

    AutoConfigurationImportSelector.class})
public @interface EnableAutoConfiguration {


    String ENABLED_OVERRIDE_PROPERTY = "spring.boot.enableautoconfiguration";

    Class<?>[] exclude() default {

    };

    String[] excludeName() default {

    };
}