使用nginx + Quiche 部署的支持HTTP3的nginx在实际测试过程中遇到了一些问题,Quiche本身是由go + rust编写的,nginx又是由c++编写的,对于我们来说未知的内容太多,所以尝试使用nginx的quic开发分支来部署一个支持HTTP3的nginx服务器。
1.下载并安装boringssl
yum install git
git clone https://boringssl.googlesource.com/boringssl
编译boringssl需要cmake和go,而 cmake 的编译安装需要gcc和openssl,所以先安装依赖环境
yum install go
yum install wget
wget https://cmake.org/files/v3.16/cmake-3.16.0-rc2.tar.gz
tar xvzf cmake-3.16.0-rc2.tar.gz
## 安装编译依赖--- 这里安装了gcc, openssl
yum install -y gcc-c++ make automake openssl-devel
## 开始编译
cd cmake-3.10.0-rc2/
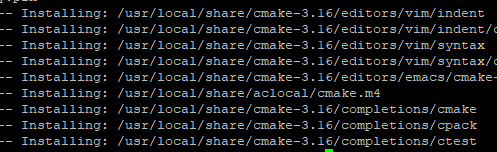
./bootstrap --prefix=/usr --datadir=share/cmake --docdir=doc/cmake && make
sudo make install

2. 编译 boringssl
cd boringssl
mkdir build
cd build
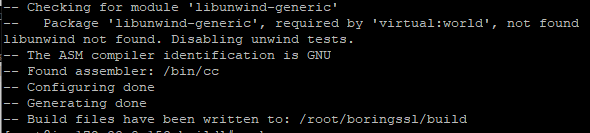
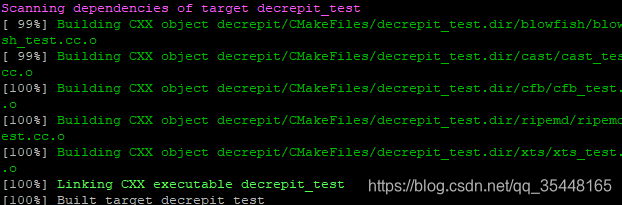
cmake ..
make
3. 安装nginx-quic
注意: hg命令是程序mercurial程序的执行命令,所以我们需要安装的是mercurial,而不是hg
$ yum install mercurial
$ hg clone -b quic https://hg.nginx.org/nginx-quic
$ cd nginx-quic
$ ./auto/configure                                 \
       --prefix=/opt/server/nginx       \
       --with-debug --with-http_v3_module  \
       --with-http_ssl_module                  \
       --with-http_v2_module                   \
       --with-stream_quic_module \
       --with-cc-opt="-I../boringssl/include"   \
                       --with-ld-opt="-L../boringssl/build/ssl  \
                                      -L../boringssl/build/crypto" \
       --add-module=../nginx-upsync-module-master
$ make
## 安装
$ sudo make install
–with-http_v3_module - enable QUIC and HTTP/3
–with-http_quic_module - enable QUIC for older HTTP versions
–with-stream_quic_module - enable QUIC in Stream
发生如下报错:
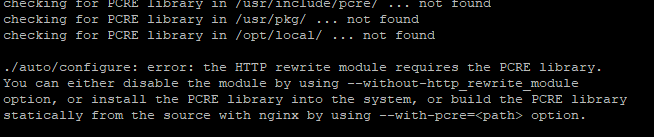
提示需要安装pcre,步骤如下:
wget https://ftp.pcre.org/pub/pcre/pcre-8.10.tar.gz
tar -zxf pcre-8.10.tar.gz
cd pcre-8.10
sudo ./configure
sudo make && make install
安装完成后启动nginx,发生如下报错:
sbin/nginx: error while loading shared libraries: libpcre.so.0: cannot open shared object file: No such file or directory
解决办法: 进入到lib64目录下,执行 ln -n libpcre.so.1.2.10 /lib64/libpcre.so.0 具体的libpcre.so的版本号看你本机安装的是什么版本
接下来还需要安装证书,步骤参考:
QUIC实战(三) letsencrypt证书申请和自动续期 就不赘述了。
最后,nginx的配置文件如下:
#user  nobody;
worker_processes  1;

#error_log  logs/error.log;
#error_log  logs/error.log  notice;
#error_log  logs/error.log  info;

#pid        logs/nginx.pid;
events {


    worker_connections  1024;
}

http {


    include       mime.types;
    default_type  application/octet-stream;
    log_format  main  '$remote_addr - $remote_user [$time_local] "$request" '
                      '$ssl_protocol/$ssl_cipher '
                      '$status $body_bytes_sent $bytes_sent "$http_referer" '
                      '"$http_user_agent" "$http_x_forwarded_for" '
                      '$request_time $upstream_response_time';

    access_log  logs/access.log  main;
    #error log level debug
    error_log logs/error.log debug;
    sendfile        on;
    #tcp_nopush     on;

    #keepalive_timeout  0;
    keepalive_timeout  65;
    #gzip  on;
    server {


        listen       80;
        server_name  localhost;

        #charset koi8-r;

        #access_log  logs/host.access.log  main;

        location / {


            root   html;
            index  index.html index.htm;
        }

        error_page   500 502 503 504  /50x.html;
        location = /50x.html {


            root   html;
        }
    }
    include /opt/server/nginx/conf/conf.d/*.conf;
}
h3server.conf
# upstream config
upstream myserver {


     server 127.0.0.1:11111;
     #超时是6m 间隔是500m
     upsync 172.xx.xx.xx:8500/v1/kv/upstreams/ibu-quic upsync_timeout=6m upsync_interval=500ms upsync_type=consul strong_dependency=off;
     upsync 172.xx.xx.xx:8500/v1/kv/upstreams/ibu-quic upsync_timeout=6m upsync_interval=500ms upsync_type=consul strong_dependency=off;
     upsync 172.xx.xx.xx:8500/v1/kv/upstreams/ibu-quic upsync_timeout=6m upsync_interval=500ms upsync_type=consul strong_dependency=off;
         #从consul拉取的上游服务器后持久化的位置
     upsync_dump_path /opt/data/consul/server.conf;
}

server {


    # Enable QUIC and HTTP/3.
    listen 443 http3 reuseport;

    # Enable HTTP/2 (optional).
    listen 443 ssl http2;

    ssl_certificate /etc/letsencrypt/live/xx/fullchain.pem;
    ssl_certificate_key /etc/letsencrypt/live/xx/privkey.pem;

    quic_retry on;
    ssl_early_data on;

    # Enable all TLS versions (TLSv1.3 is required for QUIC).
    ssl_protocols TLSv1 TLSv1.1 TLSv1.2 TLSv1.3;

    location /quic {


        add_header Alt-Svc 'h3-29=":443"; ma=86400';
        proxy_pass http://myserver;
    }
}
nginx的配置和之前使用Quiche搭建的支持HTTP3的nginx的配置差不多,就是加了关于nginx 日志格式和error日志的配置,值得注意的是:如果在编译nginx的时候没有加--with-debug这一参数,那么哪怕在nginx.conf里配置了debug级别的error日志,最后输出的还是不含debug信息的。
测试了下新的支持HTTP3的nginx服务,测试结果比之前Quiche的好很多。
PS: debug的error日志级别并不建议在流量大的时候使用,因为大量的请求会导致error.log把整个磁盘空间占满!